How to Draw an Eagle – A Majestic Bald Eagle Drawing
Eagles are undeniably beautiful and their stern look represents a mystical strength that seems to carry wisdom and authority. Learning how to draw this beautiful creature is not only a great addition to your topical drawing skills but a great exercise for learning fine drawing skills. Eagles have beautiful features and learning how to draw an eagle in a realistic way requires attention to such features. Whatever the reason for wanting to learn how to draw an eagle, this tutorial is going to help you, through a few simple steps, to create a beautiful eagle drawing.
An Easy Guide to Draw an Eagle With Colored Pencils
Eagles are quite specific in their details and features, which can seem daunting when approaching this particular animal as a drawing topic. This tutorial, however, is going to show you that the process of drawing such a beautiful creature does not have to be daunting and in fact, is quite easy when broken up into a few simple steps. We will also be creating a bald eagle drawing in a unique way with interesting drawing materials.
How to Draw an Eagle Step by Step
In this tutorial on how to draw an eagle, we will be specifically creating a bald eagle drawing. We will start by working with our graphite pencils to establish the basic eagle sketch first, working out the outline, basic details, and so on. From there we will work strategically with colored pencils to establish a base layer of color. Once we have added color to the eagle drawing, we can then move on to adding some details with a pen which will enhance the features and emphasize the definition within the eagle drawing. Now we know what to expect and can get into the drawing process.
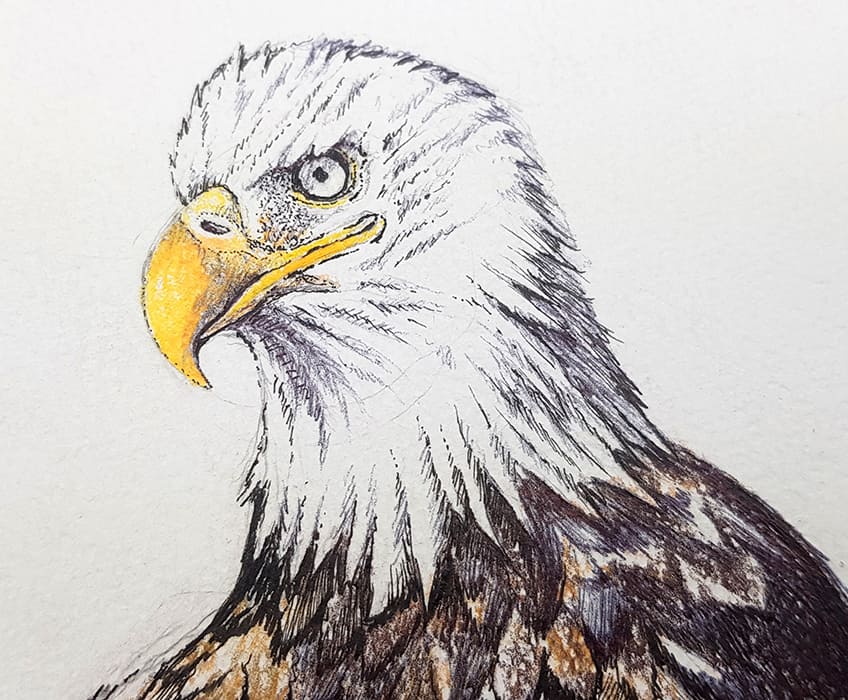
Step 1: Shaping the Eagle
Using our HB pencils, we want to start by drawing a simple sketch of the eagle. This is where we work out the basic fundamental shapes of the bird and how they are placed together.

The intention here is to form the bald eagle drawing with the basic shapes that form the head, body, feathers, and legs. Take your time with placement as well as scale, making sure all shapes are proportional.
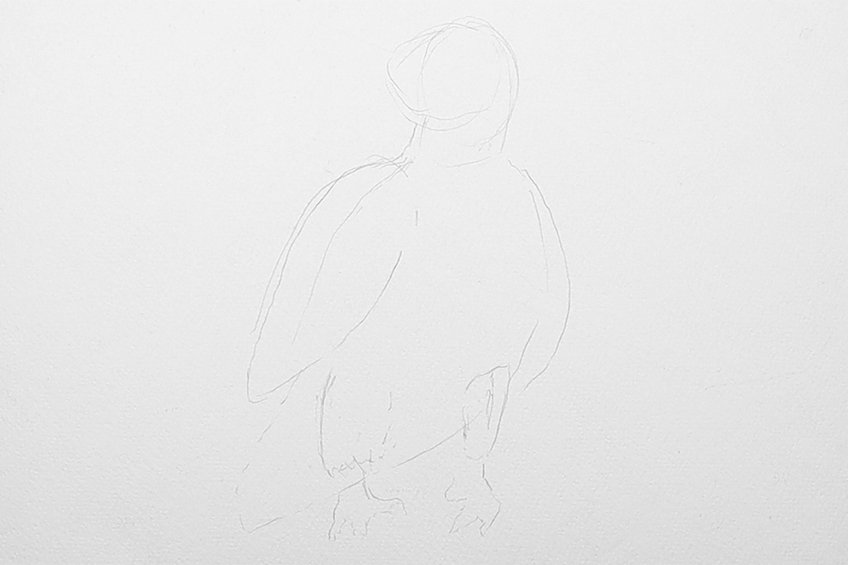
Making sure that we have established the fundamental shapes of the bird will make the stage where we sketch different features easier.

Step 2: Sketching the Eagle
Once we have established the bird in its basic shapes, we can give those shapes a light erasing and then start to work on more identifiable features. If you need to, at this point consider a reference image to guide you in your eagle sketch.

We want to basically start sketching in the different features from the head to the claws. Try to keep your sketch quite light at this point, this makes it easier to fix any silly mistakes.

When sketching the feathers into a bald eagle’s wings, we will find that they are quite layered. Bald eagles have a variety of feather lengths in their wings, which creates a variety of feathers that are stacked on top of each other.
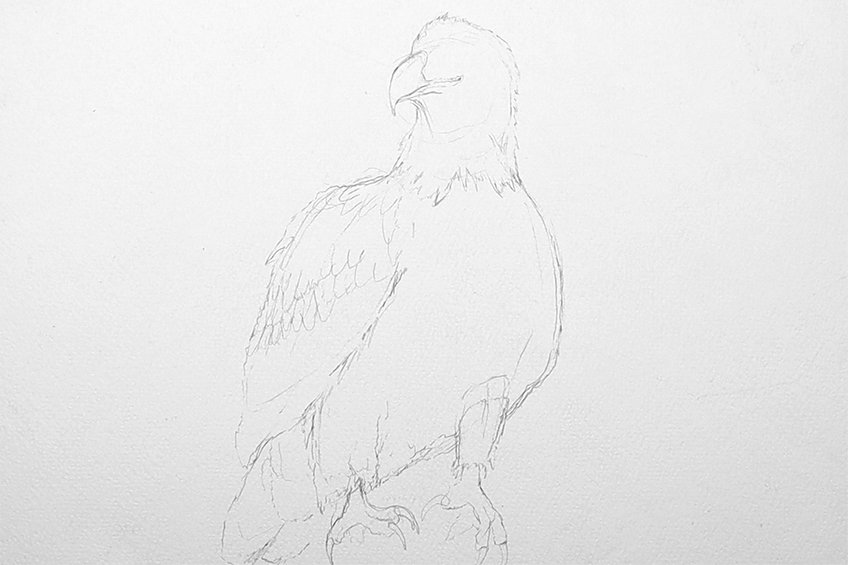
When it comes to the head area of the eagle, the beak is quite large in proportion to the face and the eye is quite rounded. The brow of the bald eagle is generally overlapping the upper section of the eye, giving the eagle its unique angry expression.
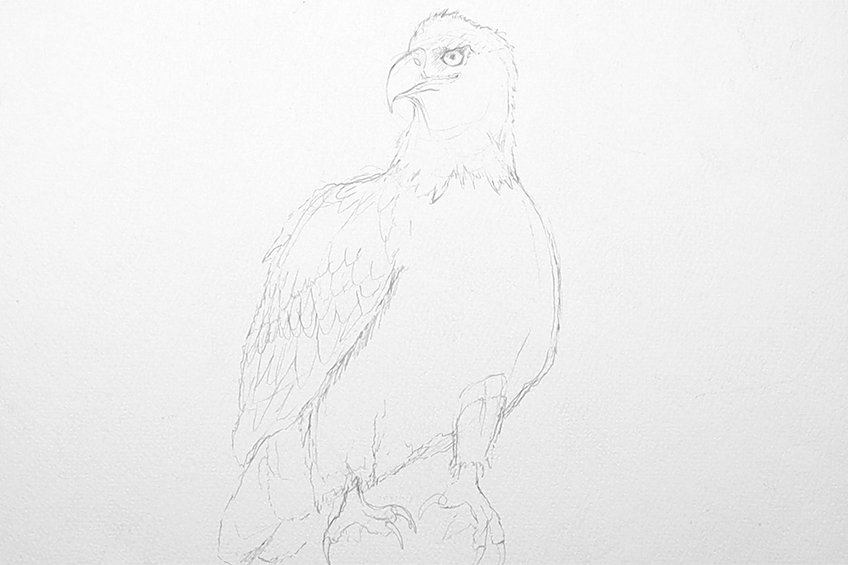
The bald eagle also has a distinct difference in the feather quality in the head area, which is unique to its appearance. These feathers in the head area create a distinction due to their shape and coloration compared to the feathers in the body.

Try to spend a good portion of your time on the facial details in the eagle drawing. We want to make sure that we allow the beak to curve downward and that it is placed quite high up in the facial area.

Step 3: Adding Color to the Body of the Eagle
Now we will transition to adding color and shading to the body features within the eagle drawing. We want to make sure that we first set an undertone of color before working in shading, which we can do with our brown colored pencils.
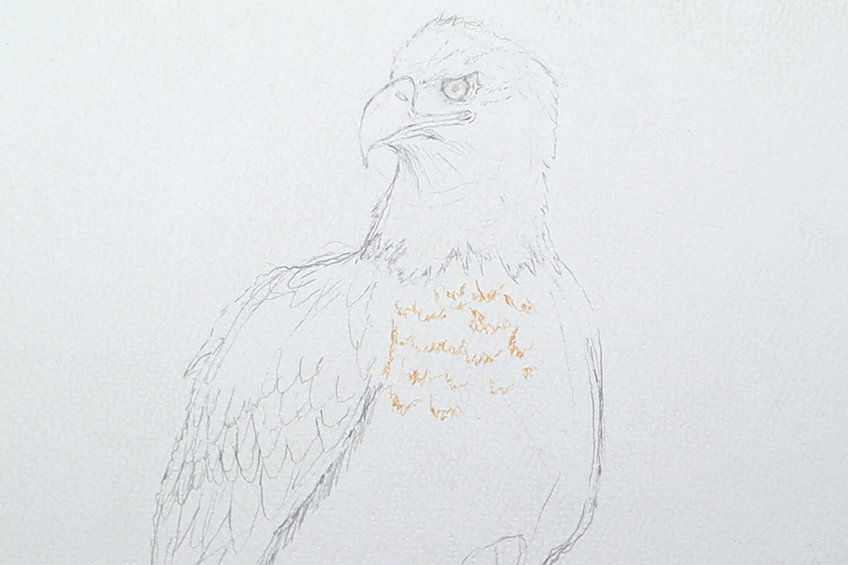
The feather shape within the body area of the eagle is quite layered, similar to the way scales are layered on a reptile’s body. We don’t need to draw these in perfectly, but we can use dark and light brown pencils to make suggestive marks.
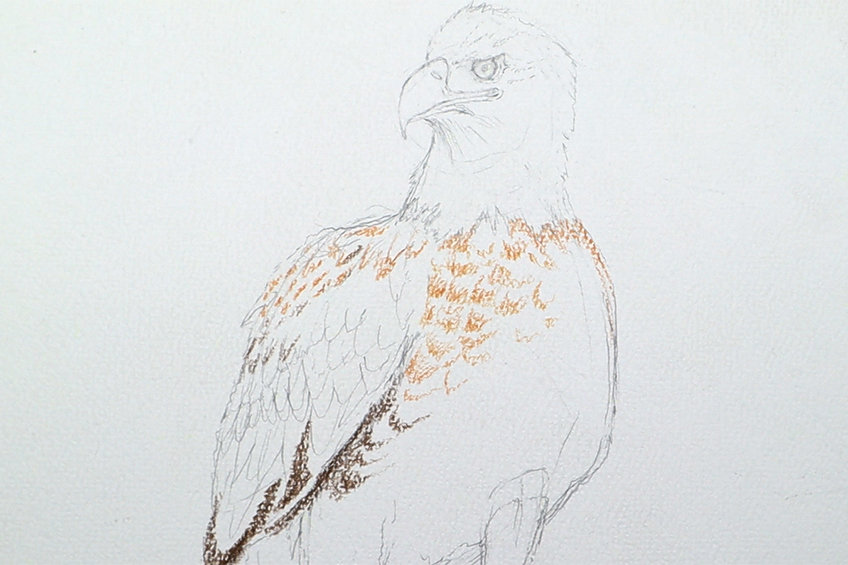
Suggestive marks mean that we can loosely draw in the basic shapes of the feathers. We also want to utilize both lighter and darker brown pencils to suggest which sides are more shadowed and therefore slightly darker in brown color.

Bald eagles have a very unique brown tonal range that shifts between lighter and darker browns within the feathers. However, the feathers tend to be more on the darker side but we Dow want to build up to that with lighter browns.
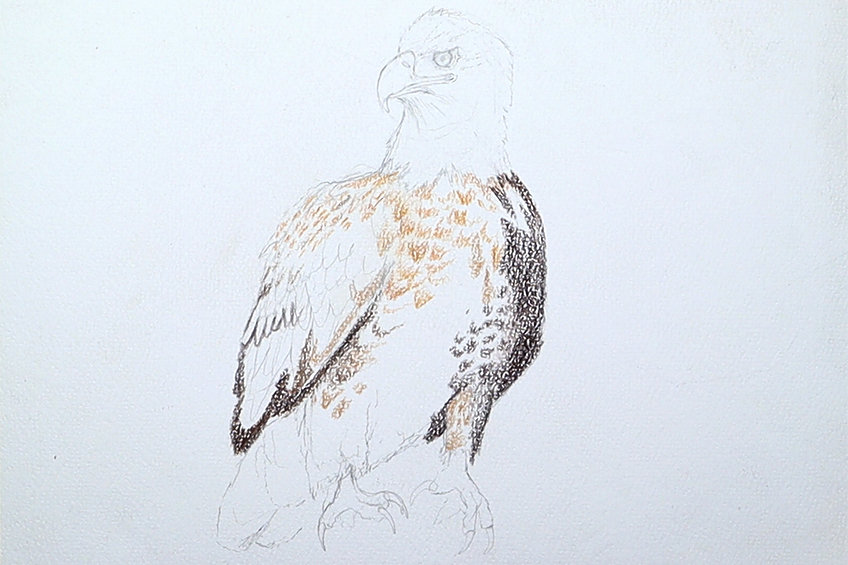
We can also generously add lighter browns around the upper winged area, which is where the lighter browns tend to be most prominent. We can be quite light at this point when adding browns, as it is better to build lighter layers of color on top of one another.

Try to maintain the scale-like aesthetic within the feathers of the bald eagle drawing. We really want to try and incorporate these details with different colors of brown pencils.

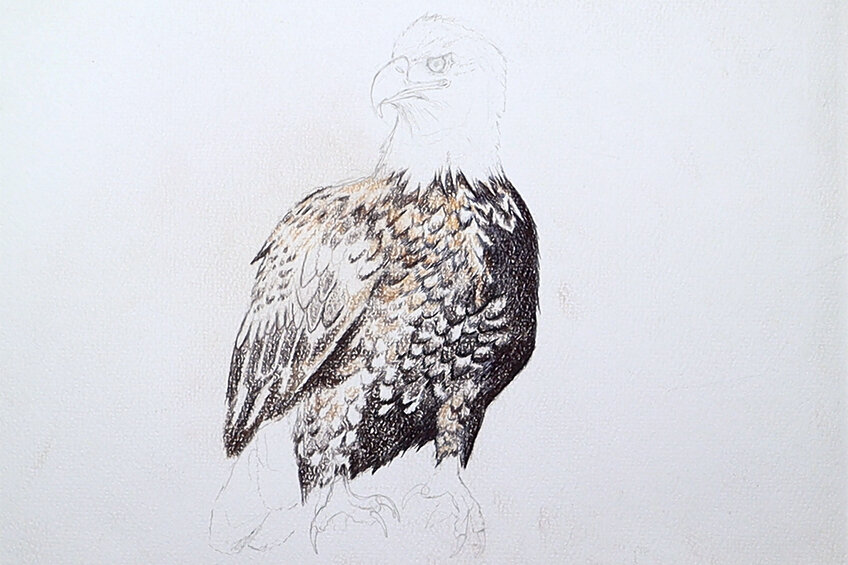
We want to make sure that we also have a distinct shadowed and lit side of the eagle. It is important to maintain consistency within the shadow placement in the eagle drawing as this will give the drawing a more realistic effect.

Step 4: Adding Pen Shading to the Body of the Eagle
At this point, we can start incorporating some pen shading into the eagle drawing to give it a little more contrast and depth. We can also, very cautiously, use our pens to enhance the outlines of the feathers in the body.
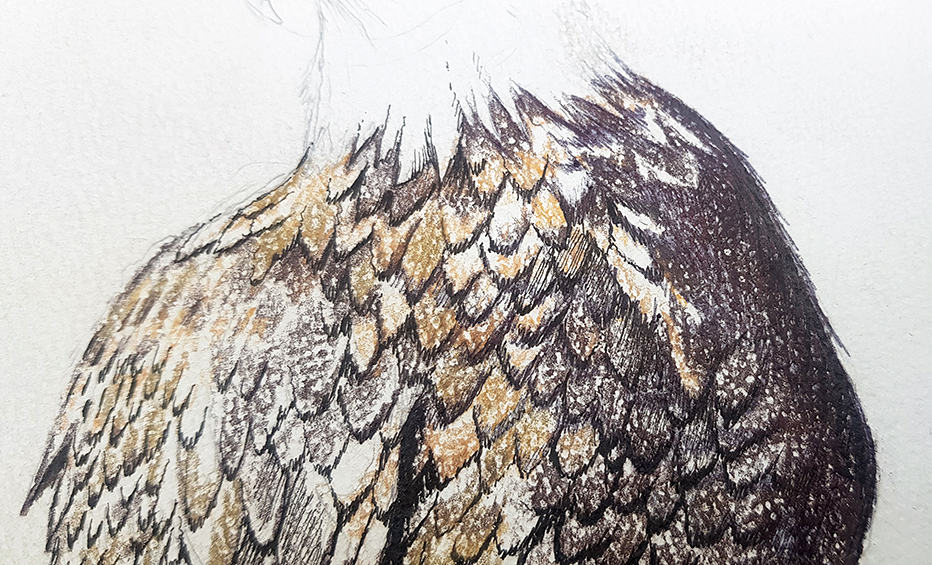
Be strategic with your pen details. By this, what is meant is that we can enhance the darkest shadowed area and be more light-handed with the least shaded areas in the eagle drawing.
The aim here is to not overpower the colors but to slightly darken the features that are shadowed and enhance the details of the feathers. This means we can add light shading to even the lit area just to emphasize their three-dimensionality.
There is almost a dark and slightly golden quality in the feathers that are in the body area of the bald eagle. This is why we want to work with predominantly darker browns with subtle applications of lighter browns. Try to spend a good portion of your time on the bodily feathers before moving on.

Step 5: Adding Color and Shading to the Face of the Eagle
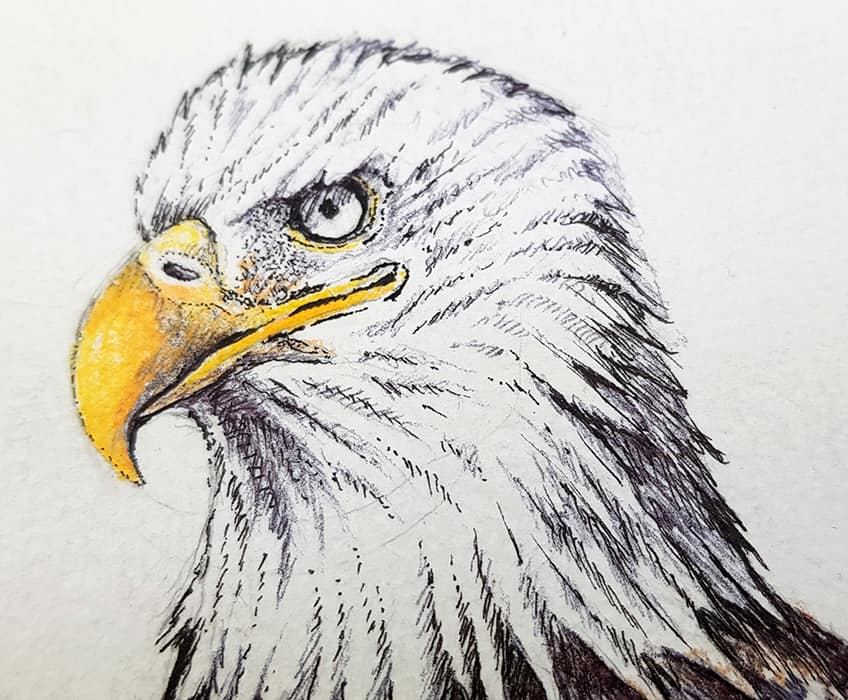
The bald eagle doesn’t have much coloration within its facial features, which makes the beak especially important as the singular-colored feature in the face. We want to utilize a combination of yellow and orange pencils to create shifts of tonal values in the beak.

At this point, we want to set an undertone of light yellows and darker oranges within the beak, which we then can enhance with pen shading. We want to make sure that we outline and add shading cautiously to the beak as it is a very small and delicate area.

With the eye of the bald eagle drawing, again, we really want to be cautious with adding shading with our pens. The eye has a black ring around it which we can draw with our pens.

From there we can proceed to add in the pupil which is completely black as well. From here we can also add in some lighter shading along the upper section of the eye beneath the brow, which will suggest shadowing from the brow.

Once we have added detail and color to the beak and eye, we want to start adding shading around the face to suggest a feathery quality. We can do this by incorporating fine linework around the face of the eagle.

We want to make sure that we add these lines in a singular direction, by doing so we create a more accurate uniformity within the feather placement on the face. Keeping the lines flowing in a particular direction gives a more realistic placement to the feathers.

Really take your time with adding linework to the feathery features surrounding the face. Try to keep consistency in how the feathers flow in the same direction and veer downward towards the neck of the eagle.

We also want to make sure that we enhance the beak and surrounding features near the eye with yellows and oranges. We can add subtle yellows around the eye, which is the normal coloration within the bald eagle’s features.
Make sure that you have a slight shadowing just beneath the brow to create a realistic effect within the eye.
Step 6: Adding Contextualizing Features into the Eagle Drawing
Once we have completed the body and head of the bald eagle drawing, we want to add in the talons. The talons are made up of four digits, however, this will vary depending on the angle at which we view the Eagle.

The talons are also yellow in color, so we want to make sure we add a base layer of yellow before shading over them.
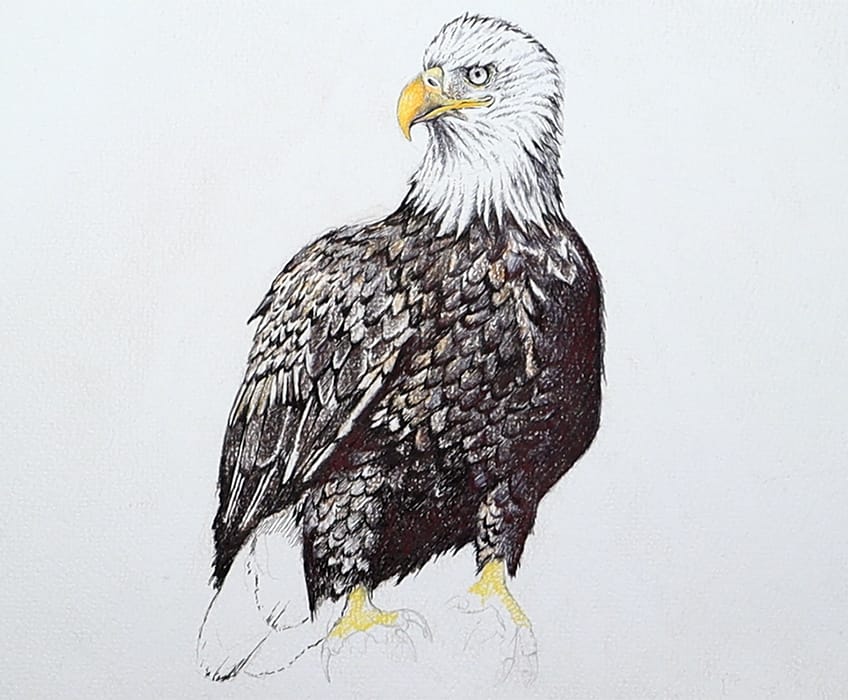
Once we have colored in the talons, we can then apply some shading to further emphasize the structure of the talons. We want to make sure we draw in the sharp claws at the ends of each digit.
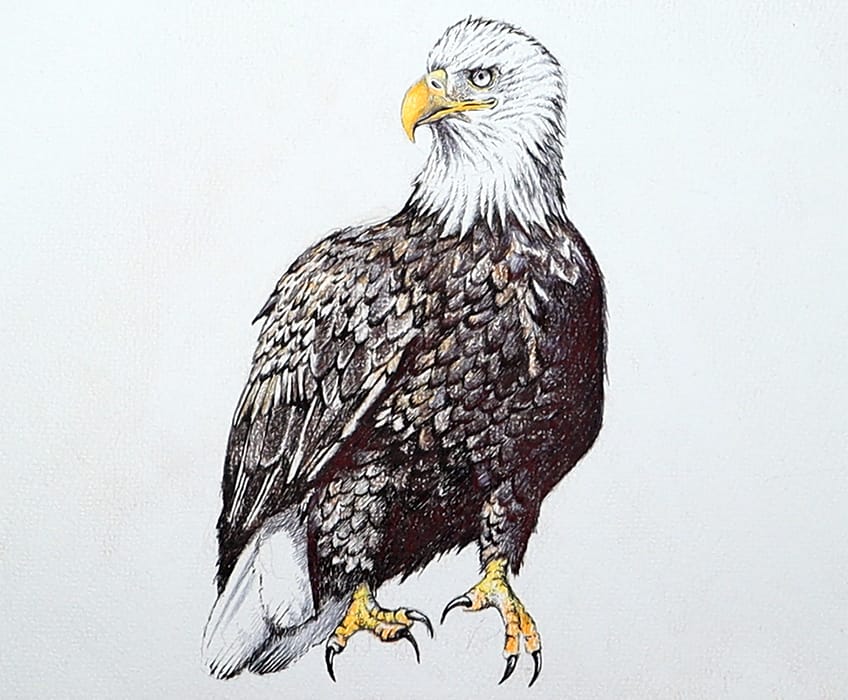
We can also add in some shading and lines that create segments in the digits, which is another unique feature of the bald eagle.
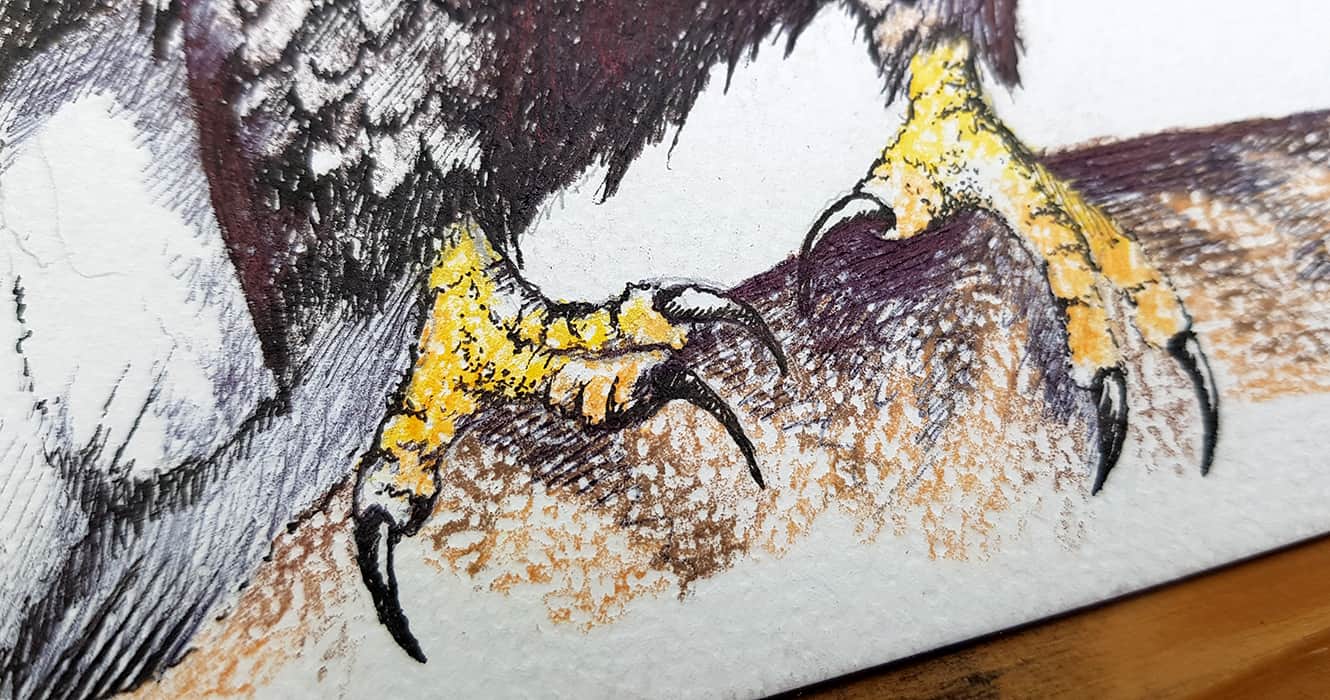
We can then proceed by adding in some sort of contextual environment to suggest that the eagle is placed on a surface of some sort. This can be a branch for instance, to which we can color and add some shading to.
From there we can give our bald eagle drawing one more check, and that is it! How to draw an eagle in a few simple steps.

Tips to Remember
- Make sure that the bald eagle sketch is established. Making sure that the sketch is the best it can be will make the rest of the steps much simpler.
- Add colors before shading. It’s always good to add colors before shading as this way, we set a base of color that we can enhance with shading.
- Take time with pen details. Working with a pen is always a delicate process, and we want to make sure we approach this process with caution and attention.
- Know when to stop. Try not to add in too much pen work as this may overpower the colors within the bald eagle drawing.
- Have fun. Enjoy the drawing process and have fun learning how to draw an eagle.
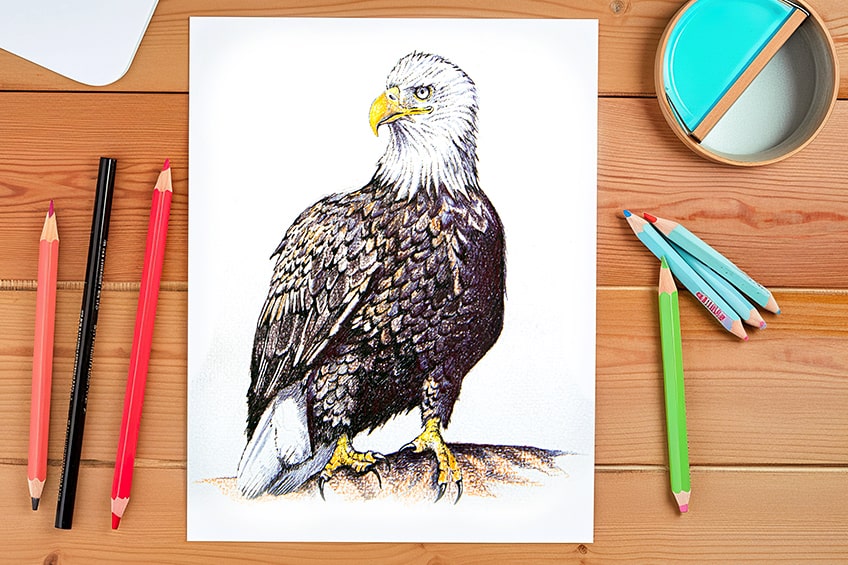
A bald eagle drawing is a beautiful drawing topic and can work as a focal point or be an addition to other drawing ideas. The process of drawing a bald eagle is also applicable to other birds and can be used as a template for other bird drawings.
Frequently Asked Questions
How Do You Draw the Beak of a Bald Eagle?
The bald eagle has quite a large yellow beak that arches downward from the face. The beak is quite large in proportion to that of the head of the eagle and is positioned more toward the upper head area of the eagle. The beak also moves into the face where there is a slit that establishes the opening of the eagle’s mouth. The beak has a large cavity in the upper half of the beak that is identified as the nostril or air cavity for the eagle.
What Colors Do You Use for a Bald Eagle Drawing?
A bald eagle drawing can be drawn with an array of colors to achieve the iconic aesthetic that is unique to the bald eagle. Predominantly, we would use a combination of darker and lighter brown hues, to establish the feathering in the lower section of the bald eagle drawing. The upper section is predominantly white, however, shadows form on the eagle which can be established with hues of gray. The beak and claws can be drawn with oranges and yellows; however, all coloration should be established with layers. You always want to work with light layers as the base and slowly add darker layers.
Matthew Matthysen is an educated multidisciplinary artist and illustrator. He successfully completed his art degree at the University of Witwatersrand in South Africa, majoring in art history and contemporary drawing. The focus of his thesis was to explore the philosophical implications of the macro and micro-universe on the human experience. Matthew uses diverse media, such as written and hands-on components, to explore various approaches that are on the border between philosophy and science.
Matthew organized various exhibitions before and during his years as a student and is still passionate about doing so today. He currently works as a freelance artist and writer in various fields. He also has a permanent position at a renowned online gallery (ArtGazette) where he produces various works on commission. As a freelance artist, he creates several series and successfully sells them to galleries and collectors. He loves to use his work and skills in various fields of interest.
Matthew has been creating drawing and painting tutorials since the relaunch in 2020. Through his involvement with artincontext.org, he has been able to deepen his knowledge of various painting mediums. For example, watercolor techniques, calligraphy and lately digital drawing, which is becoming more and more popular.
Learn more about Matthew Matthysen and the Art in Context Team.
Cite this Article
Matthew, Matthysen, “How to Draw an Eagle – A Majestic Bald Eagle Drawing.” Art in Context. July 15, 2023. URL: https://artincontext.org/how-to-draw-an-eagle/
Matthysen, M. (2023, 15 July). How to Draw an Eagle – A Majestic Bald Eagle Drawing. Art in Context. https://artincontext.org/how-to-draw-an-eagle/
Matthysen, Matthew. “How to Draw an Eagle – A Majestic Bald Eagle Drawing.” Art in Context, July 15, 2023. https://artincontext.org/how-to-draw-an-eagle/.


