How to Draw an Elephant – Create a Realistic and Easy Elephant Drawing
In this easy-to-follow drawing tutorial, we take you step-by-step through the process of creating a realistic elephant sketch. These large and peaceful animals stroll through the pastures and plains of Africa, and you can now bring them into your home with this fun and easy elephant drawing.
A Step-by-Step Tutorial to Help You Draw an Elephant
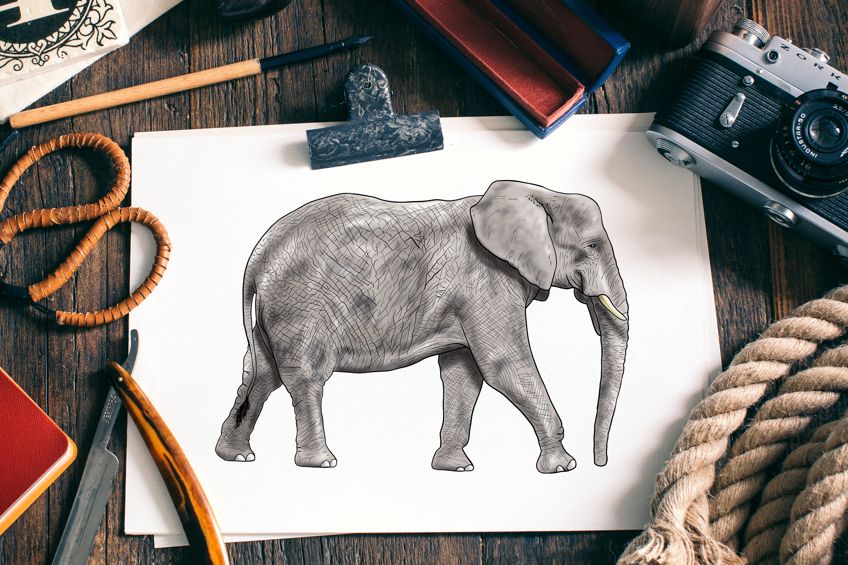
Follow along with our easy elephant drawing tutorial and learn how to create a realistic elephant sketch like the one below in just 16 easy steps! During this tutorial, we will take a look at all of the basic elements of how to draw an elephant, create textural detail, and finish it with a realistic color coat that includes highlights and shadows.
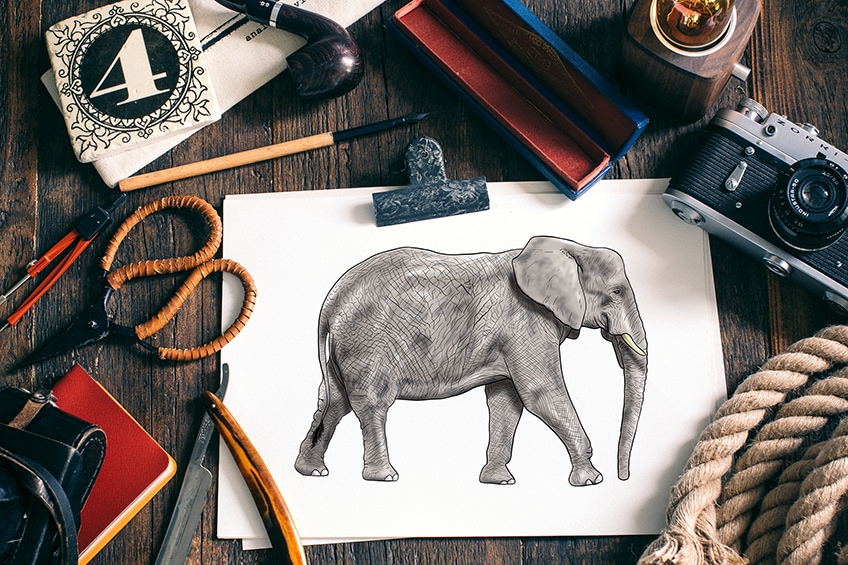
At this point, before we even begin, you may be wondering where to start with creating an elephant drawing. How can we possibly bring this beautiful and complex creature to life on paper? We begin to construct the shape of the elephant sketch by using a variety of different construction shapes and lines. These construction shapes help us to lay down the basic shape of the elephant drawing before we create the final outline and add details and textures.
You can see a brief outline of the tutorial below.
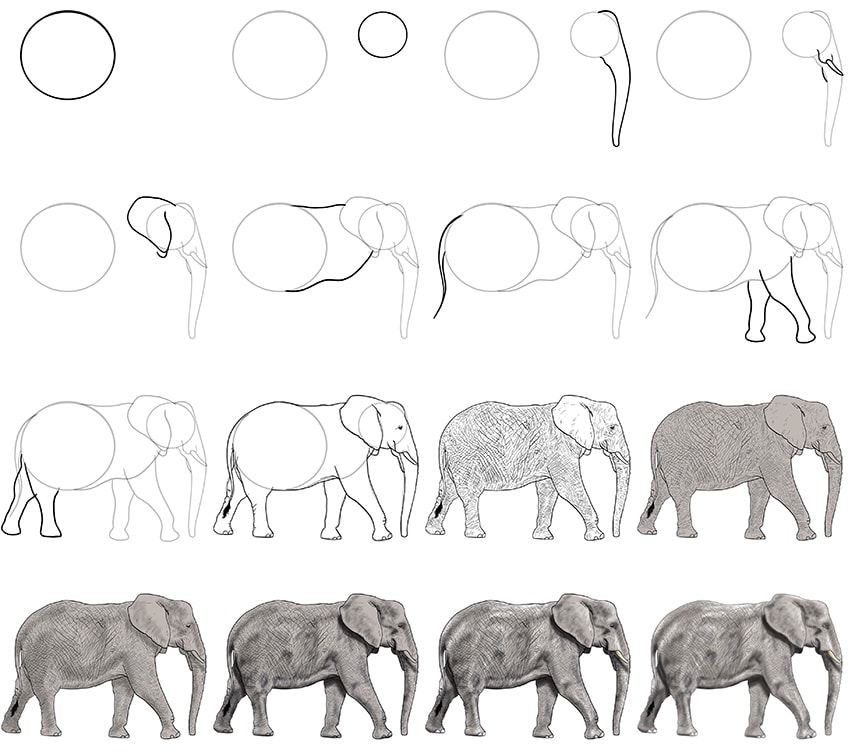
For the final five coloring steps, we have used paint to create the highlights and shadows, but you are welcome to use any medium you choose. If you are a graphic artist who prefers to use a drawing tablet, or you love to use coloring pencils or pastels, you can easily adjust the coloring steps to suit your needs.
Once you have gathered your drawing supplies, settle down somewhere comfortable, and let us begin learning how to draw an elephant!
Step 1: Constructing the Main Body Shape
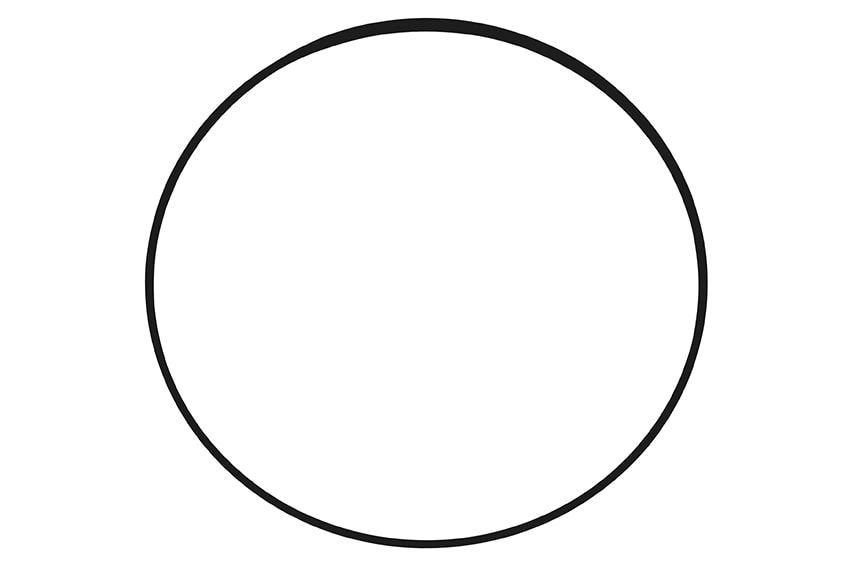
We begin our easy elephant drawing by drawing a large circle that will represent the back portion of the main body shape. Using a soft and easily erasable pencil, draw this large circle within the left quarter of your canvas.
Ensure that there is plenty of space all around the circle, particularly below it and behind it for the legs and tail of your elephant sketch.
Step 2: Creating the Shape of the Head
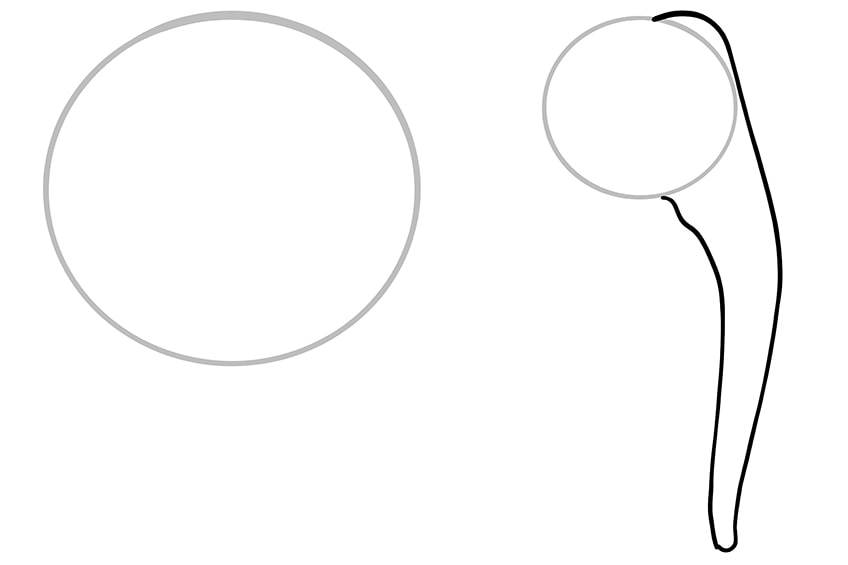
To lay the foundation of the elephant’s head, you are going to use another, smaller circle shape. Place this circle on the right side of your canvas, in line with the top of the main body circle. The head circle should be a little way away from the main body circle.
Remember to not place this head circle on the very right of the canvas, instead, leave a little space for the trunk and face.

Step 3: Shaping the Trunk of Your Elephant Drawing
This third step is a little more freehand than the previous two. We are going to draw the basic shape of the trunk, curving down from the top of the head circle. Begin by drawing a small upwards curving line from the right upper side of the head circle. Take this line down close to the side of the head circle, before curving it forwards and then backward and down to form a curved end. You can then curve this trunk shape back up to join the bottom of the head circle.
The inside of the trunk shape should be wider at the top and narrower at the bottom.
Step 4: Outlining the Tusks
In this step, you are going to draw the base shape of the tusks extending down from within the head circle into the top of the trunk. From the base of this tusk shape, draw a sharply curving forward tusk that ends on the edge of the trunk shape. This will create a realistic rooted shape for the tusk. From our perspective, the second tusk on the other side of the elephant’s body will be mostly obscured by the trunk.
As such, to give a brief glimpse of this other tusk, draw a small curved shape at the back of the tusk.
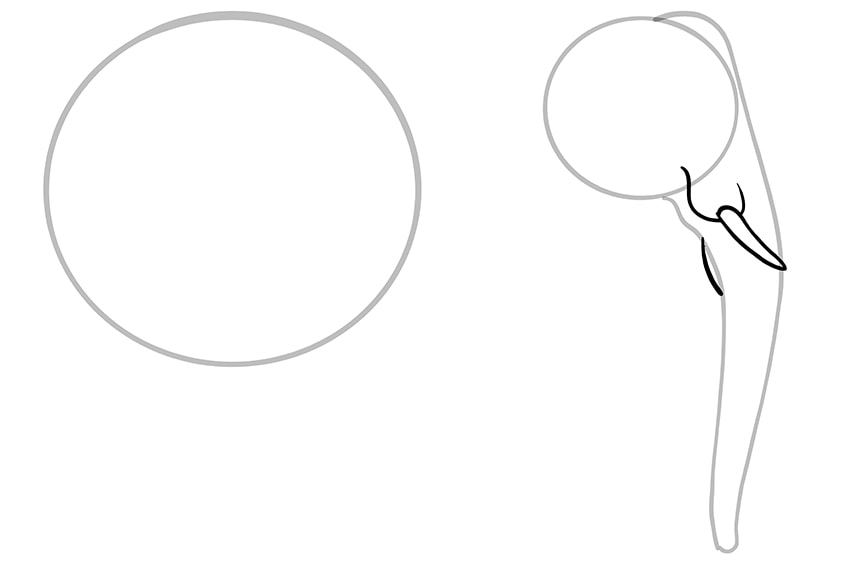
Step 5: Creating the Ears of Your Elephant Drawing
In this step, you are going to create another freehand element for your elephant drawing, namely the ears. The ears are an essential part of the elephant face drawing. Begin by drawing one massive ear beginning with a line from the top of the head, where the trunk begins. Take this line up and back, before curving it down towards the bottom of the head circle, and then back up into the head circle. For the other ear, draw a small curve below the bottom of the first, as this will be mostly hidden on the other side of the elephant’s head.
The elephant’s ear should look a little like the wing of a butterfly.
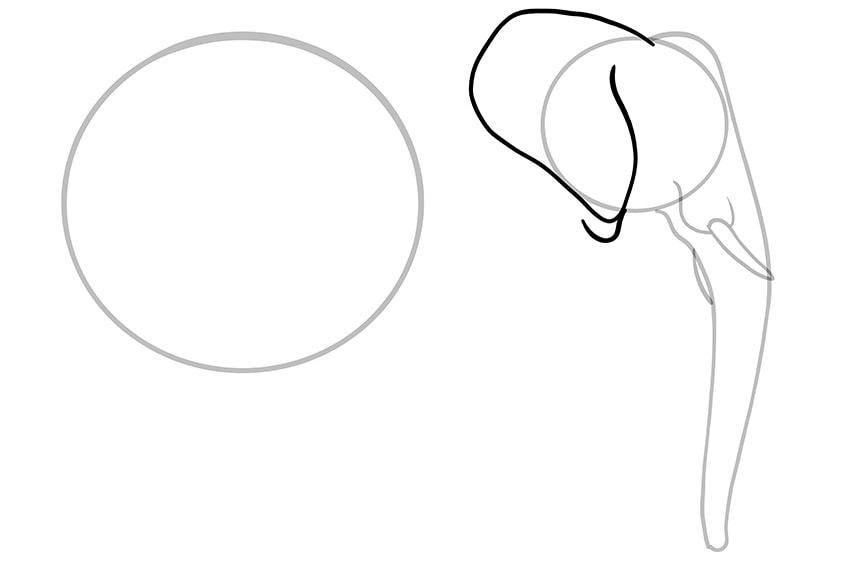
Step 6: Joining the Head and Body
Now, we are going to attach the head circle to the main body circle with the front torso. Begin with the top of the elephant’s torso, taking a short line from the back of the ear to the top of the main body circle. For the bottom of the torso, take a line down from the bottom of the large ear.
You can then curve it down and back, creating a small hump, before joining it to the bottom of the main body circle.
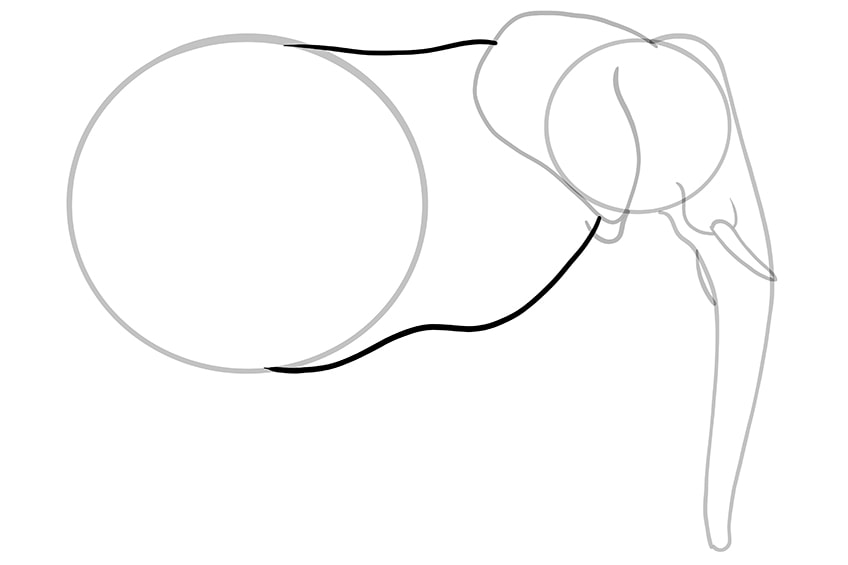
Step 7: Drawing the Elephant’s Tail
This is a quick and easy step, all you need to do is create the shape of the tail. Begin by drawing the top line of the tail first, beginning on the top right side of the main body circle from step 1. Follow the curve of this circle, and then curve in the other way, ending at a sharp point.
To finish this step, bring the line back up to meet the main body circle, just below the halfway point on the left side.
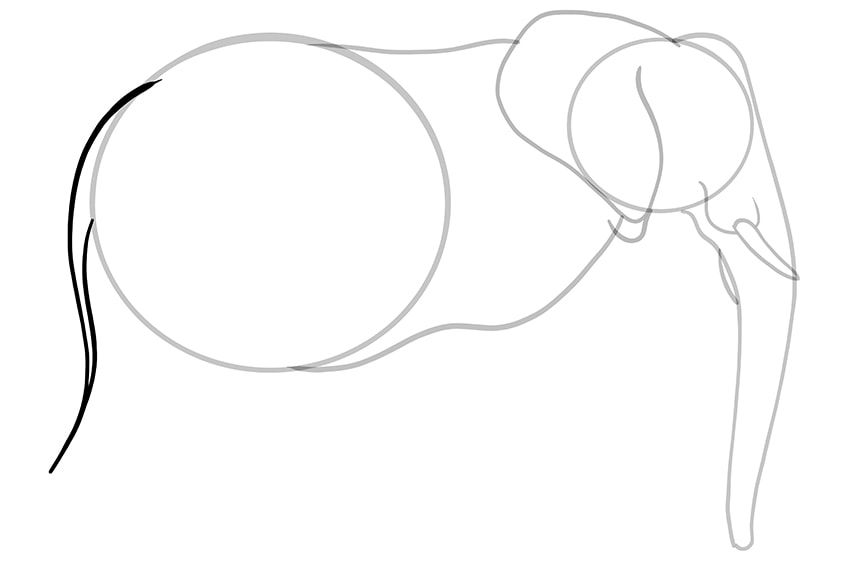
Step 8: Mapping the Front Legs of Your Elephant Sketch
In this step, you are going to create the basic shape of the elephant’s two front legs. It is important that we ensure that we have the correct scale for the legs, as an elephant is a very big animal and the legs need to be in the correct proportion. It is also important to note that as we are creating an elephant drawing from the side-on, one of the legs is going to be slightly obscured from our view. Let us begin with the leg that is closest to us from this perspective. This first front leg should be angled slightly forwards in a motion of walking. Begin by drawing a line that extends down from just within the neck area below the ears.
Curve this line forwards and down, and then create a small foot shape, before bringing the leg line back up into the front torso shape.
For the second leg, begin the front line on the back line of the first leg, creating a leg that extends straight down and ends with a foot shape.
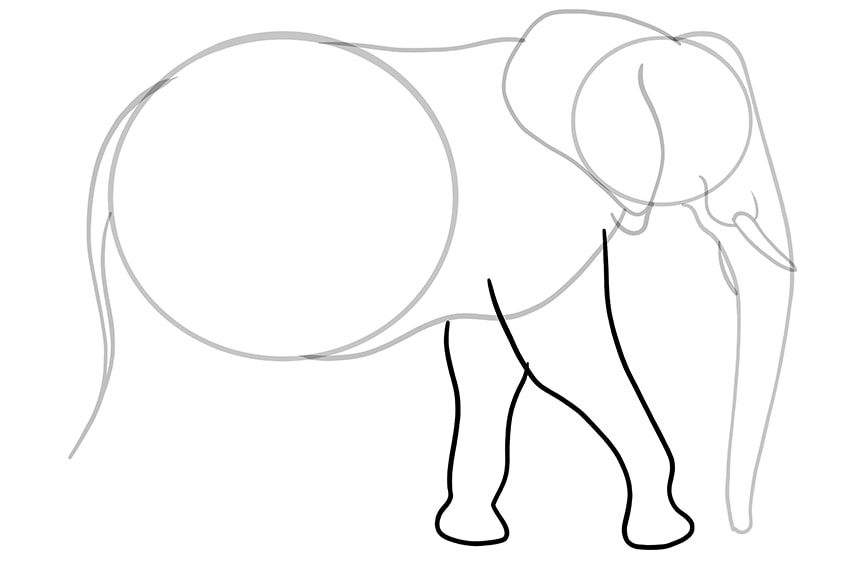
Step 9: Shaping the Back Legs
You are now going to repeat the process from the last step to create the back legs of your elephant drawing. Begin with the leg that is fully visible to us. Take the front line down from the bottom of the main body circle, and create a foot shape in line with the two front legs. Then curve this line back up and back to join the back of the main body circle, just below the bottom of the tail. For the very back leg, you are going to angle it slightly to the back. Take the backline of this leg down from the point where the tail meets the main body circle, curve it back, create the foot, and then join the back leg to the backline of the first leg.
This positioning of the legs gives the impression of movement within our elephant sketch.
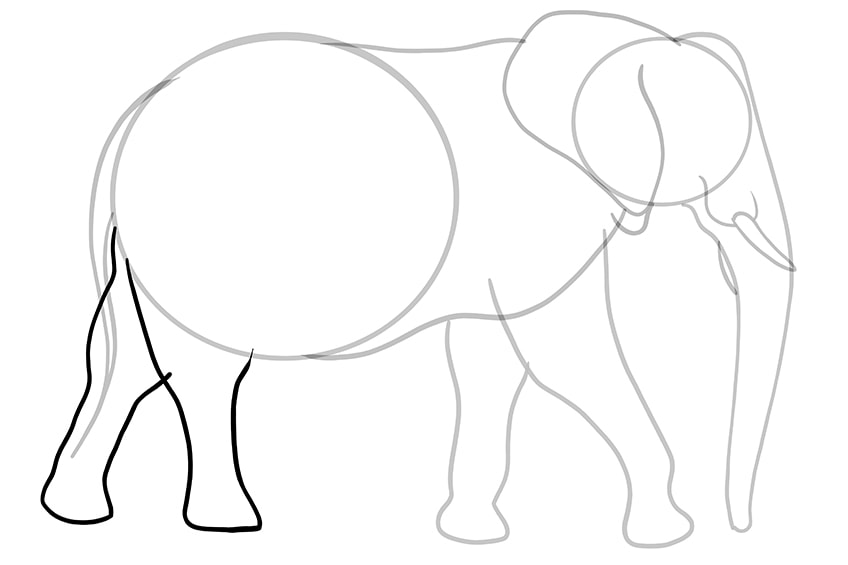
Step 10: Creating the Final Outline of the Easy Elephant Drawing
The construction steps have come to an end, and it is now time to use all of these lines and shapes to form the final outline of your elephant sketch. Begin with the elephant face drawing, adding an almond-shaped eye detail just above the trunk. You can then continue to outline the rest of the elephant face drawing, including the tusks, ears, and trunk.
Continue your outline down the body of the elephant sketch, following the construction lines closely.
When you get to the legs, create some small wrinkles around the joint areas and add two semi-circular toes on each foot. On the back of the rear legs, add a few more creases to create a realistic effect. When it comes to the tail, you want the tail to extend over the very back leg for a three-dimensional effect. When you get to the end of the tail, use some long curving strokes to create a furry end.
When you have completed your outline, you can erase the remaining outlines.
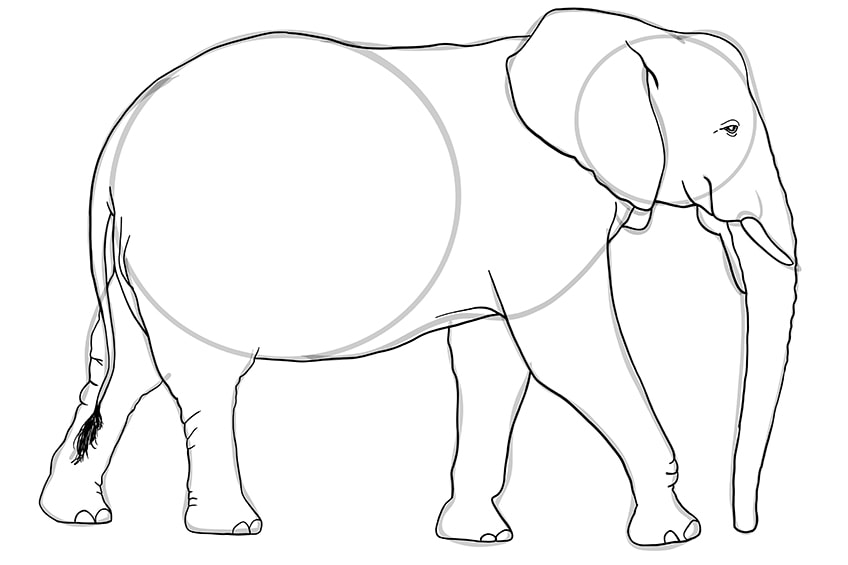
Step 11: Adding Texture to the Skin of Your Elephant Drawing
In this step, you are going to create the texture of the elephant’s body, creating the impression of wrinkly and folded skin patterns. This step may take a little time, but the patience will be well worth it in the final result. Begin within the head, using a combination of short and long lines to create texture on the face and down the trunk. Add a few little textural lines within the ear, but do not overdo it.
Make sure that these lines follow the curve of the outline.
As you move onto the body, you can begin to draw lines throughout the body that criss-cross over each other. In the middle of the torso, the gaps between these lines can become a little larger, while those on the legs and around the edge of the outline should be smaller. Take your time to do this, and try to make the pattern ununiform to be as realistic as possible.
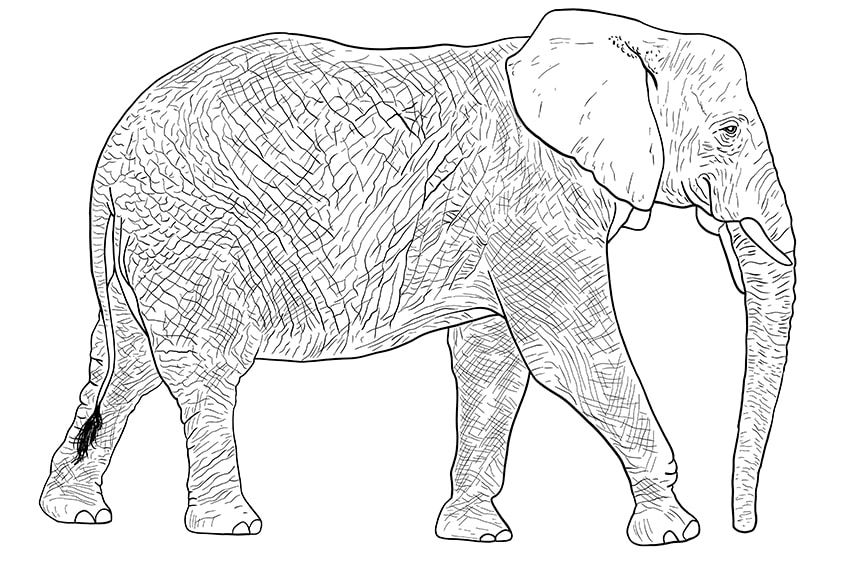
Step 12: Painting the Base Color Coat
You may look at an elephant and think that they are only a single color, but there is a great deal of variation in tone and shade throughout the body. We begin building the realistic coloring of the elephant drawing by laying down a base color. Find a darkish gray shade, and use a regular brush to fill the entire body of your elephant sketch.
Make sure that this coat is even and not blotchy in any place.
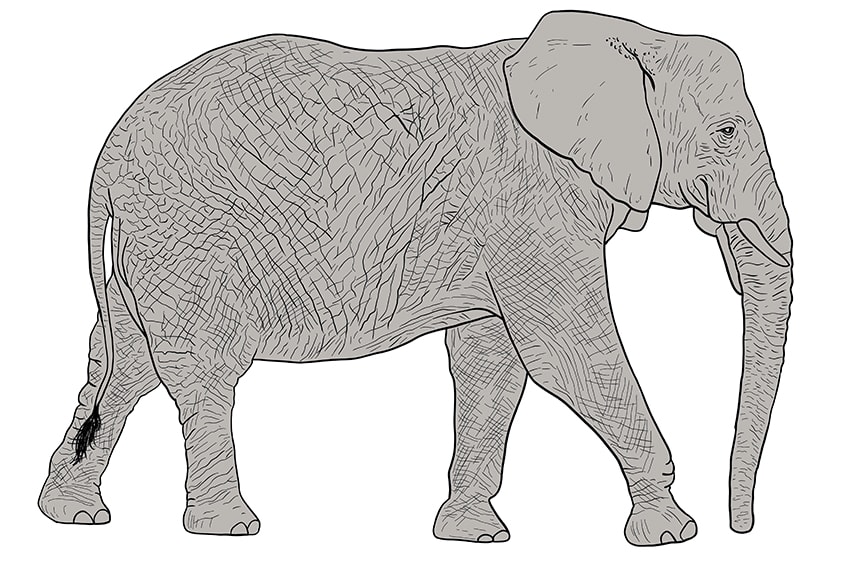
Step 13: Adding the First Layer of Shading
We are now going to add a little more structure to the shape of our easy elephant drawing by adding some shadows. Find a soft blending brush, and use a touch of black paint to contour the structure of the elephant. Focus the color around the top of the face, on the top of the trunk, below the trunk, under the belly, around the edges of the main body circle, and on the insides of the legs.
This first layer of shading can be quite light and not too specific, as, in the next step, we are going to increase the shadow in some of these areas, which will help us create a smoother blend.
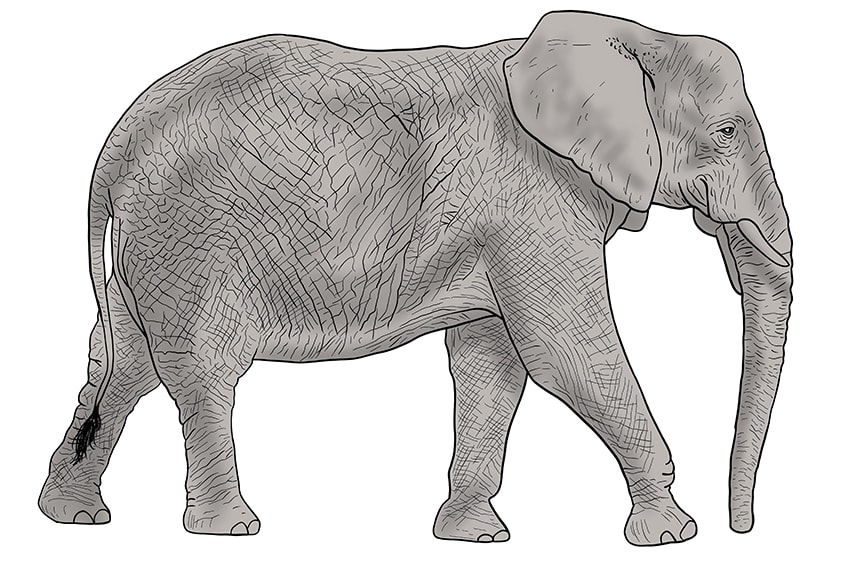
Step 14: Increasing the Shading
Now, you can use a medium-sized brush and a little more black paint to create smaller areas of darker shading within the previous layer. This will help you give your elephant drawing a more defined structure.
Find the central points of your previous shading, and darken them ever-so-slightly.
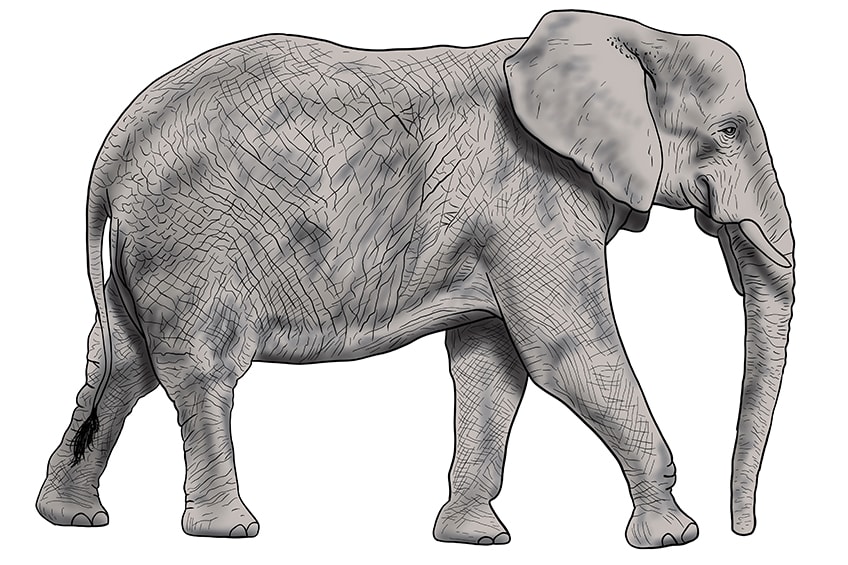
Step 15: Adding Highlights to Your Elephant Sketch
To contrast the shading you just created, you are now going to use white to highlight other areas of your elephant drawing. Use a small blending brush and some white paint to highlight the edges of your elephant sketch.
Imagine that there is a light source towards the front of your elephant, and add this white highlight to any points that would stand out and catch the light.
On the toes of each foot, add white paint. To finish this step, you can color in the tusks with a light yellow shade, and then add a touch of highlight around it.
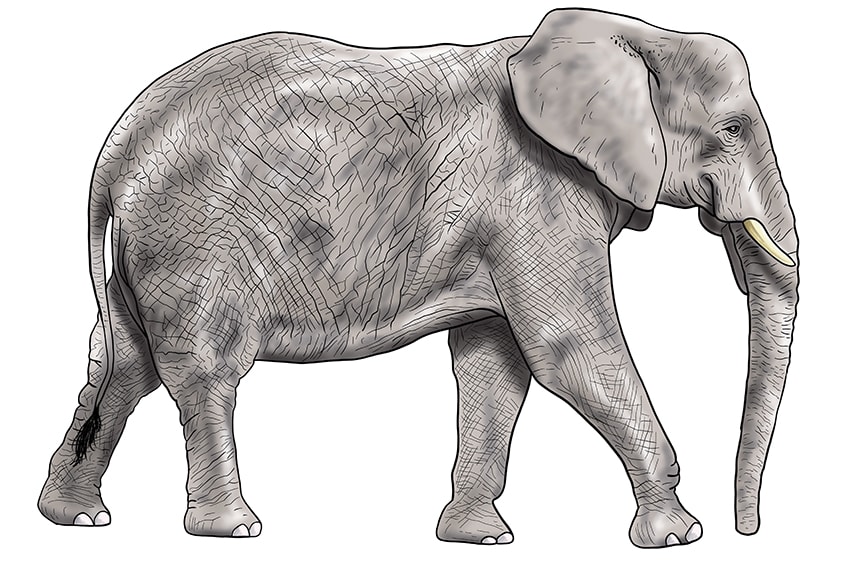
Step 16: Finishing Your Easy Elephant Drawing
In this step, you are going to put the finishing touches to your elephant sketch, to create a seamless and realistic final product. Begin by using a sharp brush and white to add a glint to the eye of your elephant. Next, use the corresponding color at each point of the outline, to trace over it.
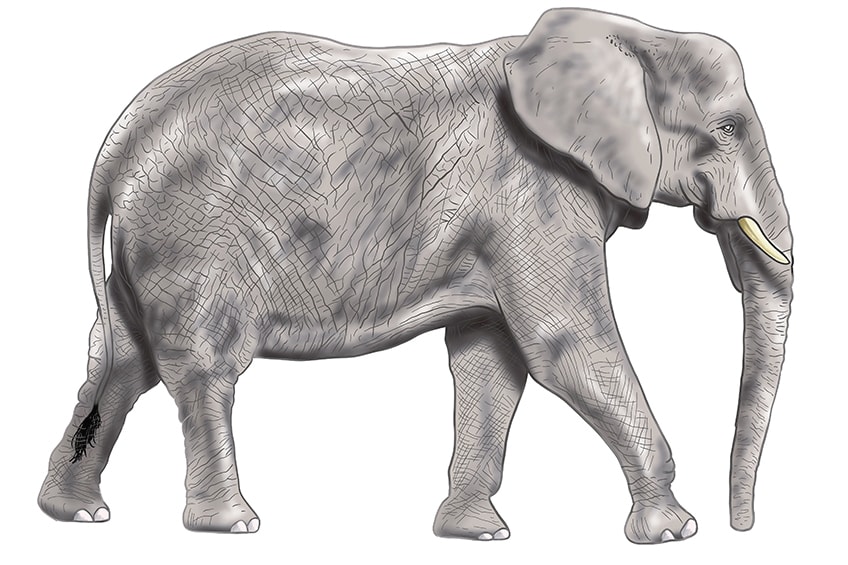
Congratulations on finishing your very own realistic elephant sketch! We hope that you have enjoyed the drawing process, and more importantly, that you are happy with your final elephant drawing.
Take a look at our elephant drawing webstory here!
Frequently Asked Questions
How do You Learn How to Draw an Elephant?
When you first approach learning how to draw an elephant, it may seem like an intimidating task. Luckily, our easy-to-follow elephant sketch tutorial makes the process easy, so that you can create your own realistic elephant drawing in only 16 easy steps!
Is It Difficult to Draw an Elephant Face?
From the side on, the only part of the elephant’s face that we really need to draw is the eye. The trunk and tusks are also parts of the face, and we show you how to create an easy and realistic elephant face drawing in this tutorial.”
Matthew Matthysen is an educated multidisciplinary artist and illustrator. He successfully completed his art degree at the University of Witwatersrand in South Africa, majoring in art history and contemporary drawing. The focus of his thesis was to explore the philosophical implications of the macro and micro-universe on the human experience. Matthew uses diverse media, such as written and hands-on components, to explore various approaches that are on the border between philosophy and science.
Matthew organized various exhibitions before and during his years as a student and is still passionate about doing so today. He currently works as a freelance artist and writer in various fields. He also has a permanent position at a renowned online gallery (ArtGazette) where he produces various works on commission. As a freelance artist, he creates several series and successfully sells them to galleries and collectors. He loves to use his work and skills in various fields of interest.
Matthew has been creating drawing and painting tutorials since the relaunch in 2020. Through his involvement with artincontext.org, he has been able to deepen his knowledge of various painting mediums. For example, watercolor techniques, calligraphy and lately digital drawing, which is becoming more and more popular.
Learn more about Matthew Matthysen and the Art in Context Team.





I thought that drawing an elephant would be hard and would come out bad, but it was really easy and it came out good! Thanks!
Thank you Erin for your kind feedback, glad our elephant drawing tutorial helped!
Oh, this is great! I’m currently in the process of finding material that will make it easier to teach kids how to draw animals in such a simple way! Thank you for your time and for sharing these great and easy drawing tips!
You are welcome Faatasiga :-).