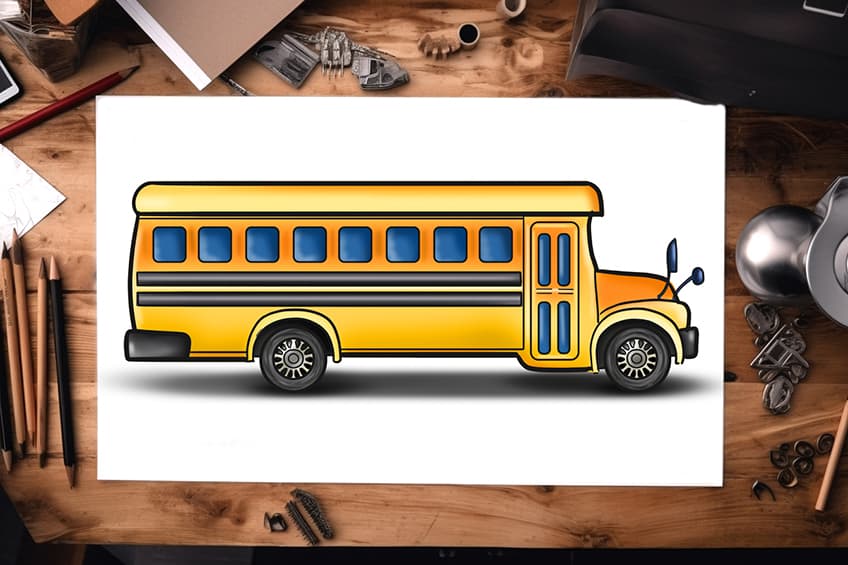
How to Draw a School Bus – Drawing the Iconic Yellow Ride
Drawing a school bus can be a fun and rewarding project, especially when you break it down into manageable steps. In this guide, we’ll walk through the process of drawing a school bus in 18 detailed steps. Whether you’re a beginner looking to practice your drawing skills or an experienced artist exploring new subjects, this guide will provide you with a structured approach to how to draw a school bus!
School Bus Sketching: Step-by-Step Drawing Guide
This collage illustrates each step required to reach the final outcome. Following this guide will also help you master the art of how to draw a school bus!

Step 1: Begin to Sketch Your School Bus Drawing
Begin our drawing tutorial on how to draw a school bus, by sketching the main body of the bus as a rectangle.

Step 2: Draw the Wheels
Draw a circle at the front end of the main body to depict the bus’s front wheel, and place another circle in the third quarter of the main body to illustrate the rear wheel.

Step 3: Begin to Outline Your School Bus Drawing
Utilize the construction lines you’ve already drawn as a guide to outline the main body of the bus, ensuring it becomes more curved and rounded towards the roof.

Step 4: Draw the Front Hood
Now, on the right side of the main body, draw the front hood of the bus, including the fender for the front wheel. Finish this step by adding the fender for the rear wheel.

Step 5: Add the Windows
Within the bus, draw eight rounded corner windows and two side body liner panels. Finish off by drawing the edges of the rear bumper.
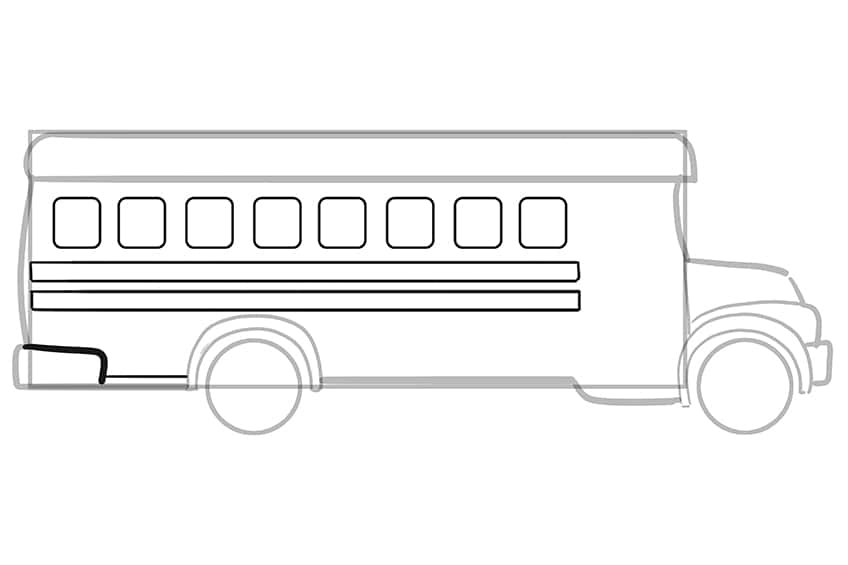
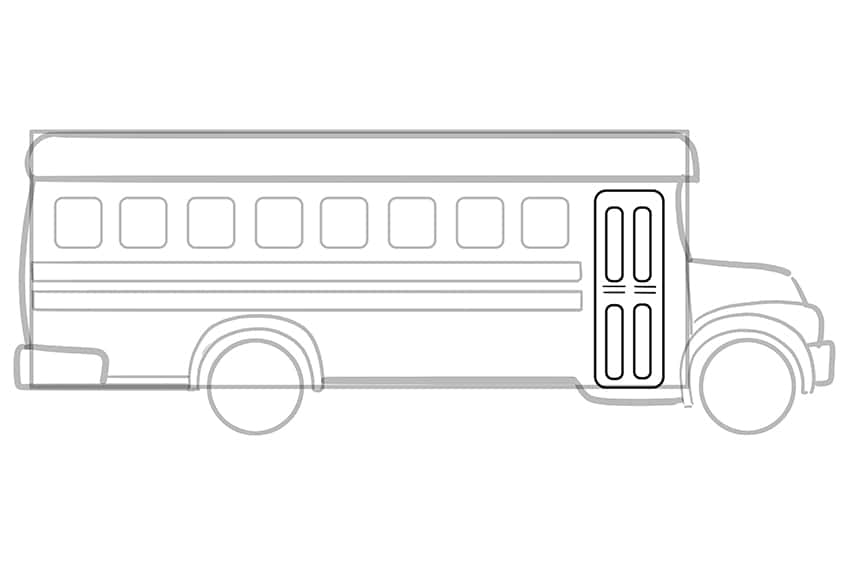
Step 6: Draw the School Bus Door
Along the front portion of the bus, draw the rounded corner door with four additional windows.
Step 7: Add the Wheels to Your School Bus Drawing
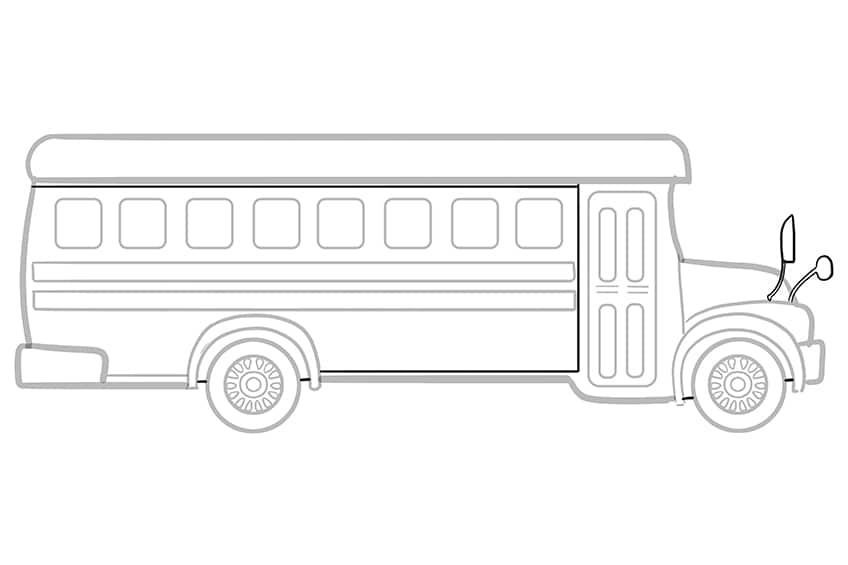
Inside each wheel, draw a secondary circle, and repeat this action twice more, each time with smaller circles. Then, sketch several ovals around the inner circle to form the rim pattern. Finish this step by erasing any overlapping lines and visible construction lines.

Step 8: Draw the Mirrors
Attached to the front hood, draw the extended bus mirrors. Finish off by drawing the underbelly and side panel lines.
Step 9: Apply the Initial Layer of Color
With a fine, sharp brush and yellow paint, evenly coat the bus.

Step 10: Continue to Color Your School Bus Drawing
Using the same brush and gray paint, color the wheels, side panel liners, and the rear and front bumpers.

Step 11: Color the Windows
Apply navy-blue paint with a fine, sharp brush to evenly cover each window, including the one on the door, and use a darker shade of navy-blue for the mirrors. Then, use the same type of brush with dark gray paint to fill in the areas within the wheel arches.

Step 12: Continue to Color the Wheels
With a fine, sharp brush, mix light yellow and white paint to color the wheels. Then, use black paint to color each of the ovals, repeating the process with the same brush.

Step 13: Begin to Shade and Highlight Your School Bus
Begin with a small, soft brush to apply light orange paint for a soft tone on the roof edges, front hood, and side body by the windows, blending these areas for smoothness. Use white paint to highlight the lower half of the roof, bus side liner, fenders, and door.
Finish with black paint to add subtle shading to the bus’s bottom half, all using the same soft brush for a unified effect.

Step 14: Continue to Shade and Highlight
Use a small, soft brush to apply black paint for shading the edges of the side liner stripes, then add a soft glow with white paint in their centers, blending well. Repeat this process on the rear and front bumpers. With a fine, sharp brush, add circular shading to the tires using black paint, letting some of the base color peek through, and then highlight with white paint.

Step 15: Add Shading and Highlights to the Windows
With a small, soft brush, use black paint to gently shade the edges of all windows, including door windows, ensuring the base color layer is slightly visible. Highlight with white paint using the same brush, then blend to smooth out. Shade the inner wheel arches with black paint. Lastly, use black to shade the mirrors, followed by white for soft highlights, maintaining the use of the small, soft brush throughout.

Step 16: Finalize the Shading and Highlighting
Begin by using a small, soft brush and black paint to add soft shading to the center area of each wheel. Finish off by using white paint which should great a glow of highlights.

Step 17: Apply a Ground Shadow
Apply black paint with a small, soft brush to shade underneath the school bus, then use a blending brush to extend and soften the shading in both horizontal directions.

Step 18: Finalize Your School Bus Drawing
To finalize our drawing tutorial, employ a fine, sharp brush and black paint to trace over all the outlines of the bus and any internal texture lines, ensuring a crisp finish. This step marks the completion of our guide, encapsulating all the techniques you’ve learned into your completed school bus illustration.

Our tutorial on how to draw a school bus was designed to be both enjoyable and informative, guiding you through each step with ease and clarity. By breaking down the process into detailed stages, we made sure that artists of all levels could follow along and expand their skills. We hope you found this journey both fun and rewarding, leaving you with not only a great drawing but also with new techniques to apply to future artistic endeavors. Thank you for joining us in this creative adventure!
Frequently Asked Questions
How Can I Add Realistic Details and Shading to My School Bus Drawing?
To add realism to my school bus drawings, I focus on observing reference images closely to capture key features like windows, doors, and wheels accurately. I use a variety of pencil grades for shading, concentrating on areas where shadows naturally fall to create depth. Techniques like hatching and cross-hatching add texture to surfaces, enhancing the overall appearance of the drawing.
What Are Key Errors to Steer Clear of When Sketching School Buses?
Common mistakes in drawing school buses include improper perspective and proportions, which can distort the shape and balance of the bus. Neglecting essential details such as windshield wipers and mirrors can also make the drawing appear incomplete. Ensuring clean and precise lines is crucial to maintaining quality in the final illustration. With practice, avoiding these errors becomes easier, resulting in more polished and realistic drawings.
Matthew Matthysen is an educated multidisciplinary artist and illustrator. He successfully completed his art degree at the University of Witwatersrand in South Africa, majoring in art history and contemporary drawing. The focus of his thesis was to explore the philosophical implications of the macro and micro-universe on the human experience. Matthew uses diverse media, such as written and hands-on components, to explore various approaches that are on the border between philosophy and science.
Matthew organized various exhibitions before and during his years as a student and is still passionate about doing so today. He currently works as a freelance artist and writer in various fields. He also has a permanent position at a renowned online gallery (ArtGazette) where he produces various works on commission. As a freelance artist, he creates several series and successfully sells them to galleries and collectors. He loves to use his work and skills in various fields of interest.
Matthew has been creating drawing and painting tutorials since the relaunch in 2020. Through his involvement with artincontext.org, he has been able to deepen his knowledge of various painting mediums. For example, watercolor techniques, calligraphy and lately digital drawing, which is becoming more and more popular.
Learn more about Matthew Matthysen and the Art in Context Team.


