How to Draw a Wildebeest – African Antelope Drawing Tutorial
The wildebeest is one of the big five animals unique to the South African landscape. This large and intimidating species of African antelope roams the plains of Africa and grazes on long grasses. Today, we are going to show you how to draw a wildebeest from scratch. Beginning with how to construct the shape of your wildebeest drawing, we will then show you how to create realistic textures and coloring. So, without further ado, let us dive right into our wildebeest drawing tutorial.
Creating a Wildebeest Drawing Step-by-Step
The mighty wildebeest makes a fantastic drawing subject because it is strangely proportioned. The odd, gangly legs and large body make it a great proportion study. Proportion is arguably one of the hardest parts of an animal drawing, and we find the best way to approach it is to begin your drawing by using construction shapes and lines. We are going to start our wildebeest drawing tutorial by using a range of shapes and lines to lay the foundation of the shape before we add any details or colors. This way, we can nail the proportions of the tricky wildebeest, and you can see the outline of the tutorial in the collage below.
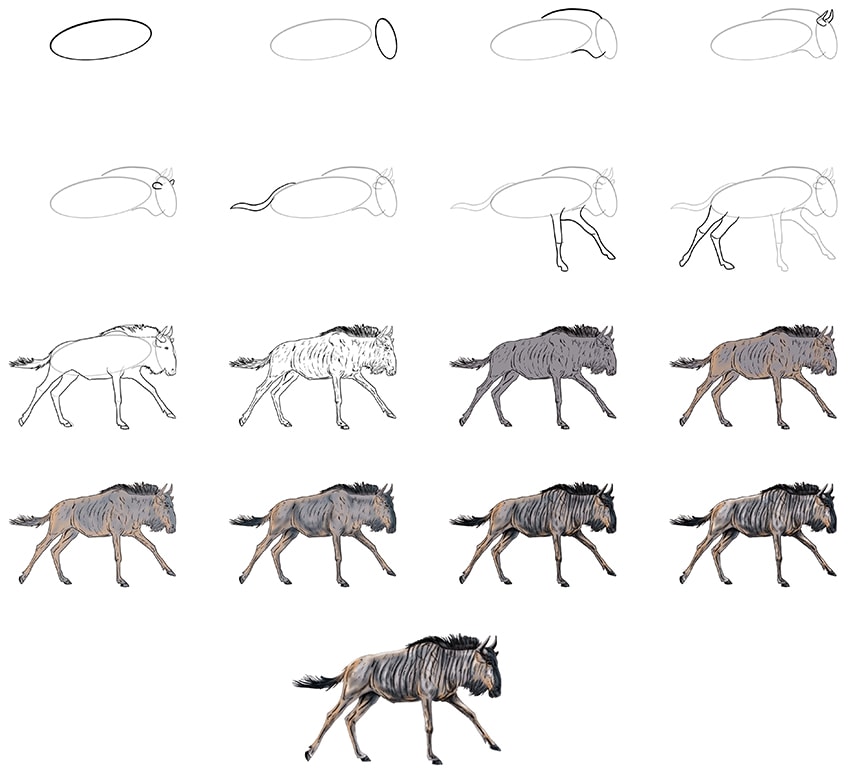
After proportion and details, we get the coloring steps. Our example drawing uses paint to color the wildebeest, but you are welcome to use any medium of your choice.
Whether you love to use coloring pencils, or you are a graphic artist who uses a drawing tablet, you can easily adapt the coloring steps.
Step 1: Creating the Main Body Shape
We begin this tutorial by laying the foundations for the largest part of the wildebeest’s body. Draw a large and narrow oval shape that is slightly angled with the right side higher than the left. This oval shape is going to represent the main part of the wildebeest’s body.
In this first step, the most important thing to remember is to place the oval in the very center of your canvas. You will need to leave room on all sides for the head and legs.

Step 2: Outlining the Head of Your Wildebeest Drawing
For the head shape, you are going to use another narrow oval. You want to place this smaller oval shape on the right side of the main body oval. This oval should be almost vertical but slightly tilted to the left side.
This head oval will help you shape the wildebeest’s head in later steps.

Step 3: Joining the Body and Head with the Neck
In this third step, you are going to draw in the neck of your wildebeest drawing to join the head and body together. Wildebeests have very short and strangely shaped necks. Begin with the top neckline, drawing a line from the top point of the head oval and curve it back onto the top of the main body oval.
For the bottom neckline, draw a slightly “S” shaped line that begins below the front of the main body oval and ends just inside the head oval.

Step 4: Drawing the Wildebeest’s Horns
This step is quick and easy, you simply need to draw two curved horns on the top of the wildebeest’s head. The horn on the side of the head closest to us should start within the head oval and angle towards the front of the canvas.
The other horn should begin on the outline of the head oval and angle directly upward.
Step 5: Shaping the Ears
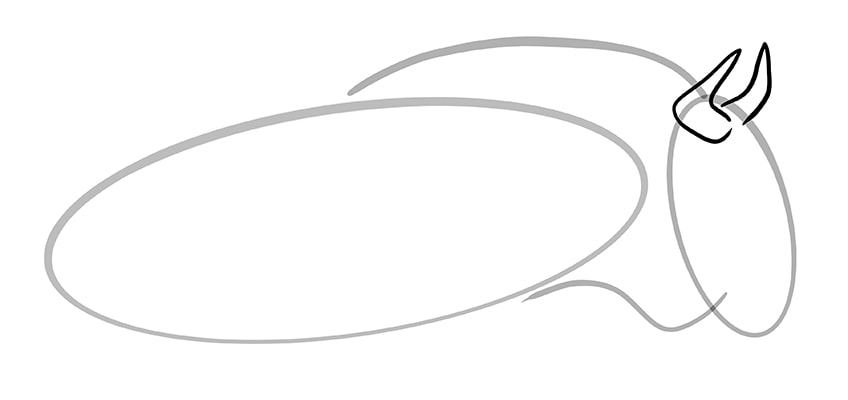
For the ears, you are going to draw two uneven ovals on either side of the head oval. The oval on the side closest to us should be almost whole and begin inside the head oval just below the horn.
For the ear on the other side, you need to draw a slightly more pointed oval that peeks outside the side of the head oval.
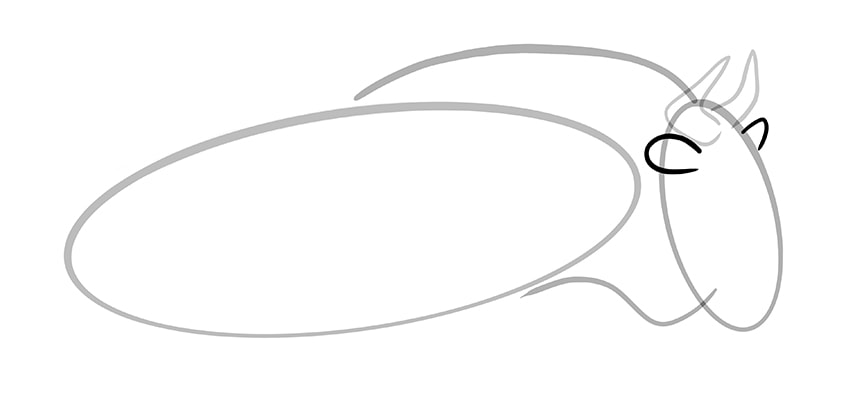
Step 6: Creating the Shape of the Wildebeest’s Tail
For the tail of your wildebeest drawing, you are going to use two curved lines. The top line should begin on the upper back and curve it down and then up again ending at a point. Then bring this curved line back up to join the back end of the main body oval.
In later steps, you will use this line to flesh out the final shape of the wildebeest’s tail.
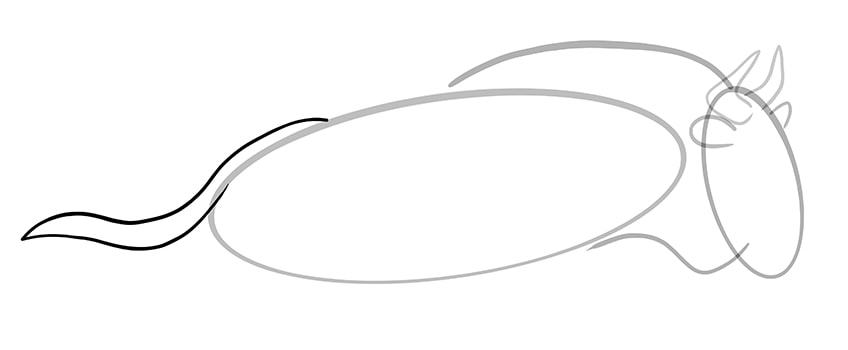
Step 7: Shaping the Front Legs of Your Wildebeest Drawing
Given the large shape of their torso, the legs of a wildebeest are very long and gangly. In this step, you are going to draw the two front legs of your wildebeest. Begin by drawing the upper portion of each leg, extending from the bottom of the main body oval. For the front leg that is the furthest back, draw a fairly thin curved line that gets thinner as it gets lower. Draw a separation line halfway down the leg, and end it with a curved hoof shape. The second leg, the one that is closest to the front of the body and furthest away from our perspective, should be thicker at the top.
The left side of the leg top should be hidden behind the other leg for the correct perspective.

Step 8: Drawing the Wildebeest’s Back Legs
You are going to shape the back legs in much the same way as you did the front legs, but they are differently angled. For the very back leg, you want it to angle it backward and begin it right below the tail. For the second back leg, you want to create a leg with a bend in it. The thigh should extend back towards the back of your canvas, and on the separation, it should bend toward the front of the canvas.
This leg stance gives the impression of walking movement.
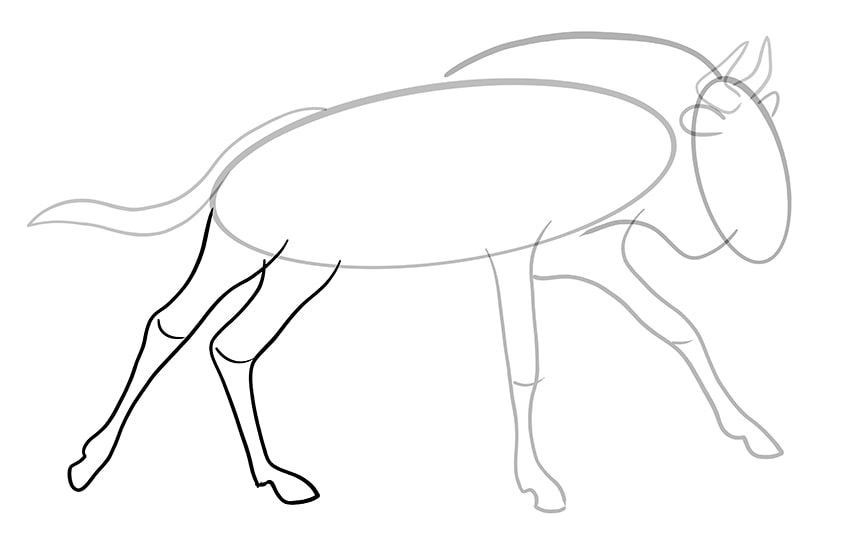
Step 9: The Final Outline of Your Wildebeest Drawing
It has finally come time to put all the hard work of your construction lines to use. In this step, you are going to use all of the construction shapes to draw the final outline of your wildebeest. You are also going to add a few facial details and flesh out the hair on its mane, neck, and tail. Begin by using short strokes to create the hairy mane on the top neck construction line. You want the hairs to curve slightly toward the back of the wildebeest’s body and end on the backline. Continue to outline the body shape of your wildebeest drawing, giving the rump and belly a slight bump.
When you get to the wildebeest’s tail and bottom neck area, make use of the hairlike strokes again to add some detail. You also want to create a hairy separation line above the hooves.
Outline the shape of the face, adding a small bump on the nose. You can then add facial details including an eye by the ear. Add a little curved nostril at the bottom of the nose and a small lip line to demarcate the mouth. Once you have completed your outline, you can erase all of the visible construction lines.
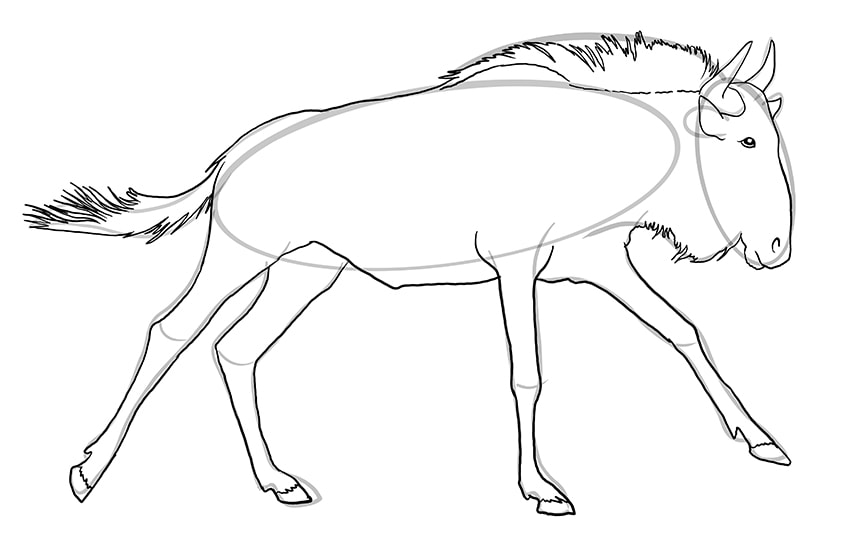
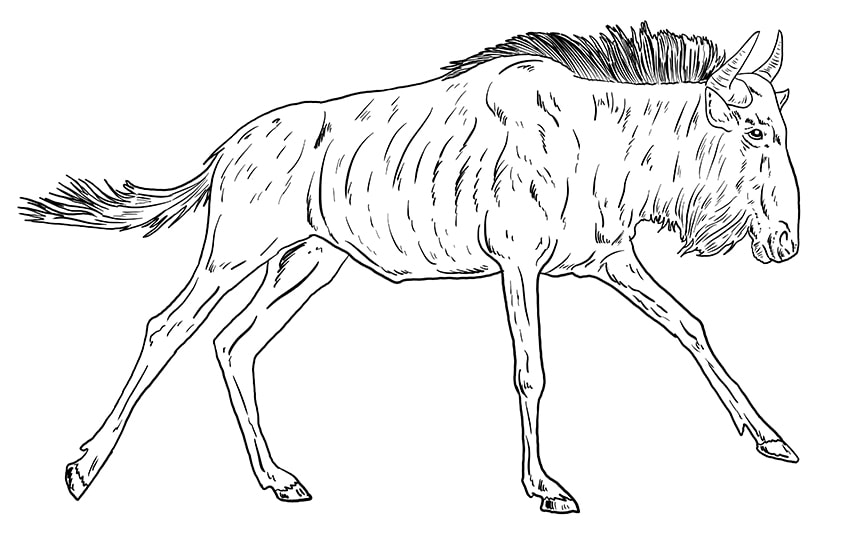
Step 10: Creating Texture
It is now time to add some texture to the body of your wildebeest drawing. Begin by filling the mane with long and dense hair strokes that follow the direction of the outline. You can do the same for the bottom beard, using a range of different length lines, and the tail.
Next, begin adding short scribbles around the face to contour the main features, including the nostrils, mouth, ears, and eyes.
As you move into the rest of the body, create vertical lines that curve slightly towards the back of its body. You can then add these scribbly lines down each of the legs. Add some little strokes on all of the hooves, and finish the texturing step by filling the horns with small horizontal lines.
Step 11: Adding the First Coat of Color
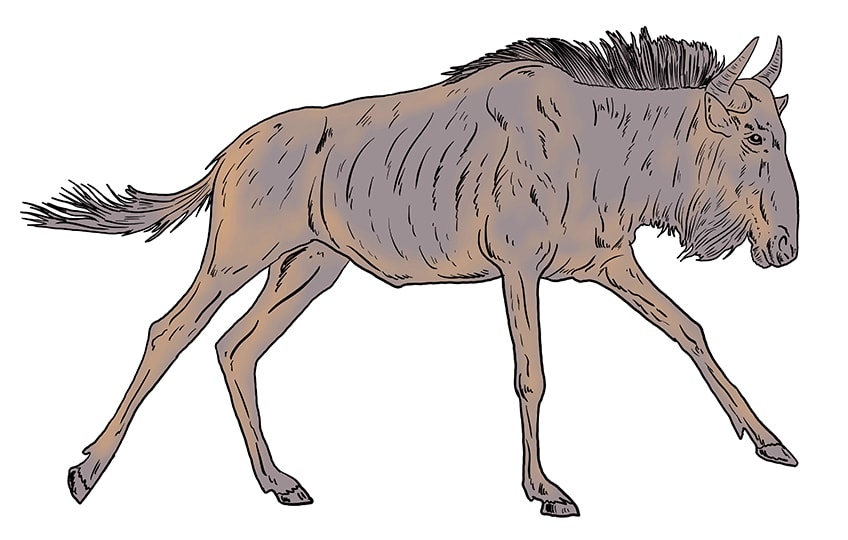
In order to build up realistic coloring, we are going to use different layers of color. We begin with a base coat that fills the entire body of your wildebeest drawing. The best base shade is a medium gray, and you can fill every part of your drawing with this shade.
Whichever medium you are using, you just need to ensure that the coat is even.

Step 12: Applying the Second Color Coat
In this step, you are going to add the second coat color. The best shade for this step is a light brown or tan color. You want to use a small blending brush to add a few touches of light brown throughout the body, legs, and face.
If you are using traditional painting mediums, you can achieve a more flawless blend by painting on the color and then using a clean soft brush to blend it out.
Step 13: Adding Light Shading
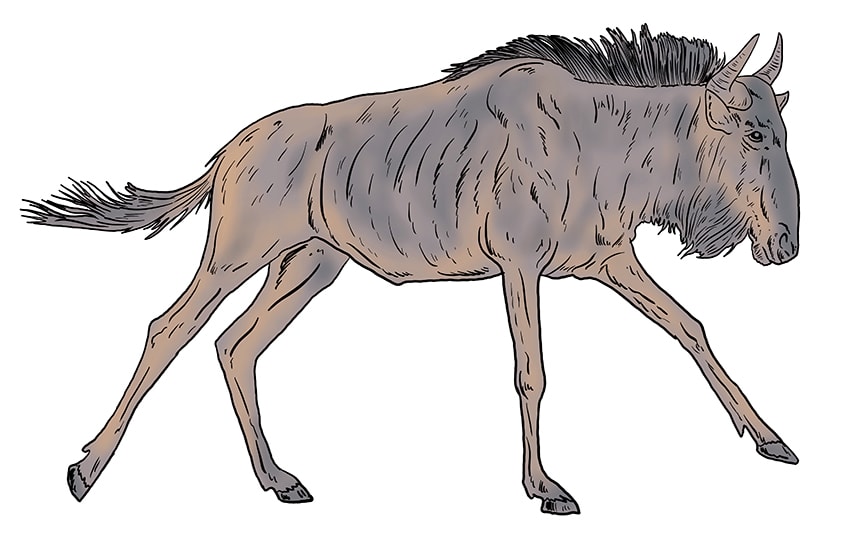
Choose a dark gray shade and then use this to add the first coat of shading to the key areas of your wildebeest drawing. Add contour shading to all the areas of the main body that are not light brown. You also want to add shading to the contoured areas of the face and the lower parts of the legs.
If you use a softer blending brush you can create a more natural shadow.
Step 14: Applying the Final Shading
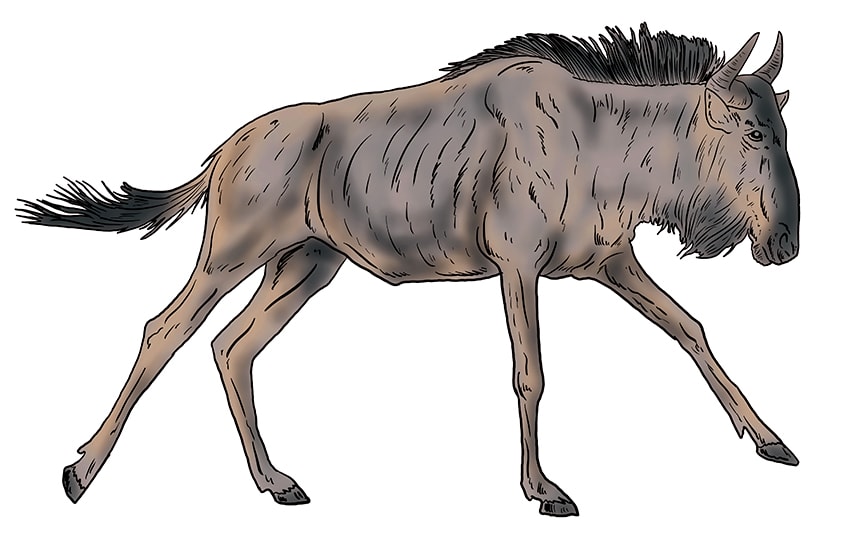
Now that you have used dark gray to shade all of the important contours of your wildebeest, find a shade of black. Use this shade and a soft blending brush to carefully go over the areas of shadow that you created in the previous step. You want to darken some part of it, particularly under the belly, on top of the head, in the mane, between the legs, in the tail, and on the hooves.
It is best to be gingerly when using black, as it is always easier to add than to take away once you have painted it.
Step 15: Creating the Color Detail
It is now time to paint on the color details on your wildebeest drawing. Use a regular brush and a touch of black paint, and use these to trace the texture lines that you drew in step 10. This will make a more realistic visual pattern that runs down from the top of the wildebeest. Add additional shading to the forehead of the face and create a dark pattern that traces the horns and lower lip. You can further darken the beard, mane, and tail. Add a final touch of shading to the hooves and the small texture details throughout the wildebeest’s body and legs.
Finish this step by using a softer brush to gently blend the edges of your texture lines to soften them a little.
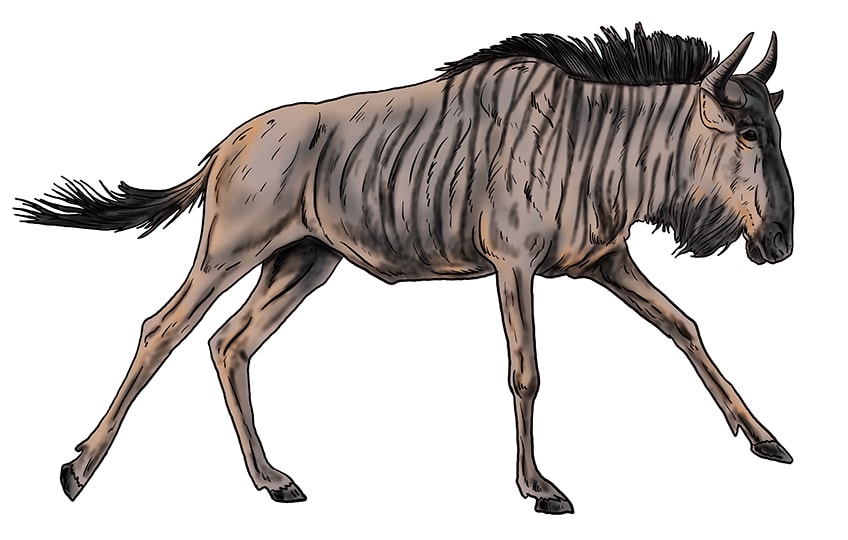
Step 16: Adding Highlights to Your Wildebeest Drawing
In this step, you are going to use a touch of white paint to contrast the shading with a highlight. You do not want your white paint to be too pigmented, a more diluted shade will be best.
Use this shade to add highlights to the parts of the wildebeest drawing that would naturally catch the light.
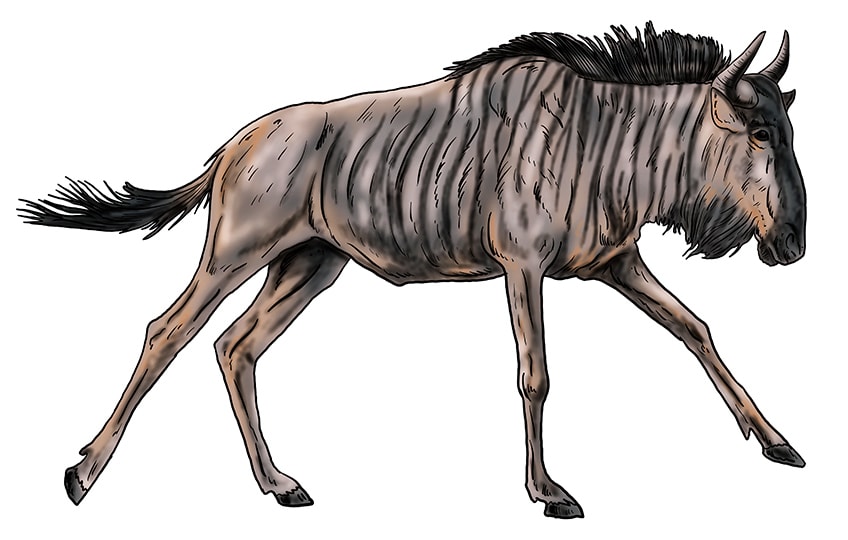
Step 17: Finishing Your Wildebeest Drawing
This final step is optional, but it creates a more seamless final drawing. All you need to do now is erase the outline of your drawing, either by erasing it on your drawing tablet or tracing over it with the corresponding color.
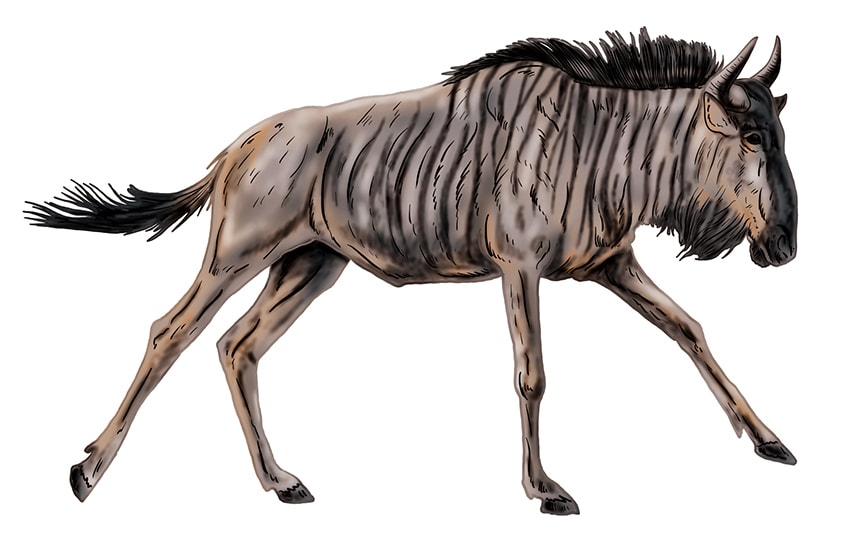
Congratulations for completing your wildebeest drawing! We hope that you have enjoyed the tutorial and that you feel more confident tackling animal drawings with strange proportions.
Frequently Asked Questions
What Is the Hardest Part of a Wildebeest Drawing?
Because of its strange proportions, the hardest part of learning how to draw a wildebeest is making sure that the legs and body are in proportion with each other. We help you nail the proportion by using construction shapes so that you can add details without fear of having to start all over again.
Is Drawing a Wildebeest Similar to Drawing a Cow?
Although wildebeests belong to the same family group as cows, sheep, and antelopes, their bodies are very differently shaped. There are some similarities, including the horns and the shape of the rump, but overall they are quite distinct animals.
Matthew Matthysen is an educated multidisciplinary artist and illustrator. He successfully completed his art degree at the University of Witwatersrand in South Africa, majoring in art history and contemporary drawing. The focus of his thesis was to explore the philosophical implications of the macro and micro-universe on the human experience. Matthew uses diverse media, such as written and hands-on components, to explore various approaches that are on the border between philosophy and science.
Matthew organized various exhibitions before and during his years as a student and is still passionate about doing so today. He currently works as a freelance artist and writer in various fields. He also has a permanent position at a renowned online gallery (ArtGazette) where he produces various works on commission. As a freelance artist, he creates several series and successfully sells them to galleries and collectors. He loves to use his work and skills in various fields of interest.
Matthew has been creating drawing and painting tutorials since the relaunch in 2020. Through his involvement with artincontext.org, he has been able to deepen his knowledge of various painting mediums. For example, watercolor techniques, calligraphy and lately digital drawing, which is becoming more and more popular.
Learn more about Matthew Matthysen and the Art in Context Team.


