How to Draw a Teddy Bear – Create a Cuddly Teddy Bear Drawing
Teddy bears are not just toys; they’re companions, confidants, and cuddle buddies that can comfort us in our loneliest moments. With their soft fur, sweet faces, and comforting presence, these beloved stuffed animals have been a source of comfort and joy for generations of children and adults alike. Whether snuggled up in bed, held tightly during a scary movie, or simply displayed as a beloved keepsake, teddy bears hold a special place in our hearts and homes. So, next time you see one, give your teddy bear a big hug and thank them for being your faithful friend. Grab your pencils and brushes, and get ready for an exciting tutorial on how to draw a teddy bear!
Learn How to Draw an Adorable Teddy Bear Drawing
You’re about to learn how to draw a teddy bear, so get ready for a fun and rewarding experience! Before you begin, it’s helpful to study different teddy bear images to see the shapes and details that make them unique. Start by sketching the outline of the bear’s body, using circles and ovals to guide you. Next, add the facial features, such as the eyes, nose, and mouth. Don’t forget to include the signature teddy bear ears and paws, which can be drawn with simple curved lines. Once you have the basic shape down, you can add details like fur texture, shading, and color to make your teddy bear come to life. Remember, practice makes perfect, so keep experimenting and have fun with your teddy bear drawings!
By following along with the steps illustrated in the below collage, you will be able to draw a realistic and adorable teddy bear!
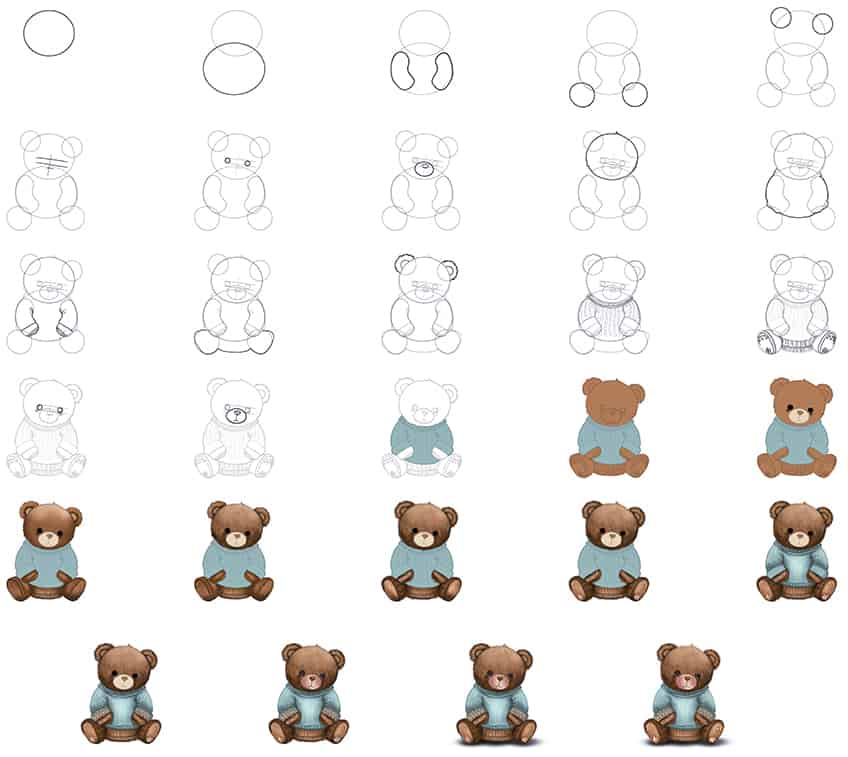
Step 1: Draw the Head of Your Teddy Bear Drawing
To begin your teddy bear drawing, start by drawing an oval shape to represent the head of the teddy bear.

Step 2: Draw the Main Body
Draw the main body of the teddy bear represented by an oval shape that overlaps the head.

Step 3: Add the Arms of Your Teddy Bear Sketch
Attached to either side of the main body, draw two curving arms.

Step 4: Draw the Legs
Draw an oval shape at each end of the main body to represent the legs.

Step 5: Add the Ears to Your Teddy Bear Sketch
On each end of the head, draw two small circles to represent the ears.

Step 6: Draw the Facial Guidelines
Within the head, draw a single center vertical line. Follow this by drawing three horizontal center lines.

Step 7: Add the Eyes to Your Teddy Drawing
Make use of the guidelines previously drawn to aid you in drawing two symmetrical circles to represent the eyes.

Step 8: Draw the Nose
Begin by drawing a wide oval shape crossing the guidelines drawn in step six. Complete the step by drawing a small oval shape between the bottom and middle guidelines.

Step 9: Outline the Head of Your Teddy Drawing
Create a furry outline around the head of your teddy drawing.

Step 10: Continue to Outline the Main Body
Make use of the previously drawn construction lines to aid you in outlining a more realistic body for your teddy bear drawing.

Step 11: Outline the Arms
Continue to outline the arms of your teddy bear. Continue to draw the sleeve cuffs at the bottom of each arm.

Step 12: Outline the Feet of Your Teddy Drawing
In this step, outline the bottom part of your teddy bear including the feet.

Step 13: Create a Realistic Outline for the Ears
Use the previously drawn construction lines to aid you in outlining the fuzzy ears of your teddy bear sketch.

Step 14: Texture the Sweater
Draw the fine collar at the top of the sweater with a leading seam of vertical lines. Continue by drawing fine dotted vertical lines throughout the sweater, these should follow the curvature of the actual teddy bear’s body.

Step 15: Outline the Feet of Your Teddy Drawing
Within each foot, draw the circular paw prints. Continue to draw the lower seam with vertical lines to complete your teddy bear drawing.
Once complete, you can erase any construction lines that are still visible.

Step 16: Continue to Outline the Eyes
Use the construction lines to aid you in outlining the eyes of the teddy bear. Following this, attach a second oval shape just below each eye. Continue to draw fine eyelashes on each eye.

Step 17: Outline the Nose
Continue to outline the nose and mouth lines of your teddy bear sketch. Once completed, erase any still visible guidelines.

Step 18: Apply the First Color Coat
Select a fine, sharp brush and a light shade of viridian green paint, and evenly coat the sweater of the teddy bear.

Step 19: Add Color to the Teddy Bear Drawing
Continue using the same brush as previously and switch to brown paint, and evenly coat the teddy bear.

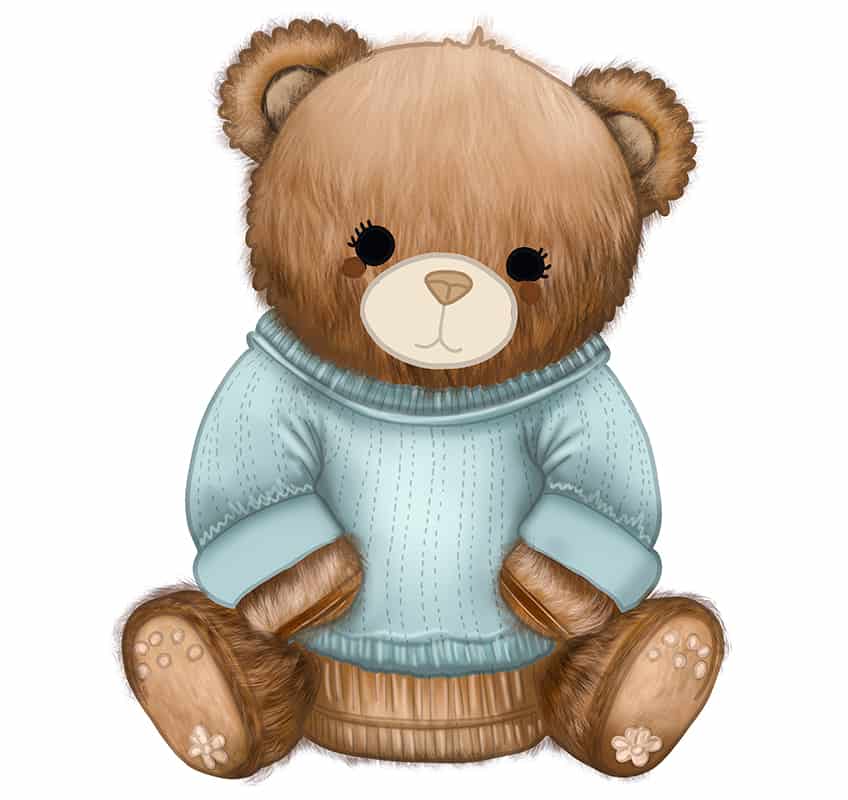
Step 20: Color the Facial Features
Color the eyes using a thin brush and black paint. Continue using dark brown paint to color the spots below the eyes. Finish this step by coloring the snout using cream color paint.

Step 21: Shade the Teddy Bear
With a small, soft brush and a darker shade of brown paint, add soft brushstrokes within the visible parts of the teddy bear including the feet, hands, and the rest of the head.
Note! The first color coat should still be somewhat visible in this shading process.
Continue by adding a soft highlight to the head and ears using tan paint. Switch to a thin brush and black paint, and enhance the earlobe lines. Complete the step with a blending brush and soften the color coats together.

Step 22: Texture the Head of Your Teddy Bear Sketch
Begin this step using a thin brush and tan paint, and add fine hairline brushstrokes to create a realistic fur texture. Continue using a combination of brown and black paint, and add vertical fur textures on the head of your teddy drawing. Repeat the process on each ear.

Step 23: Continue to Texture Your Teddy Bear Drawing
In this step, you will add a darker fur coat onto the hands and feet, using a thin brush and black paint. Continue using tan paint to fill the rest of the fur coat. Finish this step using the corresponding colors to add a fur coat extending beyond the outlines of your teddy drawing to create a less “cut out” look.
Step 24: Texture the Feet
With a small, soft brush and black paint, add soft shading onto the bottom of each foot. Repeat using a thin brush and brown paint to add fine streak lines. Switch to tan paint, and color the patterns on each foot.
Complete the step using a fine, sharp brush and tan paint, and trace the paw lines on the teddy bear’s hands.
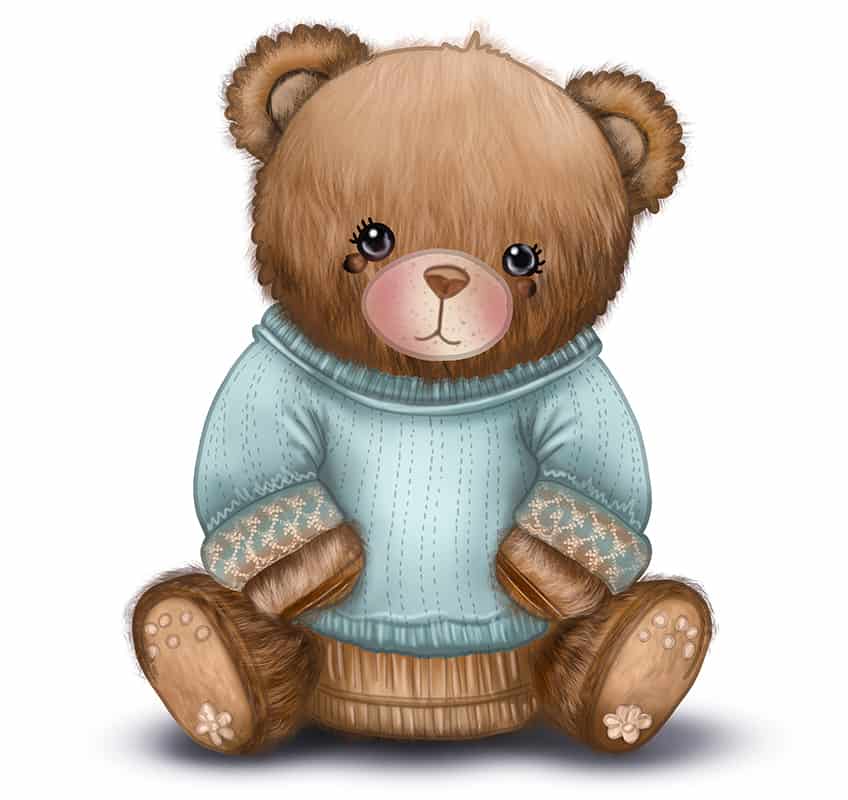
Step 25: Shade and Highlight the Sweater
Add soft shading along the edges of the sweater, with a soft brush and black paint. Repeat using a thin brush to enhance the creases of the sweater’s texture. Complete the step by adding highlights that will add a soft glow to the sweater, using a soft brush and white paint. Repeat once more using a fine, sharp brush to trace the seam lines and fine crease lines of the sweater.
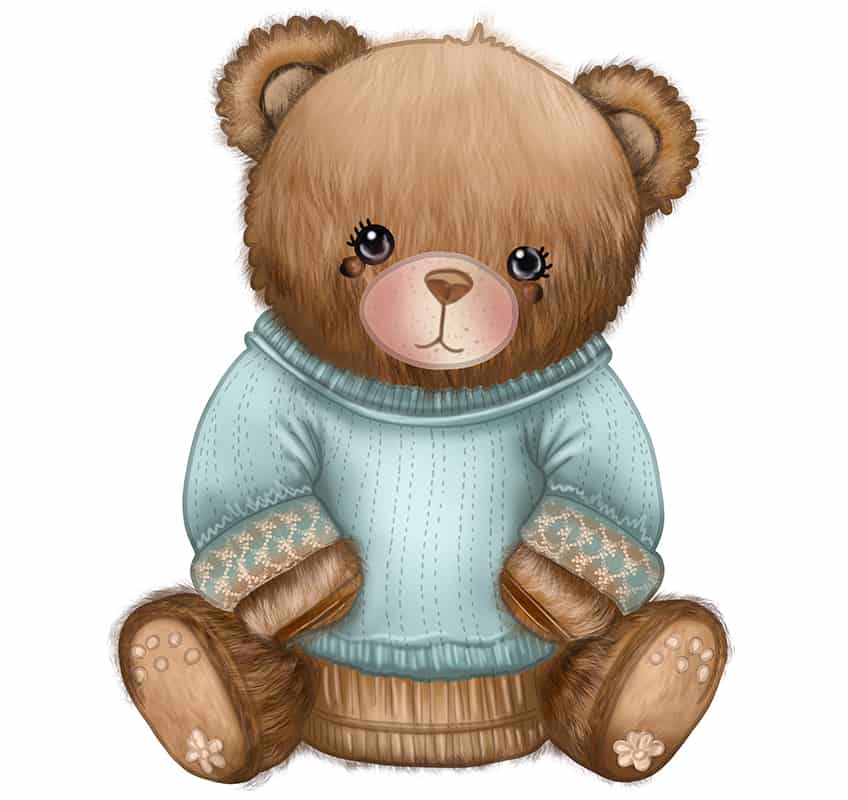
Step 26: Texture the Cuffs of the Sweater
Select a rough, texture brush and brown paint, and add floral patterns on the cuffs of the sweater.

Step 27: Detail the Eyes and Mouth
In this step, you will add a single dot within the corner of each eye using a thin brush and white paint. Continue using dark brown paint, and color the lower part of the nose, and trace the mouth line. Switch to a soft brush and shade the dots below each eye using black paint. Repeat using white paint for the soft highlights within each dot. Complete the step using pink paint to add a soft color tone to the snout.
Step 28: Add a Ground Shadow
Add a dark ground shadow underneath your teddy bear drawing using a fine, sharp brush and black paint. Switch to a blending brush to soften and spread the ground shadow.
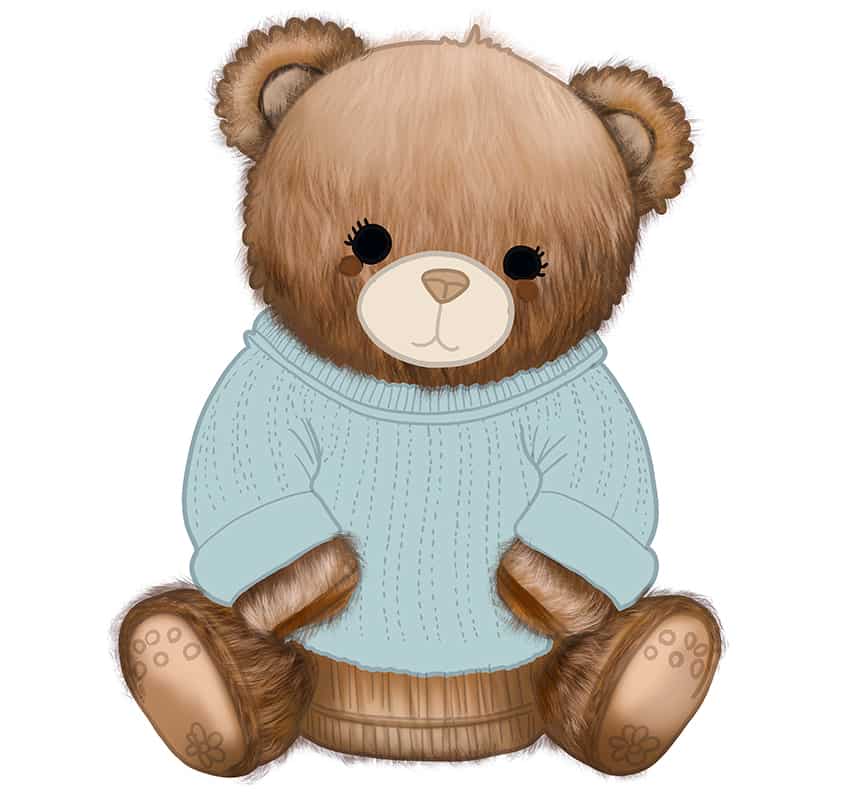
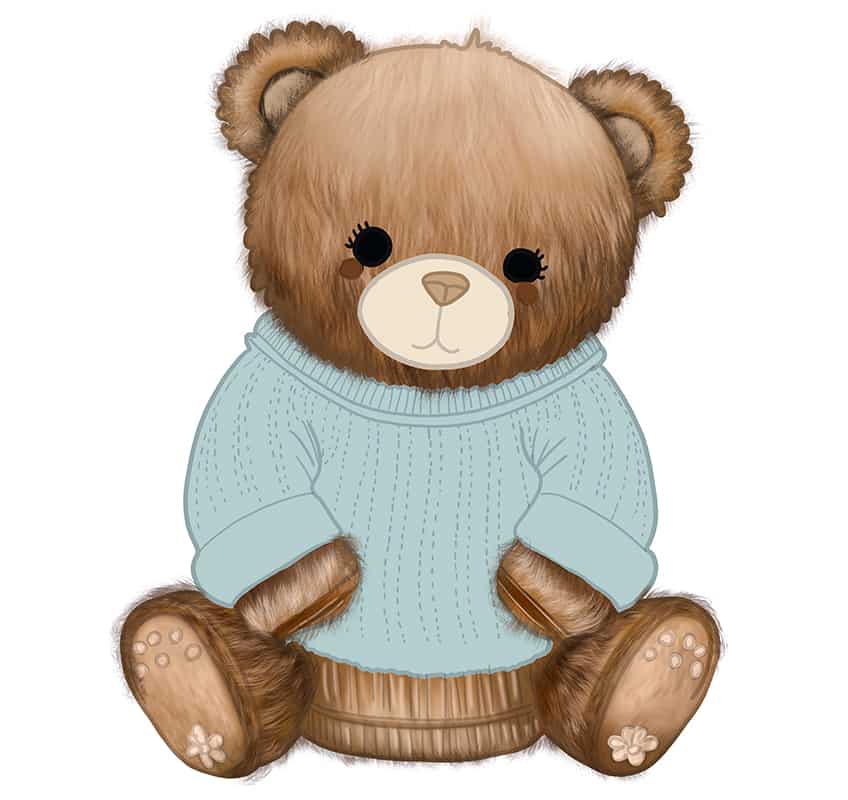
Step 29: Finalize Your Teddy Drawing
To achieve a seamless final result for your teddy bear, consider using a fine, sharp brush and the corresponding colors to trace over any visible harsh outline and texture lines. This technique can help create a polished and seamless look to your drawing!
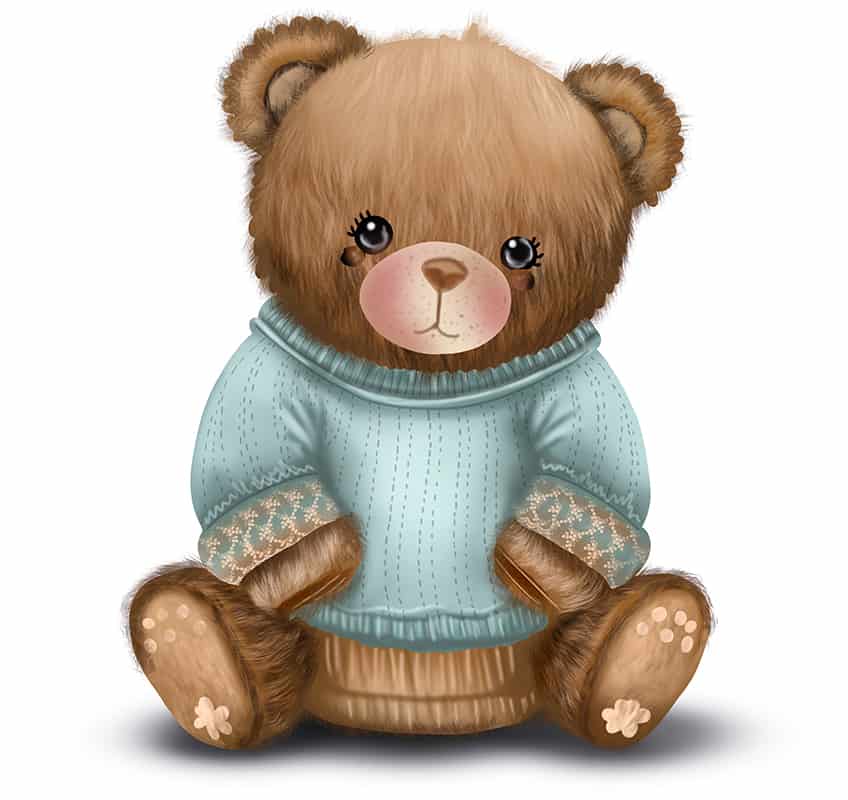
Congratulations on finishing your teddy bear drawing! Take a moment to admire your creation and be proud of your hard work. Now is the time to add any final details, such as shading or highlights, to make your drawing even more realistic. Consider experimenting with different colors and textures to give your teddy bear a unique personality and character. If you’re feeling adventurous, try drawing different poses or outfits for your teddy bear. Don’t be afraid to make mistakes and keep practicing to improve your skills. Once you’re satisfied with your teddy bear drawing, share it with others or display it in your home as a reminder of your creativity and talent!
Frequently Asked Questions
What Colors Can My Teddy Bear Drawing Be?
When choosing colors for your teddy bear drawing, consider the type of bear you want to draw. If you want to create a traditional brown teddy bear, start with a light brown or beige color for the body and a slightly darker shade for the fur texture. You can also experiment with other colors, such as gray, and white, or even bright colors like pink or blue. Use reference images to help guide your color choices to create a cohesive look.
How to Draw a Teddy Bear and Make it Look Realistic?
To make your teddy bear drawing look more realistic, pay attention to the details. Add shading to create depth and dimension, and use different stroke techniques to create texture on the fur. Observe real-life teddy bears or reference images to understand how the fur flows and how the facial features are shaped. Finally, don’t be afraid to make mistakes, and keep practicing to improve your skills. The more you draw, the better your teddy bear drawings will become!

Matthew Matthysen is an educated multidisciplinary artist and illustrator. He successfully completed his art degree at the University of Witwatersrand in South Africa, majoring in art history and contemporary drawing. The focus of his thesis was to explore the philosophical implications of the macro and micro-universe on the human experience. Matthew uses diverse media, such as written and hands-on components, to explore various approaches that are on the border between philosophy and science.
Matthew organized various exhibitions before and during his years as a student and is still passionate about doing so today. He currently works as a freelance artist and writer in various fields. He also has a permanent position at a renowned online gallery (ArtGazette) where he produces various works on commission. As a freelance artist, he creates several series and successfully sells them to galleries and collectors. He loves to use his work and skills in various fields of interest.
Matthew has been creating drawing and painting tutorials since the relaunch in 2020. Through his involvement with artincontext.org, he has been able to deepen his knowledge of various painting mediums. For example, watercolor techniques, calligraphy and lately digital drawing, which is becoming more and more popular.
Learn more about Matthew Matthysen and the Art in Context Team.