

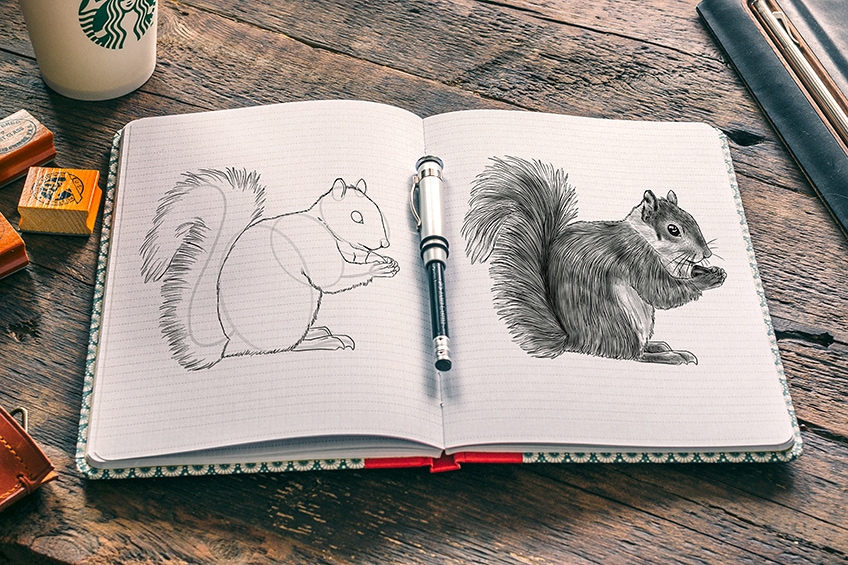
How to Draw a Squirrel – A Step-by-Step Squirrel Drawing Guide
We bet that you had never thought about how to draw a squirrel before you clicked onto this page. Now that you are here, perhaps you feel an undeniable urge to whack out your pencils and eraser and attempt this nutty idea of a drawing. Squirrel drawing can be quite simple – it just starts with a few construction lines to establish the perfect dimensions. From a fluffy tail to its tiny, beady eyes, we will guide you through this squirrel drawing tutorial, step by step!
A Quick Look at Squirrels
There are almost 300 species of squirrels that can be found all over the world, inhabiting each continent except for Antarctica and Australia. The most commonly seen and publicized squirrels are red squirrels and the grey squirrels. Red squirrels are mostly found in China, Mongolia, and neighboring Asian Countries, whereas grey squirrels are mostly found in the east of Northern America. These funny creatures are the acrobats of the forest, leaping from branch to branch and tight-roping across vines.
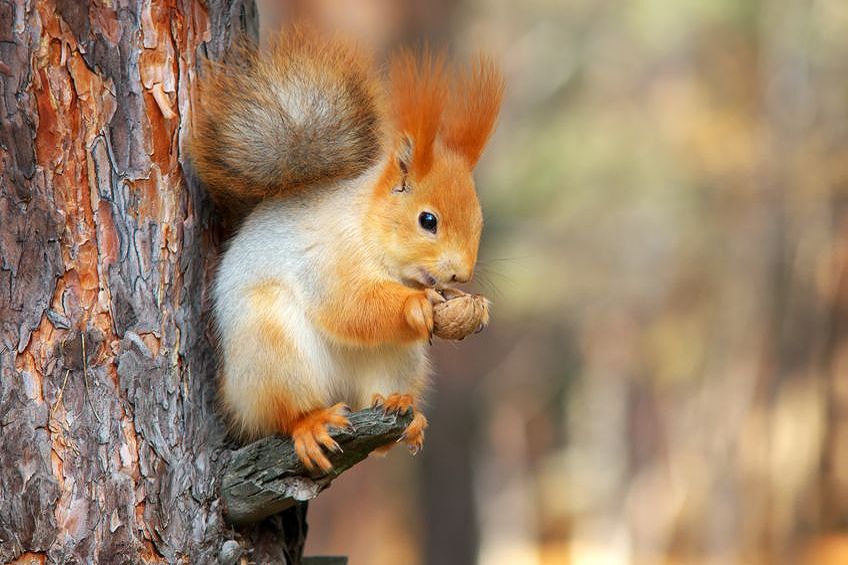
We will be using a picture of a fluffy red squirrel balancing on a tiny branch stump whilst eating a nut as a reference for our squirrel drawing. You can always choose what type of squirrel you wish to draw by changing some of the details to fit your choice of species.
A Step-by-Step Tutorial for Drawing a Squirrel
Now for the fun part – learning the foundations of a squirrel drawing. Get your comfy pants on, play your best playlist on Spotify, or turn on that rom-com you have seen a gazillion times in the background for company, and get your artistic flow on!
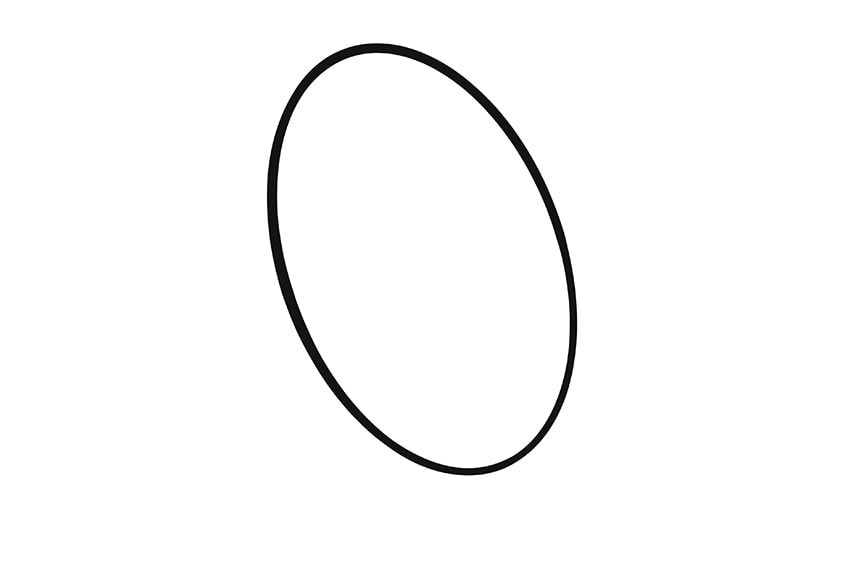
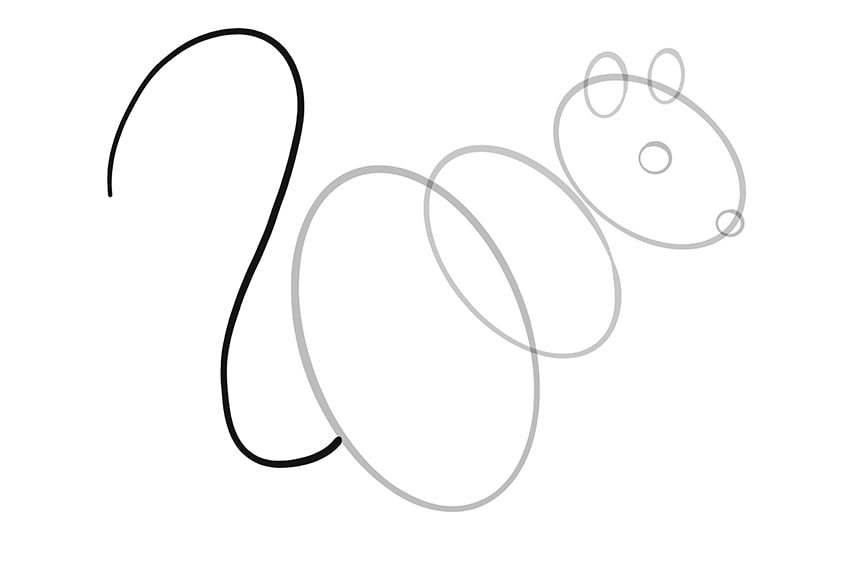
Step 1: Construction of the Main Body
Ovals, ovals, and more ovals! You might have noticed a pattern forming from practicing any of our other animal drawing tutorials. Most animal drawings (around 90% of them) require an oval to begin with. For our squirrel, this is a normal oval, not elongated or shortened, and it should be tilted quite dramatically to the left.
Of course, you can also get your oval to lean in the other direction, but you will have to flip the instructions around for the rest of the tutorial.
These construction lines should be done using a much lighter pencil than what you will use for the main outlines and the details, later on. These steps should not be scoffed at – in fact, they are the most important part, especially if you struggle with accurate dimensions.
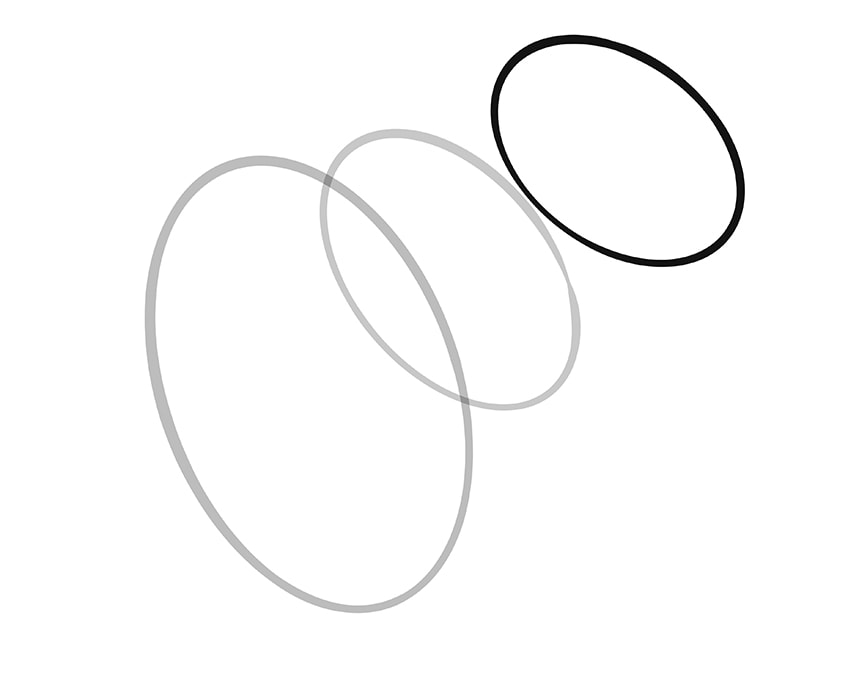
Step 2: Construction of the Squirrel’s Upper Torso
If you would like an idea as to how the squirrel will look in the end, we are copying the picture of the red squirrel we showed above. This means that the squirrel you are drawing will be hunched over as if it is eating a nut.
Where the first, bigger oval you draw is there to represent the bottom half of the squirrel’s body, the next oval will represent the upper half. To draw the upper torso, draw a second oval that is a bit smaller than the first, and make sure that it is leaning more dramatically to the same side your first oval is leaning. It must cross over the first oval, but only by about a third.

Step 3: Constructing the Head
Yet again, you add another oval. This time, your oval needs to be a smidge smaller than the upper torso’s oval, leaning to the same angle as the other ovals, but more at slightly more of a tilt. While the second oval for the upper torso had to cross over the first oval, this third oval for the head does not need to do so – it can sit right against the second oval.
Step 4: Constructing the Squirrel’s Ears
The ears of the squirrel are some of the smaller parts of its body. The ears will also use a construction oval, one for each. These ovals will be vertical in orientation, with the first one crossing over the head’s oval at its halfway point. The second oval for the ear that is further back must be just a tiny bit smaller than the first ear in the front, and it should only cross over the head’s oval one-quarter of the way, as this adds depth.
Note that the bottom half of the construction ovals will not be visible once you draw on the detailing.

Step 5: Constructing the Eyes and Nose
This next section is dedicated to the construction of the eyes and the nose. This time, we will be drawing circles, not ovals! The first circle will go right in the middle of the head’s oval, and this is for the eye. The second circle, for the nose, will go across the narrow part of the head’s oval, on the right. Hopefully, you will begin to see a squirrel resemblance starting to appear in your collection of ovals and circles.

Step 6: Construction of the Tail
A squirrel’s tail is very bushy, but in this step, we will just be doing the construction line for it. This is done by drawing a curved line that curves to the right at the bottom, almost resembling a question mark. It should connect to the bottom third of the lower torso’s construction oval. For some people, this part makes it look like you are drawing a mouse, but your squirrel will start to appear in the next few steps.
A good suggestion from us would be to make sure that there is space to add in the fluffiness of the tail, so leave a gap between the body and the tail’s construction line.
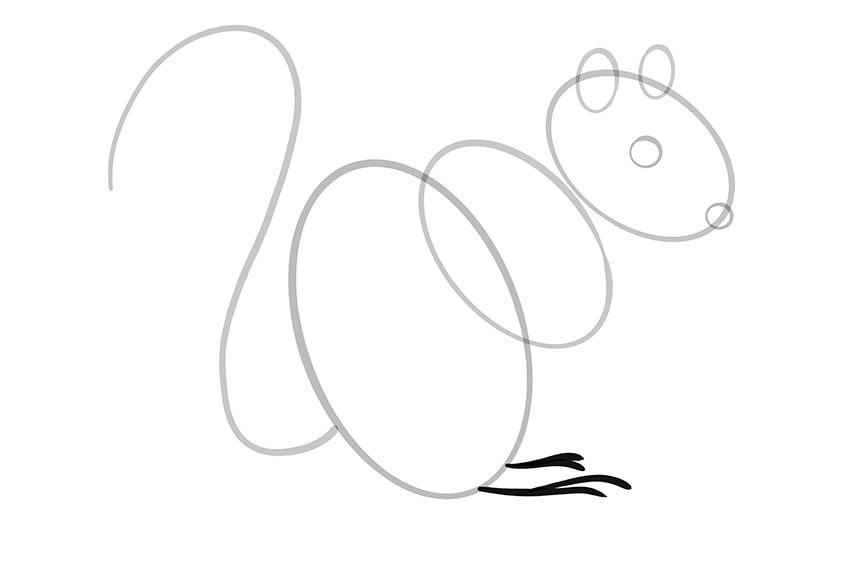
Step 7: Constructing the Squirrel’s Feet
If you scroll up a bit, you will see the squirrel picture we displayed as an example – we suggest having another look so that you are not confused by the construction lines that come next. The construction lines of a squirrel’s feet are very simple. All that is required is to draw one main line, which is curved ever so slightly, forking out halfway. Draw this twice, one for each foot.
The feet should be drawn one on top of the other, at the bottom right of the lower torso’s construction oval. The foot on the top should be half the size of the foot on the bottom. This is because the foot at the bottom is at the front and the one on top is behind it, so, naturally, it will seem smaller.
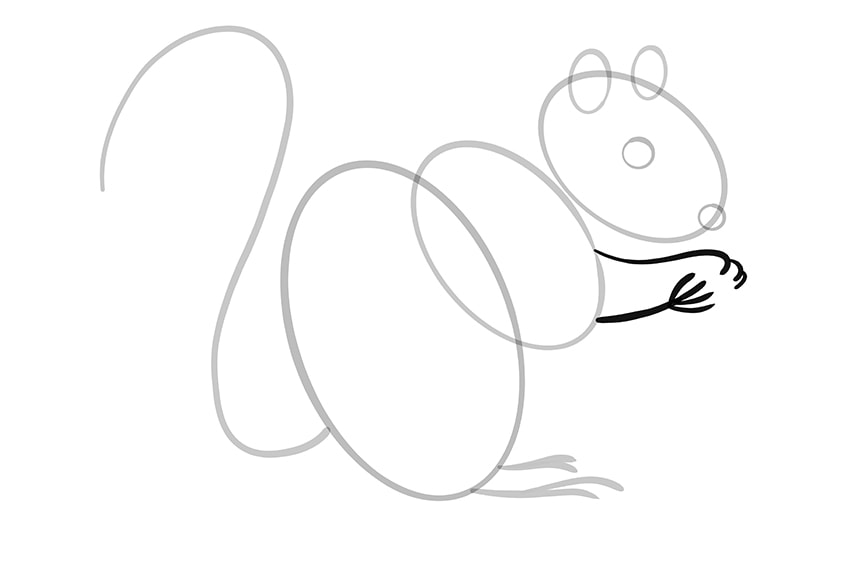
Step 8: Construction of the Squirrel’s Front Paws
For the paw that is in the front, you must draw a line that curves upwards, but only slightly. You will then need four construction lines coming out from that curved line for the fingers. You want to visualize your squirrel holding a nut, so keep the first paw at a distance that you would imagine is close to the squirrel’s mouth – see our example below as a reference.
The second paw will be slightly hidden by the nut it is holding, so you will need to make it seem as if it is holding it from behind. Feel free to study our example below – this one is quite tricky. The second paw’s construction line will start above the front paw’s construction line and should come out in line with the head’s construction oval. The construction line can curve around to form one of its fingers, from which you can then add two more curved lines for the other fingers.
The front paw’s construction is probably the trickiest of all the construction lines. Do not feel like you cannot use your eraser – these might be hard to get right on the first attempt.
Step 9: Adding the Outline of the Squirrel
We have finally finished the section for construction lines and we can start moving on to the shape and form of your squirrel – the fun part! What may be tough, in case you have not noticed yet, is the fact that the squirrel is entirely covered in fluffy fur.
We have replicated this by avoiding the use of solid lines to form its outline, but sketching lines instead. Use very small, short strokes to mimic the appearance of the fur.
When you get to the fluffy tail, you must use longer sketching lines to get it looking full and busy, ensuring that most of them must run perpendicular to the tail’s curvy construction line. When you get to the top of the tail, to where it is bent, the sketching lines should start facing upwards and then gradually start to point downwards, crossing over the end of the construction line’s curve. If you draw the sketching lines going around the construction line, on the outside, you will be left with a disproportionate tail.

The detailing for the eye is like that of a teardrop with its pointed end angled towards the squirrel’s nose. The squirrel’s ears should not have the bottom half of the construction oval drawn in. The front ear will start from just below the top of the squirrel’s head and the second ear at the back will start right from the top of the head. The ear in the front is facing forwards, which means more detail is necessary. You must draw a line on the inside of the ear on the right-hand side, running parallel to the ear’s shape.
The fingers of the squirrel can be drawn in with solid lines.
Do not forget that squirrels have pretty intense claws for scratching, burrowing, and nut-cracking. You can use your imagination when it comes to the nut you wish to feed your drawn squirrel. You can use our example as a reference while changing the shape to as you like.
Step 10: Creating Lifelike Detail
Don’t you just adore the fluffiness of a squirrel? It just makes you want to pick them up and give them a cuddle – although we do not advise that, considering these are wild animals. To get the fur just right, you must start by drawing long and short lines that run in the same direction as the body of the squirrel. This means that they must run with the curve of their body. The lines can connect occasionally – a wild squirrel does not have perfectly untangled fur.
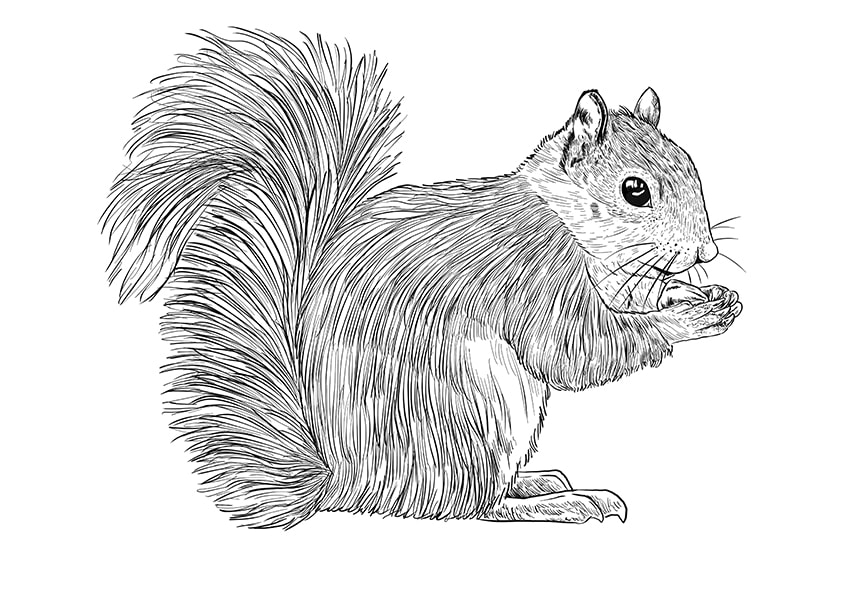
Draw heavier lines for the upper torso, its back, and its bottom leg, although you need less fur detail on the squirrel’s belly to show the difference in its coat’s colors – a squirrel’s belly is typically paler than the rest of its coat. For its tail, imagine the construction line as its spine from which all the fur lines must protrude. The bottom of the tail must have lines that are perpendicular to the fur lines in the middle of the tail.

When you get to the head, the squirrel will come to life as soon as you draw in the eye’s detail. Color it in black while leaving a few specks of white to show how it glistens and reflects the light. Draw on the whiskers coming out from the left of the nose – you can then use the bridge of the squirrel’s nose as the starting point for the whiskers on the right.
Step 11: Finishing Touches
If you are at home and you have a cotton swab on hand, you can use this to achieve a beautiful shading effect. For the fur on the main part of the upper and lower torsos, the shading should be a bit darker, and the shading can then be much lighter for the belly and neck of the squirrel.
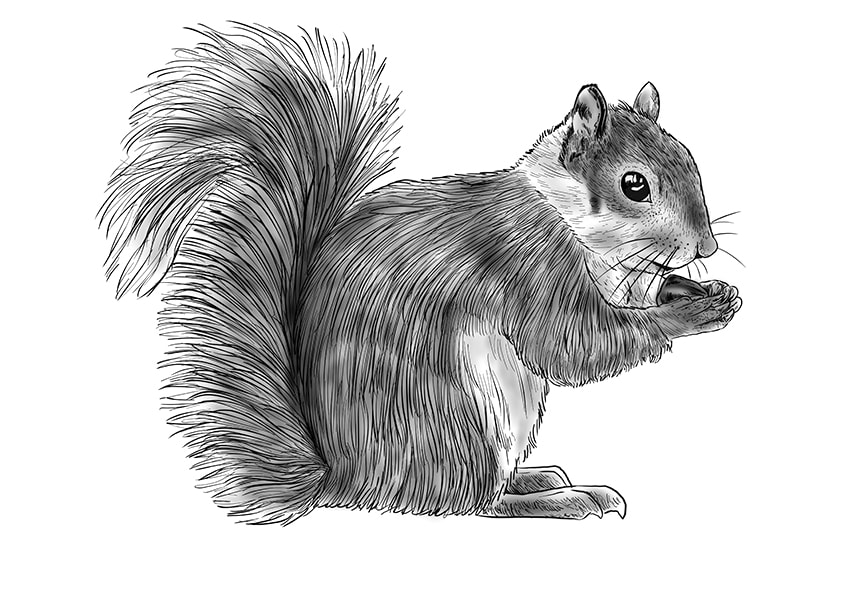
And there you have it! A bouncing, beautiful squirrel perpetually gnawing away at a yummy nut is now immortalized on the paper in front of you. We hope that you have enjoyed this tutorial on how to draw a squirrel, and remember that you will improve the more you practice!
Frequently Asked Questions
How Many Different Types of Squirrels in the World Are There?
Even though the most common of the squirrels is the grey squirrel and the red squirrel, there are actually a total of 38 different species of squirrels, 28 of which are tree squirrel species.
How Hard Is It to Draw a Squirrel?
You might have thought that squirrel drawing would be quite a difficult task, but with our tutorial, we guide you through each process and each construction line. By the end, you will know how to draw a realistic squirrel.
What Is the Purpose of Using Construction Lines?
Construction lines are important to those who are new to drawing. They are immensely helpful when trying to get the correct proportions of whatever it is that you are drawing.

Matthew Matthysen is an educated multidisciplinary artist and illustrator. He successfully completed his art degree at the University of Witwatersrand in South Africa, majoring in art history and contemporary drawing. The focus of his thesis was to explore the philosophical implications of the macro and micro-universe on the human experience. Matthew uses diverse media, such as written and hands-on components, to explore various approaches that are on the border between philosophy and science.
Matthew organized various exhibitions before and during his years as a student and is still passionate about doing so today. He currently works as a freelance artist and writer in various fields. He also has a permanent position at a renowned online gallery (ArtGazette) where he produces various works on commission. As a freelance artist, he creates several series and successfully sells them to galleries and collectors. He loves to use his work and skills in various fields of interest.
Matthew has been creating drawing and painting tutorials since the relaunch in 2020. Through his involvement with artincontext.org, he has been able to deepen his knowledge of various painting mediums. For example, watercolor techniques, calligraphy and lately digital drawing, which is becoming more and more popular.
Learn more about Matthew Matthysen and the Art in Context Team.


