How to Draw a Hippo – A Detailed Step-by-Step Hippo Sketch Tutorial
Hippos are the third-largest mammals that roam the land on earth. Although their large chubby bodies may make them appear harmless, even cuddly, these are some of the most dangerous animals in the world. In this drawing tutorial, we show you how to create your own unique and realistic hippo sketch. As well as covering the basic shape of the hippo, we show you how to create the details of the hippo face, how to create realistic texture and coloring.
How to Draw a Hippo: Easy Step-by-Step Tutorial
In all of our drawing tutorials, we begin by using construction shapes and lines to lay down the final shape of our drawing. These construction lines help us to nail the shape and proportions of the animals, particularly when they are unusual, as in the case of our hippo sketch.
You can see an outline of all the steps below, with the first eight focusing on construction before we move on to the details and colors.
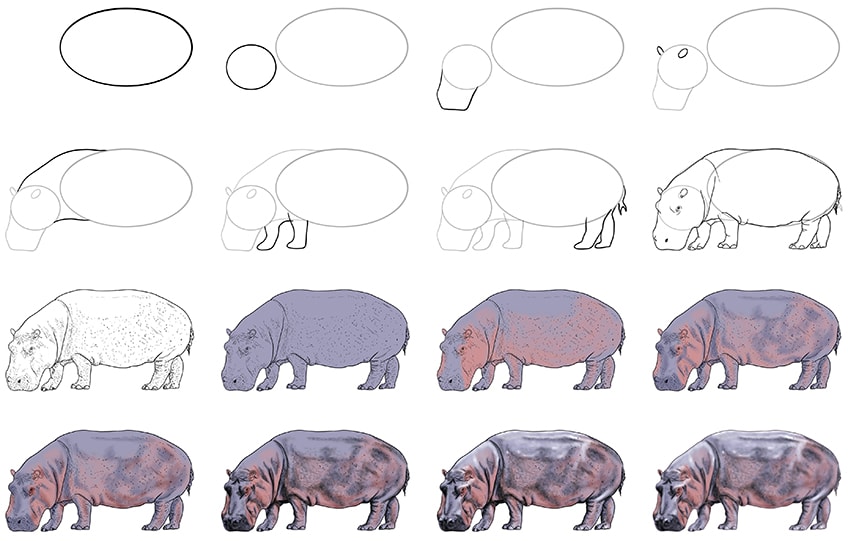
Our example drawings were completed on a drawing tablet, but the choice of medium is really up to you. Whether you are a graphic artist, or you prefer to work with physical mediums, you can easily adapt the coloring steps to suit your needs.
So, gather up your drawing supplies, find somewhere comfortable to relax, and let us begin our hippo sketch!
Step 1: Creating the Shape of the Main Body
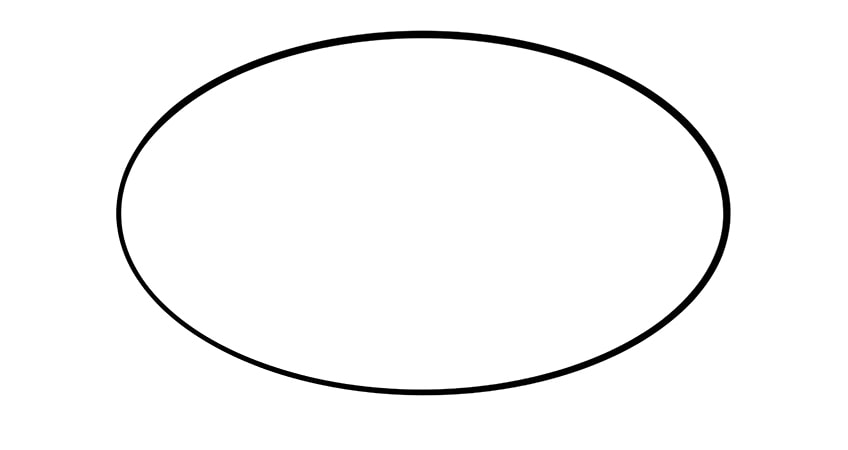
Begin your hippo sketch by laying down the shape of the main body. Use a large slightly fat oval shape to represent the torso of your hippo.
Our top tip for this first step is to ensure that this first construction shape is at the center of your canvas. You also want to make sure that there is plenty of space on all sides for the other parts of the hippo’s body, like the hippo head and legs.
Step 2: Drawing the Hippo Head Foundation
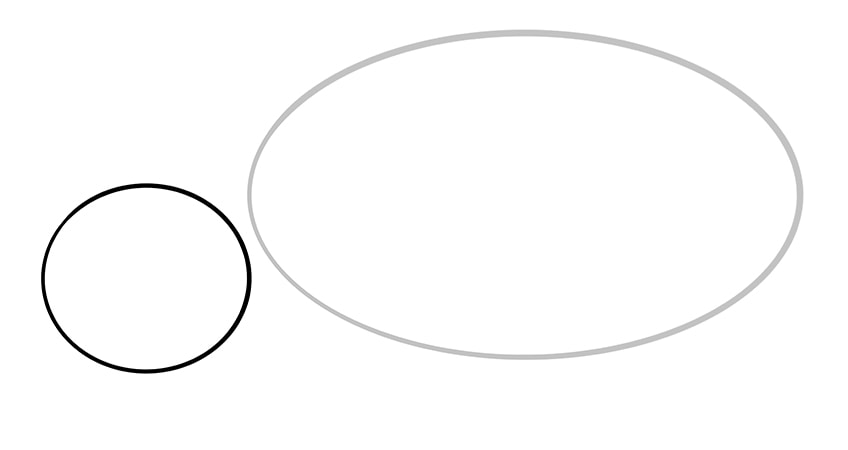
We began by constructing the largest part of the hippo’s body, and now we are going to move on to the next largest part of the hippo sketch, namely the hippo head. At this stage, you are not going to draw the whole nose of the hippo, just the upper head shape.
Close to the main body oval, and just below the midline on the left side, draw a small round circle to represent the hippo head.
Step 3: Time to Draw the Hippo’s Nose
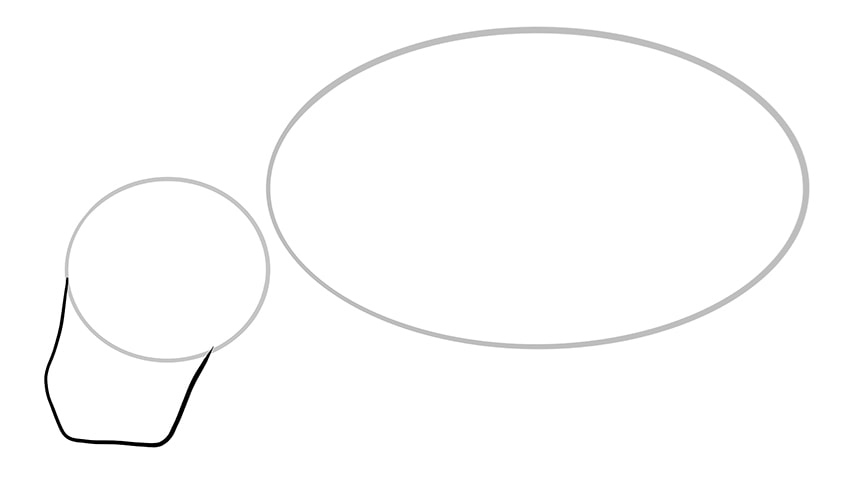
Now that we have the position of the hippo head locked in, we can shape the nose. The shape of the hippo nose is a slightly misshapen “U”. Begin drawing this “U” shape from the front end of the head circle. Take the line down, creating two little bumps.
Slowly begin to bring the line backward, and then after another little bump, take it back up to meet the head circle.
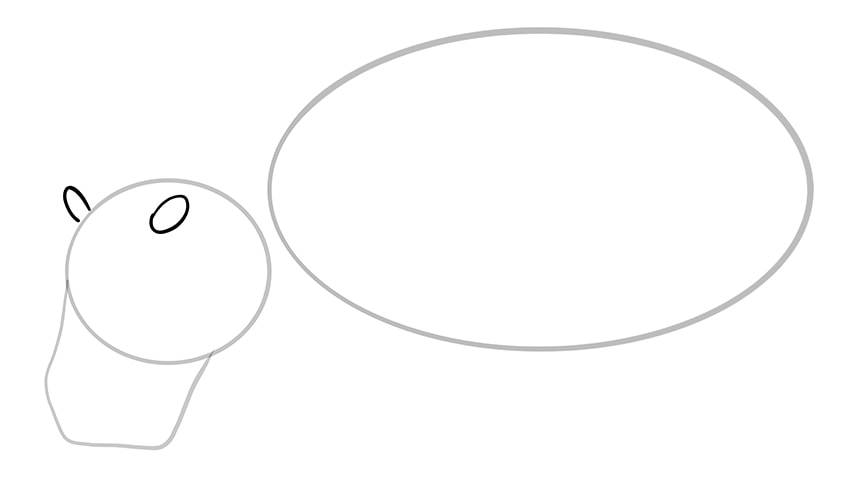
Step 4: Shaping the Hippo Ears
While the majority of a hippo’s body is not small by any means, they have very tiny ears. In this step, you are going to use two small oval shapes to represent these ears. Begin with the ear that is furthest away from us. The bottom of this ear is hidden from our view as a result of the perspective, so simply draw a small upside-down “U” shape on the left upper side of the head circle. For the other ear, draw a full small oval within the top third of the hippo head.
Both of these ears should be angled away from each other, towards their respective sides based on their position.
Step 5: Drawing the Hippo’s Necklines
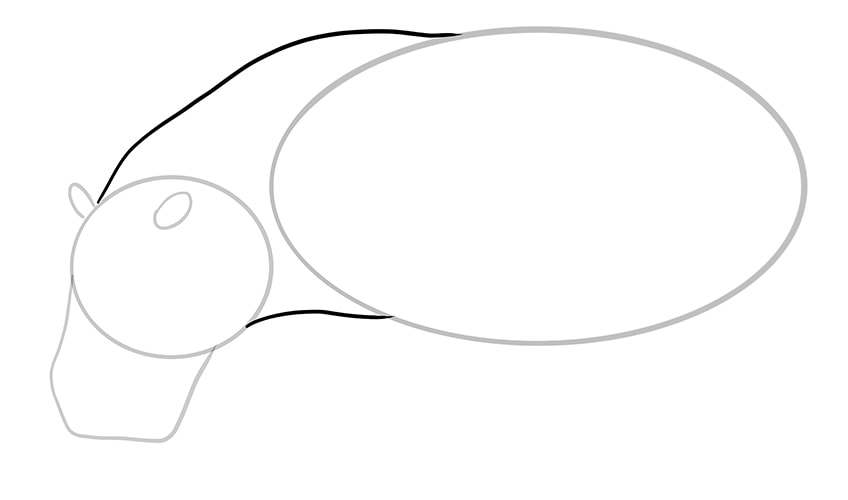
We are now going to join the hippo head and body together by drawing in the necklines. Hippos are quite chubby creatures, and we are going to capture this by adding a few subtle lumps and bumps in the upper neckline. Begin the top neckline at the point where the front ear meets the head circle. Take it up and back, adding these lumps, and joining it to the top of the main body oval.
Finish this step by drawing the lower neckline between the head circle and the bottom of the main body oval.
Step 6: Outlining the Front Leg Shape
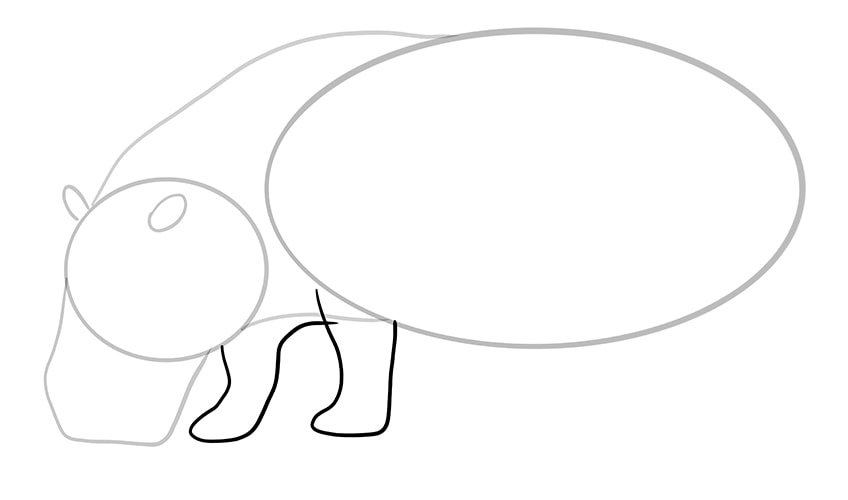
The hippo’s front legs sit along the lower neckline. The very front leg is the one that is furthest away from our perspective. As such, the top of the backline of this leg will be hidden behind the other front leg. The legs are very simple to draw. You just need to draw a shape similar to a sock, extending down from the head circle, and curving back up. For the second front leg, begin the sock shape within the neck, and end it where the neckline meets the bottom of the main body oval.
Our hippo drawing is slightly in motion, so the very front leg should be angled slightly forward, while the other leg should extend straight down.
Step 7: Creating the Shape of the Back Legs and Tail
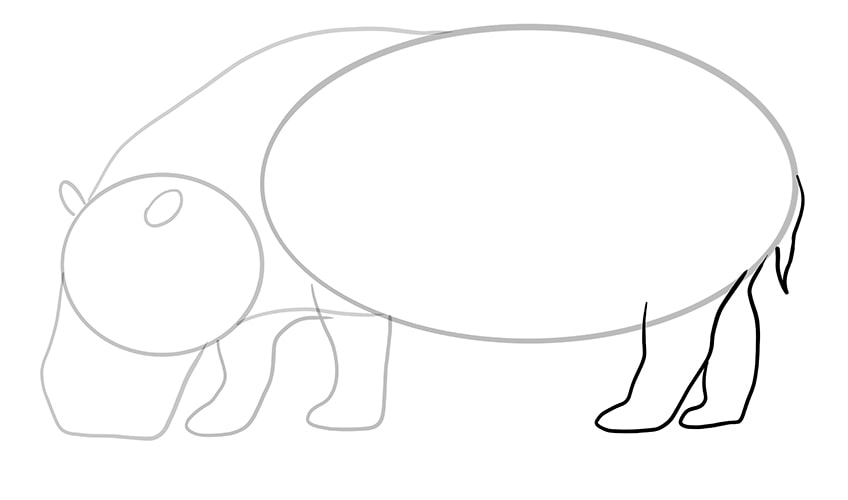
The drawing process for the back legs is very similar, if not identical to the front legs. Once again, the leg that is closest to the front is closest to us in perspective, so it should overlap the very back leg significantly.
For the tail, draw a small flame-like shape at the very back point of the main body oval.
Step 8: How to Draw a Hippo Easy Outline
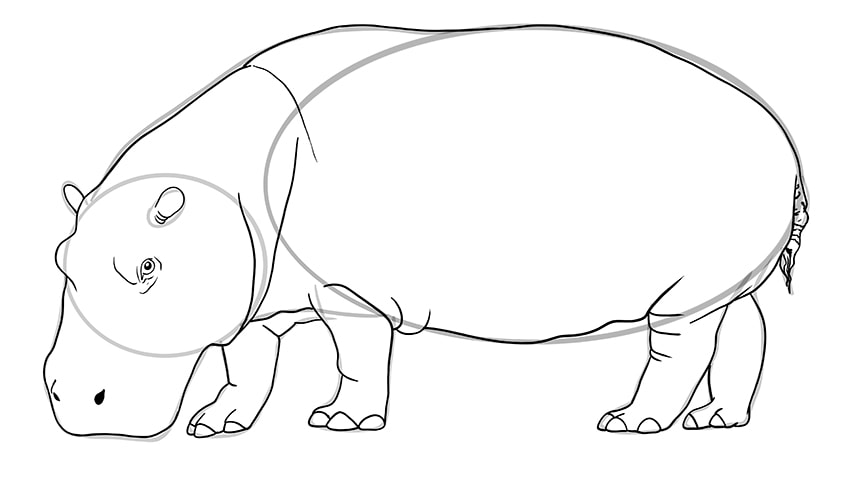
After all this hard work laying down construction lines, we have come to the step where we can put them to use. In this step, you are going to use all of these base shapes to help you draw the final outline of your hippo sketch.
Begin by shaping the hippo head and muzzle, following the construction lines very closely. Add a small hump on the hippo head just below the left-most ear, and you can now start to add some of the hippo face details. Add two little nostrils at the bottom of the snout, and draw an eye below the ear within the head.
Continue to follow the construction lines to outline the rest of the hippo’s body. You can follow the lines very closely, adding a few additional textural details as you go.
Add some lines to the hippo’s neck, and around the top of the legs. These wrinkles will create the impression of fat rolls around these points. You can also add some of these lines on the hippo’s legs and around the tail. When you get to the underbelly, you can deviate from the construction lines a little bit, to create a more lumpy and realistic look. On the bottom of each of the hippo’s feet, add three toe separations.
When you are finished with your outline, you can erase all of the construction lines that are still visible.
Step 9: Adding Textural Details to Your Hippo Sketch
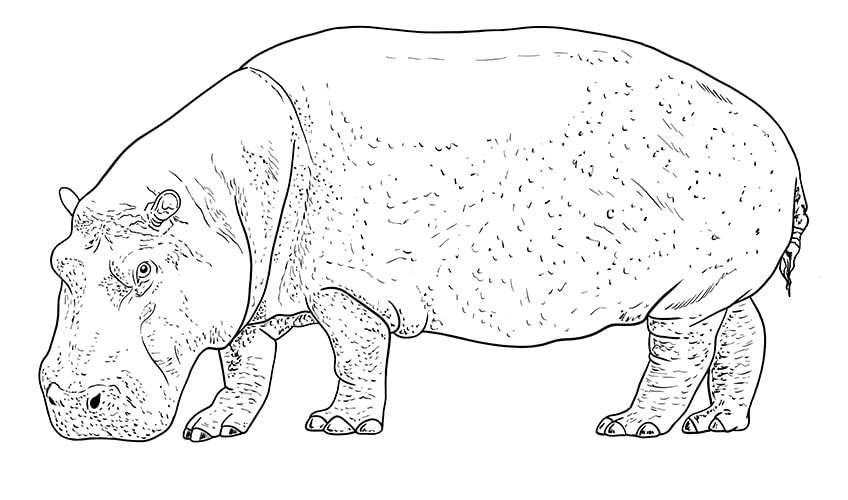
Hippos have a very interesting skin texture, but the trick when learning how to draw a hippo is that less is more. Throughout the body, you are going to use small dots, streaks, and curved lines to create skin texture. Begin at the face, adding large dots around the bottom of the nose and highlighting the contours of the hippo face.
As you move throughout the rest of the body, you want to focus the texture marks around the lines and contours you drew in the last step.
You also want to focus most of the texture around the lower half of the hippo’s body, and these marks should be a little more spaced out in the open areas. You want to make sure that there is a dense texture on the hippo’s legs and on the tail.
Step 10: Applying the First Coat of Color
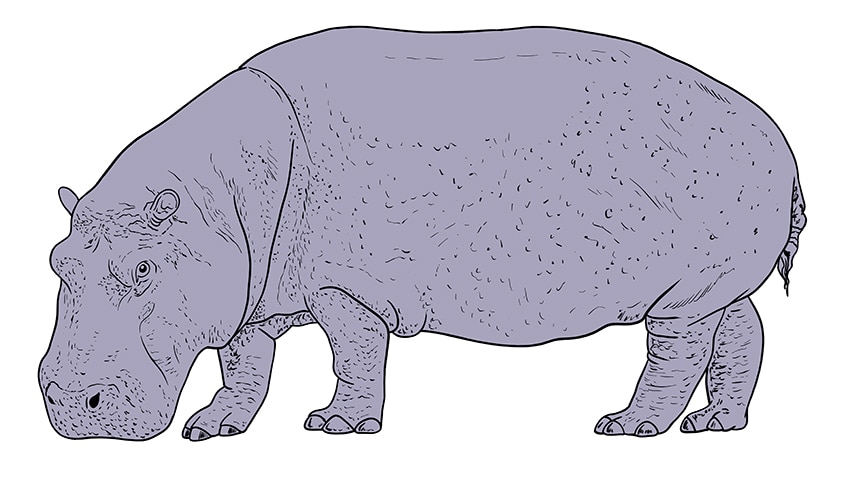
In order to build up realistic coloring, you want to use multiple layers of color. We begin with a base color that fills the entire body of your hippo sketch. The ideal shade for this base coat is a stone gray shade.
Whichever medium you are using to color your hippo, you want to ensure that you create an even coat.
Step 11: Adding the Second Color Coat
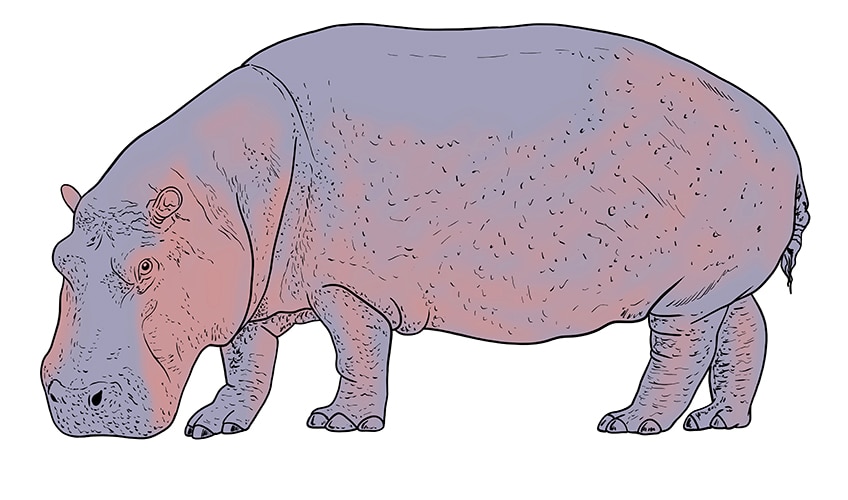
The second color that you are going to use is a light orange or pink shade. Use a soft blending brush to apply this second color around the bottom half of the hippo’s body. You also want to apply this shade on the side of the face and down the centerline of the legs.
In order to create a smooth blend, you can go over the paint with a dry brush after application to smooth it out.
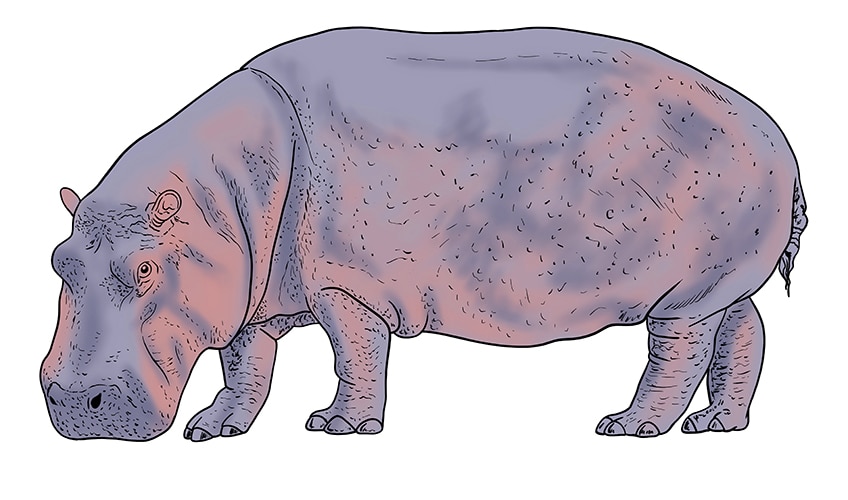
Step 12: Contouring the Body Shape
In this step, you want to use dark gray paint to gently contour around the second color coat areas and texture lines. You also want to add the contour color to areas of your hippo’s body that would naturally be slightly hidden from the light.
Contouring is one of the fundamental skills that will take your drawings from 0 to 100 very quickly.
Step 13: Adding the Third Color Coat
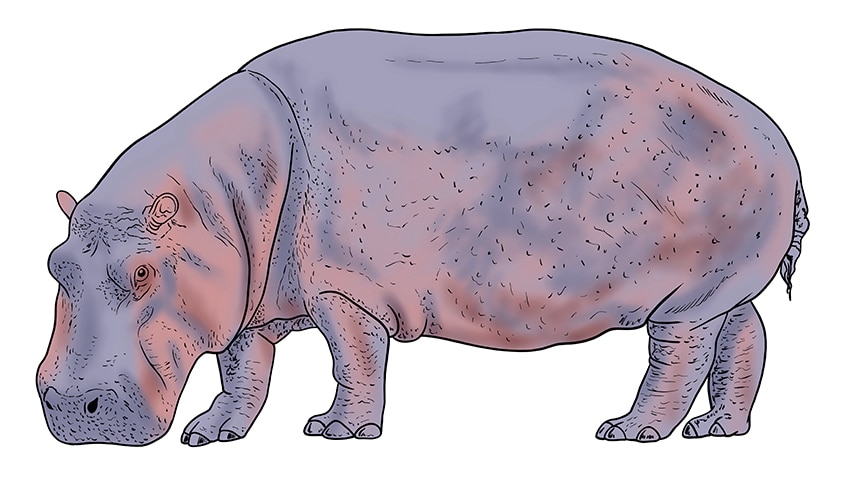
The third color that you need to use is light brown. You are going to use this shade to add some more contouring that melds together the second color coat and the dark gray contours. This shade will help you create a smooth transition between all of your different colors in these areas.
Focus this shading around the eyes, along the structure of the hippo face, neck, body, and legs.
Step 14: Adding the Final Shading Layer
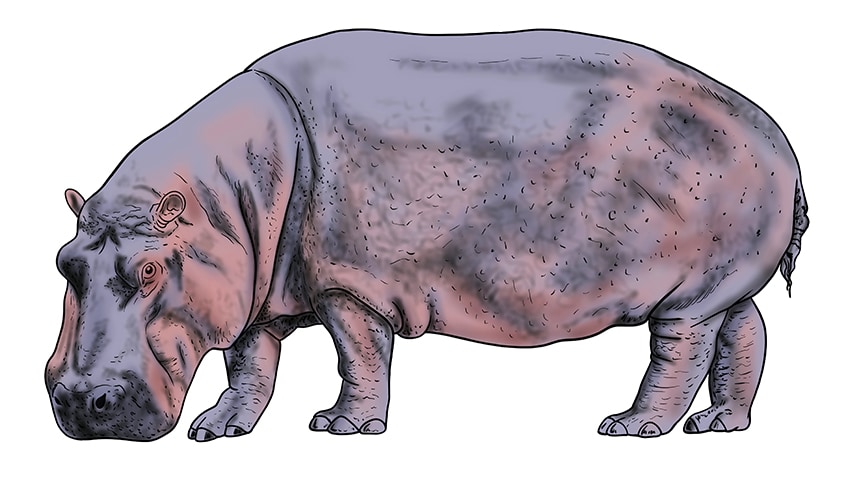
We are almost finished with our hippo sketch. In this step, you are going to use a touch of black paint and a small soft brush to add shading around the structure of the hippo face, neck, legs, and main body structure. You can emphasize the contours and add shadows along the parts of the hippo that recede from the light.
Some parts of the hippo will be darker than others, and these areas include the underbelly, the nostrils, edges, and below the legs.
Step 15: Crafting Dimension with Highlight Shades
This step is the second last, and we are nearing the end of our hippo sketch. To contrast the shading we did in the last step, you are now going to use some white paint and a small brush to create highlights wherever the light will hit.
Focus the highlights on the upper parts of the hippo, as well as along the top points of the face contours, and on the top of the hippo’s toes.
Step 16: Finishing Your Hippo Sketch
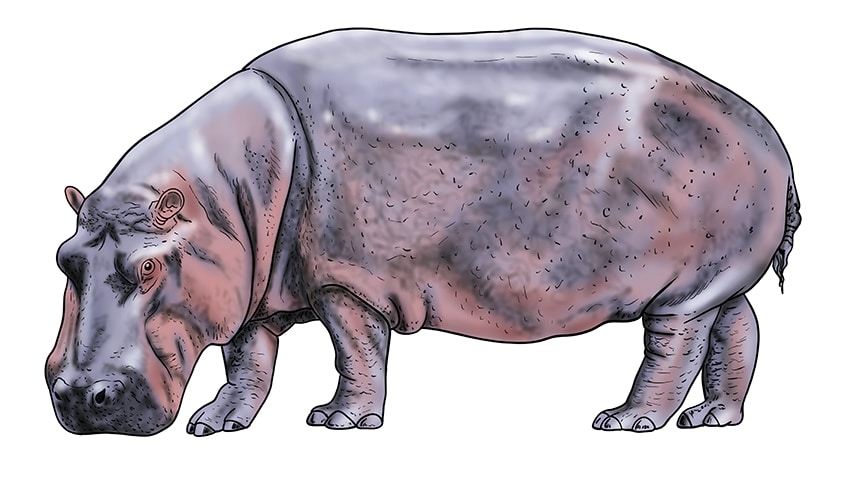
This final step is far from compulsory, but it adds an extra seamless finish to your hippo sketch. All you need to do is remove all of the outlines in your drawing. You can do this in one of two ways. If you are using a graphic tablet, you can simply remove the outline layer, but if you are working with a finished medium, you can paint over the lines with the corresponding color. 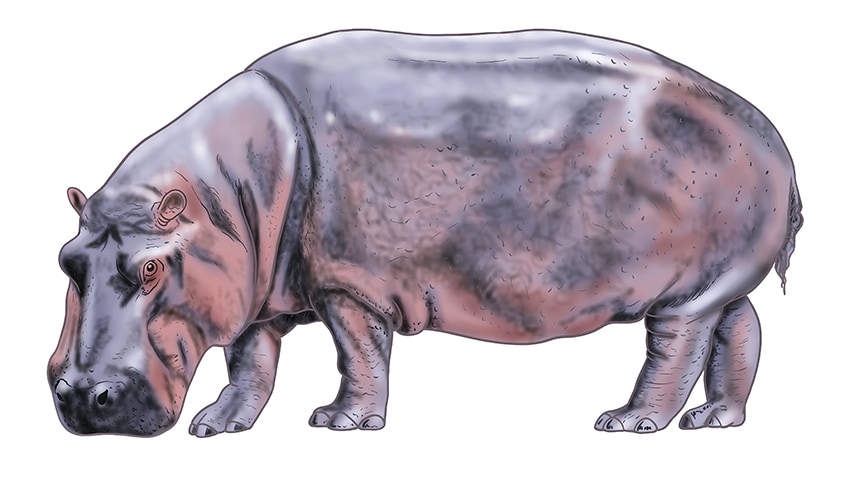
Congratulations for coming to the end of your hippo sketch! We really hope that you have enjoyed the learning process and that you are happy with your final drawing. Join us again for another animal drawing tutorial!
Video Tutorial on How to Draw a Hippo
Frequently Asked Questions
Is Learning How to Draw a Hippo Easy?
When you first decide to draw a hippo, you may think it is a difficult animal to capture realistically. Luckily for you, our tutorial makes drawing a hippo easier than ever, as we take you through every step necessary to create a realistic hippo sketch.
How do You Draw a Hippo Head?
It is very easy to draw a hippo head when you make use of construction lines. We show you exactly how to draw a hippo head and a hippo face in our drawing tutorial!
Matthew Matthysen is an educated multidisciplinary artist and illustrator. He successfully completed his art degree at the University of Witwatersrand in South Africa, majoring in art history and contemporary drawing. The focus of his thesis was to explore the philosophical implications of the macro and micro-universe on the human experience. Matthew uses diverse media, such as written and hands-on components, to explore various approaches that are on the border between philosophy and science.
Matthew organized various exhibitions before and during his years as a student and is still passionate about doing so today. He currently works as a freelance artist and writer in various fields. He also has a permanent position at a renowned online gallery (ArtGazette) where he produces various works on commission. As a freelance artist, he creates several series and successfully sells them to galleries and collectors. He loves to use his work and skills in various fields of interest.
Matthew has been creating drawing and painting tutorials since the relaunch in 2020. Through his involvement with artincontext.org, he has been able to deepen his knowledge of various painting mediums. For example, watercolor techniques, calligraphy and lately digital drawing, which is becoming more and more popular.
Learn more about Matthew Matthysen and the Art in Context Team.
Cite this Article
Matthew, Matthysen, “How to Draw a Hippo – A Detailed Step-by-Step Hippo Sketch Tutorial.” Art in Context. October 1, 2021. URL: https://artincontext.org/how-to-draw-a-hippo/
Matthysen, M. (2021, 1 October). How to Draw a Hippo – A Detailed Step-by-Step Hippo Sketch Tutorial. Art in Context. https://artincontext.org/how-to-draw-a-hippo/
Matthysen, Matthew. “How to Draw a Hippo – A Detailed Step-by-Step Hippo Sketch Tutorial.” Art in Context, October 1, 2021. https://artincontext.org/how-to-draw-a-hippo/.


