How to Draw a Gnome – Crafting Magical Creatures
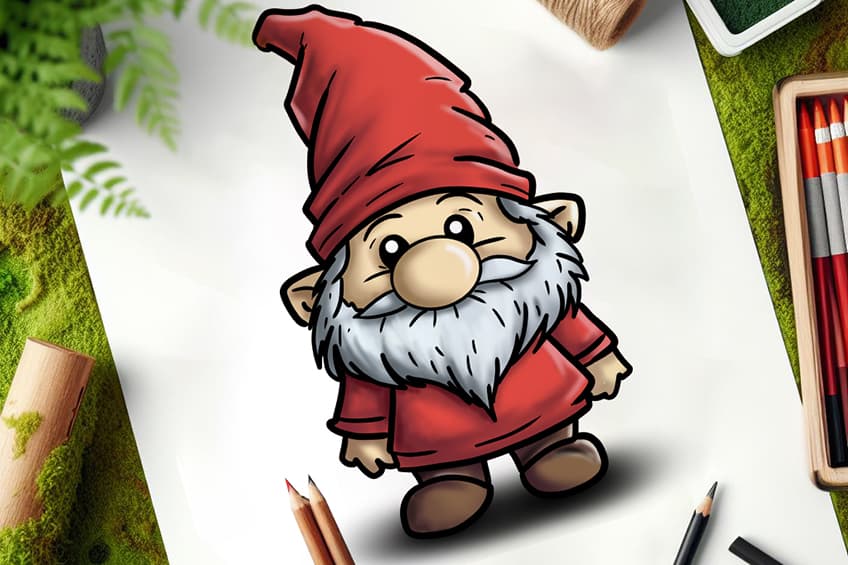
Drawing a gnome can be a delightful and creative process, involving a step-by-step approach to bring these mythical creatures to life on paper. In this guide, we’ll walk you through 21 steps to create your own gnome, starting from basic shapes and gradually adding details to achieve a charming and whimsical character. Whether you’re a beginner or an experienced artist, these steps will help you capture the essence of a gnome!
Gnome Drawing 101: Step-by-Step Guide for Beginners
This guide offers a detailed roadmap for every step in learning how to draw a gnome. By sticking to it, you’ll get better at drawing a gnome and improve your overall drawing skills!

Step 1: Start to Draw the Head on Your Easy Gnome Drawing
To begin our tutorial on how to draw a gnome, start by drawing a horizontally laying oval shape to represent the head of the gnome.

Step 2: Add the Hat and Main Body to Your Gnome
Draw two angled lines on the previously sketched head to form a triangle shape, then proceed to sketch the gnome’s main body below the oval of the head.

Step 3: Draw the Arms and Legs
Draw the visible arms on each side of the body, and sketch the visible legs below the body.

Step 4: Add the Ears and Boots
On each side of the head, sketch small oval shapes to represent the ears. Then, proceed to draw the gnome’s boots by sketching wide oval shapes that overlap the legs, completing this step.

Step 5: Draw the Guidelines on Your Easy Gnome Drawing
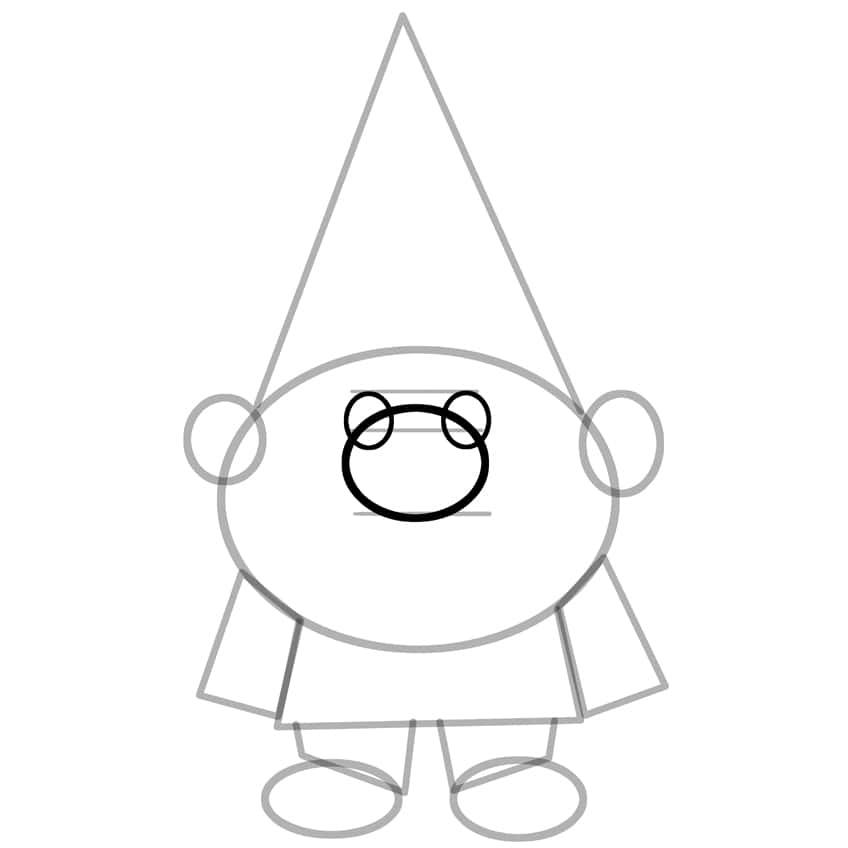
Draw three horizontal guidelines within the center area of your gnome’s face.

Step 6: Add the Eyes and Nose
Following the guidelines, sketch two eyes and a large oval shape for the nose.
Step 7: Outline the Beard
Guided by the oval shape of the head from step one, outline the spiky beard following the oval’s curvature. The beard should extend towards the lower central point of the oval shape.

Step 8: Continue to Outline Your Easy Gnome Drawing
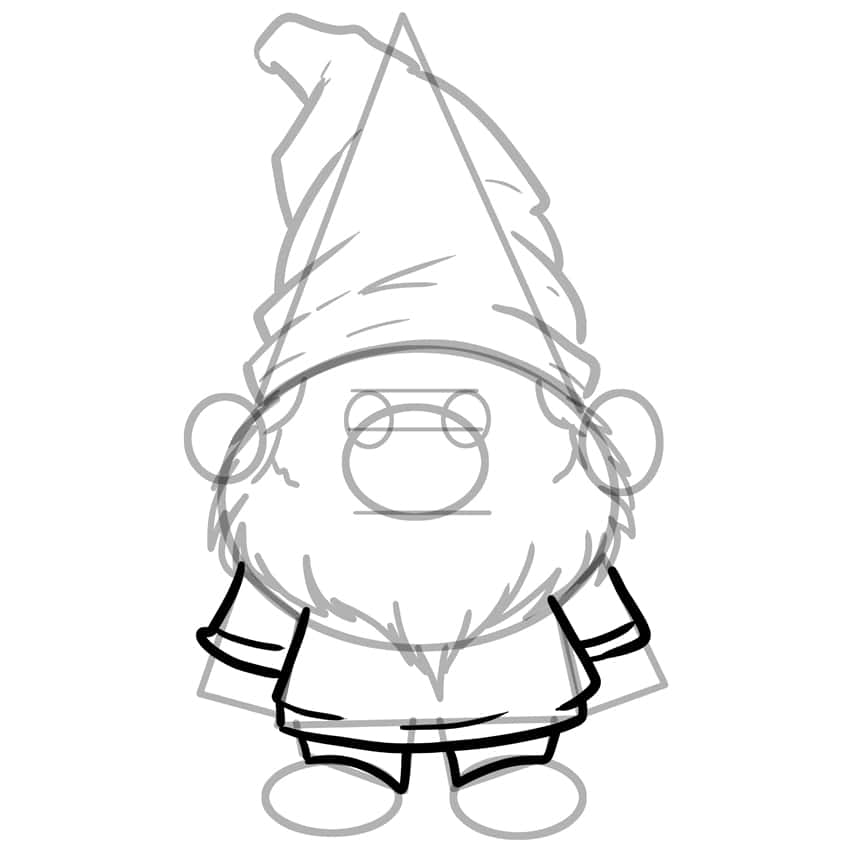
Utilize the triangle drawn above the head as a guide to outline the gnome’s hat, ensuring it is wide at the bottom and tapers to a narrow top, mirroring the shape of the construction lines previously established.

Step 9: Outline the Main Body
Continue to outline the main body of your gnome. Add fine texture lines leading with the curvature of the main body and sleeves.
Step 10: Add an Outline to the Hands and Boots
In this step, carry on outlining each of the hands and the boots.
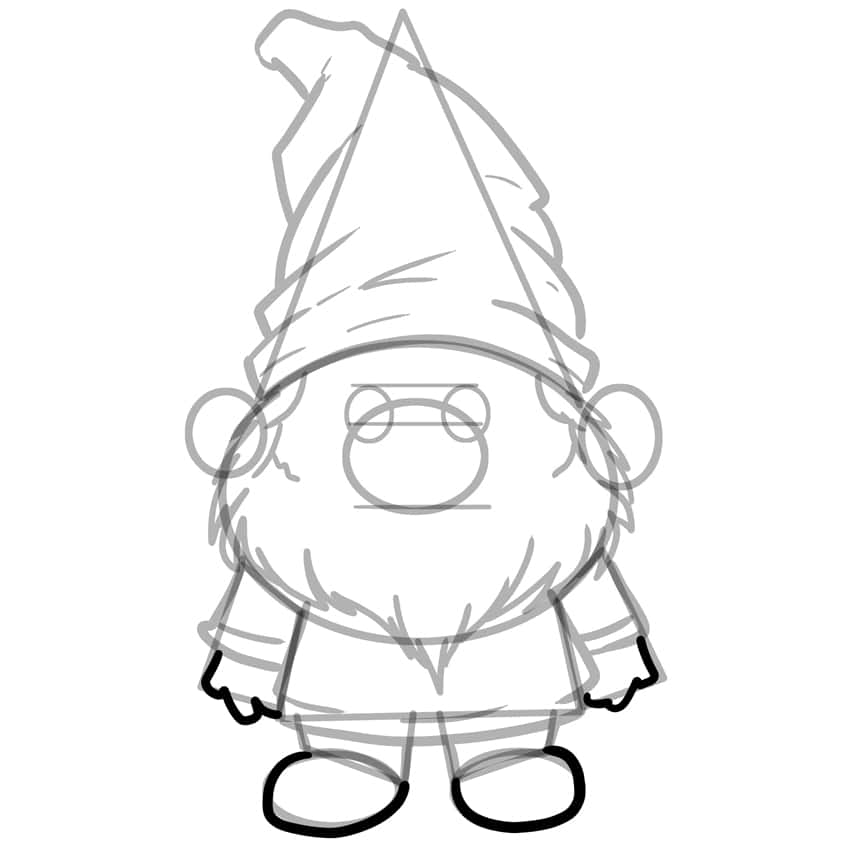
Step 11: Outline the Ears on Your Gnome Drawing
Refer to the construction lines drawn earlier to outline the ears, then sketch two lines inside each ear to depict the earlobes. After finishing, remove any unnecessary lines.

Step 12: Detail the Facial Features
Start by sketching an eyebrow above each eye and fill in the eyes with black. Then, add fine texture lines to the eyes and beard, keeping these lines short and simple for texture. Proceed to outline the nose and mustache. After finishing, erase any visible overlapping lines.

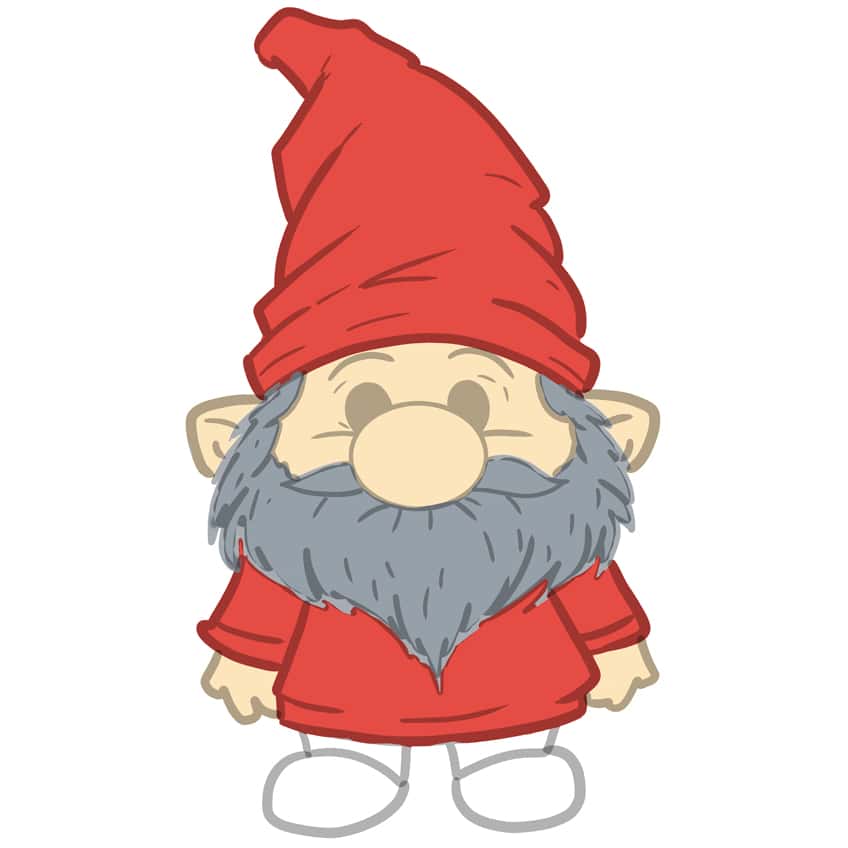
Step 13: Begin to Apply the First Color Coat
With a fine, sharp brush and red paint, begin to color the hat and outfit of the gnome.

Step 14: Continue Onto the Secondary Color Coat
Using the same brush and light cream paint, proceed to add color to the gnome’s face, ears, and hands.

Step 15. Color the Beard on Your Gnome Drawing
Select a sharp brush and gray paint, and evenly color the entire beard, this includes the mustache.
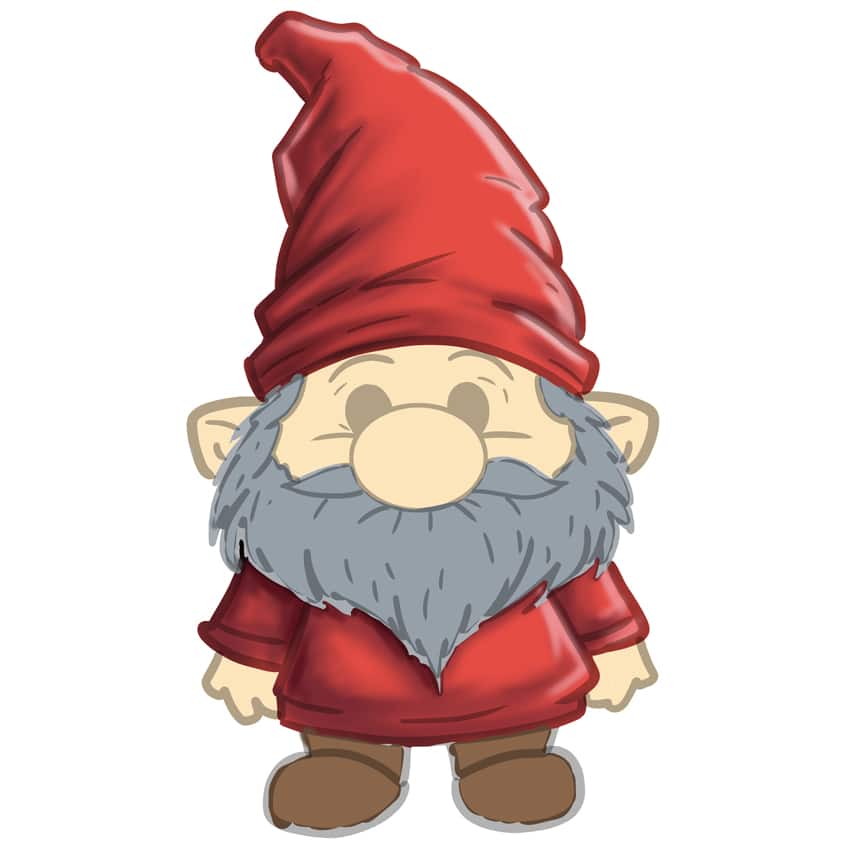
Step 16: Color the Boots
Continuing with the same brush and brown paint, evenly color each of the boots.

Step 17: Shade and Highlight the Outfit
Start with a small, soft brush and black paint to create soft shadows and contours on the gnome’s hat and outfit. Then, repeat the process with a fine, sharp brush and white paint to add light highlights along the edges.
Step 18: Continue With Shading the Visible Skin
With a small, soft brush and black paint, apply soft shadows and contours to the edges of the nose, face, ears, and hands. Then, switch to a fine, sharp brush and white paint to add soft highlights to the ears, face, and hands. Finish this step by using the same fine brush to add a shimmer to each eye with white paint.
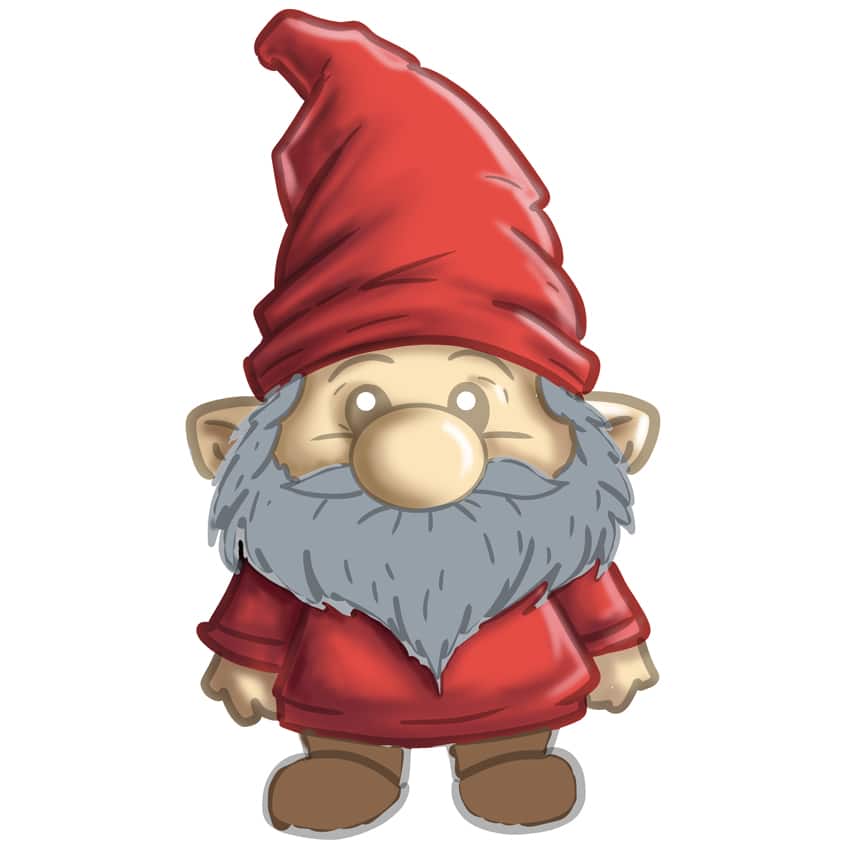
Step 19: Add Shading and Highlight to the Beard and Boots
Similar to the previous step, begin by using a small, soft brush and black paint, and apply shading along the edges of the texture lines, this will help aid the structure of the beard. Continue with white paint to add a smooth highlight along the beard. Conclude by using a blending brush to smooth out the highlights.
On the boots, simply make use of a small, soft brush and black paint to add shading and contouring along the edges. Add a light highlight with white paint.
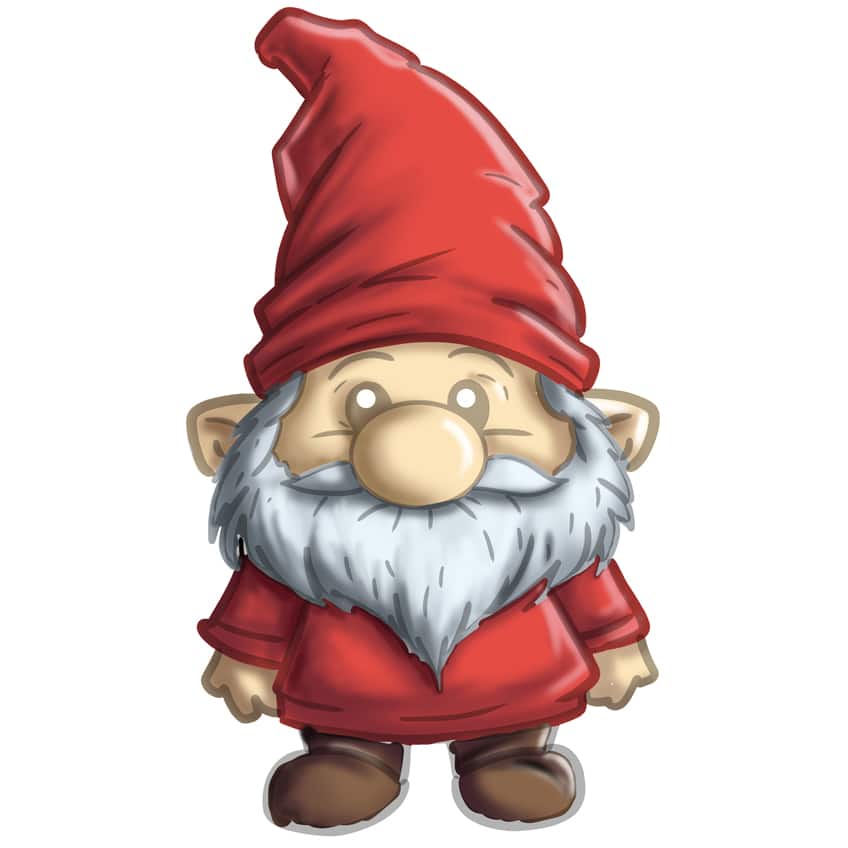
Step 20: Add a Shadow to the Ground
Utilize a small, soft brush and black paint, and create shading under the gnome. Then spread the shading outward in a circular motion using a blending brush.

Step 21: Finish Off Your Easy Gnome Drawing
With a fine, sharp brush and black paint, begin to trace the entire visible outlines of the gnome. This will create a smooth and seamless drawing.
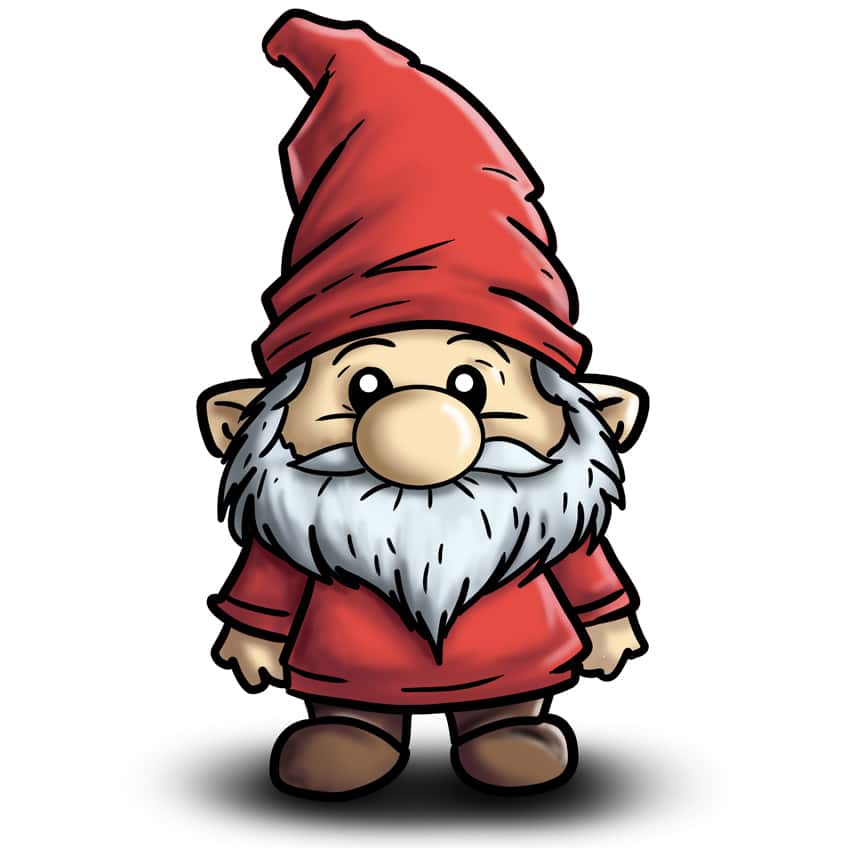
Well done on finishing our guide on how to draw a gnome! You’ve successfully navigated through the steps to bring a whimsical gnome character to life on paper. This achievement not only showcases your dedication but also marks a significant improvement in your drawing skills. Keep practicing and exploring your creativity—your artistic journey is filled with endless possibilities.
Frequently Asked Questions
How Can I Give My Gnome Drawing Personality and Charm?
Adding personality to my gnome drawings involves attention to detail. I focus on unique facial expressions, playful poses, and quirky accessories like gardening tools or whimsical hats. These little touches infuse each gnome with charm and character, making them delightful to draw.
How Do I Draw the Clothing and Accessories of a Gnome?
Drawing gnome attire starts with sketching basic shapes like the pointed hat and vest, then adding texture with folds and wrinkles. I get creative with accessories, incorporating belts, pouches, and lanterns to add flair. Attention to these details helps create charming gnome characters.
How to Give Your Gnome Drawing More Depth and Dimension?
Adding depth involves using shading techniques to create contrast and highlight areas. Determining the light source guides shading, while layering and blending different shades of pencil or digital brushes adds three-dimensionality. Background elements like foliage enhance realism and create depth.
Matthew Matthysen is an educated multidisciplinary artist and illustrator. He successfully completed his art degree at the University of Witwatersrand in South Africa, majoring in art history and contemporary drawing. The focus of his thesis was to explore the philosophical implications of the macro and micro-universe on the human experience. Matthew uses diverse media, such as written and hands-on components, to explore various approaches that are on the border between philosophy and science.
Matthew organized various exhibitions before and during his years as a student and is still passionate about doing so today. He currently works as a freelance artist and writer in various fields. He also has a permanent position at a renowned online gallery (ArtGazette) where he produces various works on commission. As a freelance artist, he creates several series and successfully sells them to galleries and collectors. He loves to use his work and skills in various fields of interest.
Matthew has been creating drawing and painting tutorials since the relaunch in 2020. Through his involvement with artincontext.org, he has been able to deepen his knowledge of various painting mediums. For example, watercolor techniques, calligraphy and lately digital drawing, which is becoming more and more popular.
Learn more about Matthew Matthysen and the Art in Context Team.


