

How to Draw a Frog – An Instructional Guide to Easy Frog Drawing
Frogs are truly fascinating creatures. They are perhaps the most unique and alien-like of all amphibians and because of this, they are a commonly chosen subject of art. Imagine being able to flawlessly draw a frog, from its feet to its eyes, or getting that shading completely right. This tutorial will descriptively guide you through each step in the process of drawing a frog, with all its twists and turns.
Instructions for Drawing a Frog
In this tutorial, we will be covering how to draw the standard framing of one type of frog, namely the red-eyed tree frog. However, you can always print out a picture of your favorite frog for when we start to add detail later on – in fact, we recommend it!
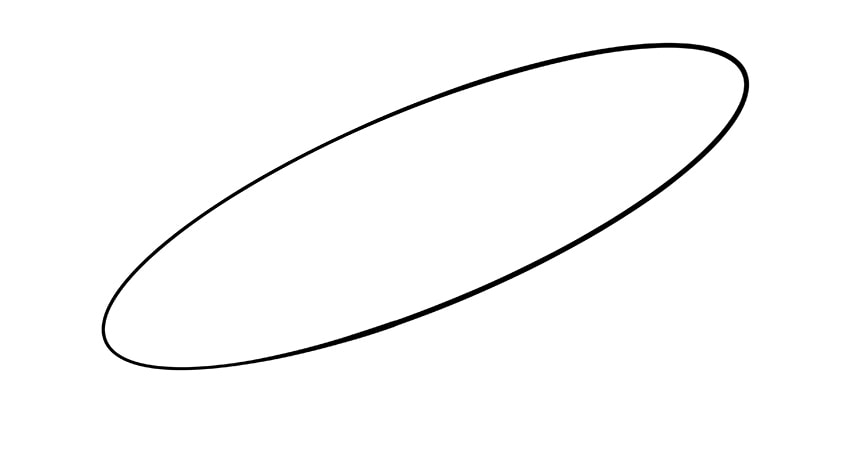
Step 1: Body Construction
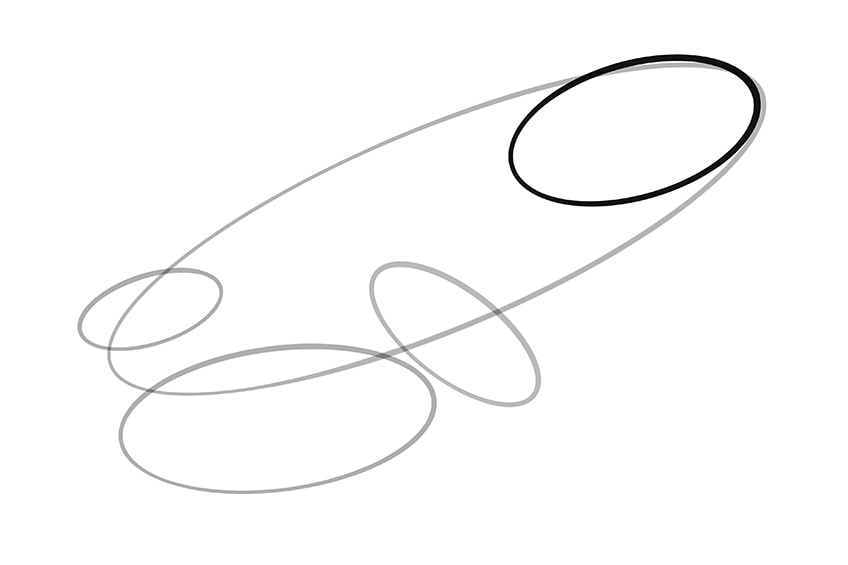
If you followed our tutorial on how to draw a human skull, you might remember that the base of drawing any animal (yes, humans are animals) is an oval. In the case of frog drawing, the oval you draw must be slanted at an angle. How big you would like your frog to be will determine the size of your slanted oval. Make sure that you have space on either side of the circle for more detail – we suggest placing it in the middle if you are new at this.
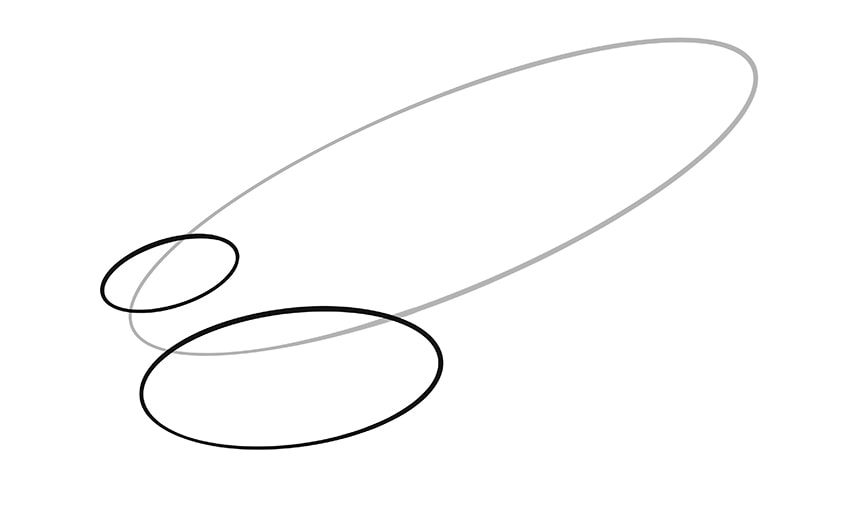
Step 2: The Back Legs
Your second step is to add in the plan for the back legs. This might be a bit tricky, so follow carefully. Both legs will need to be carefully proportioned, particularly the back leg on the far end of the frog, which is obscured by the body. Let’s start from there.
- Draw a smaller oval, as you see in the example below, leaning the same way as the original oval you drew for the body.
- Next, draw the back leg in the foreground of the drawing – the one closest to the viewer. It must be just less than double the size of the smaller oval you drew for the hind leg at the back.
This is a good way to show depth in your drawing, taking it from a two-dimensional image to one that is three-dimensional.
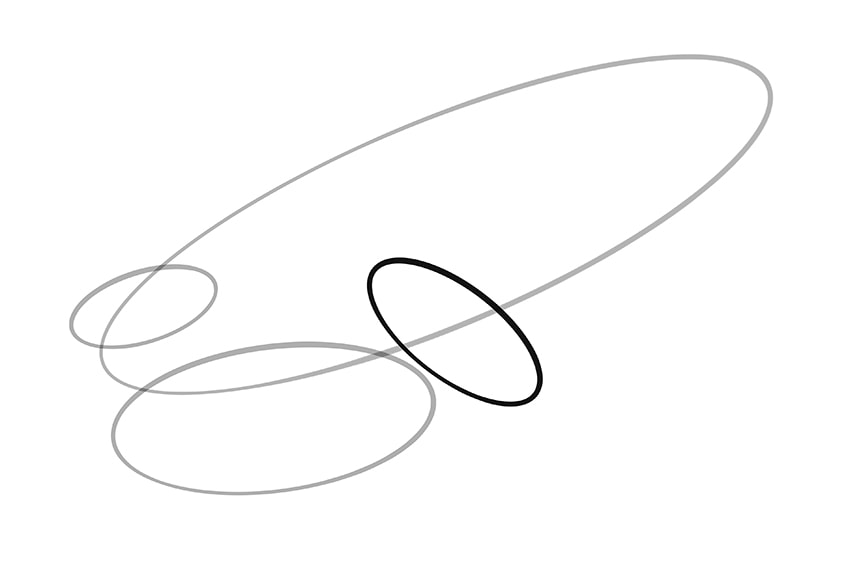
Step 3: The Foreleg or Arm
Due to the angle of our frog drawing, we are only going to add one of its arms, not both. While there are two ovals for the two hindlegs, you will only need to draw one oval for the arm as only one arm is visible. Once you become a skilled frog drawer, you can start to change the angle the frog is facing, in which case there might be a need for two ovals. If you take a look at our example, you will see that the oval for the arm is facing the other direction, but it is also narrow. Its size must fall somewhere in-between that of the two ovals for the back legs, and it must come out of the middle of the body’s oval.
Step 4: Constructing the Head
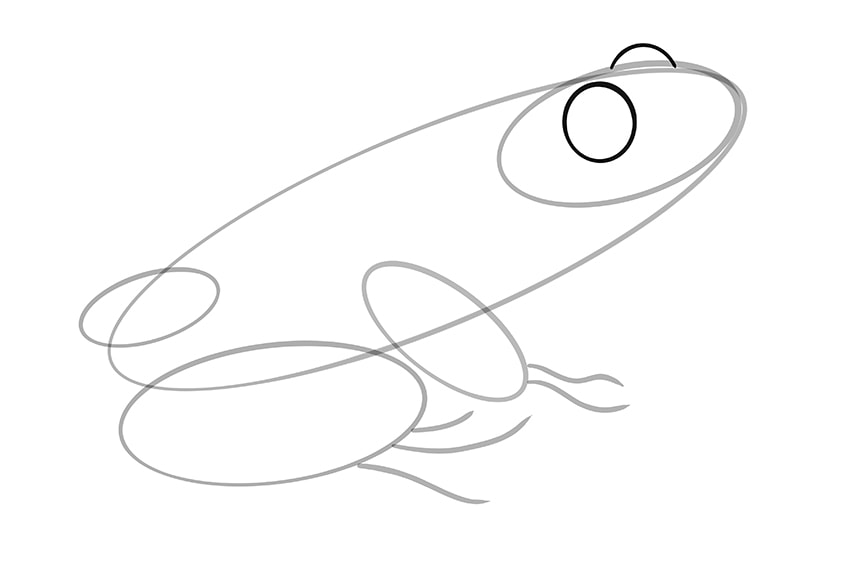
A frog’s head can be confusing because there is no neck like in a lot of other animals. In this next step, you will be able to see where the frog’s head starts and its body continues. The head’s oval will face the same direction as that of the body and should be of a similar width, fitting in nice and snugly. The front hindleg should be a bit smaller than the oval for the head.
If you look at your compilation of ovals, you should be able to see the beginnings of the shape of a frog.
Step 5: The Webbed Hands and Feet
This next step might seem daunting at first, but we will show you how simple it is. If you look at a frog’s feet and hands, you will see that they are webbed to allow for easy swimming. Starting with light construction lines, draw some curvy lines protruding from the front and back legs. There should be two lines coming from the arm and three lines from the hindleg in the foreground. In our example, the lines from the arms are curvier than the back leg’s lines. It is your choice as to which gets the curvier line – the feet or the hands. Use your imagination to choose how your frog will look.

Step 6: Adding the Eyes
There is nothing more life-giving than the eyes of your subject. We will now move away from ovals, and instead draw a sizable circle inside the head’s oval, more to the left than in the middle. Next, draw a semi-circle just to the right of your first circle, resting on top of your head’s oval.
The semi-circle is another nod to the depth of your drawing, as the frog’s eyes are on either side of the face. So, if you are looking at the frog’s side profile, you will only see the slight bulge at the top.
Step 7: Detailing the Eyes, Nostril, and Mouth
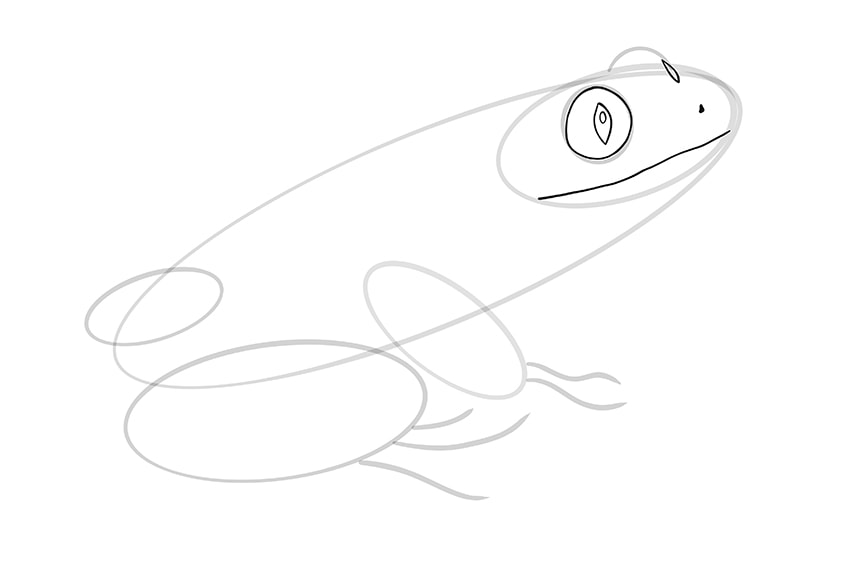
It is now time to draw the details of the frog’s face, being the frog’s mouth, nostril, and eyes. Once the following steps have been completed, you should have something similar to our example below. But of course, no one is the same, so feel free to use your artistic initiative!
- For the mouth, draw a line going across the head’s construction oval, from left to right – it does not have to be exactly straight, which will add definition.
- The frog’s nostril at first glance may seem like just a dot, but it should resemble a tiny letter “L” facing the wrong way.
- For the iris of the frog’s eye, draw a vertical oval with pointed tips in the middle of the eye’s construction circle. The pupil will then take the form of another tiny oval inside the pointed oval.
Step 8: Bringing Shape to Your Frog
This is a vital part of your frog drawing, as this is the step in which you will make it look more realistic. This can seem a little complicated, but we have outlined the basic steps to help you add definition and realism to your frog drawing.
- Draw an arch over the eye’s construction circle and connect it smoothly with the semi-circle construction eye.
- Then, add a curved line that looks like a “C” shape for the frog’s cheek.
- Next, you will add a line going from the eye’s construction circle towards the nostril.
- Now draw another line starting from just underneath the loop of the second eye in the background. The line should be going down and angled towards the right, thus forming the bridge of the frog’s nose and adding a realistic dimension to its face.
- You can then draw the frog’s bottom lip running parallel to the line you drew previously for its mouth.
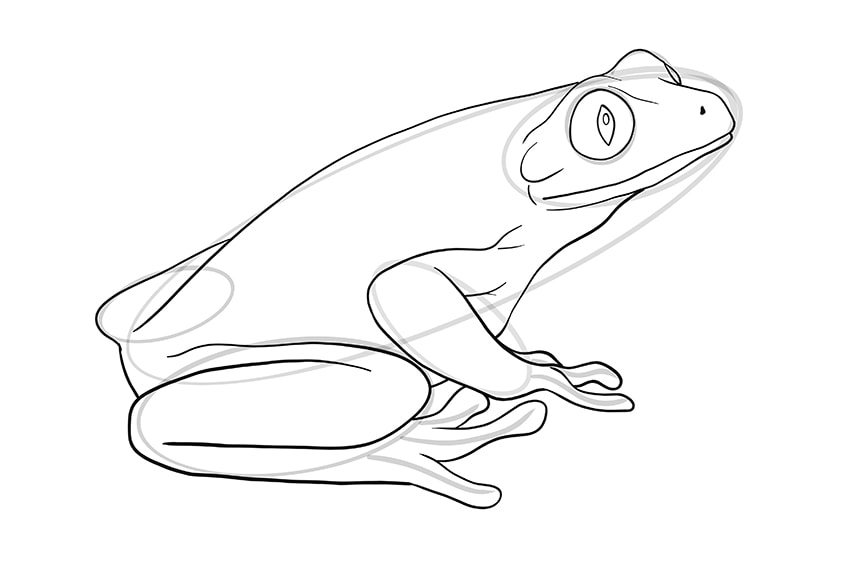
- For the curve of the frog’s back, start from the arch over the front eye and draw the line of the back, running at slightly more of a curve than the original construction oval. Let it dip down to where the construction oval of the back hindleg meets that of the body.
- Use the oval of the hindlegs in the background to guide you when drawing the shape of the back legs. The same applies to the front leg.
- For the toes, draw curved lines that look like fingers without any bones.
- Lastly, connect the arms and the mouth by drawing another curvy line – make sure that the line comes out a bit to represent the chest.
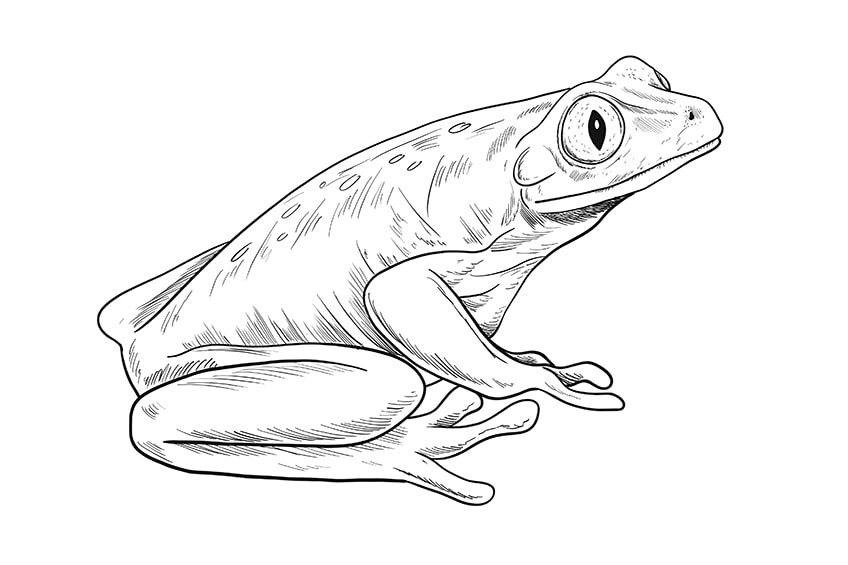
Step 9: Characterizing Your Frog
It is finally time to convert your frog from a two-dimensional picture sketch into a life-like creature with depth. This is where your true creative abilities can take the lead because how your frog ends up looking is entirely up to you. You can add shading to the lines above the front hindleg and forearm to highlight the fact that they are in the foreground. Shading can also be added under the line of the bottom lip as well as the line connecting the frog’s arm to its mouth – this defines its mouth or jaw. The underbelly and the back would be best to tackle next, leaving the face for last.
Adding shading to the frog’s face makes it that much more real. Accentuate the eyes by adding flecks in the white of the eye around the iris. The iris should also be colored in black, leaving the pupil to be white.
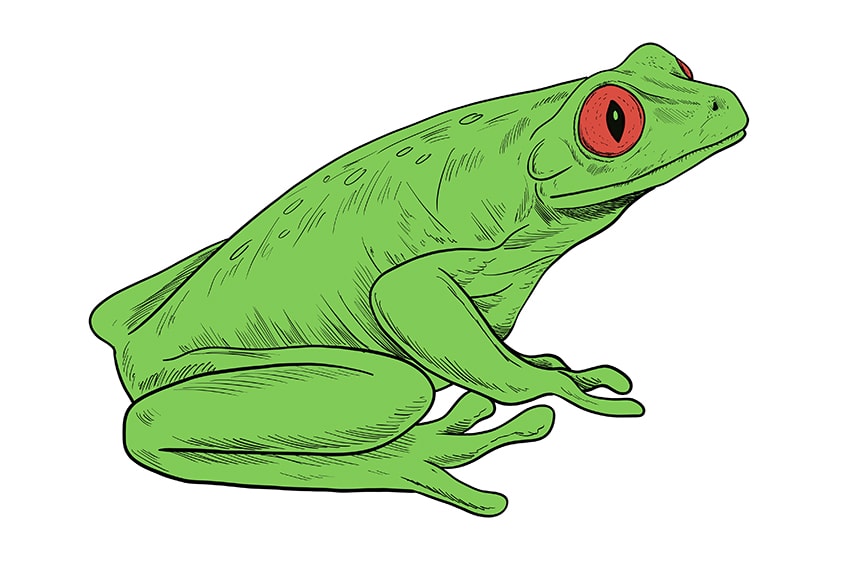
Step 10: Adding the First Tone Color
It is now time to set aside your pencil and eraser and whip out your choice of coloring material, whether it be paints, crayons, or your drawing tablet. You can choose to use your freedom of creative expression or use a picture of a frog as a reference when selecting the color you would like to make your frog’s body. We suggest using a lighter shade for the tonal color as we will be adding darker shades in the next step. Frogs often have very luminous eyes – either bright yellow or red. In our example below, we colored our frog’s eyes a scarlet red, but again, this is up to you.
Step 11: Final Touches
Frogs in real life are not just one block color. Their underbelly and bottom lips are a much paler green or yellow, so be sure to add in some shading to the underbelly for definition. You can also choose to add some flecks of yellow on the back of the frog.
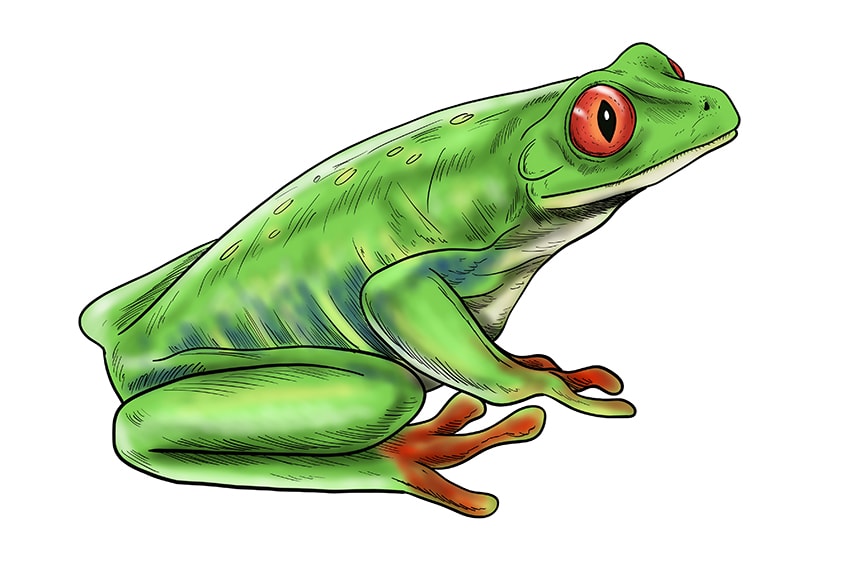
To make it easier to see the details of the shadows, we suggest adding a line of highlights around the outside of your frog.
To make the eyes shine as they do in real life, draw a highlight surrounding the iris and blend it into the red or yellow that you colored it with. Add an even lighter, almost white, highlight at the top of the eye to show its curved, three-dimensional shape.
The feet of the frog are not green, but are usually a darker color or perhaps even a brighter color like their eyes. In our example, we chose to color the frog’s feet a red shade, adding the highlight around the outside edge of its toes with a green shade.
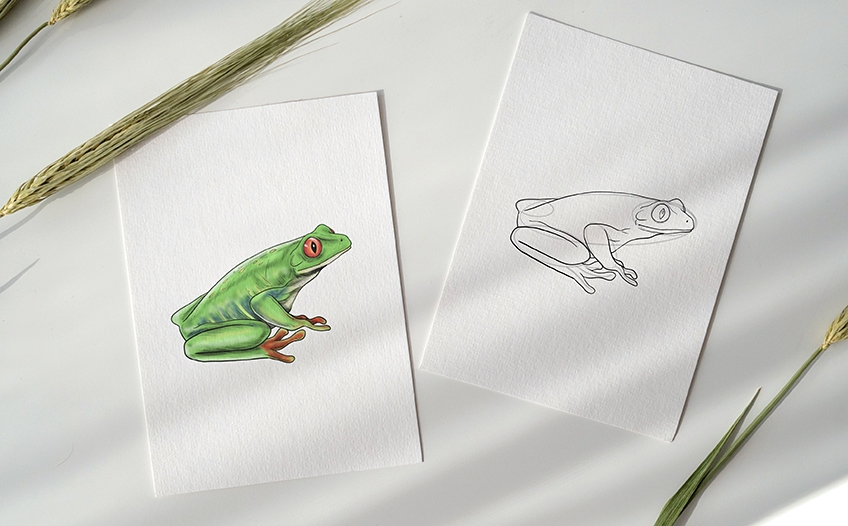
Completed!
This is the best part of the whole drawing procedure – taking a step back and admiring what you have done. Your frog might not look exactly like our frog, but that is not a bad thing, as we are all unique in our ways!
Your amphibian drawing should not stop here – you have only just learned the technique. You now you have the opportunity to master it! Enjoy this new skill and start expressing!
You can also watch our Google Web story.
Frequently Asked Questions
Is This Tutorial for Beginners?
Of course! This tutorial is designed for beginners and those looking to tune up their skills a little bit. You will learn all the steps, starting from the construction lines to the final tweaks in the shading.
How Hard Is It to Draw a Frog?
Drawing frogs does not have to be very difficult at all. Of course, it can seem a daunting task to get the proportions correct. But, if you start with the construction lines as we suggest at the beginning of the tutorial, you will not have any issues at all in completing your life-like frog drawing.

Matthew Matthysen is an educated multidisciplinary artist and illustrator. He successfully completed his art degree at the University of Witwatersrand in South Africa, majoring in art history and contemporary drawing. The focus of his thesis was to explore the philosophical implications of the macro and micro-universe on the human experience. Matthew uses diverse media, such as written and hands-on components, to explore various approaches that are on the border between philosophy and science.
Matthew organized various exhibitions before and during his years as a student and is still passionate about doing so today. He currently works as a freelance artist and writer in various fields. He also has a permanent position at a renowned online gallery (ArtGazette) where he produces various works on commission. As a freelance artist, he creates several series and successfully sells them to galleries and collectors. He loves to use his work and skills in various fields of interest.
Matthew has been creating drawing and painting tutorials since the relaunch in 2020. Through his involvement with artincontext.org, he has been able to deepen his knowledge of various painting mediums. For example, watercolor techniques, calligraphy and lately digital drawing, which is becoming more and more popular.
Learn more about Matthew Matthysen and the Art in Context Team.


