How to Draw a Fist – Clenched Fist Drawing Step-by-Step Tutorial
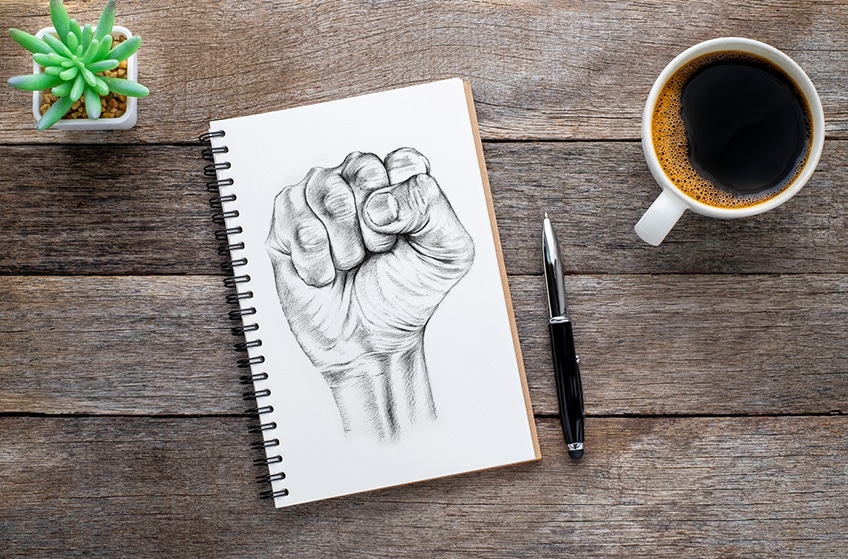
Learning how to draw a fist is a great way to enhance your drawing skills. Learning how to draw hands in any kind of way is a great exercise for understanding the shading process within the realistic subject matter. A clenched fist drawing is particularly interesting because there are little creases and indentations in the hand that make it look realistic. All these little aspects of drawing that one learns through the process of doing a fist sketch or closed fist drawing can be transferable skills for other drawings and artworks. As we go through this tutorial on how to draw a fist, we will find ourselves picking up various skills along the way that ultimately enhance our drawing ability as a whole.
Table of Contents
Before We Draw the Fist Sketch
Learning how to draw a fist comes with attentiveness to a few aspects that make the fist drawing look realistic. We will find that the way light is represented in our first drawing is going to be a fundamental principle that we keep in mind throughout the process. Understanding how light works is the fundamental principle that turns a fist sketch into a realistic fist drawing. However difficult it may sound, it is quite easy to understand when broken down into a few simple steps. In this tutorial on how to draw a fist, we will be breaking down the different steps making it easier for us to understand the process of turning a simple fist sketch into a more interesting and nuanced closed fist drawing. Let us see what materials we will need.
Necessary Materials
When learning how to draw a fist we want to make sure we are well prepared for the process. This means we will first need some good paper for our first drawing. As we develop the first sketch into a more detailed first drawing with our pencils, we will want to have a good set of graphite pencils. We will also encounter a few mistakes along the way so make sure you have an eraser. as well as a sharpener for the finer details. We will be using a pen in this tutorial, shading with a pen is going to bring out our first drawing, giving it more contrast within its features. We will be using a ballpoint pen as they are good at releasing ink sparingly which works well for shading. Lastly, we will be using a source image as a reference for our fist drawing, so that we have a really good representation of a fist for our clenched fist drawing.
- Pencils
- Ballpoint pen
- Eraser
- Sharpener
- Good paper (200 g/m – 250 g/m recommended)
- Source material (could be from your phone or a printed image)
A Step-By-Step Guide on How to Draw a Fist
Learning how to draw a fist is simple when broken up into a few steps. We begin by making a light fist sketch, figuring out the general form of how large our fist drawing is going to be. We then begin to use our pencils and erasers, whereby we slowly fix and correct any aspects of the first drawing so that everything is in its correct proportions. A clenched fist drawing is unique as various shadows form within the creases of the hand. Once our first sketch is complete, we will begin light shading with our pencils, bringing out the various shadows in the clenched fist drawing. After we are satisfied with how the first drawing looks with our pencils, we will then move on to shading with a pen. Shading with a pen is the same as shading with a pencil. We use pencil shading to guide us as we slowly build layers on top of one another. Now let us go through this tutorial on how to draw a fist step by step.
Step 1: Making a Light Sketch of the Fist
Let us begin by making a circle on the page with our pencils, to demarcate the area in which we will draw the fist. Once we have established the circle on the page, we will then proceed to lightly sketch our fist within the circle. We want to do this as we refer to our source image, going back and forth between our source image and fist sketch.
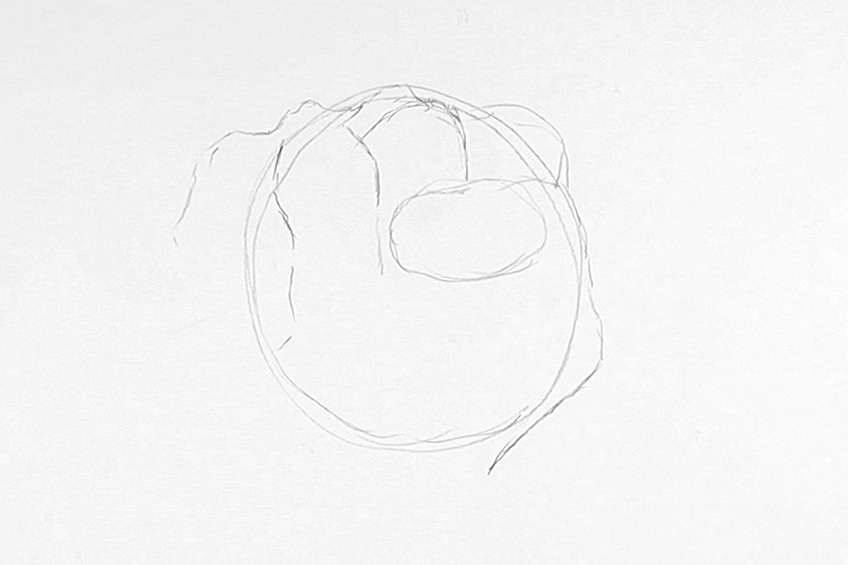
We want to keep this process of developing the fist sketch relatively loose. The aim is to capture the general shape of the fist, as well as its different components with an HB pencil. We want to consider the placement of each finger, relative to that of the other fingers.
We can keep our eraser on hand for this part, as it will require some trial and error. Again, the aim of this step is to allow ourselves some time to capture the shape and form of the hand. We are essentially working with our pencils to make a faint fist sketch. We want to spend time analyzing our source image as we slowly refine the fist sketch into an outlined version of a clenched fist.
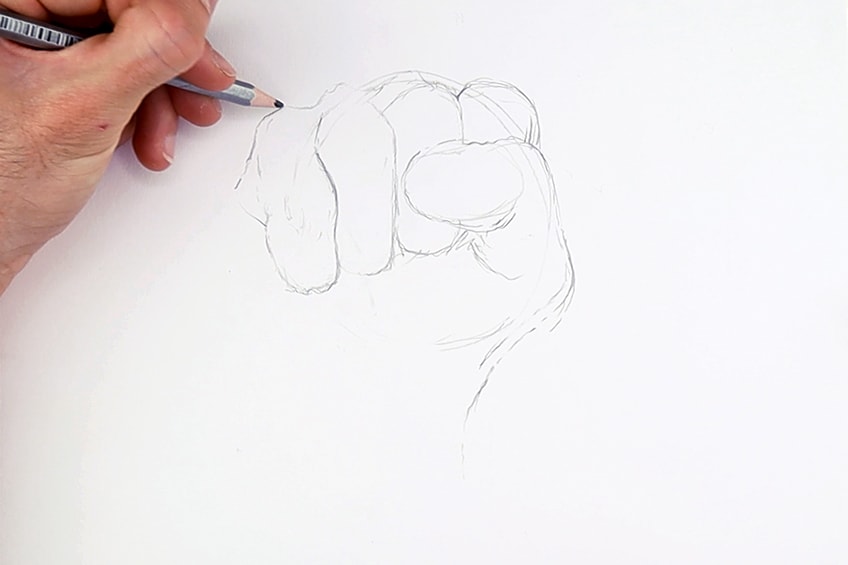
Again, as you slowly sketch out the fist, figuring out its shape and form, consider each finger. Consider if one finger is slightly higher than the next or if one is slightly thicker or thinner than the other. Try to notice these kinds of details as you refer to your source image for guidance. We want the shape to be as accurate as possible.
As we constantly refer to our source image for guidance, we want to make the outline of the shape and form of the fist as similar to the source image as possible. By doing so, this will help our shading process to develop more smoothly. The more accurate the form and shape, the easier it will be to place the shadows in their correct positions within the hand.
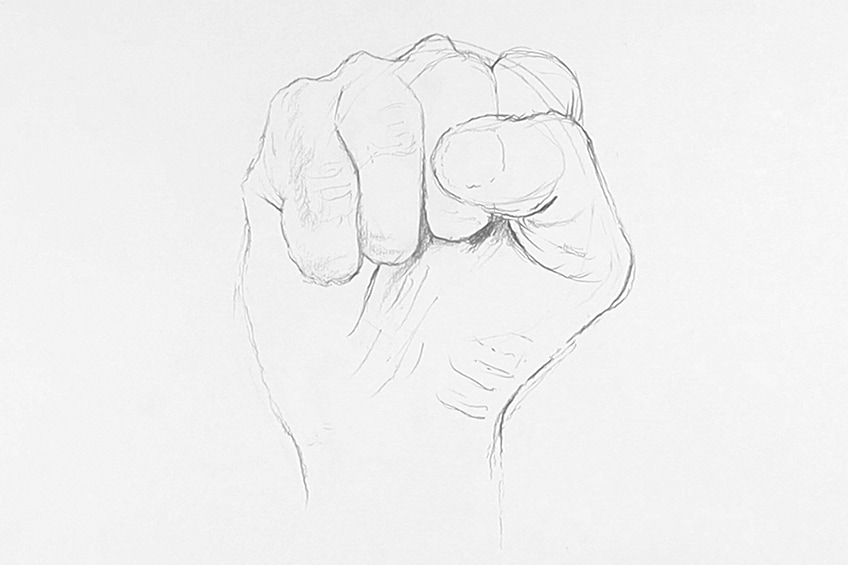
We also want to pay attention to the palm of the fist, this area has various lines moving in various directions. If we can capture this line work within the palms of the hand, we will have better guidance in adding the shadows along these lines. These lines also indicate the crease in the hand, which we will shade in later.
Until you are completely satisfied that your fist sketch resembles the source image, take your time refining the pencil sketch before moving on. Consider tricky components, such as the thumb. Perhaps take some time on the thumb, really trying to capture its proportions and shape as it sits perpendicular to the index finger.
Step 2: Light Pencil Shading
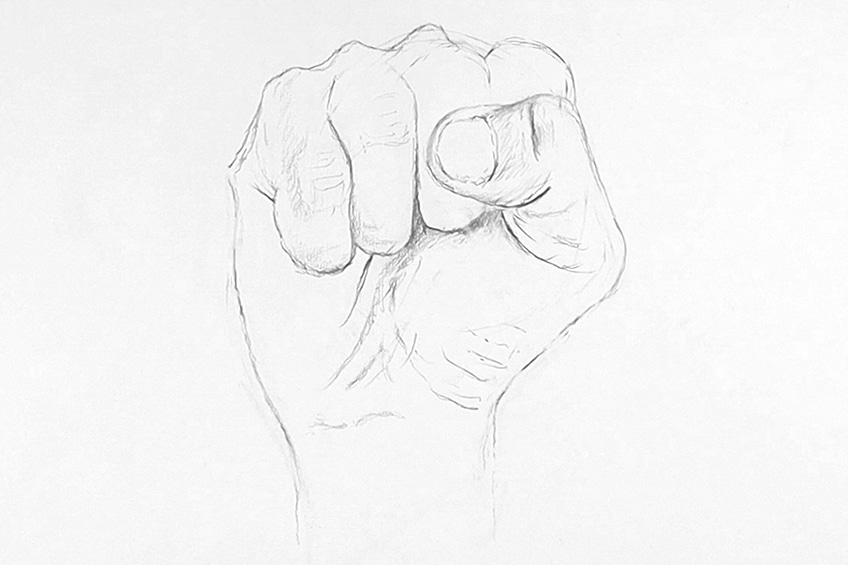
Once we are satisfied with the linework developed with our pencils, we can proceed to add some light pencil shading to our drawing. We want to really pay attention to the light source within the source image. The light within the source image is quite central, this means the shadows are faint in some areas such as above the knuckles.
The darkest shadows are in the center of the clenched fist, where the fingers fold into the hand against the palm. These shadows also develop a gradient that slowly moves from the inner dark section of the hand to a lighter section out toward the palm of the hand.
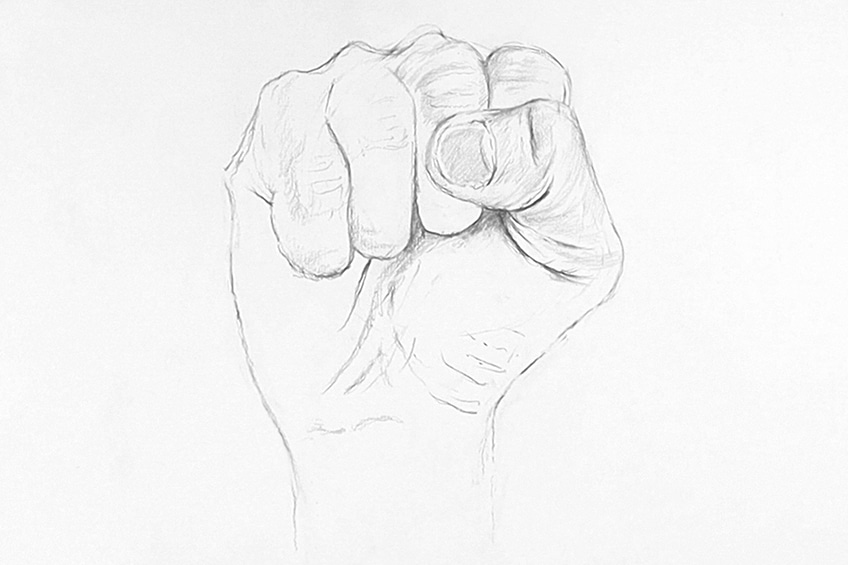
As you consider each knuckle along the hand, we can see subtle shadows on the left side of each knuckle. This means that even though the lighting is quite central it does seem to be coming slightly more from the right. Again, take time on this step as you carefully analyze the source image whilst adding in the shading marks.
Another area that can be quite tricky to capture the shadows in is the thumb area. The thumb has an interesting shadow formation that changes between the inner parts of the thumb and the outer parts of the thumb. Pay attention to the gradient shifts in the thumb around the knuckle area and the inner thumb area where the hand creases.
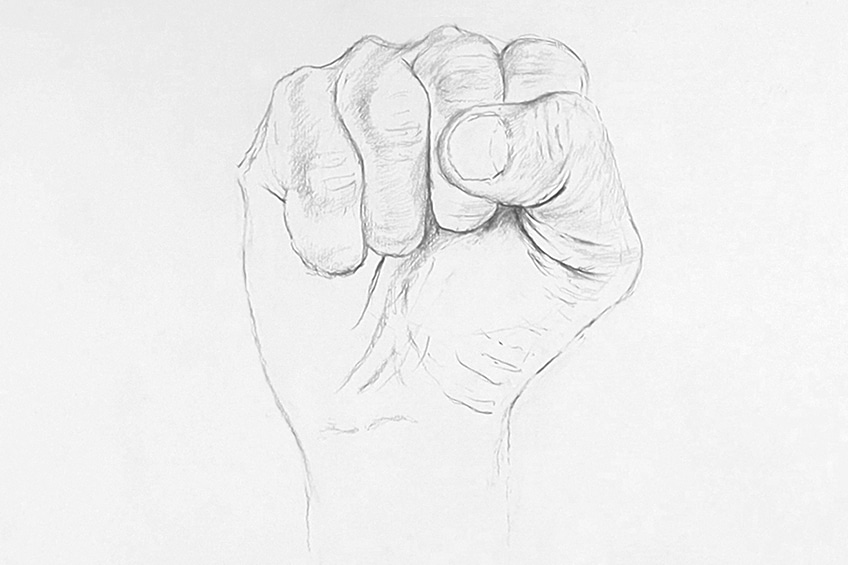
As we slowly and faintly develop the shadows in the hand with our pencils, consider the wrist area. The wrist area is interesting as it contains various wrinkles that move along the wrist horizontally. The bones that run vertically through the wrist also develop shadows, so keep this in mind when shading around this area. Again, we want to consider the crease and wrinkles around the palm area of the hand. The shape of the wrinkles on the palm of the hand moves from the inner hand outwardly toward the outer parts of the hand. Pay attention to the palm of the hand and how the lines in the hand form along the palm of the hand.
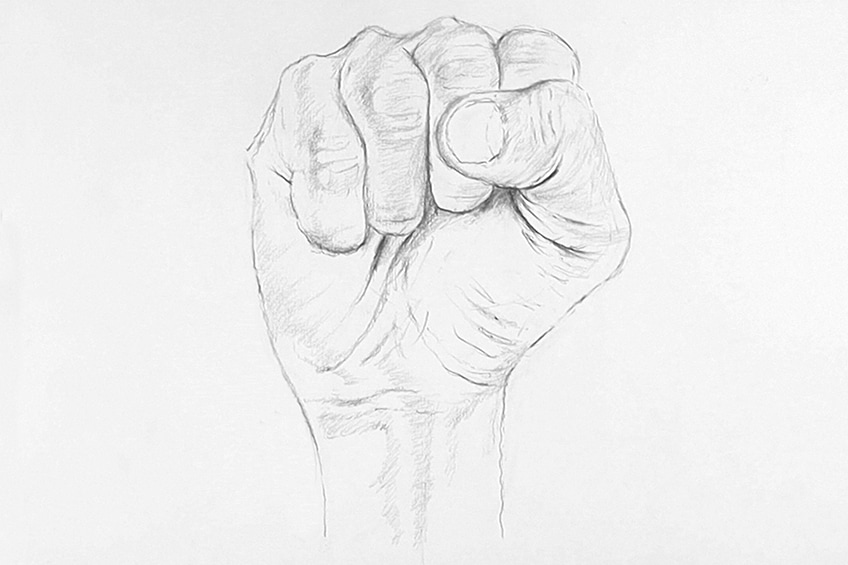
When we analyze the fingers in the source image, we can see that there is shadowing that runs down the fingers. Again, shading is about paying attention to all the details and shadowing that the light source is exposing. We really want to pay close attention to these shadows as they can change the color of the skin tone in various areas of the hand.
Another area we can come back to is the crease around the inner thumb area and the index finger. The index finger is pressing into the hand which is creating tension around the inner thumb. This is causing a series of wrinkles to appear which result in various streaks of shadows. Take a moment to analyze this area whilst shading
We really want to make sure that our shading is placed correctly within our drawing, whilst we are still in the pencil stage of the tutorial. This is going to make it much easier for us when we move on to shading with a pen. So, keep your eraser nearby as you go through this step tweaking until correct.
Make sure you consider all details of the hand, from the intricate creases around the thumb to the softer shadows near the edges of the pinky finger. Consider each finger size in relation to one another as well as the subtle wrinkles along the wrist. the more you refine the shading with pencil, the easier it will be for you when shading in pen.
Step 3: Shading in Pen
Once we are satisfied with our pencil shading, we can then move onto the part of the tutorial where we begin to shade with the fist drawing with a pen. We want to use a ballpoint pen because of how the ink comes out sparingly from the tip of the pen. Let us start near the inner thumb area, allowing the pencil shading to guide our marks.
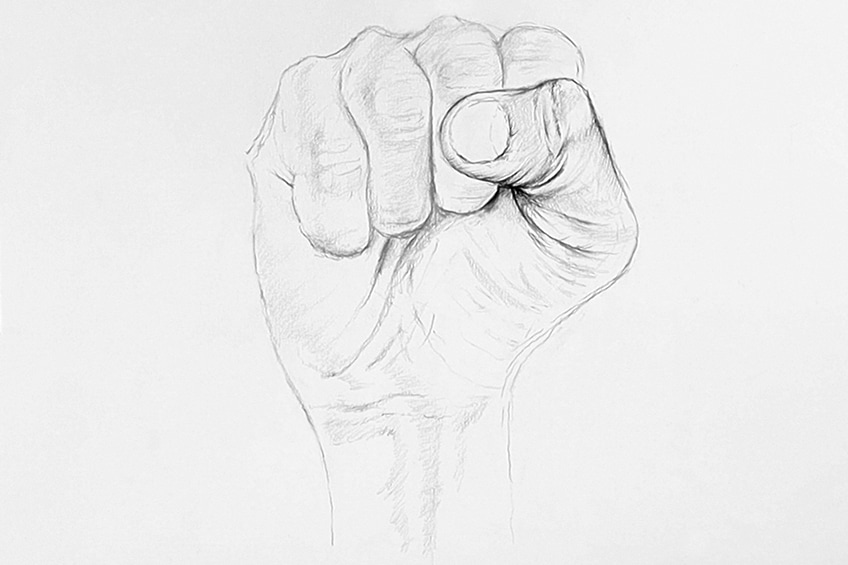
Working from the inner parts of the hand allows us to develop seamless gradients as we move outwardly toward the palm. For instance, consider the wrinkles that develop from the inner parts of the hand. They slowly lighten in their gradients as the wrinkles move from the inside of the hand, outwardly, toward the palm of the hand.
We develop these gradients by the pressures that we apply to our pens. For instance, we press hard for the darkest shadows and lighten our touch to lighten the shadows. We can also play around by layering our pen marks in a cross-hatch style or simply utilizing various different shading marks for different qualities in the hand.
Focusing on the thumb area, and then slowly working our way around the hand is a great way to develop consistency in our shading. When we start with one side and slowly progress to the other side, we essentially are allowing our previous marks to indicate how dark or light our next shading marks should be.
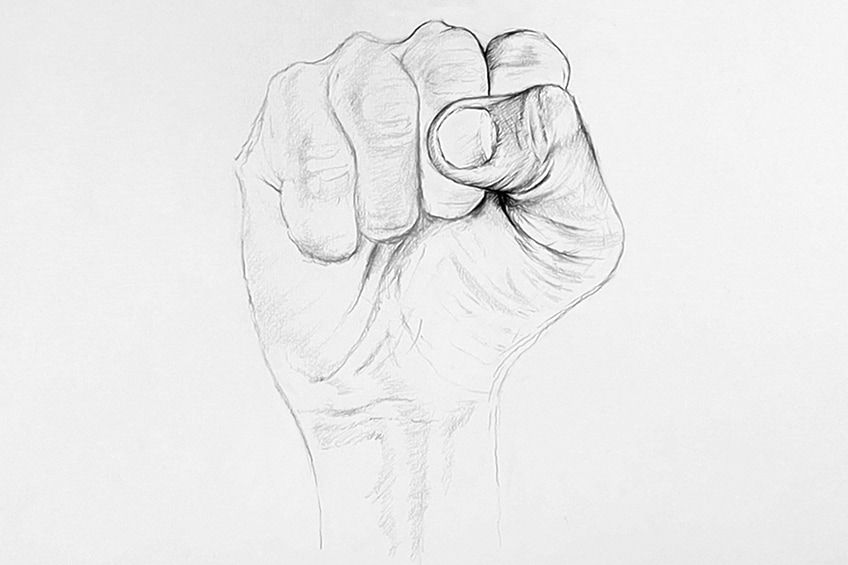
Always compare your shading marks within the different aspects of the hand as you refer to your source image for guidance. Consider the different tonal values within the various shadows that appear on the hand and in between the fingers. This is a great way to develop your drawing, as it will provide consistency between your fist drawing and the source image.
As we shade with our pens make sure you are constantly referring to your source image for guidance. When we consider the variety of different shadows, we can see that there are different tonal values, some are lighter and some are darker. We want to make sure we use both the pencil marks as well as the source image to help the process of shading in pen.
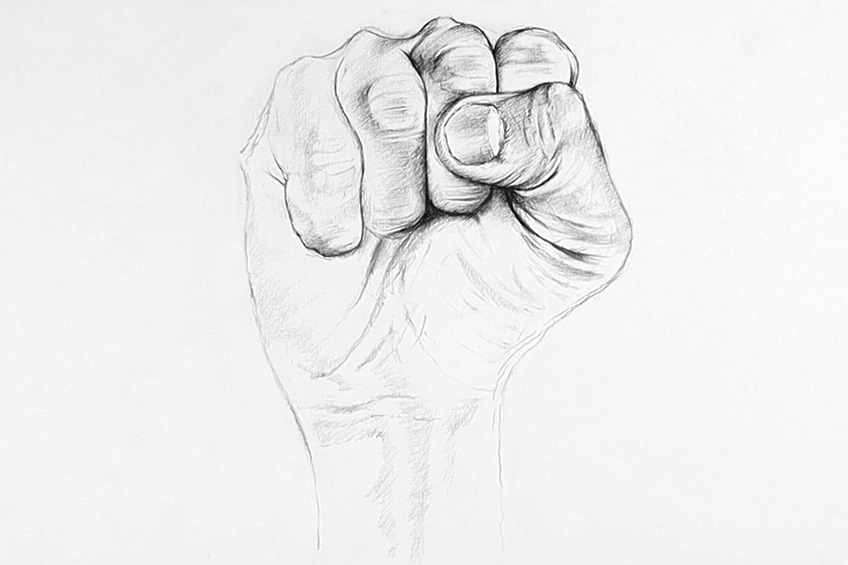
An interesting combination of tonal values can be seen around the thumb. If we consider the nail of the thumb, we can see that it is slightly darker than that of certain parts of the skin. These little details are what help us to refine the shading process.
The shadowing around the knuckles can be seen on the left side of the knuckles. However, because the light is somewhat quite central within the source image, we can also find slight shadowing above the knuckle area.
As we allow the pencil marks to guide our shading, we can also use this time to change anything as we go through the process of shading with a pen. In our clenched fist drawing, we will find that there will be some details we may have missed at the beginning of the tutorial. Feel free to fix anything if necessary.
Start to focus a little on the variety of tonal variations found within the creases of the palm. Again, we can achieve the gradients of dark to light by paying attention to the pressure that we apply to our pen or pencil. This is especially important near the areas of the hand, where creases form from the fingers pressing against the palm of the hand.
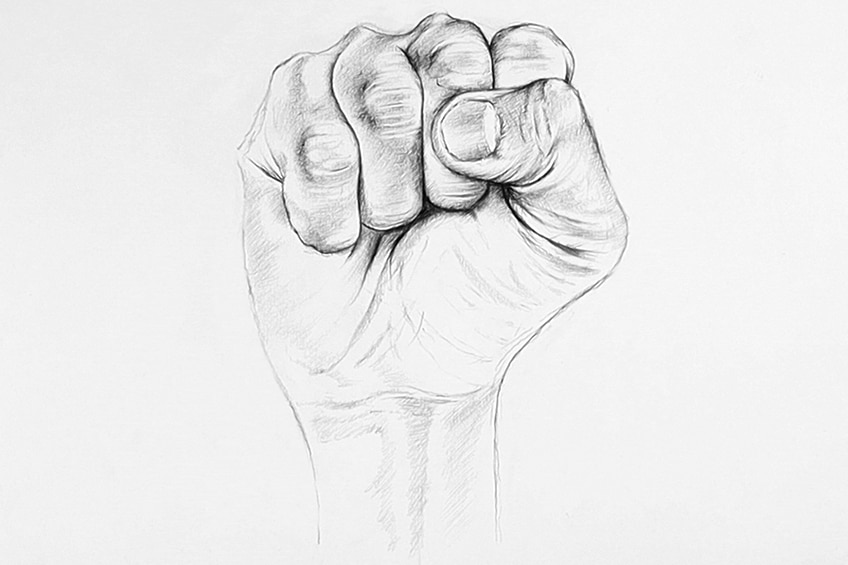
Consider the pinky finger, notice how the knuckle is lighter than the areas around the knuckle. That same can be said for the other fingers as well, where the shadows fall along the side of the fingers. These shadows help to form the light exposure to the fingers, which again, is predominantly present on the right side of the page.
Even though the light is predominantly present on the right side of the page, we can see that there is a slight tonal difference in the fingers according to the source image. There is some light shadowing on the fingers just below the knuckles, which is slightly lighter than the shadows on the left side of the fingers.
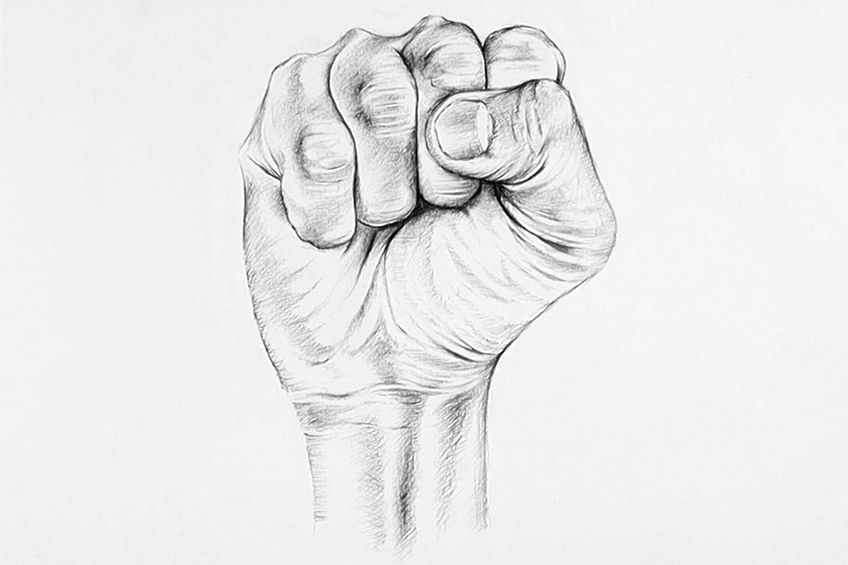
As we go through our clenched fist drawing, let us notice the shadowing that moves downward from the palm to the wrist area. There are two bones that run vertically through the wrist, which cause shadows to appear as vertical strips of shadow. Try focusing on how the source image represents these shadows on the wrist.
The palm and the wrist contain a variety of little wrinkles that move in various directions. Drawing can take a while, which means we want to be patient and slowly work our way through these little details within the palm and wrist of our closed fist drawing. Take your time when shading with a pen.
Step 4: Touch Ups
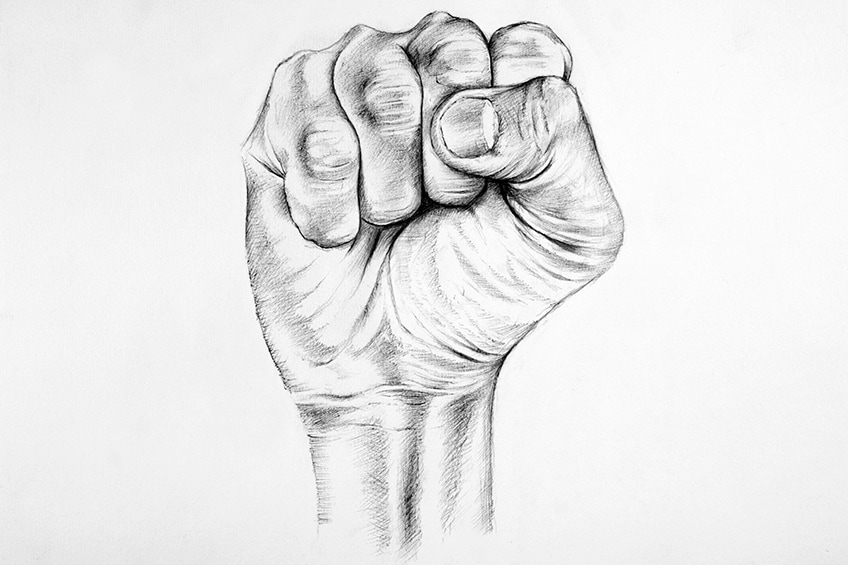
As you continue shading and feel that you are coming to an end of your drawing, allow yourself to give it one last check. You want to make sure you feel that you have covered all aspects of the hand within your shading process.
We can also give our page a light erasing of unnecessary lines that we feel might still be present on the page. There you have it, four comprehensive steps on how to draw a fist. Drawing a closed fist is a unique task, and requires patience and time. Allow yourself to go through this tutorial with some patience and dedicated time and you find yourself satisfied with the end results.
Tips to Remember
- Keep an eraser nearby as this will help you throughout your drawing process.
- Don’t worry if you make mistakes, it’s better to take time by correcting mistakes than to rush a drawing and then be dissatisfied with the result
- Try to get the pencil part of the tutorial correct. This will make shading in the pen much easier for you.
- Remember, shading with a pen is the same as it is with a pencil. Pay attention to how much pressure you apply to the pen.
- Drawing takes practice, so if the drawing is not perfect you can always try again. At least now you have the knowledge and tools to draw a clenched fist.
- Most importantly, have fun. Perhaps listen to a podcast or some music as you go through this tutorial!
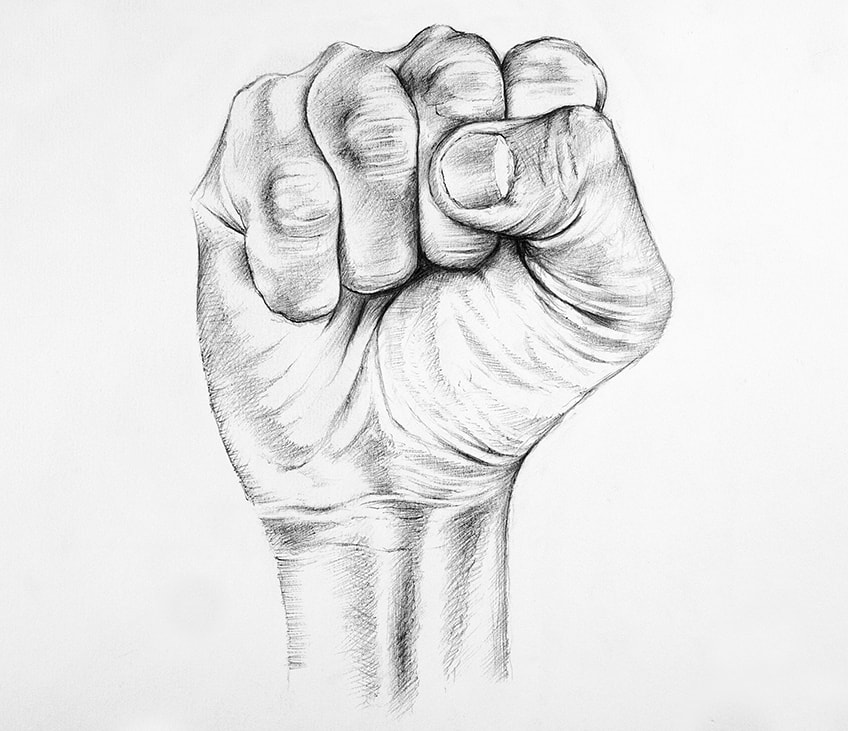
Drawing a closed fist is an interesting task as it can be seen as quite complex and difficult. However, anything complex can be broken up into digestible steps that help you to slowly and patiently build up the drawing. In this tutorial, there are only three steps, however, they are quite thorough which means we need to focus whilst doing them. A clenched fist drawing is such a great way to enhance your drawing skills you slowly turn a fist sketch into an intricate and realistic fist drawing. Now that you have all the tools, take some time to practice and see how your progression unfolds.
Take a look at our fist drawing webstory here!
Frequently Asked Questions
How Do I Draw a Realistic Hand?
The most important aspect of drawing something realistic, whether it is a closed fist drawing or something else, is to understand the way light works. Light is the reason for shadows, without light there would be no shadows. Once we understand how light interacts with our subject matter, we can then use shading as a means of representing those shadows within an object to define its structure more realistically. This concept applies to a clenched fist drawing, whereby the light is interacting with the various creases and indentations made by the clenching of the fist. So we will use our pencils and pens to shade in the areas where the shadows are represented and we will slowly develop the various gradients of shadow within the hand based on the way light interacts with the structure of the hand. Fundamentally, once we understand light we can then understand how to shade in an object which will make it look realistic.
How Do I Shade in a Hand With a Pen?
Similar to the first question, you first want to understand light and how light interacts with a structure. Paying attention to light and how it reveals the shadows within a structure, will provide you with the areas for shading. Defining these shadows with pen shading can be approached the same way as you would with pencil shading. What we want to pay attention to is the pressure that we apply to our pen. Applying more pressure will result in darker marks, whereas applying lighter pressure will result in lighter marks just as it does with a pencil. A fist drawing is a great way to figure out the various pressures that you may apply because we are working with various gradients within the shadows of the clenched fist drawing. As long as we pay attention to the amount of pressure we apply, we will find ourselves drawing a closed fist drawing fairly correctly.
How to Draw a Clenched Fist?
This tutorial breaks down the various steps that make up a clenched fist drawing. A closed fist drawing can be tricky; however, it is really simple when you build the structure up, step by step. We begin with making a light fist sketch figuring out the scale and shape of the hand. We then slowly begin to refine the fist drawing with our pencils. Once we have the shapes and scale of the hand-drawn correctly we can then begin some light pencil shading, to indicate where the shadows form on the hand. Once that is complete, we can then move on to refining these shadows with darker marks creating more seamless gradients and overall contrast. We can either do this with pencil or pen, however, this tutorial breaks down the process of shading in the clenched fist drawing with a pen. This is the basic format of how to draw a fist.
Matthew Matthysen is an educated multidisciplinary artist and illustrator. He successfully completed his art degree at the University of Witwatersrand in South Africa, majoring in art history and contemporary drawing. The focus of his thesis was to explore the philosophical implications of the macro and micro-universe on the human experience. Matthew uses diverse media, such as written and hands-on components, to explore various approaches that are on the border between philosophy and science.
Matthew organized various exhibitions before and during his years as a student and is still passionate about doing so today. He currently works as a freelance artist and writer in various fields. He also has a permanent position at a renowned online gallery (ArtGazette) where he produces various works on commission. As a freelance artist, he creates several series and successfully sells them to galleries and collectors. He loves to use his work and skills in various fields of interest.
Matthew has been creating drawing and painting tutorials since the relaunch in 2020. Through his involvement with artincontext.org, he has been able to deepen his knowledge of various painting mediums. For example, watercolor techniques, calligraphy and lately digital drawing, which is becoming more and more popular.
Learn more about Matthew Matthysen and the Art in Context Team.
Cite this Article
Matthew, Matthysen, “How to Draw a Fist – Clenched Fist Drawing Step-by-Step Tutorial.” Art in Context. February 2, 2023. URL: https://artincontext.org/how-to-draw-a-fist/
Matthysen, M. (2023, 2 February). How to Draw a Fist – Clenched Fist Drawing Step-by-Step Tutorial. Art in Context. https://artincontext.org/how-to-draw-a-fist/
Matthysen, Matthew. “How to Draw a Fist – Clenched Fist Drawing Step-by-Step Tutorial.” Art in Context, February 2, 2023. https://artincontext.org/how-to-draw-a-fist/.


