How to Draw a Crow – Tips from the Artist about Drawing a Crow
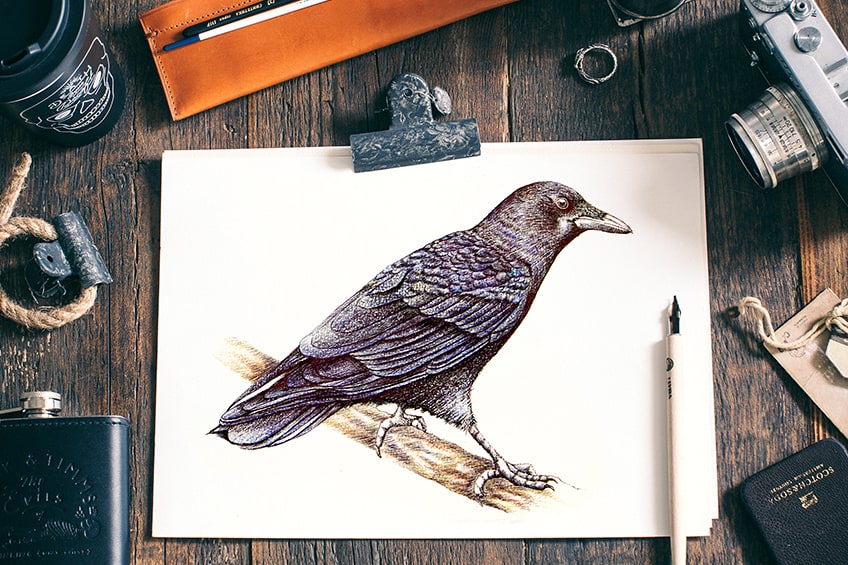
Crows are such fascinating creatures because on one hand, they are beautiful and on the other, they carry such an ominous presence. This makes them a powerful and gloomy symbol with such a versatile function, which can be a great addition to artworks within genres such as horror, folklore, fantasy, or surrealism. In another sense, it’s also a beautiful animal that can function as the focal point of an artwork or even stand alone. There are many useful reasons to learn how to draw a crow and many ways to integrate this particular animal into your own work. In this easy crow drawing tutorial, we will learn how to draw a crow in a unique and simple way.
An Easy Guide to Drawing a Crow With Colored Pencils
This animal is really easy to draw and, in many ways, its lack of color makes it a particularly easy drawing topic. In this easy crow drawing, we will find that utilizing colored pencils in tandem with pens and pencil makes for a great drawing combination to create not only a realistic crow drawing but something completely different. We will find that the process of developing a simple crow sketch into a more refined crow drawing is much more simple than we think and, in this tutorial, we will break down the process into digestible steps.
Necessary Materials
We will be working with colored pencils, mostly ranging between blacks and blues. We will also be working with pencils and pens, all of which work really well together. We want to ensure that we have an eraser for the early stages of the crow sketch. All of the materials can be found through the links below:
- HB Pencil
- Ballpoint Pen
- Marker Pen
- Eraser
- Sharpener
- Derwent Coloring Pencils
- Good Paper (200 g/m – 250 g/m recommended)
How to Draw a Crow Step by Step
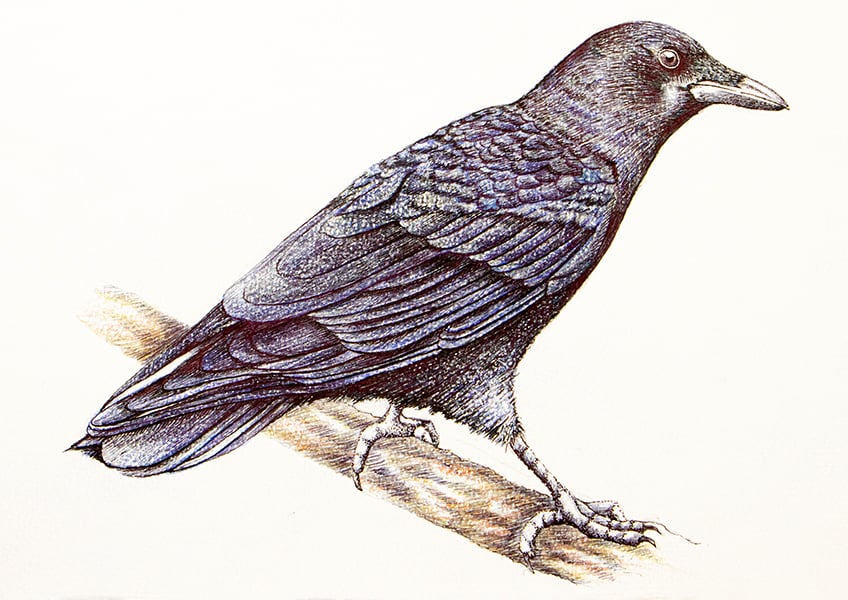
In this tutorial on how to draw a crow, we will start with a basic crow sketch, where we work out the crow’s form and structure first. From there, we will proceed to work on different features at a time, starting with the head. We will work with colored pencils and pens to create a beautiful, layered quality in the bird. From there, we will proceed to do the same in the wings and then lastly work on the feet to further contextualize the crow drawing a little more.
Step 1: Sketching the Crow
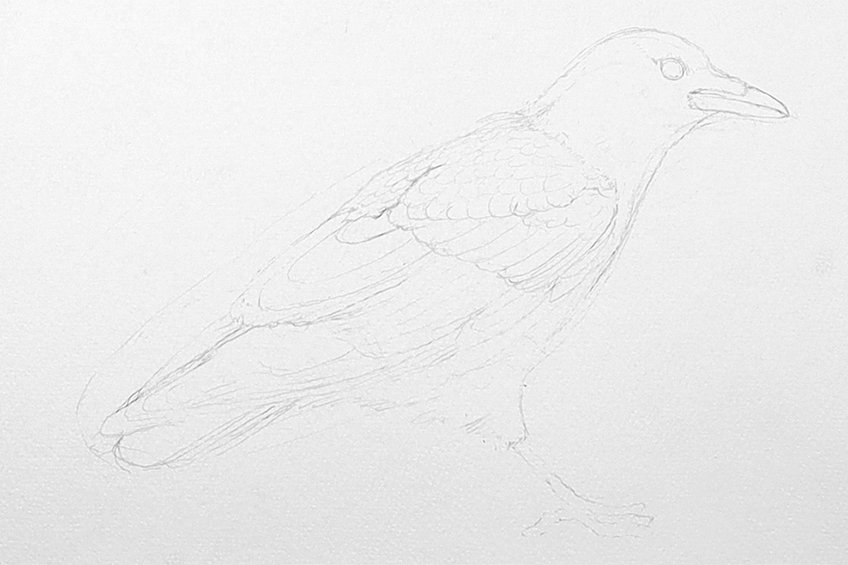
We can start by creating a light sketch of the crow by drawing the bird in its most basic shapes. We want to draw in these oval triangular-like shapes that will then be refined later into more identifiable features.

We will find that at this point we want to start lightly working on the features, starting with a basic outline. By doing so we can start comparing and working out the scale and shape of each feature.
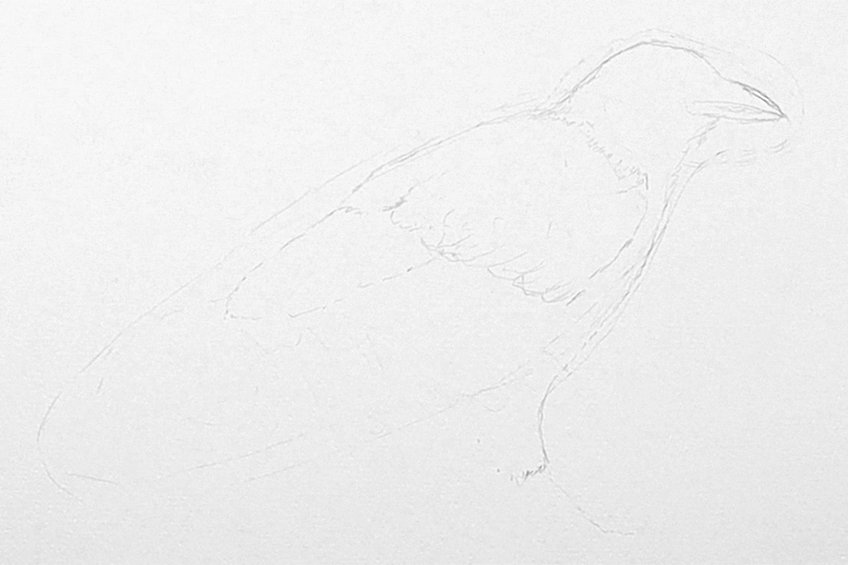
We want to start sketching the different segments of feathers in the wings of the crow. Crows have different-sized feathers as well, which tend to be smaller in the upper areas of the bird, and then longer at the bottom area of the bird.
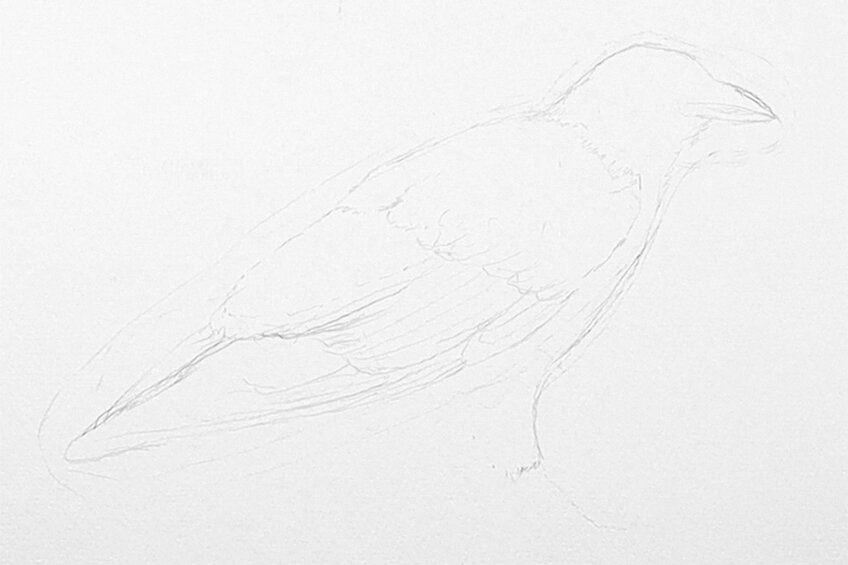
We want to think of it as if the feathers are stacked, as the longer feather will form from underneath the upper feathers. This makes the smaller feathers near the upper area of the wings seem as if they were stacked on the longer feathers.
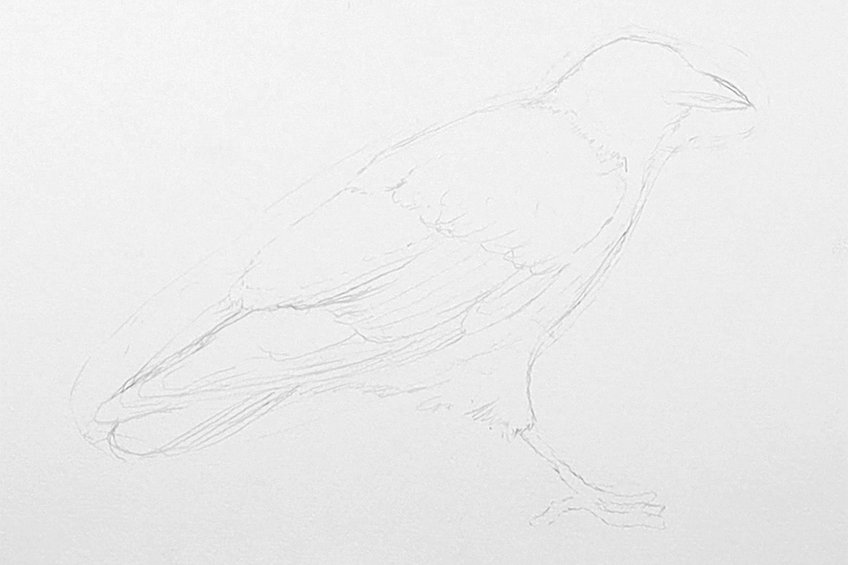
We can also start drawing in the legs, which will have four digits. However, you might not draw all the digits in the feet due to the perspective that the bird is drawn from. In this case, drawing the bird from the side will make fewer digits visible.
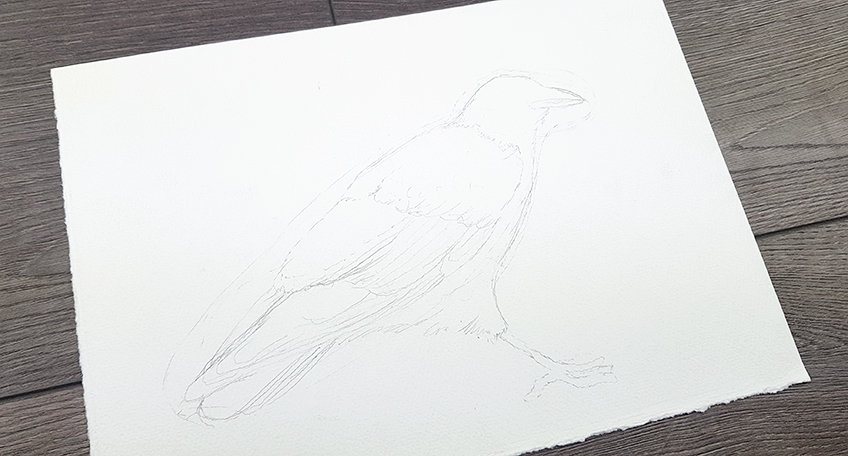
Consider looking at a reference on the internet to assist you in your drawing process if needed, this can help a little when working out the scale of different features. We will find that often we erase some features and redraw them at this stage to capture their form more effectively.
Also, take your time with the feathers, as we want to make sure we capture the layers and segmentation within the feathers as best we can.
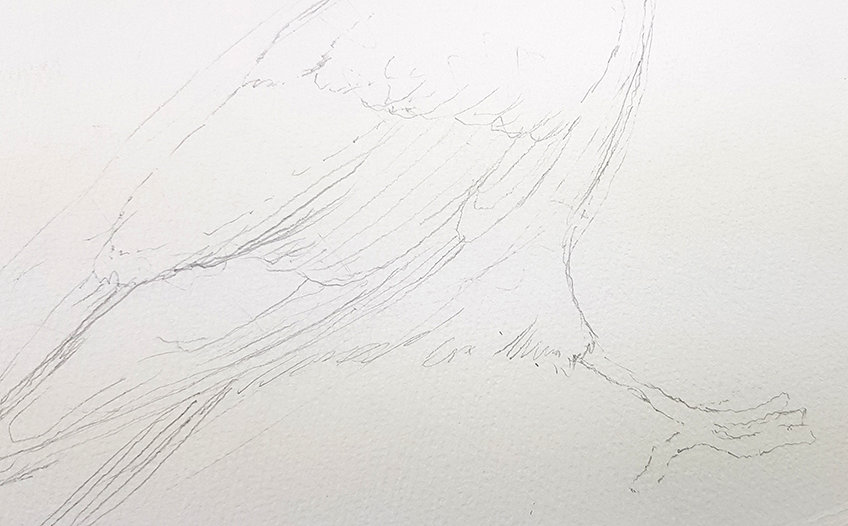
This is important because all birds have different feather compositions and in the case of a crow drawing, we want to capture both the long and short feathers.
Remember, the feathers that sit on the upper section of the wings are much smaller and almost have a scale-like appearance. The mid-area feathers will extend from the bottom of those upper feathers, which will be longer in length.
You will find that the process will take time, where we draw and erase marks until we capture them as accurately as possible. Again, use a reference from the internet to get a better sense of the length of the feathers.
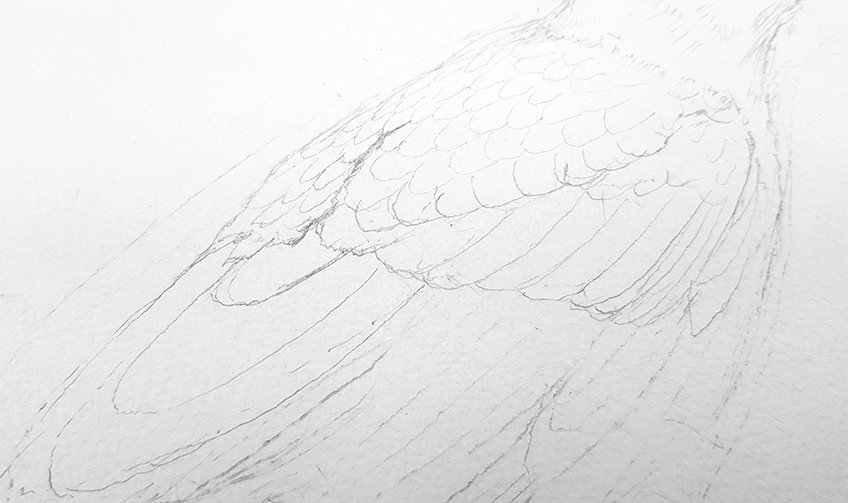
Make sure that you also keep your sketch quite light, this way, as we integrate color, we can use the sketch marks as a guideline without them overpowering the colored marks.

Step 2: Adding Color and Shading to the Head
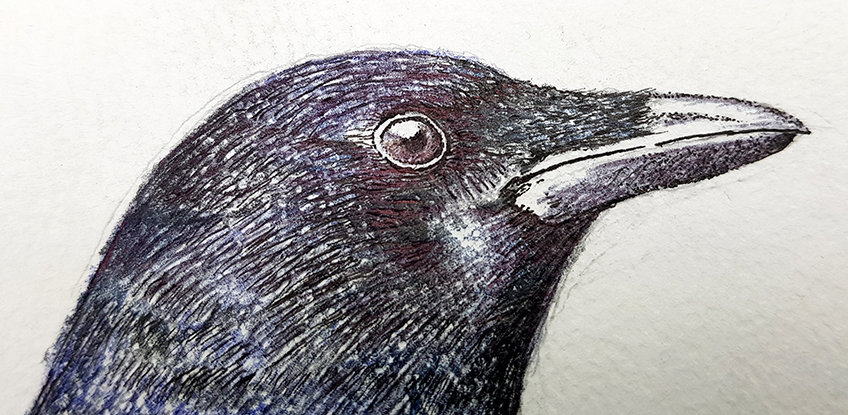
We will now proceed to work mostly in the head area, which flows into the underbelly section of the crow. We want to start incorporating some base layers of color, using a light blue pencil to start to work in some color into the head area of the bird.
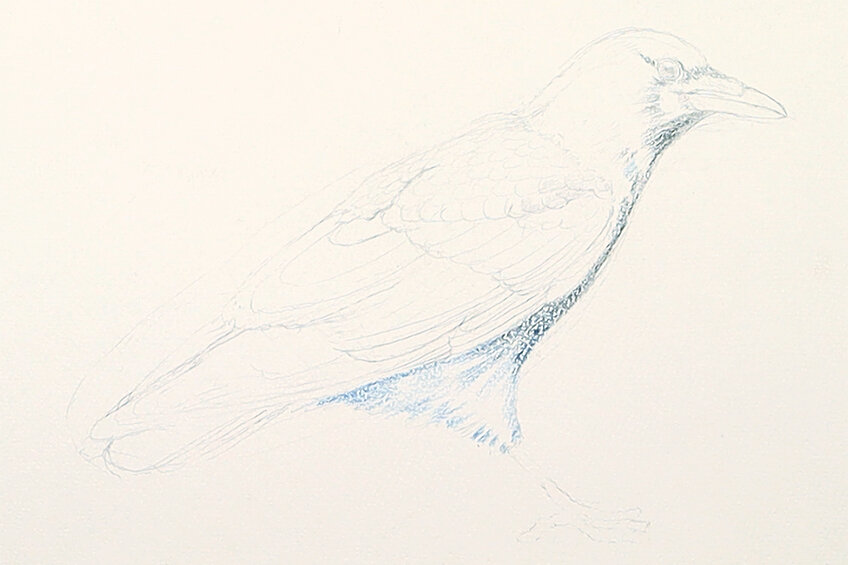
Crows have a slightly blue hue to their predominantly black coat, which becomes more prevalent in the sunlight. We want to add this light blue hue by working in the blues first which we will then go over with black pencil and black pen.

We don’t need to color the bird completely, rather we can incorporate the color through the process of adding lines. Lines also establish a particular short feather-like quality in the bird. Which is how the length of feathers normally is in the head area.
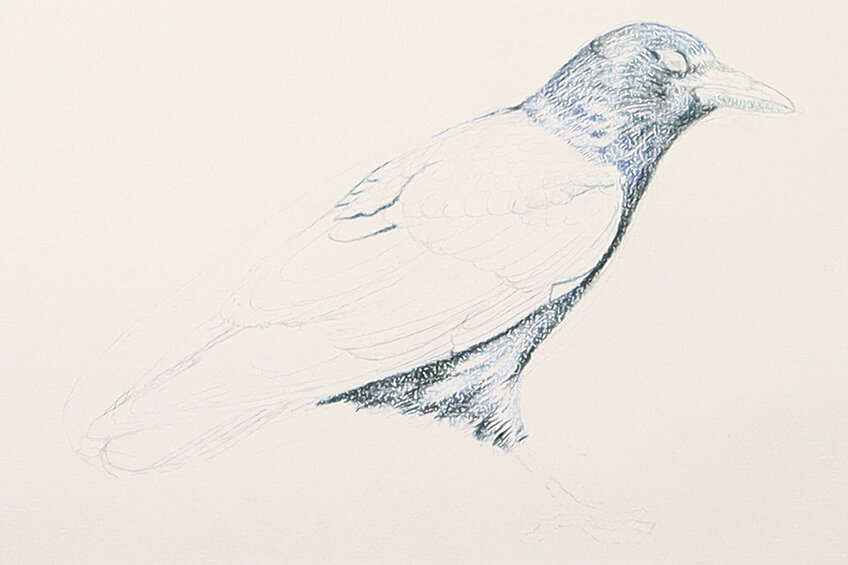
The intention will be to create variation in the tonal range, which means we want to work in lighter layers and then be strategic with how we add darker layers. We can add darker linework sparingly, making sure we try to create darker and lighter moments in the head.

We want to also start adding some shading to the eye and beak of the crow drawing. We want to make sure that there is a highlight within the eye as a reflection to suggest a more realistic surface in the eye.
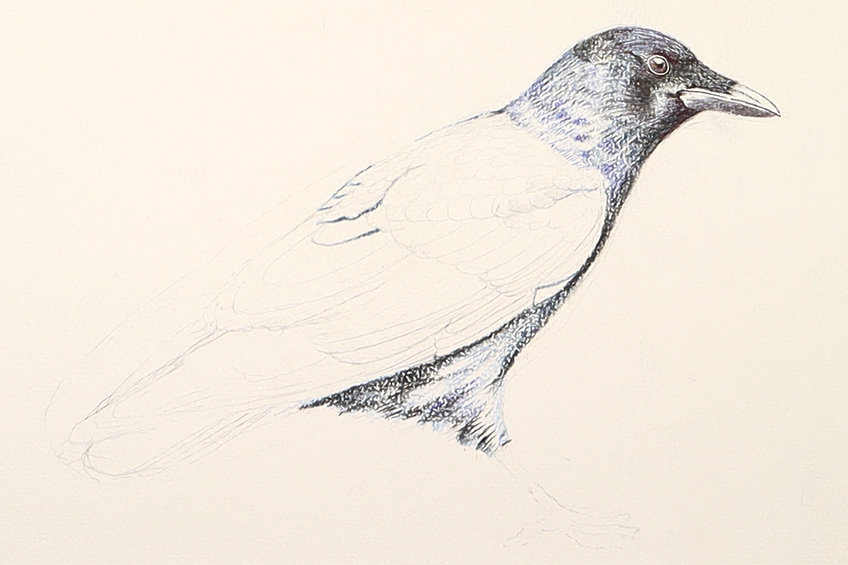
As we slowly layer in lighter colors and then darker colors, we can play around with making some areas lighter and darker. The reason we do this is to create three-dimensionality, this way the bird is not a singular color and flat looking.
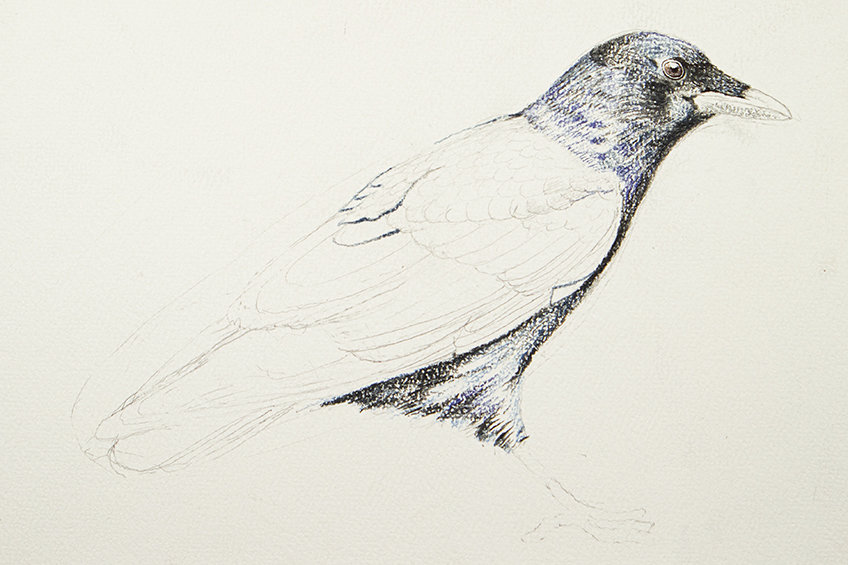
Once we start layering in linework with our pens, we will start to see how the bird becomes darker but retains that subtle blue hue that is present underneath.

Take your time with the head area, making sure you work in light and darker blues as an undertone. From there you can work in both black pencil and pen lines to emphasize the layered effect of the feathers.
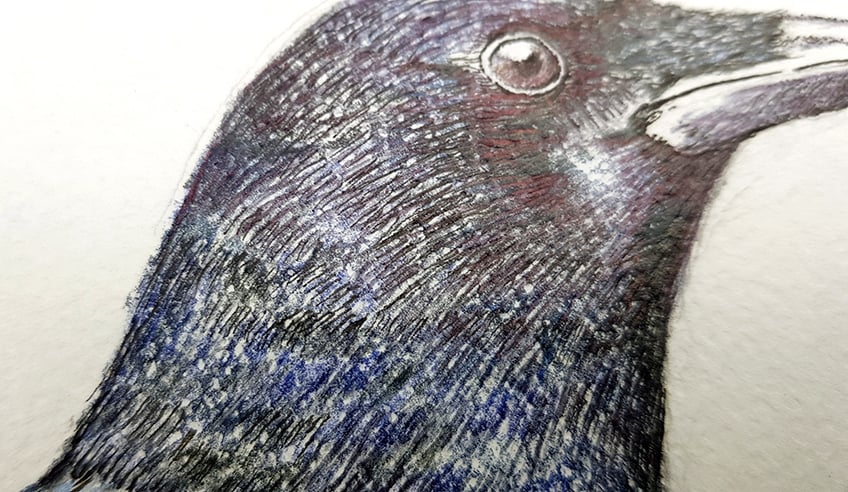
We also want to make sure we have a significant highlight in the eye, as well as make the bottom half of the beak darker. The bottom half of the beak tends to always be darker due to overshadowing.
Step 3: Adding Color to the Upper Feathers in the Wings
To keep color consistency, we now want to use the same light blue pencil and color in the wings area to set a base of blue. From here we will proceed in the same way, where we build layers on top of one another, from lighter colors to darker colors.
We can also darken the feathers in the leg area of the crow, as this is normally a dark feature due to the overshadowing of the wings that are placed on top of the bird’s body.
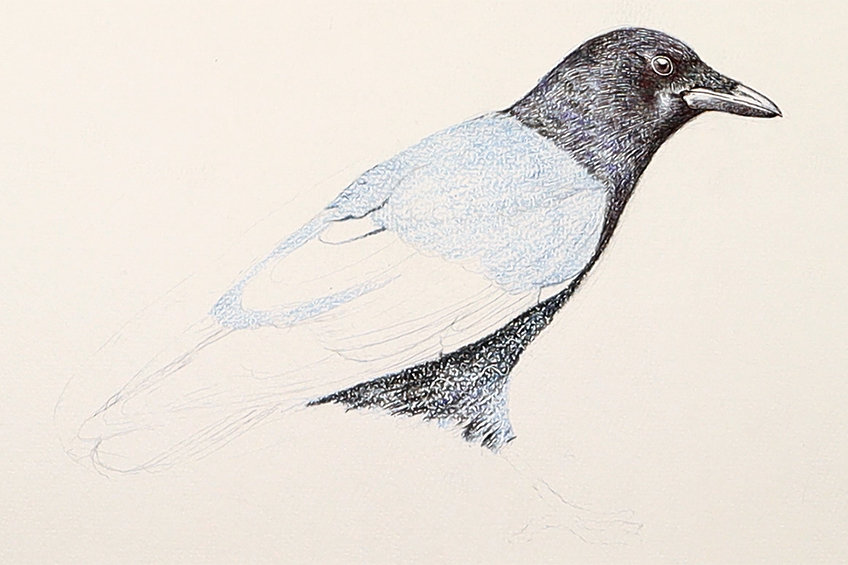
Using a darker blue pencil start to draw in the feather details again, starting from the top and working through to the bottom features of the crow drawing. Use your pencil sketching to assist you in adding colored details.
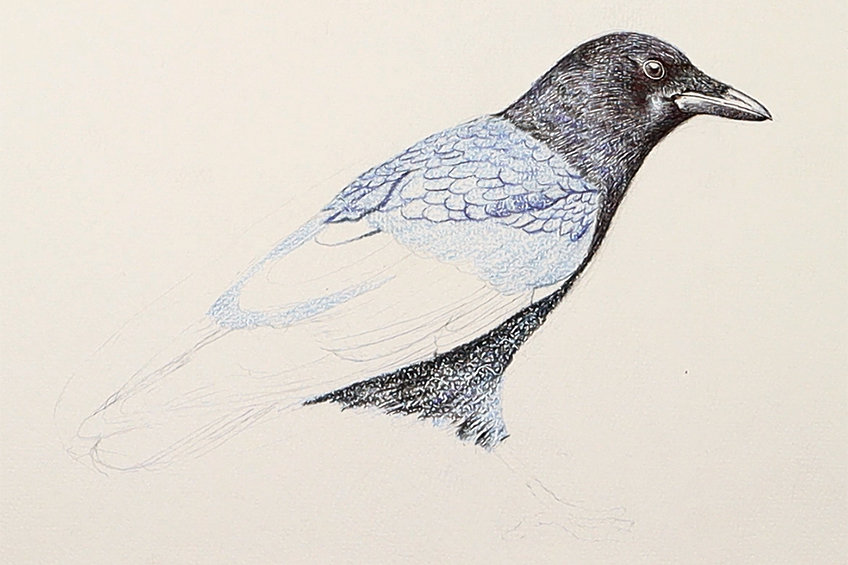
We will want to start incorporating dark blue shading into the feathers to start bringing some dimension into the wings.
Step 4: Adding Shading to the Upper Feathers in the Wings
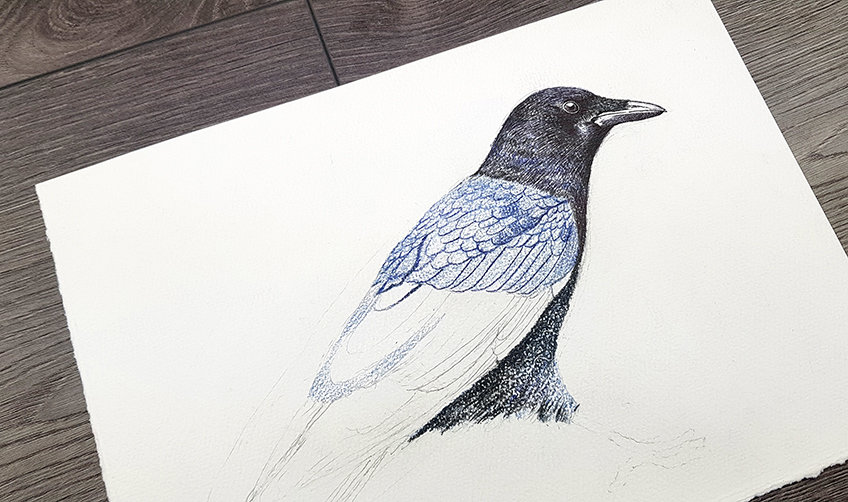
Now that we have set a base layer of blue in the upper feathers of the wing, we can proceed to do the same as we did for the head, where we work in darker blues and black pen shading. The intention here is to be cautious with our pen marks.
We also don’t want to overpower the color in the wings, but rather, we want to emphasize the shadows and form of the feathers. We can lightly shade in between feathers to bring more structure to the different segments in the feathers.
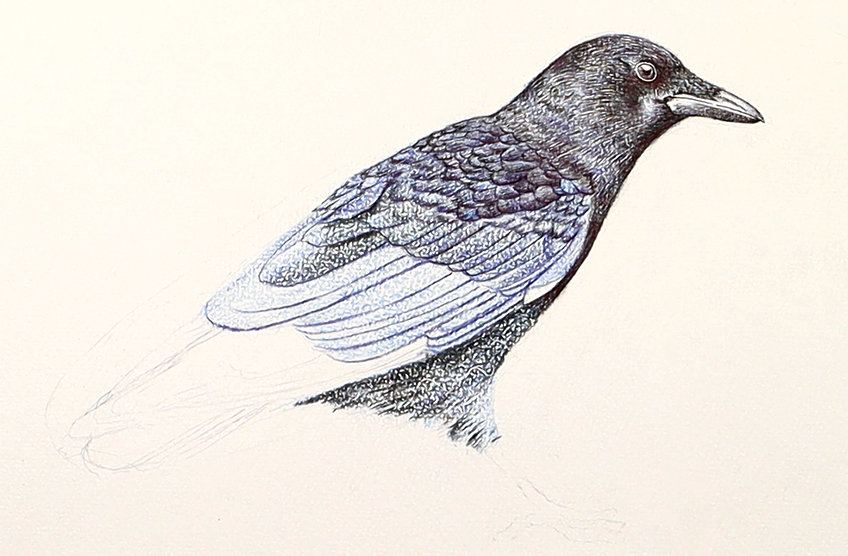
Try to incorporate pen shading mostly on the same of each segment of feathers, this way we keep shadowing mostly to one side. This gives a more realistic effect on the structure of the feathers.
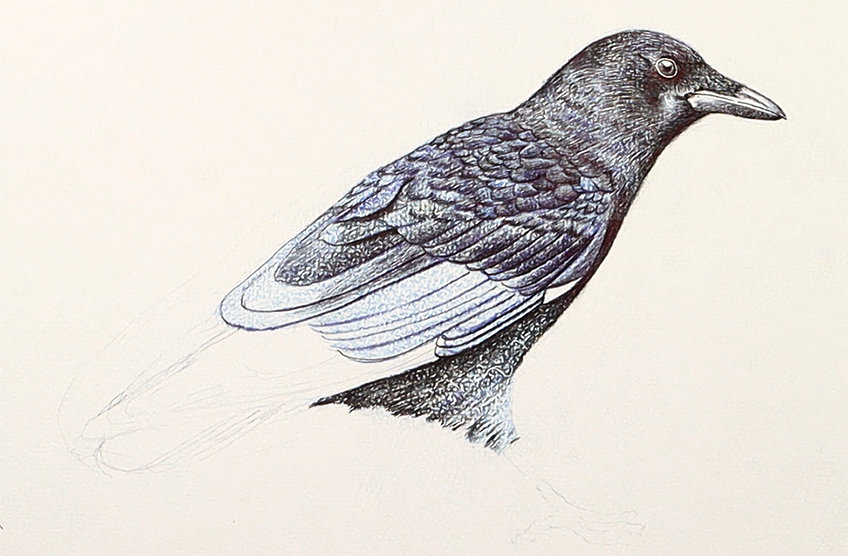
We want to make sure we take our time with each segment of feathers, slowly adding some blue shading and then going over that shading with some pen lines. Try to work on the upper feathers before moving to the lower section of the feathers.

Once you have established all the layers you can then start darkening areas of the wings as you choose. We can do this if we feel that the bird should be a little darker and less blue, we want to make sure that the bird is not too blue but only has a slight hue of blue.
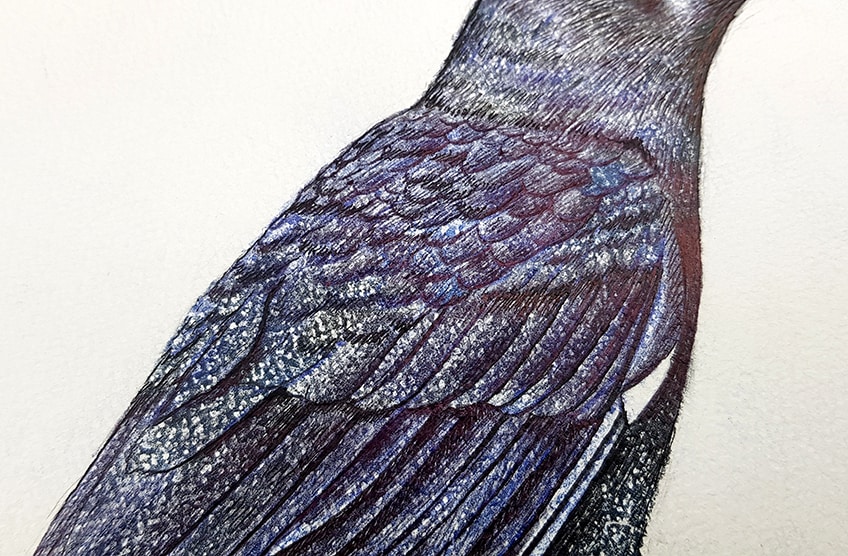
It’s good to slightly layer more pen shading over the wings once you have completed layers of color, this way you can manage how dark you would like the bird to be with dark layers of black shading.
Step 5: Adding Color and Shading to the Lower Wing Feathers
Now that we understand the basic process of filling in the wings with blue coloration as a first set of layers and then shading over that layer, we can then proceed to do so in the feathers at the lower section of the wings.
Again, try to work with different blues, both lighter and darker, and work in the blue as a base layer. You want to make sure you build up from lighter blues to darker blues, which you then can shade over with your pens.
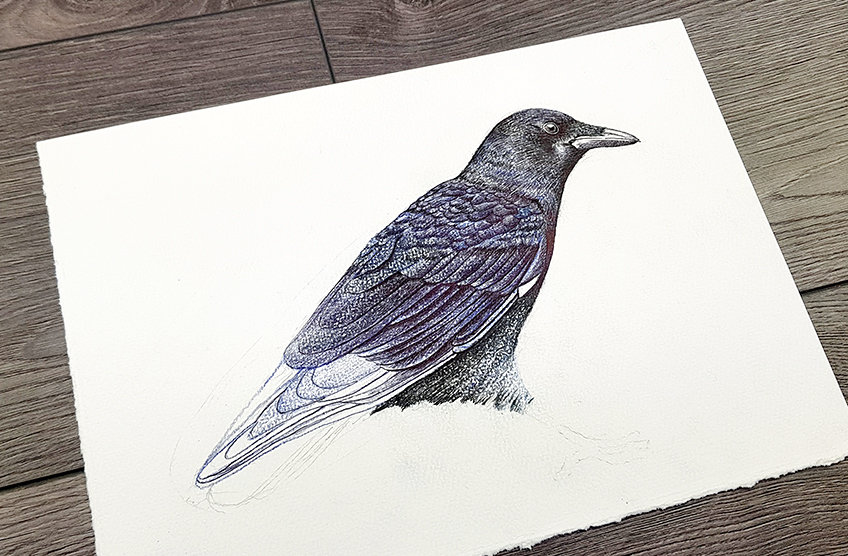
Try to consider the incorporation of darker pen shading and how it can emphasize shadows without overpowering the blue hues. We want to slowly work in pen shading, this way we can stop without making it too dark.
We want to make sure we work on adding these layers into the lower feathers that create a tail-like feature in the bottom wing section. Again, take your time with coloring in the different feathers.
Take your time and if you feel yourself feeling fatigued remember to take a break. Make sure that you are not making all segments the same, we can give them different tonal values with blue colors.
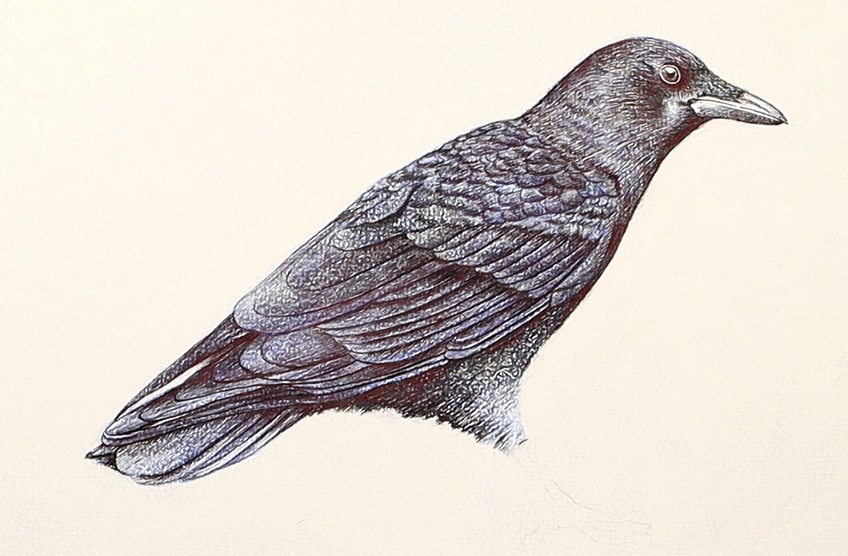
We also want to think about how feathers sit on top of other feathers and how this will create shadows on the feathers beneath them.
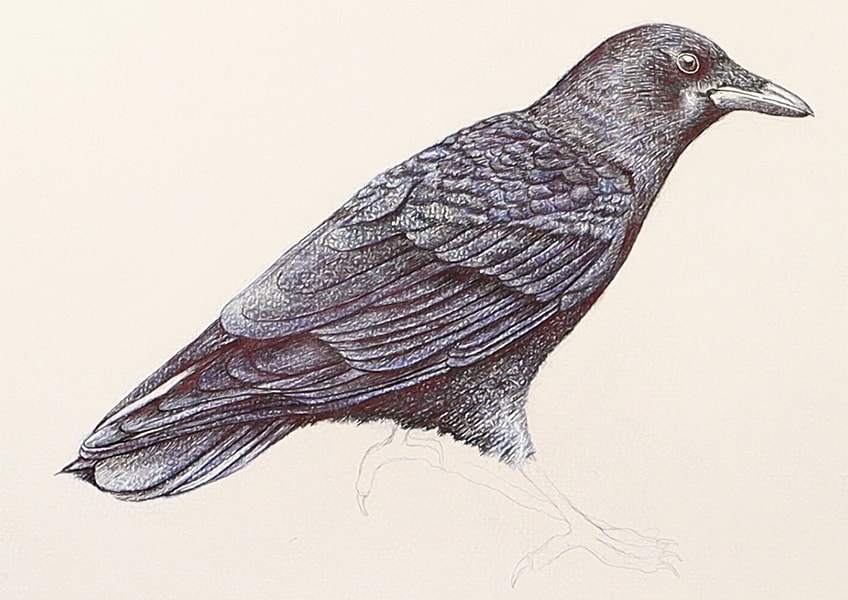
As we have colored and shaded the different areas of the wings, we can then slowly darken areas in the wings that might need more shading. You can slightly darken the entire wing area so that the blues are slight and faint.
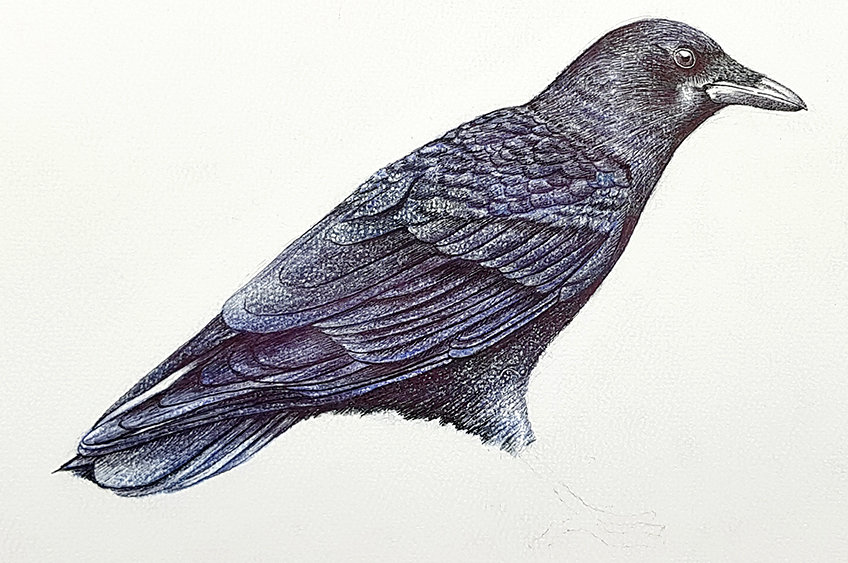
Step 6: Contextualizing the Crow Drawing
Once we have drawn the entire body, we then can contextualize the crow drawing by adding in the legs and feet. The logs are quite simple as they resemble a stick lick structure with four digits at the end.
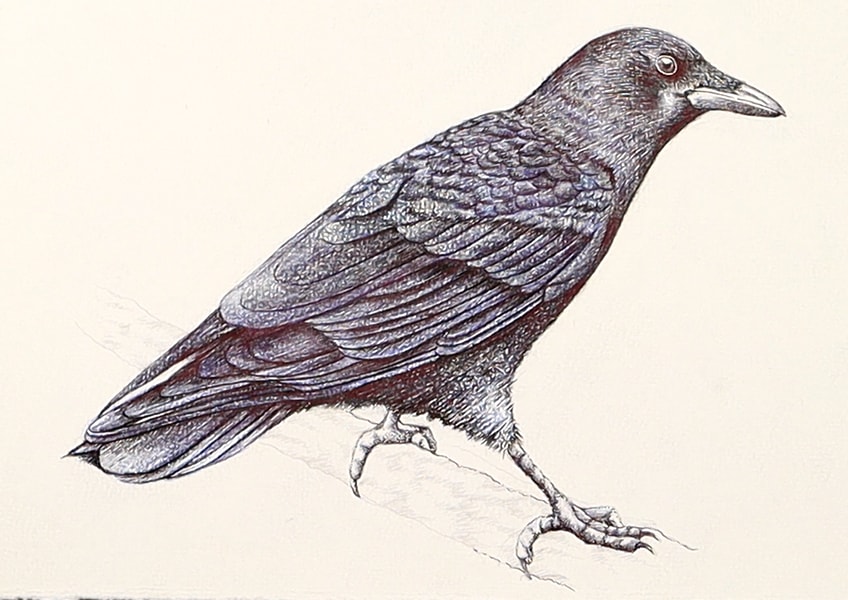
You can play around with how you draw in the digits on the feet as all four might not be visible depending on the perspective you are drawing the bird from.
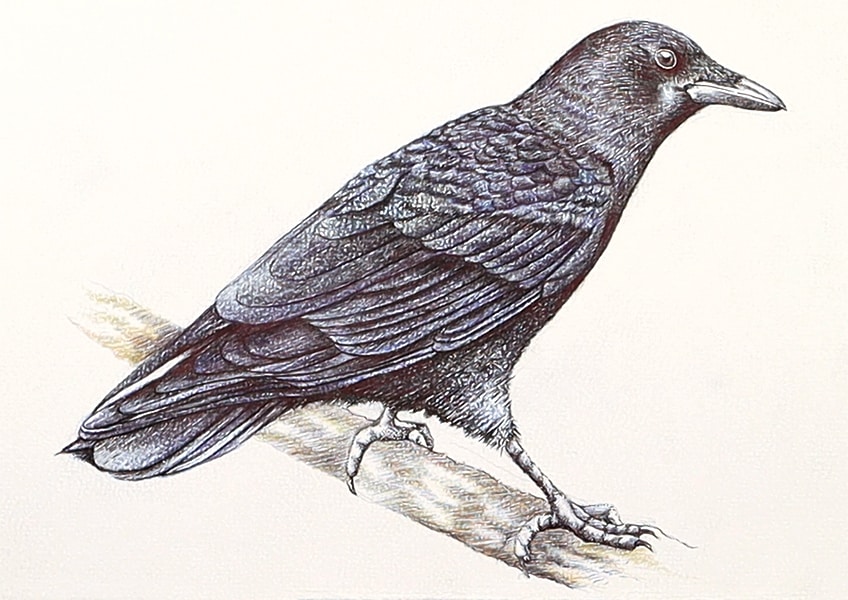
We can also draw in a branch to give some sort of environment in which the bird will be placed. You can draw in a branch as a good suggestion, following the same process of building the drawing up through layers of color and then shading.

Take your time with the feet and the Contextualizing environment and once you have completed this you should be done. And there you have it! An easy crow drawing, established through a few simple steps.
Tips to Remember
- Take time on the sketch. Once the sketch is well drawn, it will make the shading process much easier.
- Work with layering colors. In this easy crow drawing, we learn that layering colors from light to darker tones is the best way to manage your coloration in the crow drawing.
- Use linework to your advantage. The line work is a great way to create a feathery texture within the crow drawing.
- Take time with the different features. Make sure that you spend a decent amount of time on each section of the crow drawing before moving to the next.
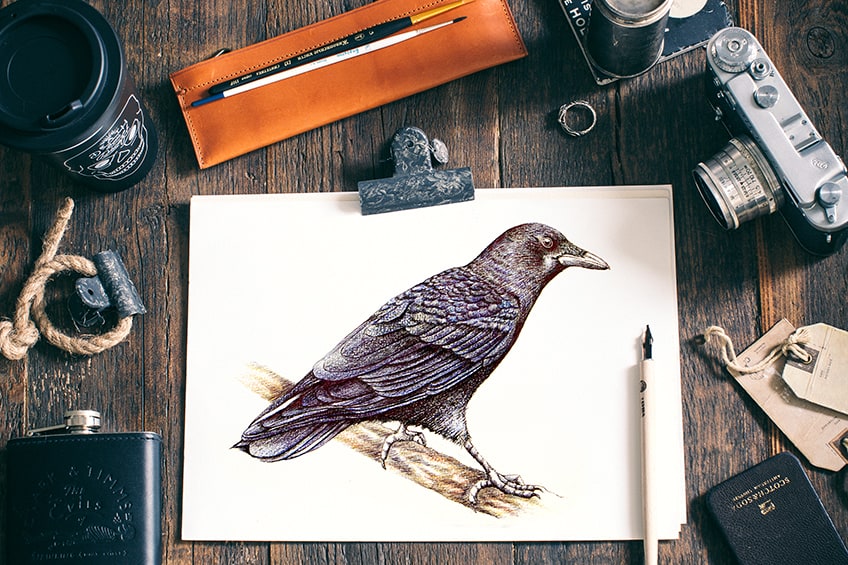
There are so many ways to draw a crow and, in most cases, they are often drawn black without the subtle detailing of blue hues. This tutorial on how to draw a crow provides you with the skill set to draw a crow effectively, but also to work with color and shading in a unique way. Learning how to layer with color and shading is a skill that can be used in various ways and not just in a drawing of a crow.
Frequently Asked Questions
How Do You Color a Crow Drawing?
In this tutorial, we break down the process of layering colors to give the crow drawing a more nuanced and unique aesthetic. Crows are actually not entirely black, and learning how to capture the blue coloration is a great way to create something different. We do this by coloring the crow with lighter blues to establish blue undertones, which we then can layer strategically with darker blues. We try to be intentional about how and where we shade the crow drawing with darker blues. Creating a variety of tonal values is always the best way to emphasize dimension within the bird’s feathery exterior. Having a variety of blues will also enhance any pen shading that is then added later on top of the colored layers. This is the best way to color in a crow drawing because you can effectively manage how dark you want the bird to be.
How Do You Draw the Beak of a Crow?
Crow beaks are quite spearheaded and point out of the face, near the eye of the crow. The crow’s eye is generally in line with the upper half of the beak and the beak has a slight downturn shape. The bottom half of the beak is also generally darker than the upper half, due to the overshadowing of the upper part of the beak. In this easy crow drawing tutorial, we look at the simple sketching process early on to establish the shape of the beak first and then refine it with more enhanced detailed sketching. From there, it is a matter of shading to further emphasize its three-dimensionality.
Matthew Matthysen is an educated multidisciplinary artist and illustrator. He successfully completed his art degree at the University of Witwatersrand in South Africa, majoring in art history and contemporary drawing. The focus of his thesis was to explore the philosophical implications of the macro and micro-universe on the human experience. Matthew uses diverse media, such as written and hands-on components, to explore various approaches that are on the border between philosophy and science.
Matthew organized various exhibitions before and during his years as a student and is still passionate about doing so today. He currently works as a freelance artist and writer in various fields. He also has a permanent position at a renowned online gallery (ArtGazette) where he produces various works on commission. As a freelance artist, he creates several series and successfully sells them to galleries and collectors. He loves to use his work and skills in various fields of interest.
Matthew has been creating drawing and painting tutorials since the relaunch in 2020. Through his involvement with artincontext.org, he has been able to deepen his knowledge of various painting mediums. For example, watercolor techniques, calligraphy and lately digital drawing, which is becoming more and more popular.
Learn more about Matthew Matthysen and the Art in Context Team.
Cite this Article
Matthew, Matthysen, “How to Draw a Crow – Tips from the Artist about Drawing a Crow.” Art in Context. March 22, 2023. URL: https://artincontext.org/how-to-draw-a-crow/
Matthysen, M. (2023, 22 March). How to Draw a Crow – Tips from the Artist about Drawing a Crow. Art in Context. https://artincontext.org/how-to-draw-a-crow/
Matthysen, Matthew. “How to Draw a Crow – Tips from the Artist about Drawing a Crow.” Art in Context, March 22, 2023. https://artincontext.org/how-to-draw-a-crow/.


