How to Draw a Caterpillar – In-Depth Tutorial
Learning how to draw a caterpillar is such a fun activity because caterpillars are very abstract looking. Caterpillar drawings are quite easy to turn into realistic drawings because of their strange aesthetic. The basic structure of a caterpillar is bizarre and once we understand the eruciform-like structure we can play around with how we add details to the insect. Caterpillars are such beautiful creatures and make for great artwork. These little insects are a very versatile subject and can be a beautiful addition to various artworks. Learning how to draw a caterpillar is also a great way to develop your pattern drawing skills as well as symmetry and consistency within a drawing.
Step-by-Step Instructions on How to Draw a Caterpillar
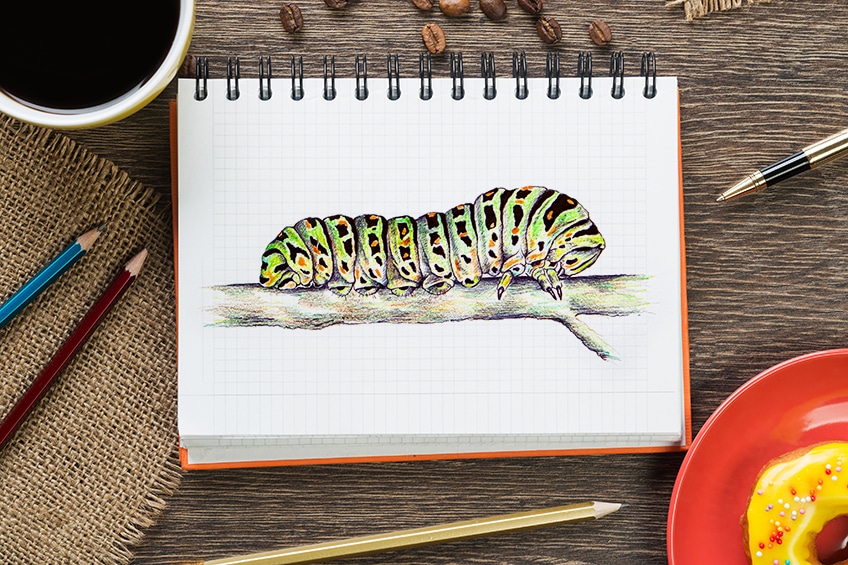
In this tutorial on how to draw a caterpillar, we will start by sketching out the caterpillar, where we focus on creating the different segments. These segments in the caterpillar make up the abdomen, thorax, and head of the caterpillar. From there, we will work with adding in some shapes to indicate where the colors will be placed within each segment of the caterpillar.
After, we will proceed to add color to our caterpillar drawing, using the color scheme of the black swallowtail caterpillar.
Then, lastly, we will add some pen work to give the caterpillar a little more contrast and shading to emphasize the form and dimensions of the caterpillar. Now that we know what to expect, let us get into this tutorial on how to draw a caterpillar.
Step 1: Sketching the Caterpillar
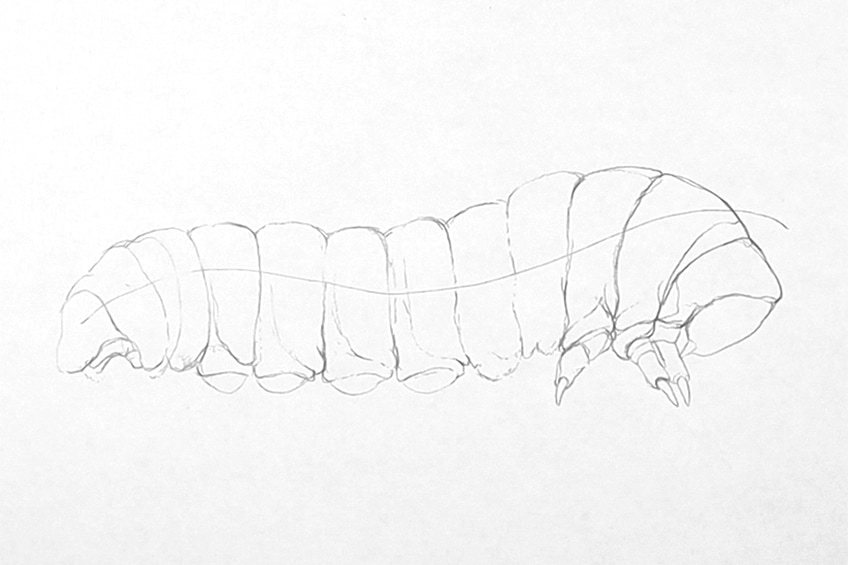
We start by drawing a curved line on our page with our HB pencils to determine the length and scale of our caterpillar drawing.
We want to give our line a wave-like motion with two arches in it, which will guide the flow of the caterpillar drawing.


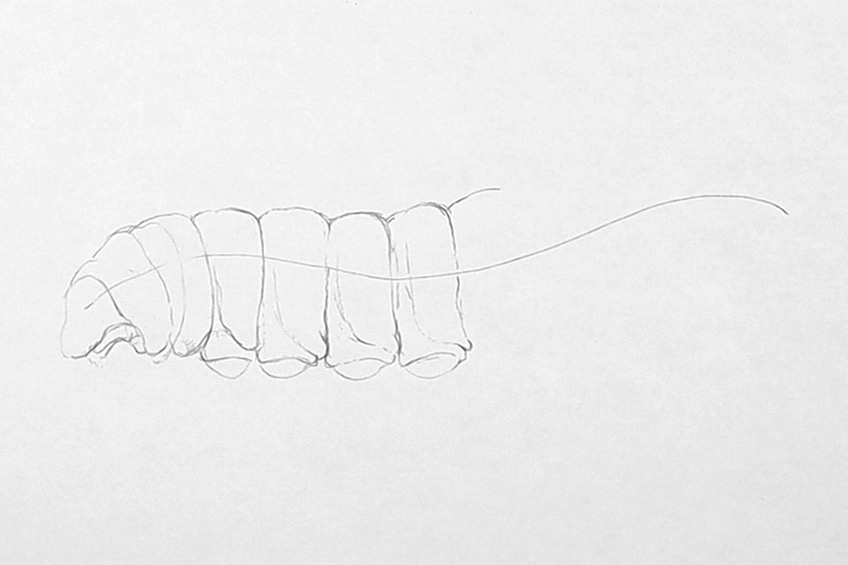
These are half-moon shapes that fall under the fourth, fifth, sixth, seventh, and eighth segments in the abdomen.
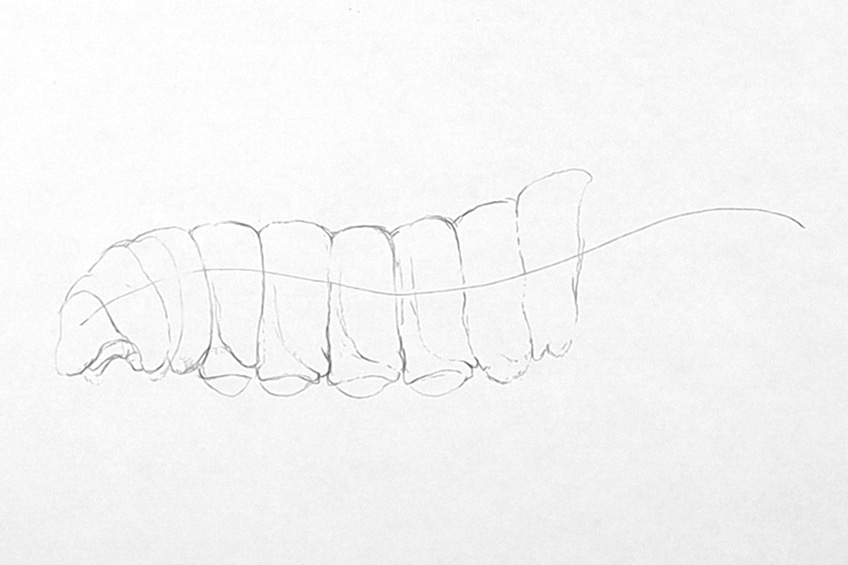


The head will poke out slightly like a half-moon shape as if it were curled up in the last segment and you could only slightly see it.
Step 2: Adding Black Swallowtail Patterns to Our Caterpillar Sketch
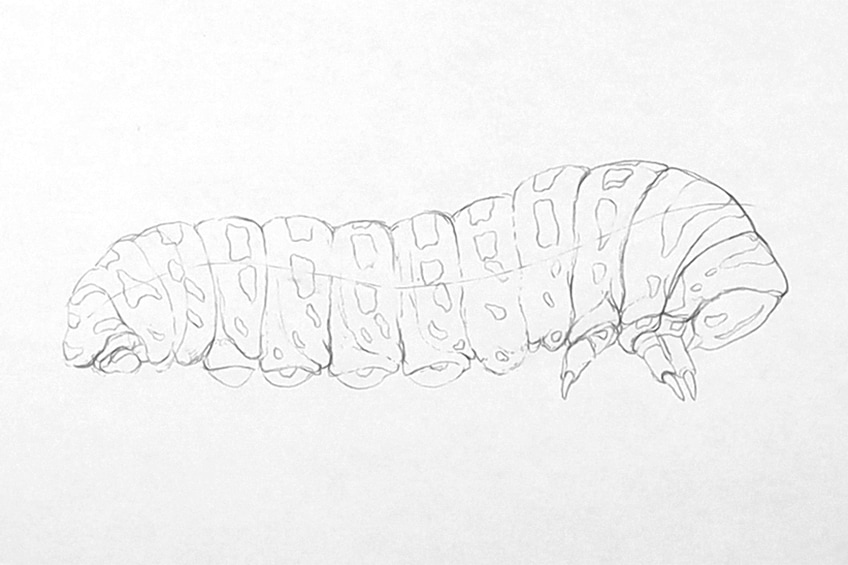
We will now proceed to add some stripes and shapes into the different segments of the caterpillar drawing, which establish the unique look of the black swallowtail caterpillar.
Beginning from the head we want to add blob-like shapes to the different sections of the caterpillar.
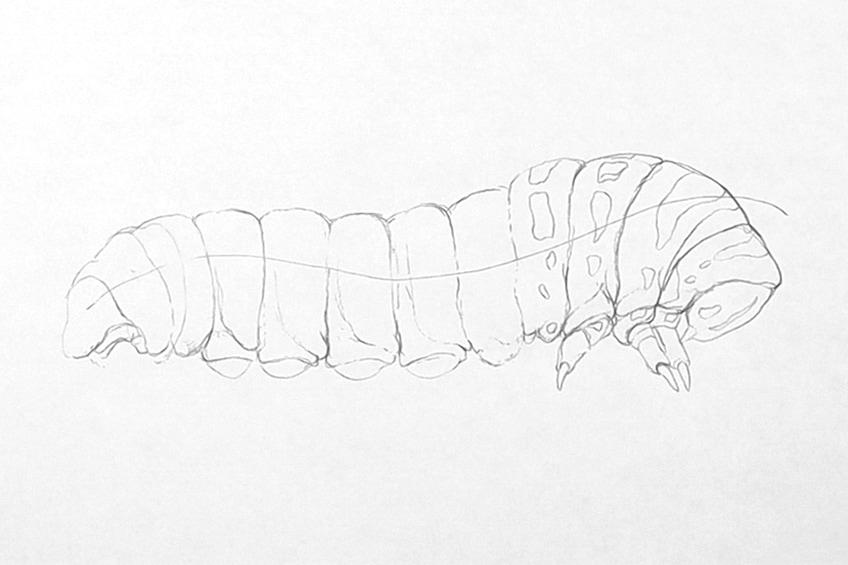
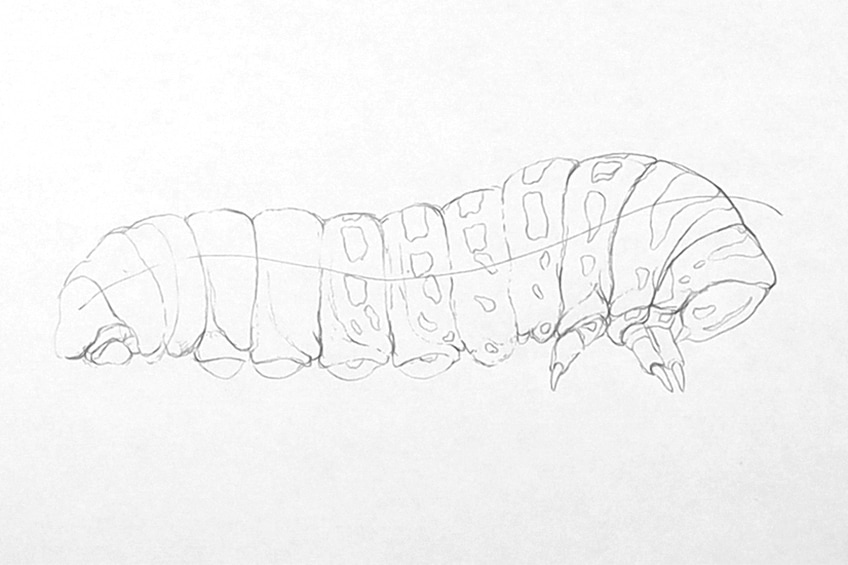
This is so that the patterns flow and form within each segment as naturally as possible.
Step 3: Adding Color to the Caterpillar
We want to spend a good portion of time adding color to our caterpillar drawing. Let us take a yellow pencil and proceed to add yellow to the bottom of each segment within the caterpillar.
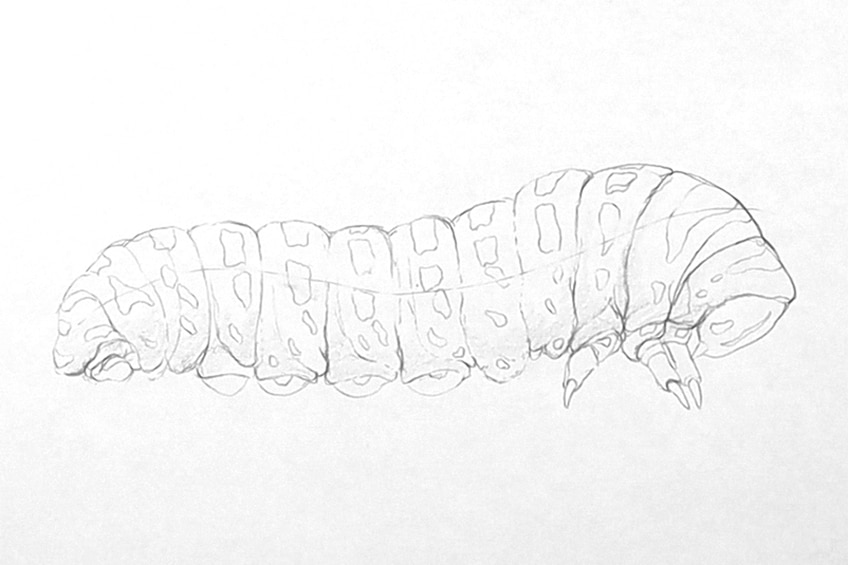
This will give the caterpillar slight transparency near the bottom of its abdomen area.
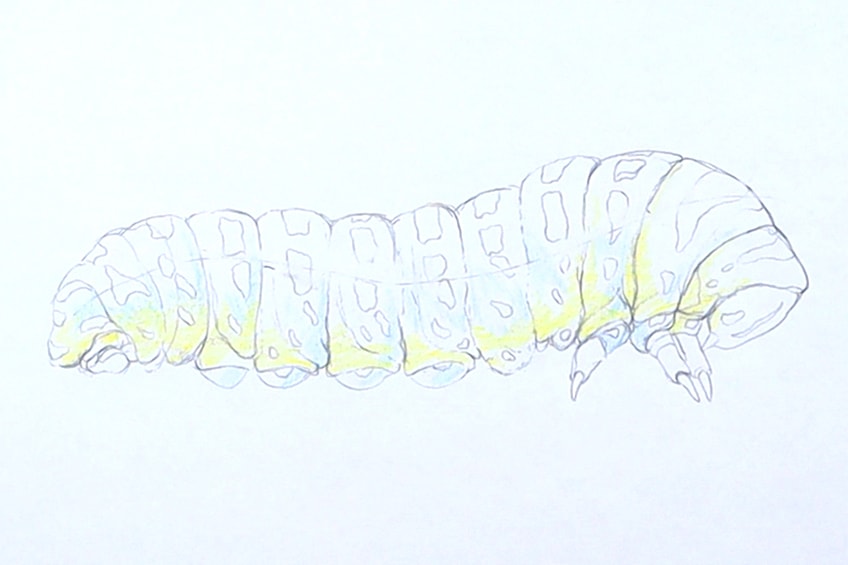

This allows the green to blend into the yellow.
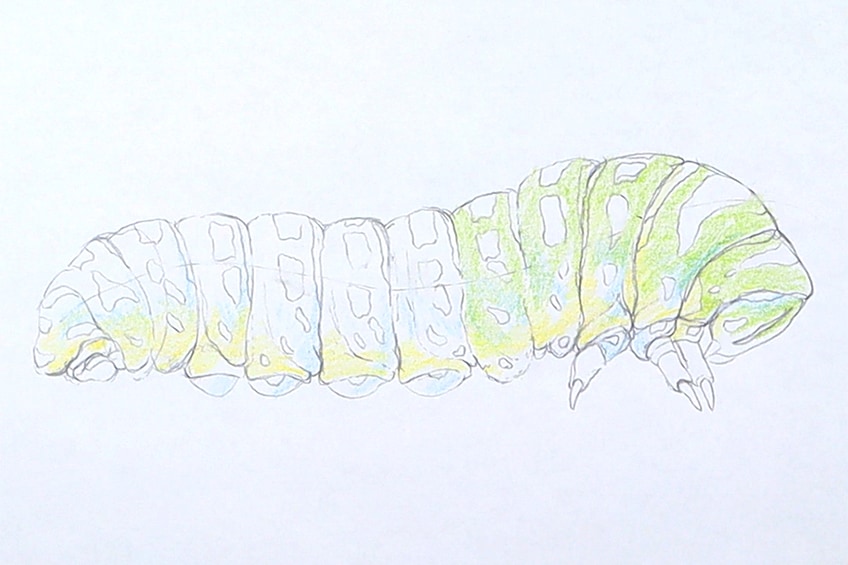

The coloring process is additive, which means we added in the light colors first and are now going over them with darker colors.


Step 4: Adding Shading and Color to the Caterpillar’s Patterns
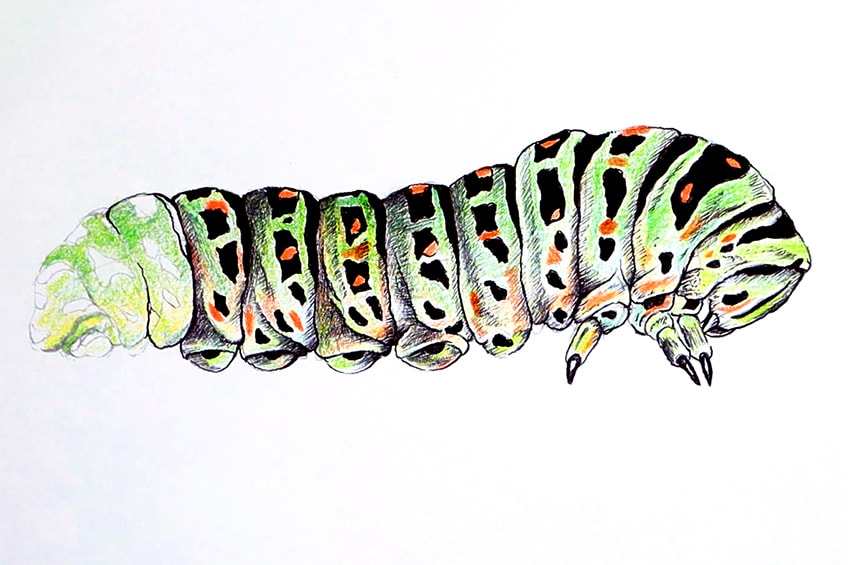
Starting from the head area, we want to work our way through the caterpillar, slowly adding black to the patterns in each segment.
We want to use a marker or brush pen to do so and should approach each section with caution.

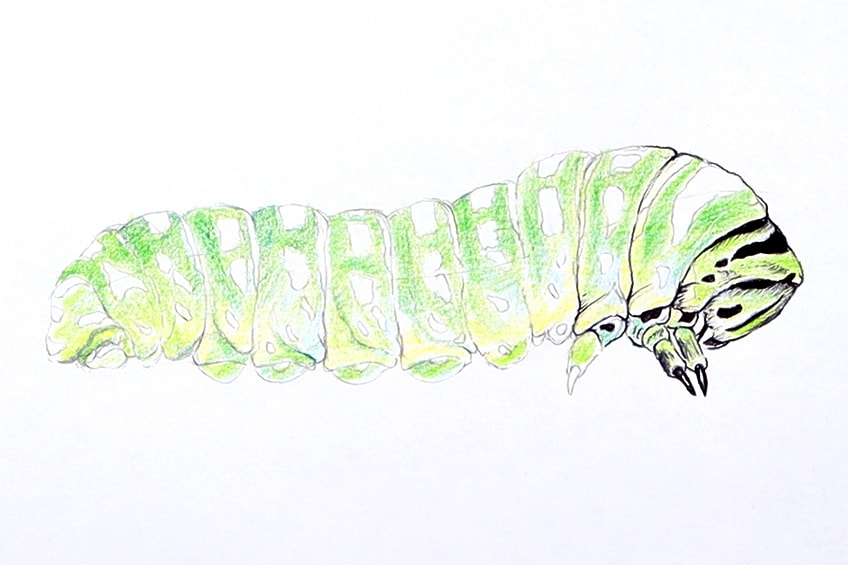
However, when shading with a pen, we want to add some shadow along each divisional line between each segment.
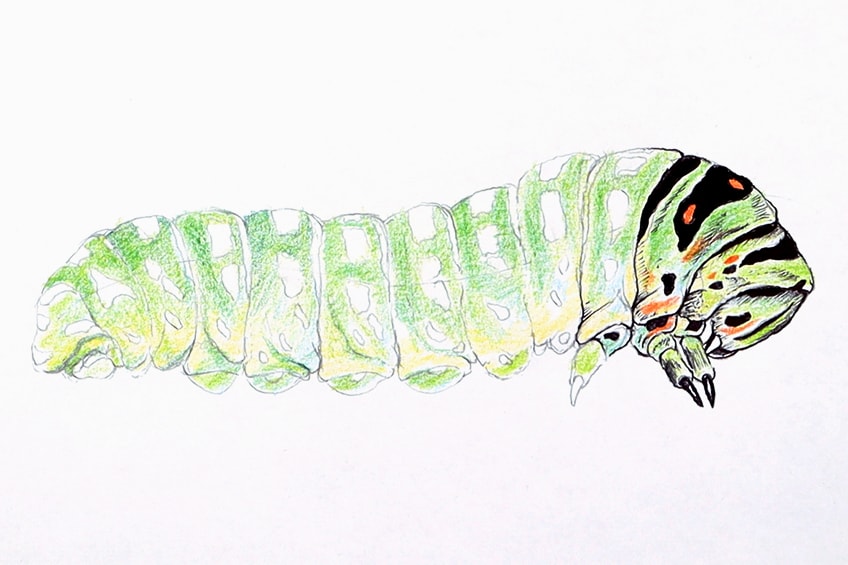

The patterns look similar but are all subtly different within the black swallowtail caterpillar.
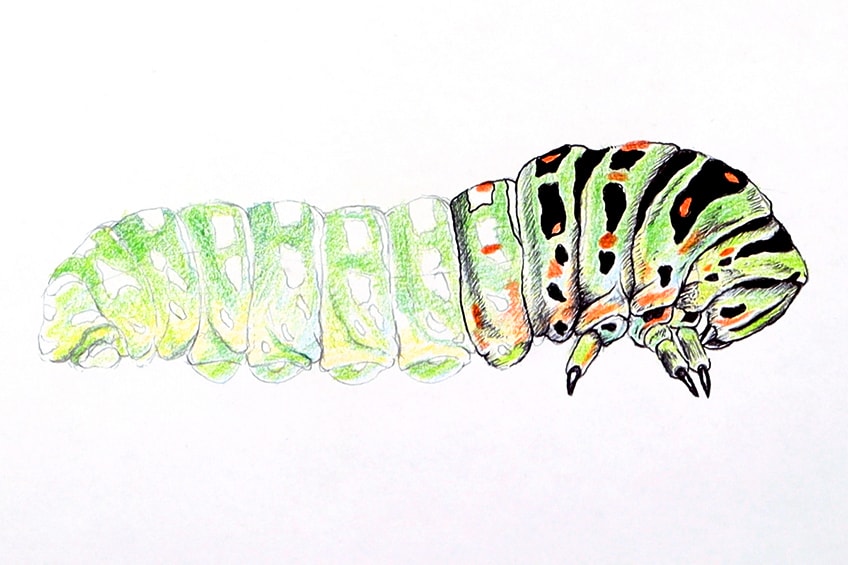
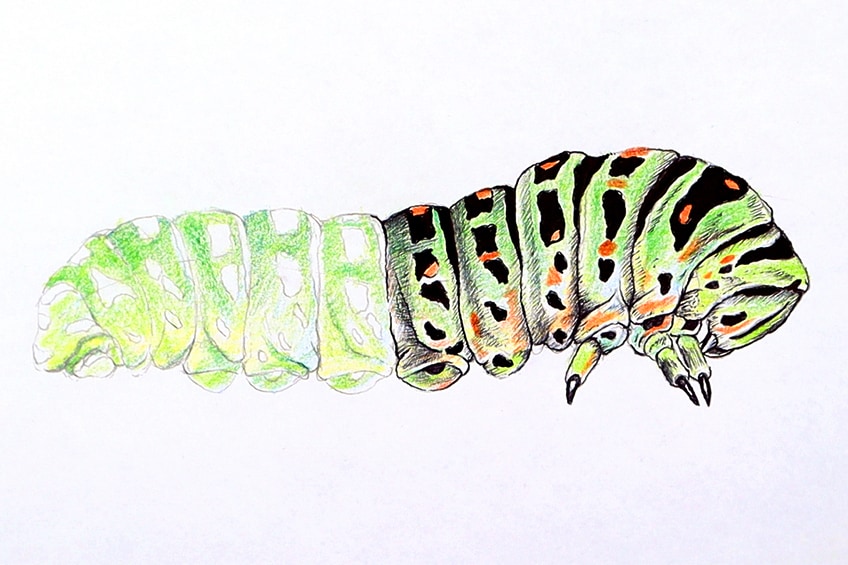
Some of the segments will layer over the legs and we want to define this quality with our shading.
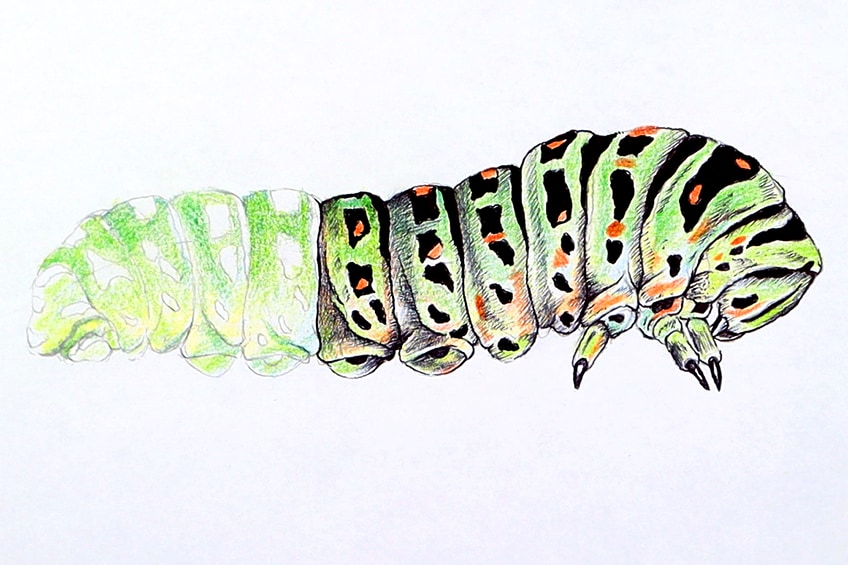
This way, you can come back feeling a little more refreshed.
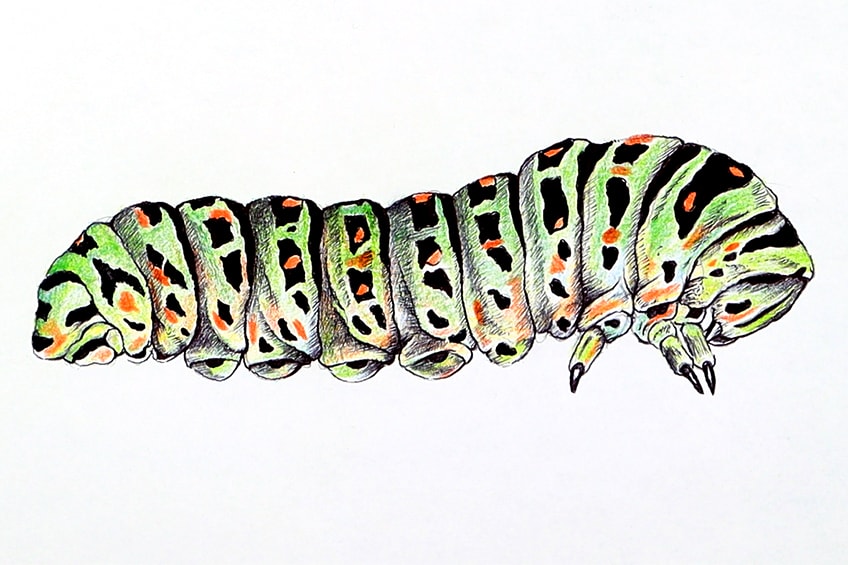

By doing this, we give the caterpillar a little more of a realistic aesthetic.
Step 5: Contextualizing the Caterpillar by Drawing a Branch
Now we want to give the caterpillar a little more context so that it does not exist within a void. We can do this by drawing a branch.
Using your HB pencil, let us proceed to draw a branch shape that falls underneath the caterpillar.


We will then go over this with some darker colored pencils.

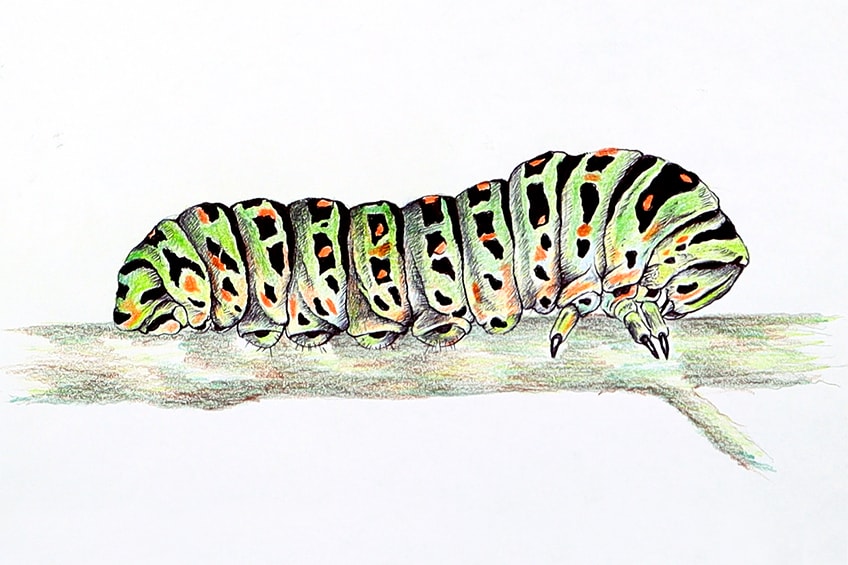
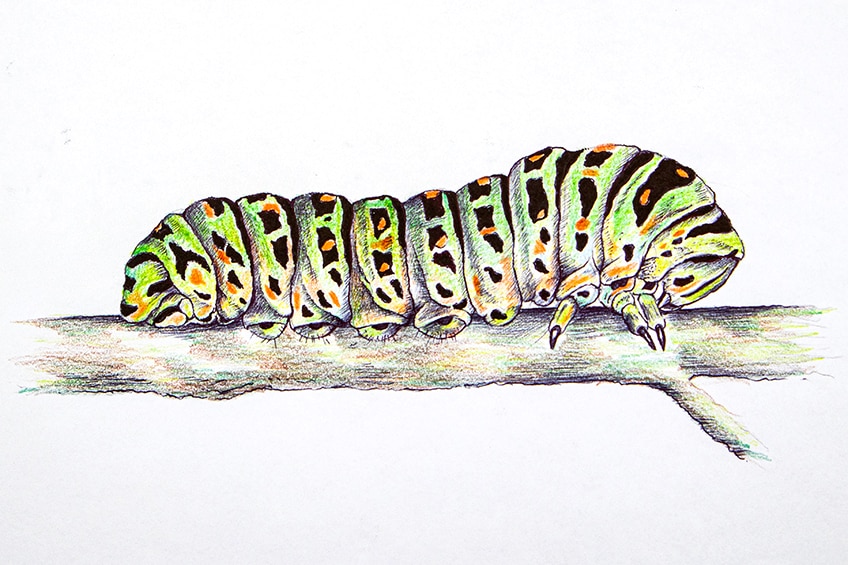
And there you have it, instructions on how to draw a caterpillar in a few simple steps!
Tips to Remember
- Capture the caterpillar sketch in pencil first. It’s always better to capture the caterpillar sketch before moving on to using a pen or colored pencils.
- Use a reference image. This tutorial teaches you how to create a caterpillar drawing without a reference image, but often one can be of great assistance in the drawing process.
- Take your time. We want to make sure we go through each step slowly and patiently.
- Consider light and shadow. We want to make sure that we are consistent with the placement of shadows within the caterpillar drawing.
- Go slowly with the pen. Drawing in pen, it is easy to make a mistake, so take it slow and be cautious when making marks.
Learning how to draw a realistic caterpillar is a great way to practice pattern design and color combinations. Caterpillar drawings provide the artist with the opportunity to explore color palettes and how they can be used effectively. This tutorial breaks down the easy caterpillar drawing process that helps you to establish the form and structure within a simple caterpillar sketch. From there, the process of adding color and working with a ballpoint pen is a matter of patience and correct placement of shading and details.
Frequently Asked Questions
How Do You Color a Caterpillar?
Caterpillars can be colored in various ways due to the range of species being very broad. This provides the artist with a great opportunity to explore color combinations and how to place them within the caterpillar drawing. Caterpillars also have unique patterns on their eruciform bodies, which are often consistent from head to bottom. This is another opportunity to be intentional about how the colors are placed within the caterpillar’s body so that the color sequences remain consistent. This is also a good way to make your caterpillar drawing seem more realistic, as symmetry and consistency are often common features within the body structure of caterpillars.
How Do You Draw the Caterpillar Shape?
The caterpillar, like any other insect, has three main sections: a head, a thorax, and an abdomen. However, these three sections can be considered homogenous within the body of the caterpillar and are not easily identifiable because of their worm-like body. If you look at an image of a caterpillar closely, you will find that the head is quite small and tucked in one of the segments of the thorax, almost as if it were wearing a hoodie. The abdomen’s segments are about nine of them, including the thorax. These segments are generally the same in size near the middle of the caterpillar but get smaller near the back end of the caterpillar. The segments also get slightly larger near the front of the caterpillar near the head, where the head is usually smaller and tucked into the thorax. In addition to this, the caterpillar has little circular-shaped legs that fall in the middle of the abdomen area.
Matthew Matthysen is an educated multidisciplinary artist and illustrator. He successfully completed his art degree at the University of Witwatersrand in South Africa, majoring in art history and contemporary drawing. The focus of his thesis was to explore the philosophical implications of the macro and micro-universe on the human experience. Matthew uses diverse media, such as written and hands-on components, to explore various approaches that are on the border between philosophy and science.
Matthew organized various exhibitions before and during his years as a student and is still passionate about doing so today. He currently works as a freelance artist and writer in various fields. He also has a permanent position at a renowned online gallery (ArtGazette) where he produces various works on commission. As a freelance artist, he creates several series and successfully sells them to galleries and collectors. He loves to use his work and skills in various fields of interest.
Matthew has been creating drawing and painting tutorials since the relaunch in 2020. Through his involvement with artincontext.org, he has been able to deepen his knowledge of various painting mediums. For example, watercolor techniques, calligraphy and lately digital drawing, which is becoming more and more popular.
Learn more about Matthew Matthysen and the Art in Context Team.
Cite this Article
Matthew, Matthysen, “How to Draw a Caterpillar – In-Depth Tutorial.” Art in Context. August 5, 2022. URL: https://artincontext.org/how-to-draw-a-caterpillar/
Matthysen, M. (2022, 5 August). How to Draw a Caterpillar – In-Depth Tutorial. Art in Context. https://artincontext.org/how-to-draw-a-caterpillar/
Matthysen, Matthew. “How to Draw a Caterpillar – In-Depth Tutorial.” Art in Context, August 5, 2022. https://artincontext.org/how-to-draw-a-caterpillar/.


