Stippling Art – Creating Designs and Patterns With Small Dots
You may have heard of the term “stippling”, but you may not know what it stands for or what it means. In this article, we will be explaining what stippling art is and how you can be a part of it. In short, stippling art is a drawing technique that creates images and shapes on paper by making small dots close together, just like creating real-life pixels. Stippling art is fun and can be done by anyone, but it will take time and patience. We will now be guiding you through the process of how to stipple, and within no time at all, you will be creating your own stippling drawings!
What Is Stippling in Art?
The term “stippling” is derived from the Dutch word “stippelen”, meaning small dots. Stippling is a drawing technique that involves using small dots, enabling the artist to create very interesting patterns, textures, and images, and can be done using different mediums like ink, pencil, pen, and even in digital format.
It is usually done using a single color, with black and white being used the most.

With stippling art, you can create highlights and shadows. When the dots are further apart, it creates highlights, or when closer together, it creates shadows. This will form contours of a particular shape and give the image realism and depth, and arranging the dots in this manner will represent a complete art piece by only using small dots.
Brief History of Stippling
The stippling process was first invented by an Italian engraver and painter Giulio Campagnola in 1510. He was an engraving artist that used stippling as an art technique to improve variations of tone. During this time in history, engraving was done by hatching, or cross-hatching, which is an art technique by drawing parallel lines closely spaced together, which would create a stippling shading and tone effect. Campagnola concluded that by engraving small dots instead of parallel lines, he could create a smoother transition of shading and tone. This new method led to important advances in printmaking, allowing the relocation of photographs into newspaper impressions.
In the 17th century, an English mezzotint engraver, Isaac Beckett, created a shading effect that he used on 184 portrait engravings. Today, many artists use this technique by using mediums like mechanical pencils or ink pigment liners.
Since 2017 stippling has increased dramatically in the tattoo business, where the technique is a style that is practiced by the artist and preferred by the clients. Stippling in tattooing was found mainly in mandalas, and geometric, spiritual, or religious tattoos, but can be applied to almost any type of design or pattern. The stippling technique is also used in scientific illustrations, where it allows the illustrator to signify, or symbolize, texture and grayscales simultaneously.

It is also extensively used in biology and archeology and has evolved to be able to emulate computer-generated images. In botany, stippling is used to describe different flora species, where it refers to the patterns that are found inside particular types of flower petals. These patterns are very similar to the dot patterns that artists create when using the stippling technique.
Mastering Stippling Techniques
In general terms, stippling has four main techniques that include dotting, dashing, tracing, and hatching. All four of these techniques can be applied to one art piece, or you can use them independently to create a better effect or contrast. Most artists apply one or more of these techniques in every art piece they are creating, allowing them to highlight various features or even to draw attention to different spaces of the artwork.
General Stippling Technique
Stippling is a technique that artists use to create textures, shadows, and shading. Normally artists using the stippling technique limit themselves to only one color, which is produced by making use of crayons, pastels, pencils, or pens. The plainness of only one color that is combined with the dots and patterns can produce striking images. This form of shading and texture creates the illusion that the texture or shading is solid, but by taking a closer look, you will be able to see the streaks and dots that go to make up the stippling effect.
Then, depending on what finish the artist has in mind, they will apply different stippling techniques to give the desired results.
Dotting
This is the most basic of all the stippling techniques and forms the core of this type of art form. When different amounts of pressure are applied to the paintbrush or pen, it will create dots that vary in size and thickness. If they are placed very close together, it gives the illusion of continuity. The harder the pressure applied to the tip of the pen will result in larger dots, and this technique is used by the artist on certain areas of the artwork that need to be darker. The lighter the pressure, the smaller the dots creating a gradient effect.

Dashing
Dashing is a conversion or an adaptation of the dotting technique, and by flicking the wrist the artist can create small dashes. This stippling technique is not usually used on paintings but rather for adding fine detail. Smaller dashes of the artwork can represent certain movements and are usually used when painting rocks, glass, and other forms of natural surfaces.
Tracing
Tracing is a more advanced stippling technique and is utilized to create textures on paper. To apply this technique, you need to take some textured tinsel and place it behind the paper. Then lift the paper and gently tilt it in different directions. Next, take a pastel, crayon, or brush, and lightly brush over the lifted surface, by applying light pressure you can create subtle designs, while harder pressure will create a more noticeable pattern.

Hatching
Hatching or cross-hatching is a stippling technique and can be applied separately, however, many artists combine them. The hatching technique is applied when small lines are drawn in one specific direction, which creates a stippling shading or shadow effect. Cross-hatching is applied when lines are drawn in opposite directions, which will create an illusion of depth.
Stippling vs. Pointillism
In both techniques, stippling, and pointillism, the artist makes use of a series of dots to create a specific image or texture, but they are two separate and distinct techniques. Stippling is applied with the use of ink and a pen, whereas pointillism is applied by making use of paint and a paintbrush. Stippling is also done by using only one color and keeps away from blending dots that are different colors.
Pointillism is the complete opposite, as it applies different colored dots and blends them to create the desired shade.

The pointillism technique was developed by Paul Signac and Georges Seurat in 1880 and has remained very popular amongst artists, especially some famous artists like Picasso and Van Gogh. They discovered that by evenly distributing drops of different colored paints, it could create an optical illusion that had the effect of making their paintings appear shimmering with light.
Experimenting With Stippling Styles
There are many different drawing styles that you can try, and one of those drawing styles is stippling. This is a drawing style that uses small dots that are very close together and it creates depth, texture, and shading. By varying the size and distance of the dots, you can create realistic artwork, which opens the way for unlimited patterns, shapes, and images that you can create.
Geometric Stippling: Precision and Symmetry
Geometric drawing has a large variety of possibilities that you can use to create stunning images of people, animals, and any other form or object. By using different geometric shapes, like squares, triangles, rectangles, circles, and much more, the scope is endless as everything around us is defined by geometric shapes.
With geometric shapes, you can define symmetry as a mirror image of the other half, which means that the shape you create has both sides equal, like a square.
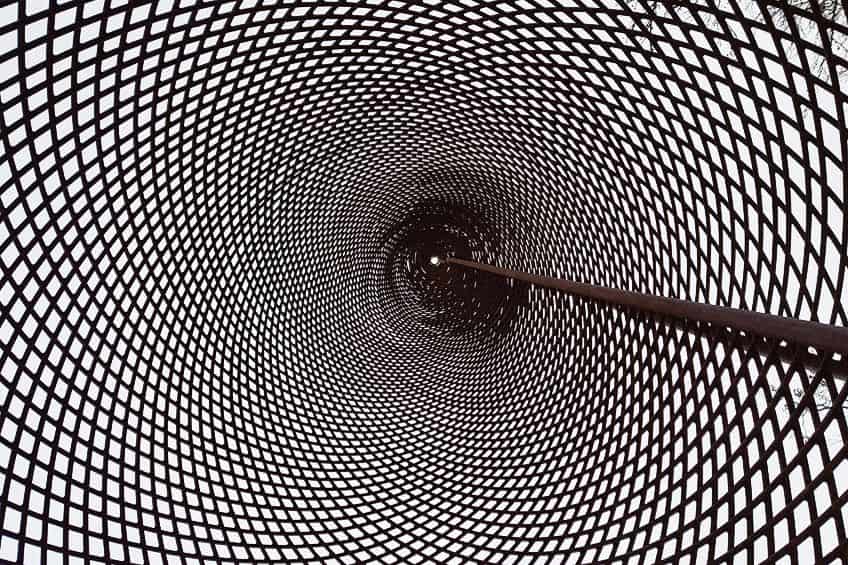
However, you can also have shapes like a rectangle that has only two symmetrical sides. The geometrical shapes you can use are all different, but you can use the symmetry of them all to create your image or pattern. Stippling is a type of linear drawing that is depicted with small dots instead of solid lines.
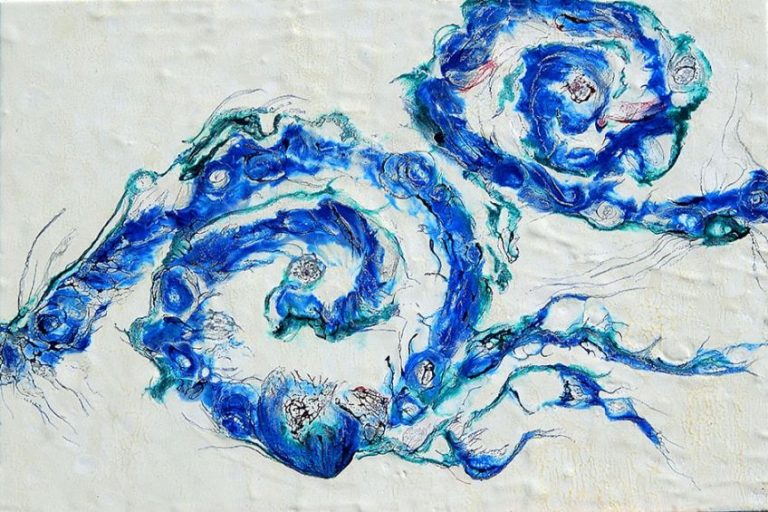
Organic Stippling: Capturing Nature’s Beauty
You can use stippling in art to show all the amazing beauty of nature, like skies, mountains, trees, flowers, animals, and much more. By bringing a lot of small hand-drawn dots together, you can portray in detail the wonders of the universe.
Portraiture in Stippling: Techniques for Lifelike Representations
By using the technique of stippling, you can create amazing lifelike portraits, when assembling thousands of hand-drawn dots with an impressive level of tone and an amazing amount of detail. However, the process requires much patience and dedication and can take many days or months to complete, but the result is worth it all. Portraits are difficult to stipple as the shadows appear to be soft, but by drawing shapes like spheres, you will soon be able to improve your skill and render a perfect portrait of your family member, yourself, or try to stipple from an old stock photo.

Combining Shading Techniques for Realistic Effects
Making use of different-sized dots and spacing them differently gives you realistic effects, showing depth, contrast, shape, and form, but they can also express light and shadow. This effect can also be done using different pencil leads. “A” and “H” leads will give you a light gray color whereas a B lead will give you a dark tone, and the pressure you apply will also affect the tone. Amassing the amount of dots in a single area can form darker or lighter tones and is another way to apply a shading technique.
By combining lines of different thicknesses and lengths with stippling dots, you can create hair for animals, and for different shading patterns, you just combine scribbling with hatching.

When you mix all the different stippling techniques, and mediums in one art piece, you will be amazed at what affects you can create, producing a completely original artwork. Why not give it a try and experiment with shading and other stippling techniques, and see what you can come up with?
Learning How to Stipple
When starting your stippling experience for the first time, it may seem a little intimidating. However, if you are ready and willing to put a few hours aside for this challenge, as it will tax your patience, then you can produce amazing results. Below are some of the things needed to stipple, so use your creativity and enjoy the challenge.

- Lightweight paper
- Hard pencils
- Pencil eraser
- Marker
The hard pencils should include HB, H, or 2H. Do not use soft pencils as they will smudge your drawing. When it comes to the marker, use a fine, or ultra-fine marker for stippling. Next, we will be looking at the subject matter.
Choose Your Subject
It is possible to create a stippling drawing from your imagination, but it is a lot easier to have a hard copy for you to follow. Try to choose a subject that is simple and offers you a wide range of values. This could be a photo, a picture, or an actual object like some fruit. Now examine the subject to understand where the light and dark areas are situated, which will assist you to know what areas need more, or less stippling.
Now take note of the different shapes and figures, as you will have to recreate them with stippling dots.
Decide on Your Medium
Stippling is a drawing process creating hundreds of small dots to make your image. So, you need to ensure that you choose a drawing instrument that will enable you to make small dots, as the smaller the dots are, the more realistic your image will be. For this purpose, a fine-tipped marker with a 0,03- or 0,005-inch nib allows you to make small dots for shading purposes. You can also use a pencil but ensure that it has a hard lead as a soft lead will smudge your drawing.

Decide Where You Want to Start
Examine your original image carefully and decide where you want to start. Usually, it is easier to start where the darkest part of your image is situated. You do this, as that is the area where you can easily fix some mistakes you may make. This means you can just add more dots to rectify your error.
Initial Sketch
If you are not a seasoned stippling artist, then it is important that you first draw an initial sketch before you start to stipple. You need to draw this carefully and precisely as it will serve as a scaffolding on which you can build your image. This initial sketch is often referred to as the “blanket layer”, and is the first layer of your stippling, and make sure you use a pencil for this part as you will be erasing it at the end of the exercise.
At this stage, you may feel as if this is too great a challenge, but be patient and keep stippling, and do not give up.
Start Stippling
Start at the darkest point by pressing your pen or pencil onto the paper. The closer you make your dots, the darker that area will be. Now work your way around the image filling in the dark areas. Next, move to the lighter areas by adding fewer dots and spacing them further apart.
Try to keep the dots as evenly spaced as possible to make your image more attractive when finished.

Try to avoid drawing dashes as this will ruin your project, so ensure you lift your pen or pencil completely off the paper when completing your dots. Stippling is a long process, so do not be in a hurry to finish and take your time, be patient and you will be rewarded.
Add Details
As you see the image developing, start to add some small dots in the patterns that will form lines and shapes. From a close-up, you will only see dots, but from a distance, they will look like lines. The shadows on your image need a lot of dots to create darkness, and lighter areas need fewer dots. You can now erase the initial pencil sketch and your artwork will appear lighter and brighter.
Tips for Successful Stippling Projects
Whenever you tackle a project, you will most likely want it to turn out really well., which will also apply to your stippling project. It may be the first time you are trying to stipple, and you do not want to make too many mistakes. So, here we have compiled a list of tips to make your stippling project a little easier.

- For accurate and precise dots, use a hard lead pencil or a fine liner.
- With a pencil, make a light outline sketch that can be erased after shading.
- Examine your subject to see where light and dark areas are, then you will know how to place your dots.
- Start by using fewer dots first, then you can increase the amount until you are satisfied with the contrast, which makes shading a lot easier.
- Step back from your work often, which will help you to see your whole image instead of just focusing on details.
- Take your time and be patient, by drawing slower the results will be much better.
- Always feel free to experiment, try new things, and have fun.
- Do not draw solid outlines of your image, as this undermines the stippling art process and the results will not look good, rather draw dotted lines instead.
- The process of stippling is additive, which means you can only darken the image and cannot make it brighter once you have made your marks.
- Try to keep your artwork as small as possible like an A4 paper size.
- Make a distinction between gradients and edges.
- Relax and enjoy your stippling as you do not have to recreate an exact image of your subject.
- Start with a simple design first, and then later you can tackle more complex designs.
- Ensure your lighting is adequate and there are no shadows in your workplace.
- Get yourself a comfortable chair that will not leave you tired after a few hours of work.
When you start your stippling experience, try to enjoy yourself so that it does not become a burden to perform. As there are no hard and fast rules when it comes to stippling in art, do not be afraid of trying new things. Practice, and practice some more until you are happy with your stippling results.
Frequently Asked Questions
What Is Stippling in Art?
Stippling is an artistic technique that incorporates the use of small dots grouped together to create a pattern, texture, shading, image, and highlights. The dots can be drawn by hand, etched, or painted. You can also make use of different mediums like paint, ink, pencil, or fine liners.
What Are the Advantages of Stippling as an Art Form?
The stippling technique is becoming increasingly popular amongst artists, as it offers certain benefits. It allows you to capture intricate details, creates unique textures that give your artwork a distinctive look, and adds depth by creating shadows, highlights, and gradients.
Can Anyone Learn Stippling?
Although stippling art is practiced by many artists as it gives them many benefits and advantages, it can also be an art form that you can practice at home. It does not require any advanced technical expertise, as it only needs you to draw dots and requires materials that are available in many local stores.
How Long Does It Take to Complete a Stippling Artwork?
Stippling is an art form that comprises hundreds of small hand-drawn dots strategically placed, and it has an amazing amount of detail, tones, highlights, and shadows. Therefore, it will take time and patience to complete. An artist by the name of Baker took 160 hours to complete a portrait of an elephant, but you, as a beginner, should try something simpler that will take less time.
Are There Any Recognized Artists Known for Their Stippling Artwork?
Many famous artists have used stippling in their art pieces, such as Nicholas Baker, Isaac Becket, Giulio Campagnola, Xavier Casalta, Miguel Endara, Jaya Suartika, Rob Christensen, Pablo Picasso, Leonardo da Vinci, Michelangelo, and many more.

In 2005, Charlene completed her Wellness Diplomas in Therapeutic Aromatherapy and Reflexology from the International School of Reflexology and Meridian Therapy. She worked for a company offering corporate wellness programs for a couple of years, before opening up her own therapy practice. It was in 2015 that a friend, who was a digital marketer, asked her to join her company as a content creator, and this is where she found her excitement for writing.
Since joining the content writing world, she has gained a lot of experience over the years writing on a diverse selection of topics, from beauty, health, wellness, travel, and more. Due to various circumstances, she had to close her therapy practice and is now a full-time freelance writer. Being a creative person, she could not pass up the opportunity to contribute to the Art in Context team, where is was in her element, writing about a variety of art and craft topics. Contributing articles for over three years now, her knowledge in this area has grown, and she has gotten to explore her creativity and improve her research and writing skills.
Charlene Lewis has been working for artincontext.org since the relaunch in 2020. She is an experienced writer and mainly focuses on the topics of color theory, painting and drawing.
Learn more about Charlene Lewis and the Art in Context Team.
Cite this Article
Charlene, Lewis, “Stippling Art – Creating Designs and Patterns With Small Dots.” Art in Context. August 8, 2023. URL: https://artincontext.org/stippling-art/
Lewis, C. (2023, 8 August). Stippling Art – Creating Designs and Patterns With Small Dots. Art in Context. https://artincontext.org/stippling-art/
Lewis, Charlene. “Stippling Art – Creating Designs and Patterns With Small Dots.” Art in Context, August 8, 2023. https://artincontext.org/stippling-art/.