


How to Paint Rocks – In-Depth Tutorial and Ideas
Creating decorative rocks has become a very popular craft amongst people of all ages. Painted rocks can be wonderful features to decorate your home and garden. They are also incredibly thoughtful, personalized gifts to others. To start creating easy rock painting ideas, you just need to make sure you have the right materials including the smoothest rocks, vibrant acrylic paints, a variety of brushes, and other materials of your choice.
Painted Rocks as a Popular Craft
Decorated stones and rocks are extremely easy to create if you are a beginner at arts and crafts, and is a fun activity for all ages. It is for this reason that it has become one of the most popular crafts amongst both children and adults. This is a craft that helps people improve motor skills, enhance artistic skills, and explore their creativity and emotions. Painted rocks are great personalized crafts that will brighten the corners of your home and garden. Often you will notice that the materials you need for painting onto rocks you will most likely have readily available at home. The trickiest part could perhaps be sourcing the right rocks for your project.

How to Paint Rocks – Step-by-Step Guide
We’ve created an in-depth tutorial to guide you through all steps for the best possible results.
What Are the Best Types of Rocks to Paint Onto?
Start big! Smaller rocks can be quite difficult to work with when learning how to paint rocks. This is because the surface area you have to work with is quite small, so it is suggested to start with bigger rocks. The ideal rock for easy beginner-painted rocks should have a very smooth and flat surface with a greyish, natural finish.
Often you might stumble across a rock with an interesting shape that will catch your attention. This might influence the formation of a design.
Where You Can Find Smooth Rocks to Paint
You can find most rocks for craft from rivers, beaches, and forests; however, you must make sure the natural environment from which the rocks are collected is not protected and that it is not illegal to collect from that landscape. These types of rocks and stones could be sandstone, marble, granite, slate, labradorite, or limestone. You can also purchase stones from most craft stores, garden and landscaping centers, or pet stores. Another option is to purchase prepared rocks online or create artificial stones from scratch with a polyurethane mixture.

Materials Needed for Painting on Rocks
With the right materials and paint supplies, you can create some fascinating painted rocks. You can also create quite a variety of textures and techniques such as dot-painting, embellishments, marbling, and much more when experimenting with these tools and materials.
- Apron or craft clothes
- Variety of rocks and stones
- White primer or wall paint
- Fine grit sandpaper
- Paper for planning designs
- Pencil for outlining designs
- Paint brushes and sponges
- Palette or plate for paint mixing
- Water container
- Paper towel or earbuds for paint removal
- Acrylic paint or craft paints
- Acrylic varnish or sealant with UV protection
- Acrylic paint pens (optional)
- Acrylic inks and fine liners (optional)
- Chalk markers or crayons (optional and suggested for kids)
- White gel marker or pen (optional)
- Stencils (optional)
- Sealer (optional)
How to Prepare Your Rocks
Before you jump right in, you will need to make sure that your rocks are prepared properly. It is recommended to prepare and prime a couple of rocks and stones at one time so that you do not have to wait for the base coats to dry separately. Once you have collected your stones you can begin preparing them for priming.

Wash Your Rocks
Deeply rinse and wash all of the dirt and residue off the surface of your rocks. You can use a toothbrush and lukewarm water to get into the finer cracks if it is muddy. Do not use soapy water here, as it might break the surface of the rock and the paint may not stick properly.

Prime Your Rocks
Rocks and stones with all their textures and grooves are quite porous if left untreated. This means if you paint directly onto an unprimed rock, you might lose color vibrancy and struggle to work on the rough texture. Wall paint or a spray primer of your choice, will work well to fill these gaps and holes to provide a clean, smooth working surface. Apply one coat of primer on either side and wait for it to dry in between stages.
TIP: Using a hairdryer can speed up the drying process.

Plan Your Design
If you already have an idea in mind, you can go ahead and begin planning your design. Alternatively, explore the options in this article below for easy rock painting ideas you can create. Begin by tracing the outline of your rock onto a piece of paper with a pen or pencil. Next, perfect and plan your design onto the piece of paper by simplifying things using geometric shapes, patterns, and silhouettes. Color preferences are completely up to you; however, it is always recommended to work with complementary colors if you do not know where to start. Once you have your design, you can begin mapping it directly onto the rock with a dark pencil or chalk.

Now that you have planned your designs, you can start the most exciting process of them all – painting and decorating your rocks! Start by setting up your workspace, gather your paints, paintbrushes, and other materials and begin adding your personal touch to your creations.
Prepare Your Workspace
Gather all the materials and tools needed for creating your design. It is recommended to wear an apron or clothes that can get a bit messy. You should also prepare your table or desk in a well-lit area that is covered and protected from paint splatter.

Prepare Your Paints
Pour your selected paints into a palette, or onto a plate if you do not have a painting palette. It is important to separate colors in your palette according to how you plan to use and mix them. As an example, keep the paints you plan to mix closer together within your palette or plate. Use one paintbrush per color to keep things clean and free from the accidental mixing of paints.
TIP: Use the three primary colors, as well as white and black acrylic paint, to mix your own unique colors.

Paint in Your Planned Design
Begin by painting in your first layer using one color only. As you work through sections of your design, ensure that the layers have dried properly before adding the next layer of color. Work in the final layers by adding highlights and outlining the darker areas to make your design pop!

Signing, Drying, and Sealing
It is such a gorgeous touch when painted rocks have been signed by the creator. You are encouraged to sign your finished creation for others to be able to find the wonderful creator. Make sure that the final layers of paint are completely dry to avoid any smearing and begin sealing your rock with a spray or a UV-resistant sealant.

Display your Stones
Once your coat of varnish has dried properly, you can go ahead and display your artwork indoors or outdoors, on shelves and tables, gift them to someone, or hide them somewhere for a stranger to find.

What Is the Best Type of Paint for Painted Rocks?
The best type of paint you can use for learning how to paint rocks is either acrylic paint or craft paint. Acrylic paints tend to dry with a glossy, vibrant finish, and craft paints often dry with a flat, matte finish that improves the general quality of the painted rock. Acrylics in general are great for crafts that feature indoors or outdoors in the elements; however, you will need to seal and protect your painted rocks with either UV-resistant varnish or sealant spray.

Best Paint for Painting Rocks: DECOART Americana Multi-Surface Satin Acrylic Paint
The DECOART Americana Multi-Surface Acrylic Paint is a great option for basic priming, background layering and as a mixer when added to other acrylic paints. This is a good option for priming and coating your painted rocks. However, it can be limiting and requires a few layers of paint when applied to surfaces.
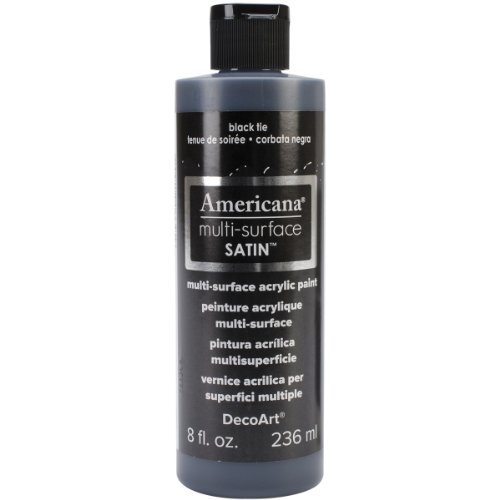
- The acrylic paint is non-toxic and suitable for many surfaces
- Once dried, the paint has a durable, hard, and permanent finish
- The paint has a thick texture with superior flow and leveling
- Great for priming surfaces
- Even streak-free coverage
- Does not pool on surfaces
- Matte finish
- Accurate colors once dry
- Poor coverage
- Thin and difficult to work with
- Long drying time
Markers and Pens You Can Use for Decorated Stones
If you struggle to work on the finer details with paintbrushes – fear not, for there are many other ways of applying paint to your rocks! Acrylic markers and pens are great options for people who enjoy working with a tool that has more control and consistency. Black pens are ideal for outlining shapes within designs, whereas white gel pens work well to add highlights when painting on darker rocks. Chalk pens and crayons are the best options for children and beginners because they are easy to remove underwater and encourage more play and experimentation.

Best Pens for Decorated Stones: SAKURA Pigma Micron Pens
These Micron Pens have an excellent jet-black ink quality and can be purchased as a collection of tip variations. They are great for beginners and provide very clean, fine, and accurate lines on the working surface. They would work great on decorated stones; however, they are known for smudging easily and require a bit of patience while waiting for the ink to dry.
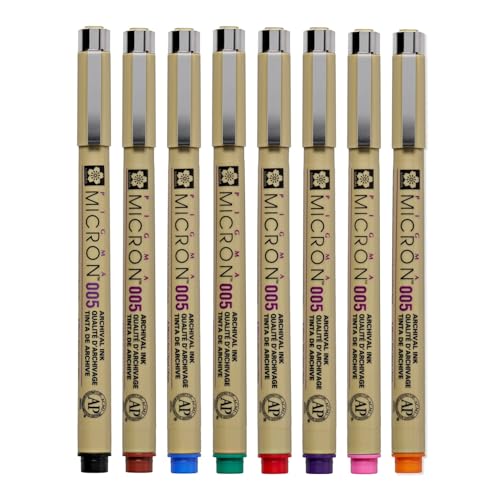
- Available in a range of different sized nibs for versatile lines
- The ink is water-resistant and does not leak for clean linework
- Suitable for a range of different surfaces including stone
- Clean and accurate linework
- Variation of sizes
- Water-resistant
- Long lifespan
- Do not leak ink
- Smudges easily while wet
- Long drying time
- Prone to fading
- Fragile tips
- Cannot be refilled
Kits for Painting on Rocks
Another option for generating easy beginner-painted rock art ideas is to purchase a rock painting kit. This often includes the perfect variety of rocks, paints, pens and brushes, palettes, stickers, and other accessories. If you are new to crafts, this would be a great option for you to start with because you will be set up with all the basics.

Best Rock Painting Kits for Decorated Stones: J MARK Rock Painting Kit
The J Mark Rock Painting Kit is the ideal set-up for beginners with easy rock painting ideas. While it is relatively costly, the kit includes a variety of 42 accessory pieces that make it great fun to experiment with! The quality of the paint is brilliant and bold, however; paints could wash off easily if left outside. It is recommended to source the best possible paints if you plan to keep your painted rocks outside, or in your garden.

- The kit includes everything that you need for rock painting
- The paints and markers are non-toxic and are child-friendly
- Comes with a variety of accessories, including stickers and glitter
- Includes everything that you need for rock painting
- Easy to use
- Comes with paint, stickers, and glitter
- A little pricey
Other Tools and Materials You Can Use for Painting onto Rocks
You will need a variety of other tools and materials to create interesting textures and techniques on painted rocks. Toothpicks and sharps objects can either create fine dots or leave textured scratches when layers of paint are removed. Stencils can feature as wonderful templates when working across multiple rocks and stones. This technique can work especially well for generating ideas for easy beginner-painted rocks. Paper towels and earbuds are also highly recommended to have on hand for when small mistakes occur.
TIP: You can wash away any mistakes while the paint is still wet. You can also prime your rock over again if you would like to restart your design.
What Can You Do With Your Painted Rocks?
There are many different and exciting things to paint on rocks and there are many places that could be filled with lovely, personalized messages and images created on decorated stones. You can add them to your garden, gift them to someone for special occasions, frame them, sell them online, use them as seasonal décor or paperweights, create magnets out of them and make use of them in a variety of other ways!

Beyond serving as useful objects, they feature as wonderful projects in which you can spend a rainy day or introduce the craft to a classroom of creative students.
Easy Rock Painting Ideas Top 20
Here are some of the most popular ideas if you are looking for rock painting inspirations:
- Mandala Stones: Create intricate, colorful mandala patterns on smooth river rocks for a calming and visually appealing design.
- Simple Human Forms: Easily doable for children.

- Word Stones: Write inspirational or motivational words on rocks to spread positivity and encouragement.
- Galaxy Rocks: Craft rocks that resemble the cosmos with swirling blues, purples, and stars, making them look like miniature galaxies.
- Cactus Garden: Paint a variety of cacti and succulents on rocks, perfect for low-maintenance desert-themed decorations.
- Story Stones: Create a series of stones with images that can be used to tell a story or inspire creative storytelling.
- Beach Scene: Recreate tranquil beach landscapes with sand, sea, and palm trees on your rocks for a relaxing coastal vibe.
- Rainbow Pebbles: Paint rocks in the colors of the rainbow or gradient patterns for a vibrant and cheerful display.
- Complete Animals in the Form of a Stone: Design rocks as whole animals, for example a cute fox.

- Garden Markers: Label your plants with painted rocks that feature the names of herbs, flowers, or vegetables.
- Patterned Stones: Experiment with geometric shapes, stripes, and polka dots to create visually striking, abstract patterns.
- Pet Portraits: Capture the likeness of your beloved pets on stones, offering a unique and personal keepsake.

- Nautical Rocks: Paint anchors, seashells, or lighthouses on rocks for a maritime touch in your home or garden.
- Zentangle Designs: Employ intricate black-and-white doodles and patterns for a meditative and highly detailed rock art.

- Halloween Rocks: Craft spooky or cute Halloween-themed rocks with ghosts, pumpkins, or witches for festive decorations.

- Emoji Rocks: Paint popular emojis on stones to express emotions or add a touch of whimsy to your space.
- Abstract Landscapes: Create imaginative landscapes with vibrant colors and shapes that evoke a sense of wonder and mystery.

- Cute Insects: Paint charming, friendly insects like bees, ladybugs, and dragonflies to bring a touch of nature indoors.
- Constellations: Depict star constellations on rocks to make your own mini-night sky display.
- Holiday Stones: Celebrate various holidays by painting rocks with festive themes, such as Christmas trees, Easter eggs, or Valentine’s hearts.
What Is the “Kindness Rock Project”?
The “Kindness Rock Project” is a global community of painted rock artists and creatives consciously taking part in the act of placing inspirational painted rocks in places for strangers to discover them. This concept i1s simply centered on the kind-hearted act of stumbling across a rock that holds and spreads positive energy and affirmations for people to find and ponder over.

Now that you have the basic steps for being able to produce easy beginner-painted rocks and stones, you can let all the rock painting ideas fly in! There are so many possibilities and options for finding and discovering things to paint on rocks. You will find yourself on a constant hunt for the perfect shaped rock and fall into a delightful groove of creating them – not only for yourself – but for others to stumble across and appreciate the genuine creativity that went into making that painted rock.
Take a look at our painting rocks webstory here!
Frequently Asked Questions
Do You Have to Prime Rocks Before Painting?
It is recommended to always prime your rocks before you start painting. You will essentially fill the gaps in the rock to create a smooth and less porous working surface. You can prime your rocks with a basic primer or wall paint. You can also mix wall paint with acrylics to create interesting base colors for your rock painting ideas.
Can You Use Acrylic Paint on Rocks?
Yes, you certainly can! In fact, acrylic paint is the recommended paint choice for painting on rocks. You should be aware of where you plan to place your rock. If you are planning to place it outdoors in the direct sunlight, it is suggested to use acrylic paint with UV resistance, or a spray sealant.
Can You Use Nail Polish to Paint Rocks?
You can definitely use nail polish for painted rocks if you have quite a collection of them. Nail polish does not spread as far as acrylic paints do, but they can create really interesting textures on the surface of the rock, such as a marble effect. You can also use puff paint, gel roll pens, glitter glue, and other materials to create other striking textures.
What Is the Best Glue for Attaching Rock to Rock?
There is quite a variety of different glues that work well with painted rocks. The most highly recommended option is the GE 11 silicone sealant which, once dry, binds the rocks together as if the sealant were a rock itself. Other options include most superglues; however, it is suggested to purchase the best quality possible.

Demi Bucklow is an independent artist and photographer living in Cape Town, South Africa. Since graduating from the University of Cape Town in 2018 from Michaelis School of Fine Art with a degree specializing in fine art photography, she currently works as a freelance artist, content creator and writer. Demi’s particular interests explore a range of multimedia illustration, collage art, photography and videography, darkroom processing and stop-motion animation. Her work is an exploration of nature and its phenomenon – somewhere between art and space.
Artistic practice presents the ability to communicate a vision. It is through techniques of pointillism and realism that form, and substance are explored as a metaphor for matter; super-imposing a thousand marks and points until an image is formed before our eyes. From illustrations to surrealist landscapes, Demi translates corporeality – mixing the obtuse and vacuous with the astute and expressive which leads to a mixture of irrevocable pondering over what is and what could be.
Learn more about the Art in Context Team.


