How to Draw Sonic the Hedgehog – A Fun Drawing Tutorial
Sonic is an iconic character that originates from Japanese animator and video game designer Naoto Oshima in 1989. This character has been redefined and changed throughout the past couple of decades. Sonic has also been a character that has shifted from games into the movie sphere. This iconic character makes for a really fun drawing because there are a lot of ways to approach a Sonic drawing. This tutorial explores the more classic vintage representation of Sonic the Hedgehog that has been seen in comics and animations throughout the years.
Step-by-Step Guide on How to Draw Sonic the Hedgehog
In this tutorial, we will start by establishing a unique sketch of Sonic to capture his personality and his iconic superpowers. In this tutorial, we will draw sonic in a running formation, which we will do with a light sketch at first. We will then proceed by refining the sketch with distinct black linework, to emphasize the cartoon-like aesthetic of the character. We will then proceed to integrate color, and slowly work with layering colors to represent three-dimensionality within the Sonic the Hedgehog drawing.

Step 1: Sketching Sonic the Hedgehog
We start by shaping the character within a unique stance of our choice, where we assemble the basic features.

The intention is to establish the basic features of Sonic, starting with his face. Naturally, the features will distort slightly due to the perspective we are seeing of his pose.

We want to slowly form the character within his correct proportions, making sure we capture his hands, body, and the larger iconic spiky fur.

Allow yourself to explore unique poses that represent Sonic the Hedgehog’s unique identity. This can be a running pose for instance, where we play around with how we represent the features.

Sonic is also a happy-go-lucky mischievous character who has super-speed powers, which means we can represent those unique qualities in his pose. However, try to be conscious of perspective and keep the drawing light for now.

Step 2: Defining the Character Outline
Once we have lightly sketched the character, we can start using bold black lines to refine the shape of the character. We can proceed by following the linework of the lighter sketch established beforehand.
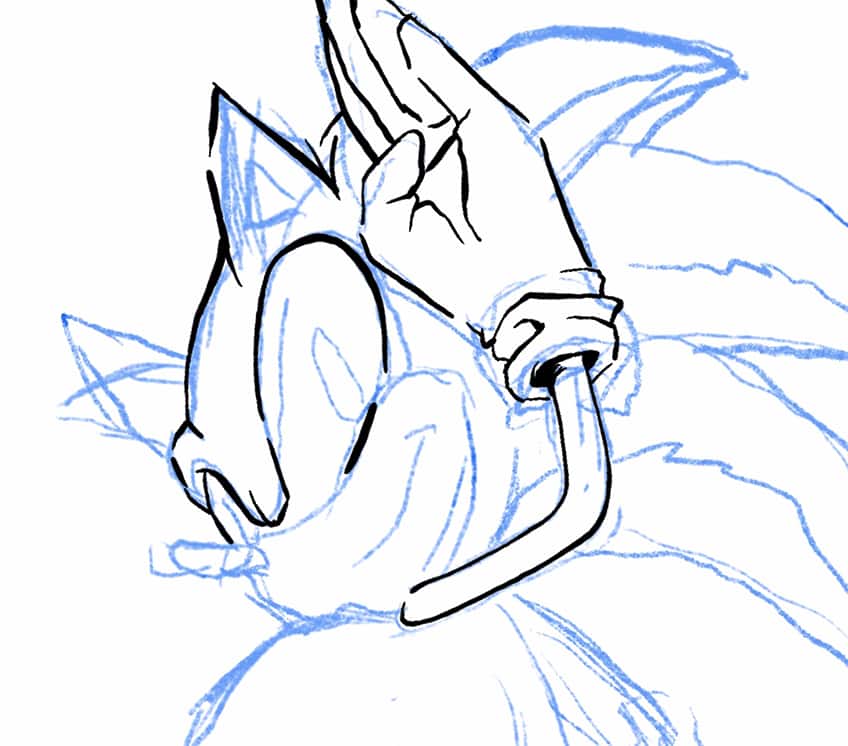
As we refine the character, utilizing black lines is also a great way to emphasize the iconic shape quality of comic-style character design. As we refine the Sonic drawing with emboldened lines, we also want to be quite precise with defining the different features. For instance, we want to maintain the zig-zag-like quality within the iconic spikes in the fur to emphasize dimension.
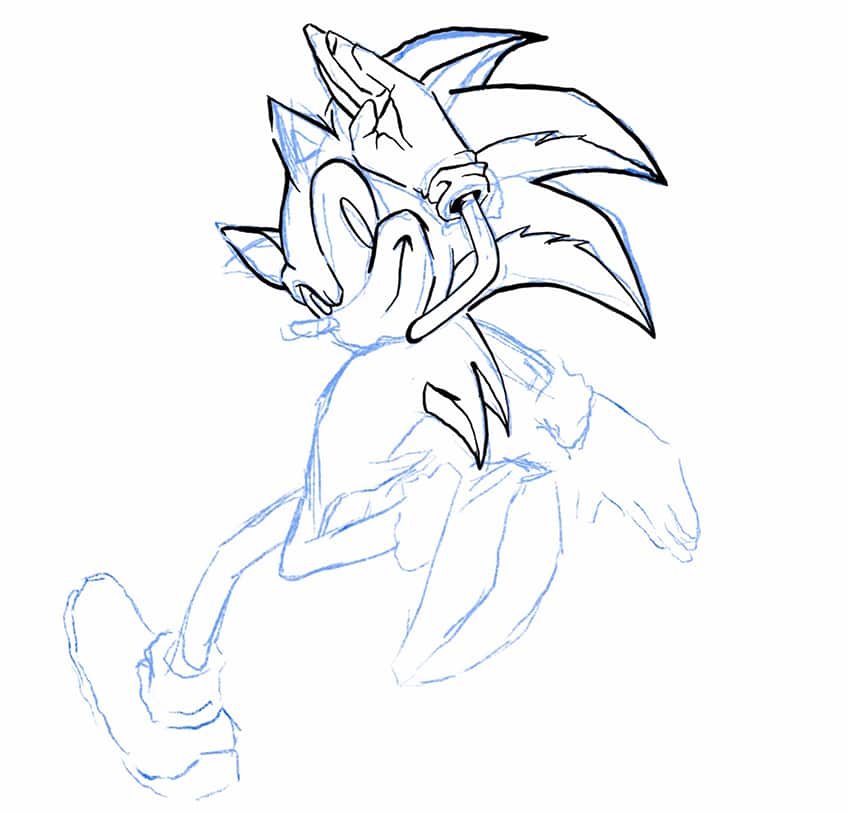
We can also be more intentional with representing the three-dimensional quality in all features as we work our way through the character design. We can do this by defining the unique shapes of the different features with linework. This is particularly helpful for socks and gloves, where we establish these lines that move back and forth and define ripples in the fabric.

We can define the features with these sharp harsh edges that define the structure of the features within these iconic cartoon-like aesthetics. Allow yourself to define that rigid and defined edging in the lines as you work your way through the entire character.
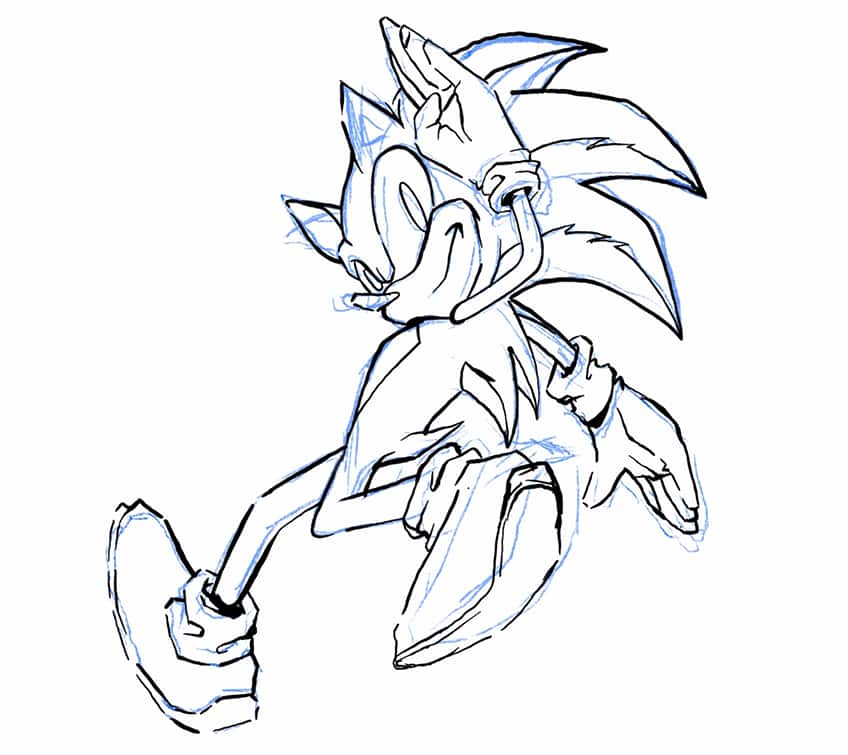
Step 3: Refining the Character With Colored Details
As we proceed. We can lightly erase the character, leaving behind a light sketch of the character to assist us in defining the character outline. This is where we start to work with the corresponding colors associated with the Sonic the Hedgehog color scheme. We can start defining the fur with a darker blue linework.
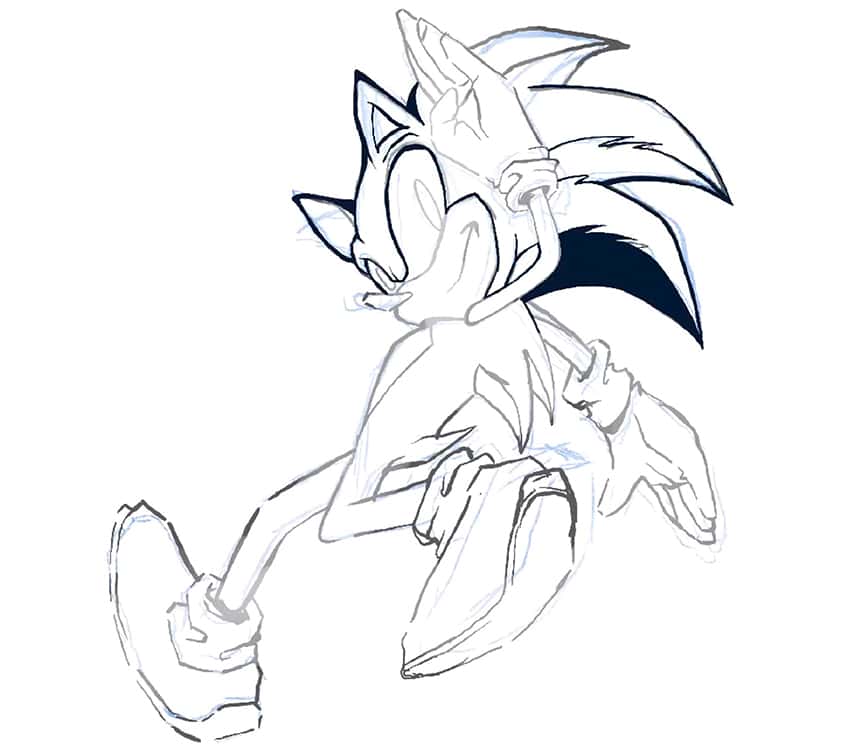
We still want to maintain the rigid linework as we work over the light outline of the Sonic the Hedgehog drawing.
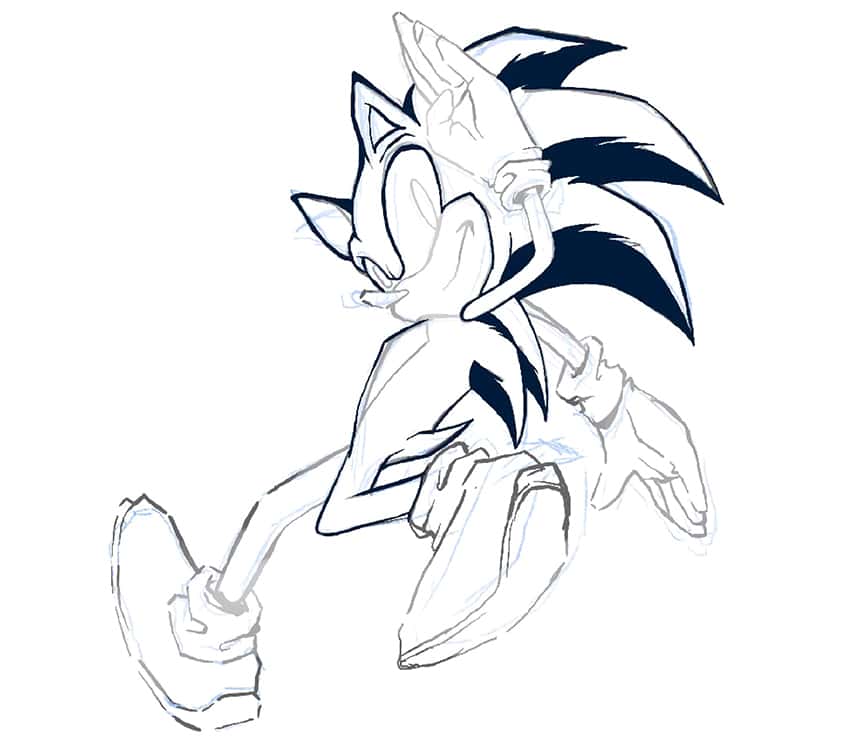
We can also start considering the three-dimensional quality defined through different shades and tonal values. For instance, we can add darker blues to the spikes that give a more three-dimensional structure to that feature. At this point, considering looking at a reference image can be a great way to assist you in the representation of the various colored features. This is where we work with various colors to represent the different features. We can enhance the linework of the face, arms, and hands with black linework again, to emphasize their form.
However, we can maintain the dark blue coloration and outline as we define the body of Sonic the Hedgehog.
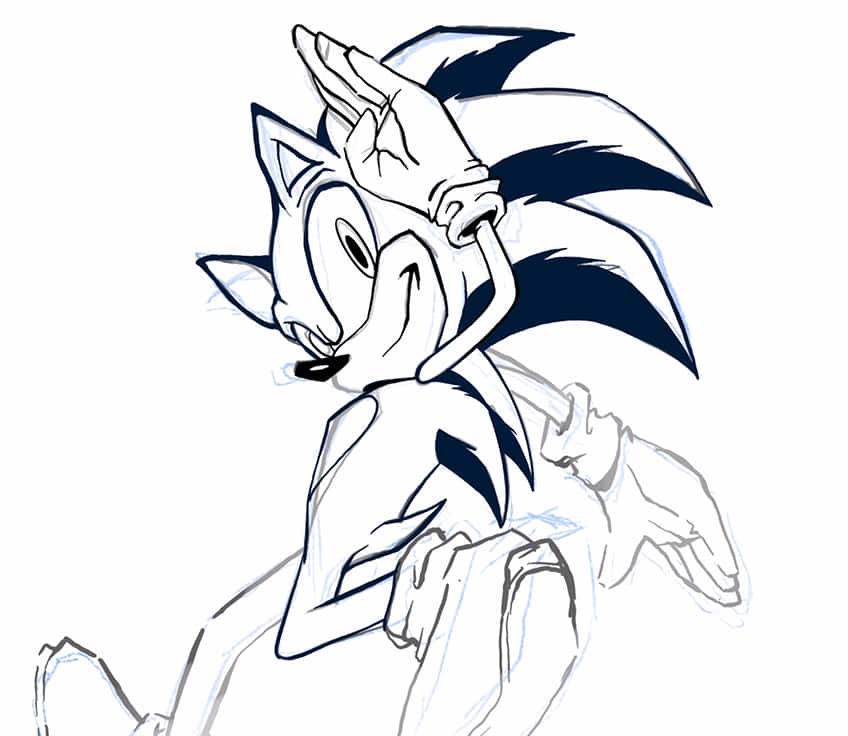
Step 4: Filling In the Character With Color
As we continue we can proceed by filling in the character with the correct color scheme. This is where we can fill in the fur features in the body with a soft blue color. We can also add this blue coloration to the head and around the facial features. We want to leave the eyes white and we can add in some green color to the eyes.

The arms, mouth, and inner ears can have the same light brown color which is unique to the character design.

We can also add this light brown coloration to the exposed shape along the surface area of the stomach. We can also start playing around with building shadows with darker shades of the various colors within the different features. We can play around with darker and lighter shadows in the various features to build up their three-dimensional quality.

As we work our way down to the shoes we can fill them in with a bright red color, however, we can define their structure with darker shades to define shadows.

We want to also fill in all areas of the shoe, including the tread to maintain consistency in detail. We want to also make sure we fill in the yellow buckle that may be visible in the shoe. Take your time building up the various shades of colors within each feature to define their shape.

Step 5: Adding Details to the Sonic Drawing
We can also deafen the structure of the white features with gray shadow formations to bring a more three-dimensional shape to the fingers and folds in the material.

We can integrate these subtle gray shadows along the lines of the white socks as well. Allow yourself to work with these shadow qualities in all features of the Sonic the Hedgehog drawing. By integrating these shades into all the features, we maintain this consistency within the aesthetic of the character design.

As a last addition, depending on whether you are drawing with a digital device or not, you can play around with adding effects. Halftone is a great idea to define a vintage aesthetic in the Sonic the Hedgehog drawing.

However, you want to make sure you don’t overpower the character with effects and stay within the correct corresponding color scheme of the character. and there you have it! How to draw Sonic the Hedgehog in a few simple steps.

Tips and Tricks to Remember
- Lightly sketch the character. Shape the character in the Sonic the Hedgehog drawing with basic shapes.
- Refine the character lines. From there, work with bold lines to define the shape of the character design.
- Add layers of color for dimension. Build up your Sonic the Hedgehog drawing with various shades of colors to bring about more three-dimensionality.
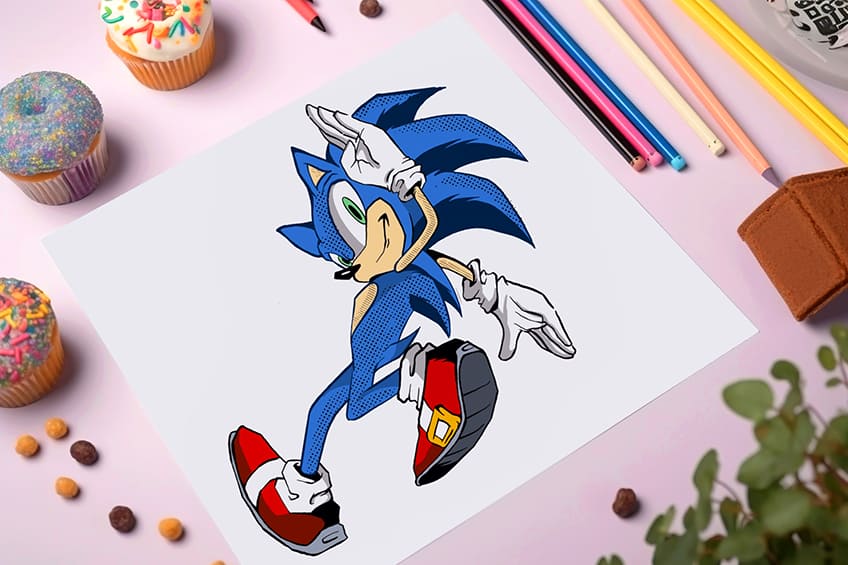
A Sonic the Hedgehog drawing is a really fun way to learn some classic drawing techniques. This drawing comes with some interesting tips and tricks that can be applied to other cartoon and character drawings as well.
Frequently Asked Questions
How to Add Color to a Sonic the Hedgehog Drawing?
Sonic the Hedgehog can be colored in various ways, however, the classic color combination of this iconic character is generally the blue fur paired with light brown skin, red shoes, and white gloves. This can be created in a variety of ways, ranging from various blues and reds and so on. However, you first want to establish the character with a sketch of his various features. From there, you can proceed to pair the right colors with the right features. We want to make sure we keep the spikey fur features their iconic blue color, but we can integrate various shades of blue for dimension. We can do the same for the remaining features, where we utilize different shades of color to create dimension in the features.
How to Draw the Face of Sonic?
Sonic is an animated and exaggerated representation of the hedgehog animal. This gives Sonic a unique set of features, such as his spiky fur, but his face remains quite cartoon-like. We can define the face with these enlarged eyes, paired with a thin black button-like nose. The face remains a neutral brown color to suggest that it doesn’t have fur, which gives the mouth an exposed aesthetic. The mouth can then be defined with simple black line work. The eyes are fairly large, with smaller irises and pupils that are green in color. These are the general set of features that are unique to a Sonic the Hedgehog drawing.
Matthew Matthysen is an educated multidisciplinary artist and illustrator. He successfully completed his art degree at the University of Witwatersrand in South Africa, majoring in art history and contemporary drawing. The focus of his thesis was to explore the philosophical implications of the macro and micro-universe on the human experience. Matthew uses diverse media, such as written and hands-on components, to explore various approaches that are on the border between philosophy and science.
Matthew organized various exhibitions before and during his years as a student and is still passionate about doing so today. He currently works as a freelance artist and writer in various fields. He also has a permanent position at a renowned online gallery (ArtGazette) where he produces various works on commission. As a freelance artist, he creates several series and successfully sells them to galleries and collectors. He loves to use his work and skills in various fields of interest.
Matthew has been creating drawing and painting tutorials since the relaunch in 2020. Through his involvement with artincontext.org, he has been able to deepen his knowledge of various painting mediums. For example, watercolor techniques, calligraphy and lately digital drawing, which is becoming more and more popular.
Learn more about Matthew Matthysen and the Art in Context Team.


