How to Draw Baby Yoda – A Cute and Easy Drawing Tutorial
Baby Yoda is an iconic and beloved character that has been made popular through the Mandalorian series. This cute old baby-like alien has become a pop culture icon due to his unique set of features. Yoda is a strange creature that has a very specific green coloration and an old type of aesthetic. This Baby Yoda drawing tutorial teaches us a few things about color, shading, and how to utilize these tools to define a specific character. There are a few things to learn along the way through the process of drawing Baby Yoda, making it a fun and educational activity. Plus, we also get to add Baby Yoda to our drawing repertoire, and can use him as a feature in our Star Wars-inspired artworks!
Step-by-Step Guide on How to Draw Baby Yoda
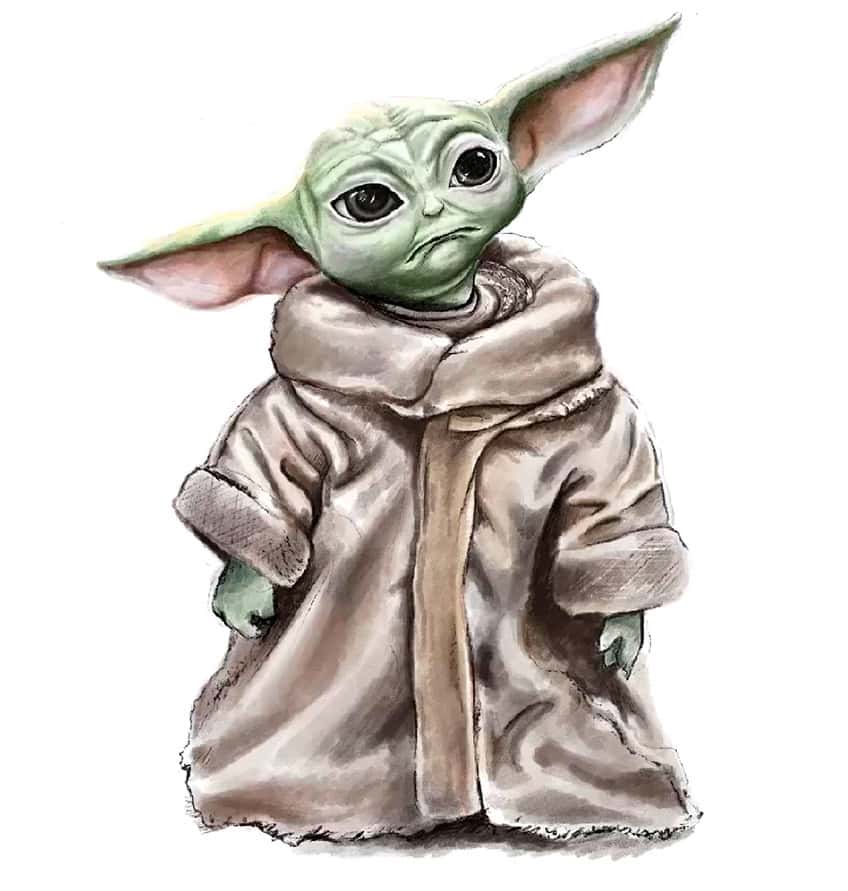
In this Baby Yoda drawing tutorial, we will start with shaping the character in his basic proportions. Baby Yoda is made up of two main sections, which are his head and the big brown cloak that he wears. We will sketch the character out, and we will then proceed to refine each of these sections with color details. We will spend some time on the face to define the unique attributes of the face, such as the eyes, wrinkles, ears, and so on. We will then work on his cloak and define the details and shadows with layers of color.
Step 1: Shaping the Baby Yoda Character
We start by shaping the Baby Yoda character, lightly sketching out his basic proportions. The head of Yoda is quite circular with long fox-like ears that extend outwardly from the sides of his head.
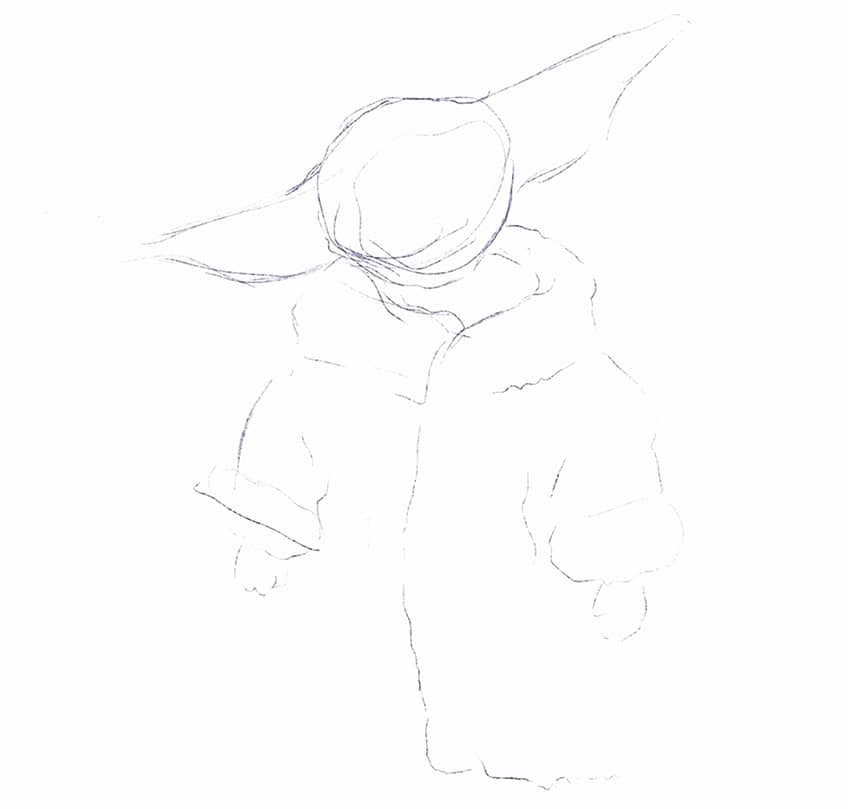
His facial features are made up of two large elliptical eyes, with a small nose and slitted mouth. His expression is generally neutral, which can be defined by his straightened mouth shape. Yoda also has these wrinkles that run along his head, giving him his iconic ambiguous age quality which makes him appear both young and old at the same time.
Step 2: Integrating Light Layers of Color into the Yoda Drawing
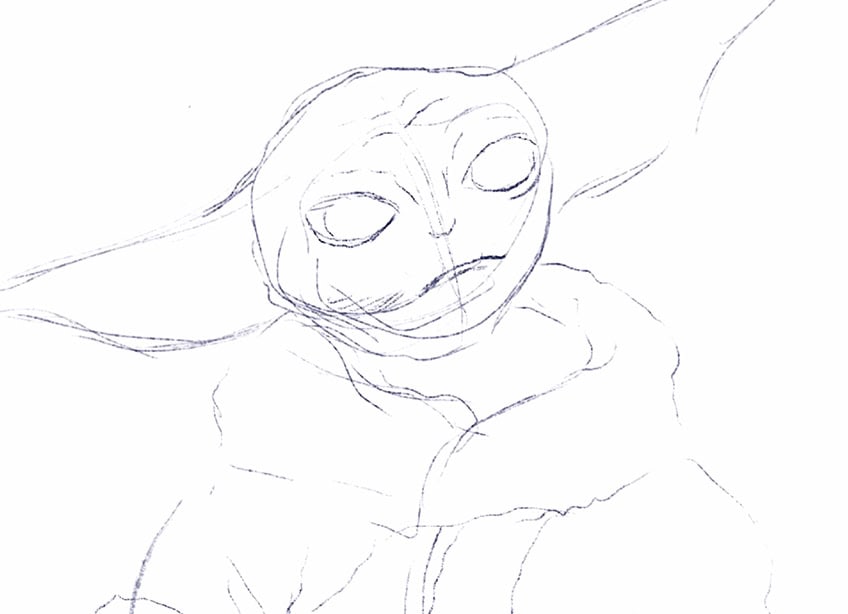
We can start working with color, where we build up the character through different layers of tonal values. We want to start with light layers of green and proceed to fill in the face, moving around the eyes.
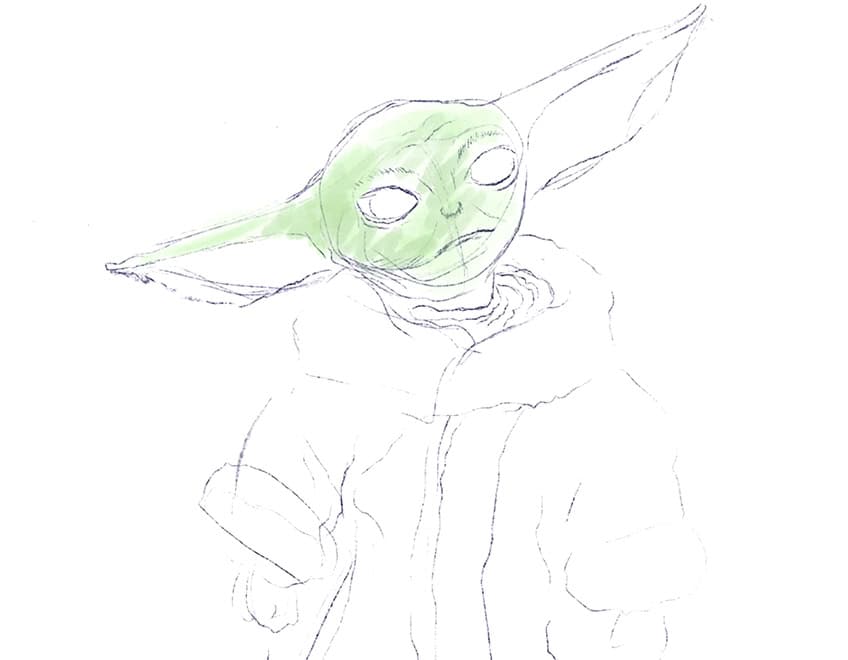
We can also start defining the cloak of Yoda with light brown details, giving more shape to his attire.
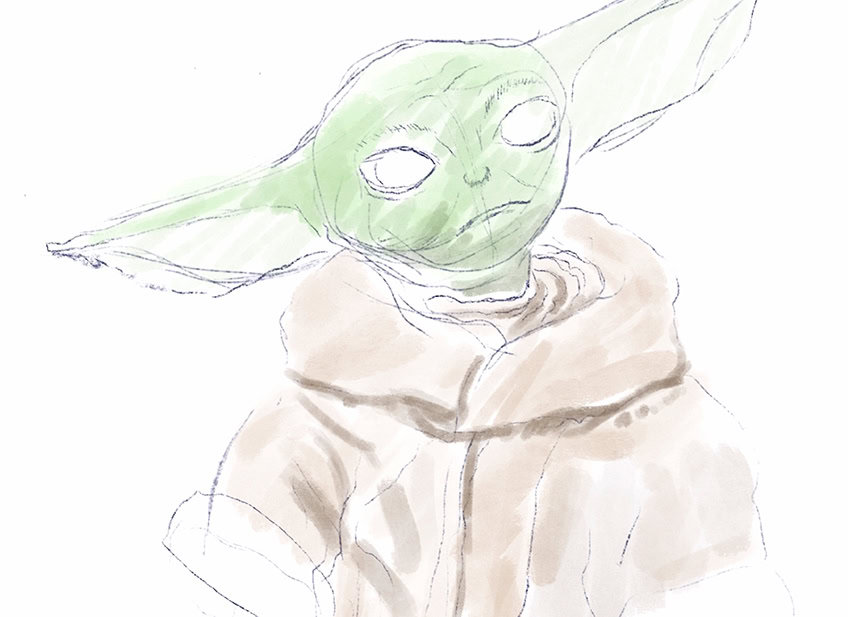
To bring more form to the face, we can start adding in some darker green coloration near the bottom of the face. This is going to start giving the face more three-dimensionality. It’s also important for us to consider where the light source is coming from.
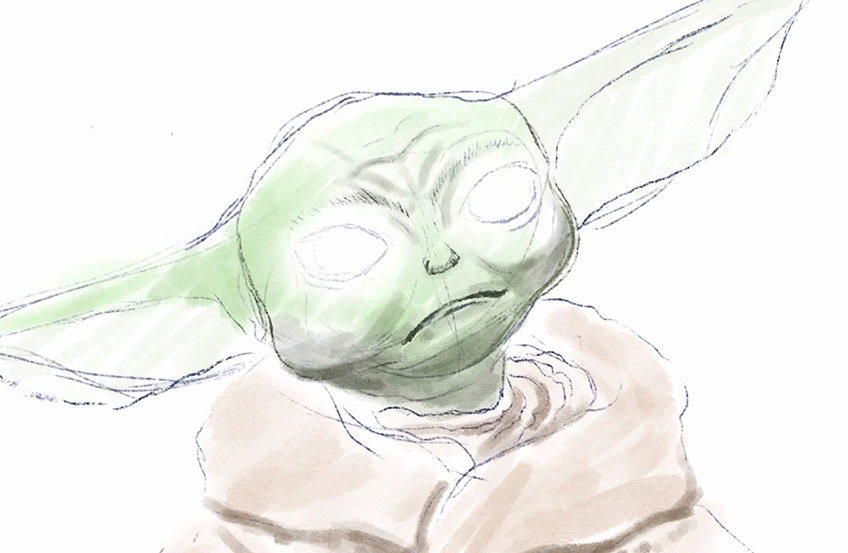
Naturally, as we build up these details, we can start considering how we can utilize darker greens in the face for shadows and darker browns in the coat for shadows.
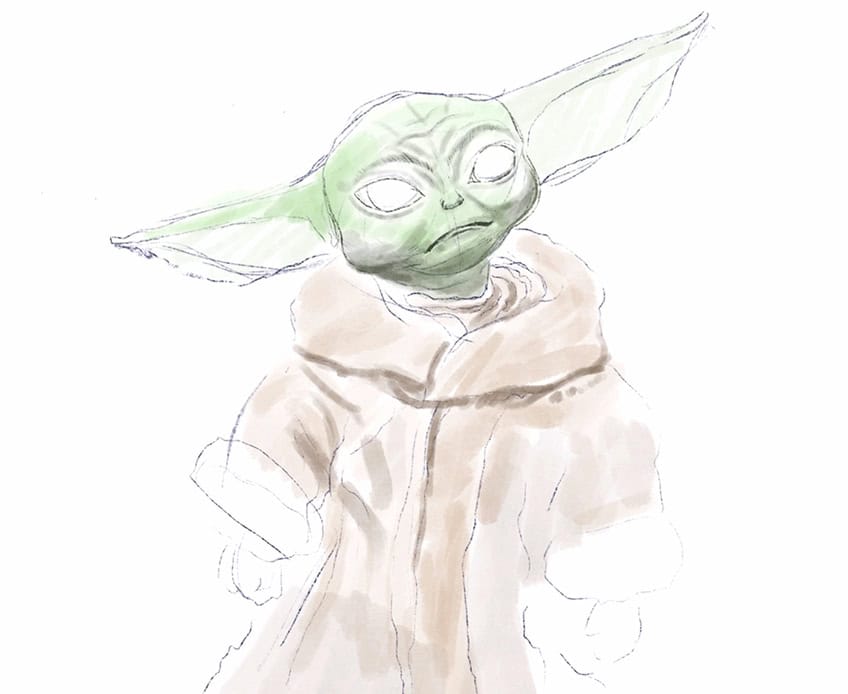
Step 3: Adding Details to the Face
Yoda’s face is made up of wrinkles and groves throughout the face, which we can define with darker green shading. We can also start to darken the eyes with a light layer of black shading.
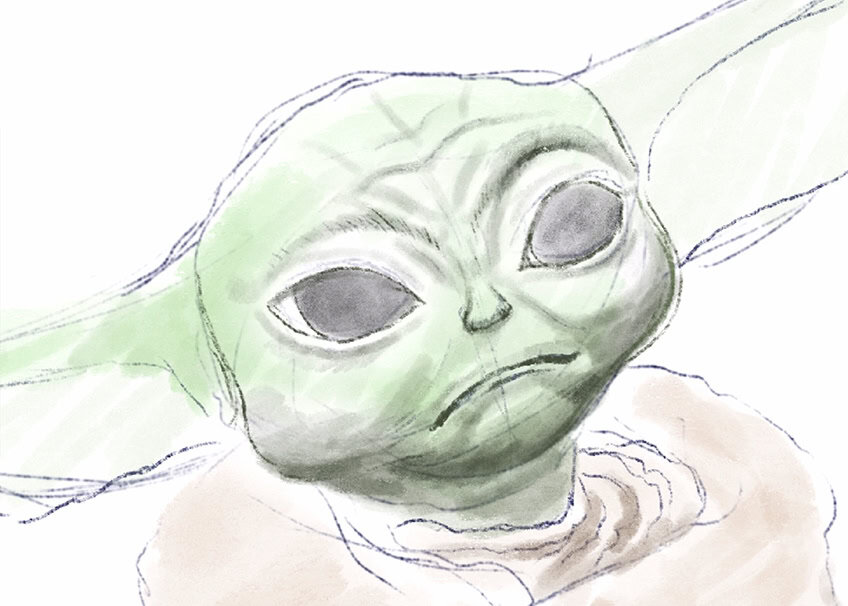
The eyes are quite specific to the Baby Yoda character, being quite large and baby-like. Yoda has significantly large pupils which contribute a lot to the baby-like aesthetic of the character.

Baby Yoda also has a slight brown coloration in the retina of the eye, we want to make sure we add in this dark brown feature to represent the eyes as best we can.

As we start to define the wrinkles around the eyes and top of the head, we can also make sure to keep the nose very small. We can also continue to define the face with highlights in the eyes.
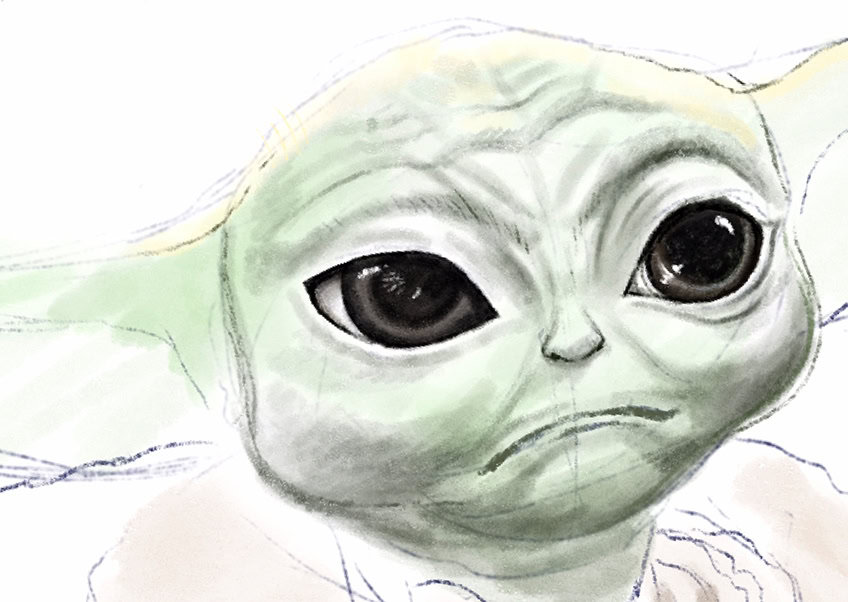
We want to take our time defining the shadow formations in the facial features, such as adding darker shading to the brow ridges to define the facial expression a little more significantly.
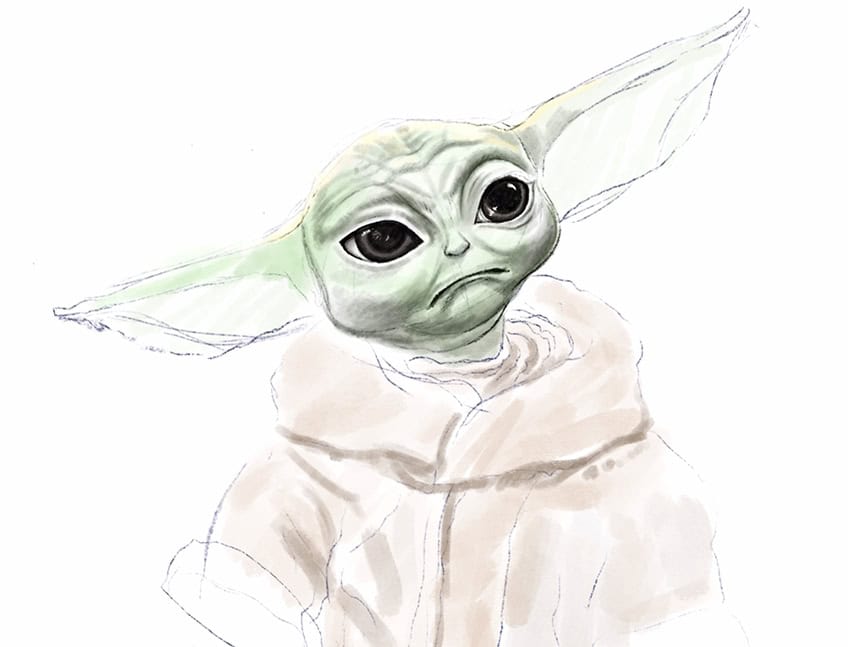
We can also make the mouth slightly darker in a downturn shape, which is another unique attribute of Baby Yoda. We can slowly enhance the shadows beneath the mouth that flow into the chin and cheeks.
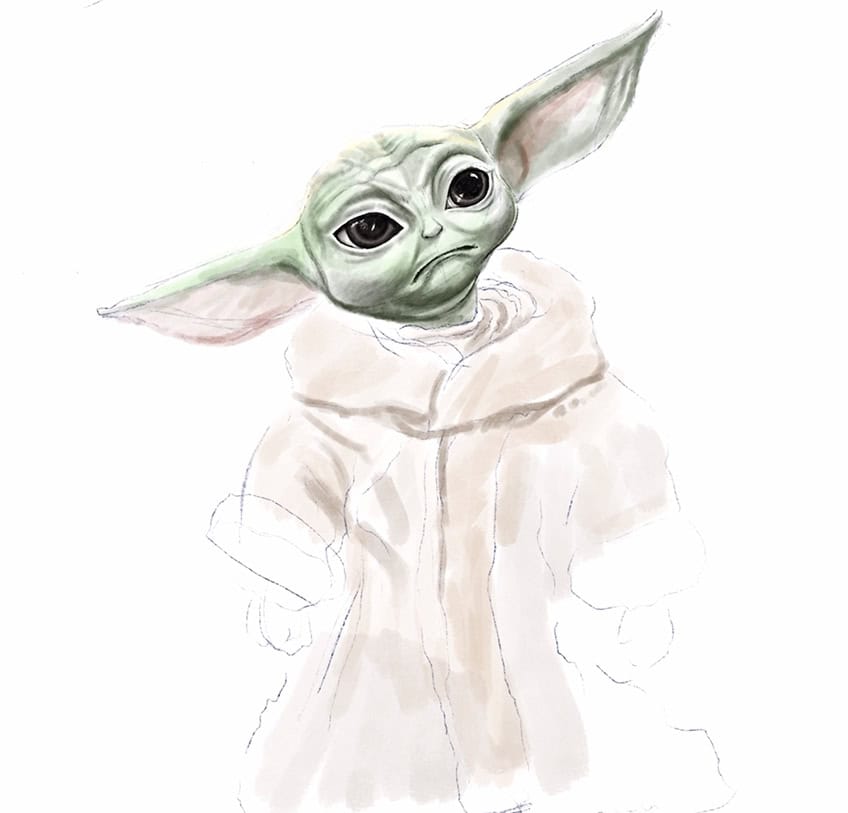
We can continue to add green coloration to the upper ridges of the ears. The inner ears are slightly more pink and brown similar to that of a cat. We can also define the ridges in the ears by adding some darker tonal values of brown.
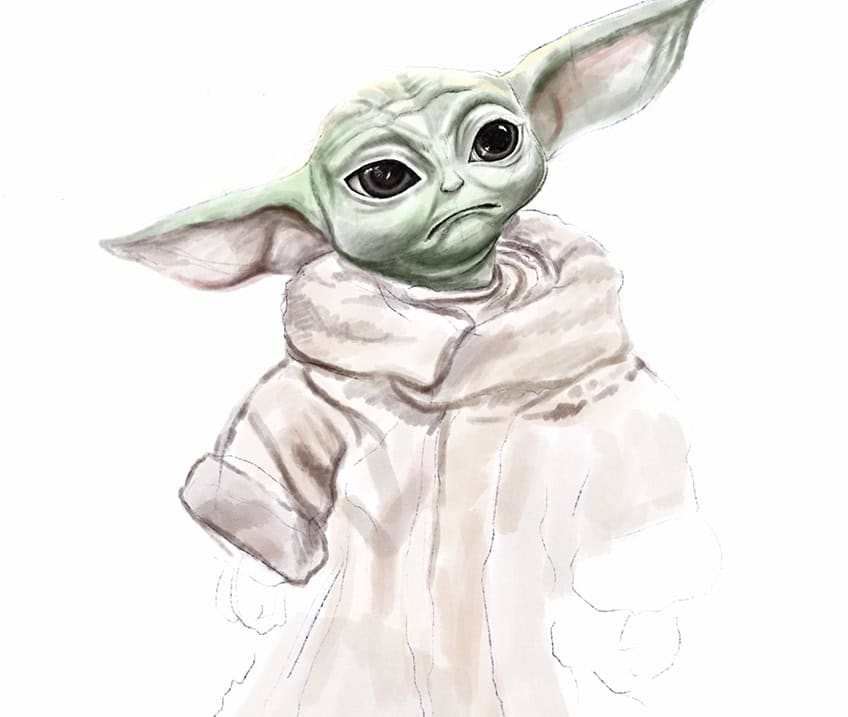
Take your time adding details to the facial features, making sure you work with darker green shading to define the wrinkles and grooves within the various features of the face.

We want to make sure we are the structure of these grooves to represent the facial expression of Baby Yoda.
Step 4: Defining the Details of the Cloak
Yoda’s cloak is a singular brown garment with very simple details, this means we are defining the grooves with various shades of brown to shape the cloak.
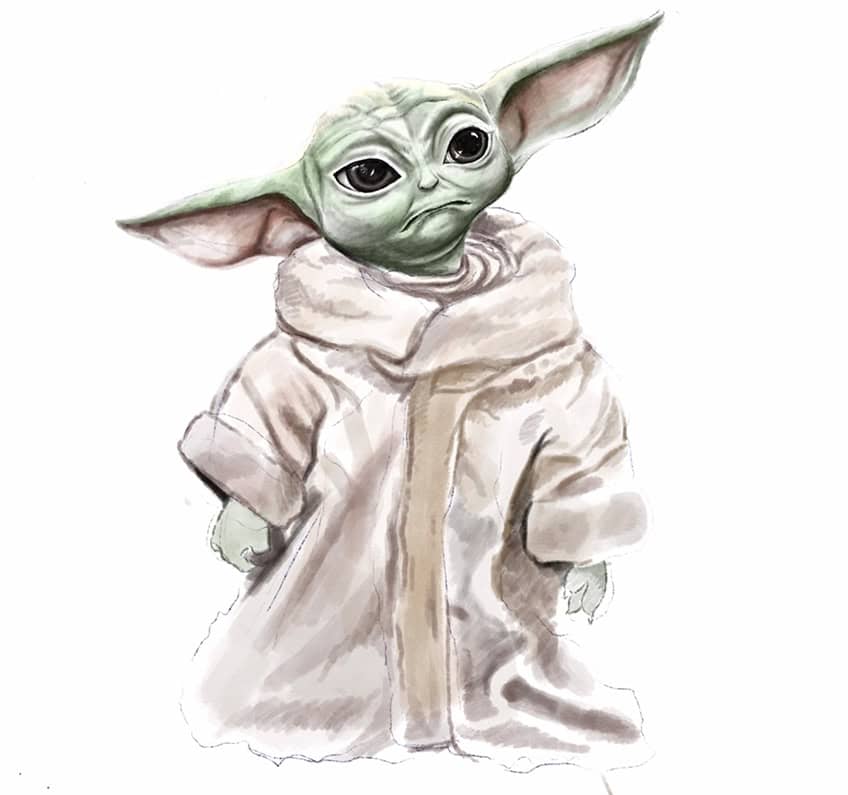
Naturally, fabric can fold and move in various directions which causes these unique shadow formations in the fabric. We want to define these shadow formations with a darker shading that establishes these geometric patterns in the garment.

The cloak also has this thick neckline and lapels that wrap around Yoda’s neck and are seemingly folded. His sleeves are also folded because Yoda is a very small character, all these details are quite large on him. We want to make sure that we define this circular stitching around his neck to contextualize how he fits into the clothing he is wearing.
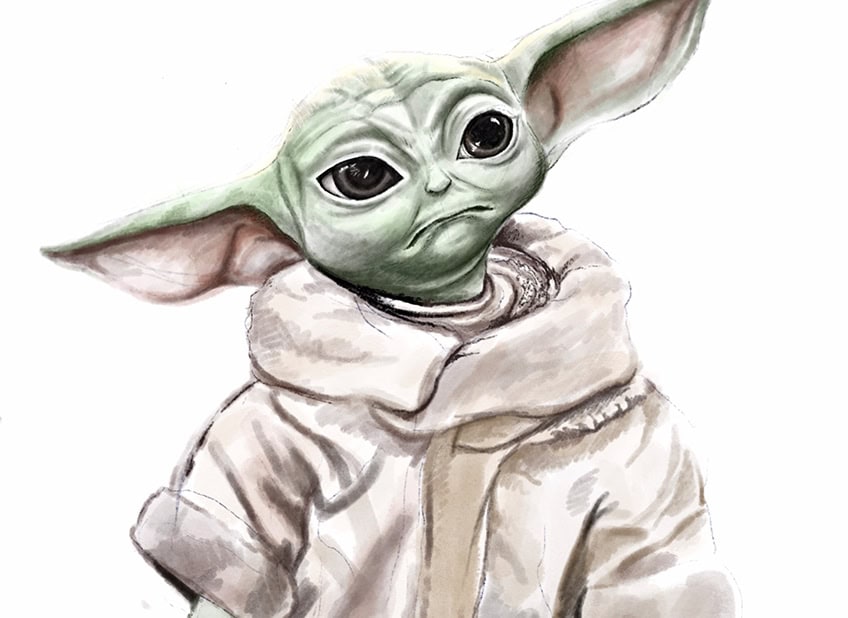
With the details of the garment, the intention is to take our time with building up the shadow formations through layers of color, working our way from light layers to darker layers of brown.

As we work our way through the entire garment, we can also make sure to define the hands of Baby Yoda. The hands are very simple in shape, with three small circular digits on each hand spending on the perspective from where they are seen. We want to make sure that the garment has these thick and bulky folds to define the oversized quality of his clothing.

As we work our to the bottom of the cloak, we can start working in shadows near the bottom of the cloak to suggest weightiness and define how it makes contact with the ground.
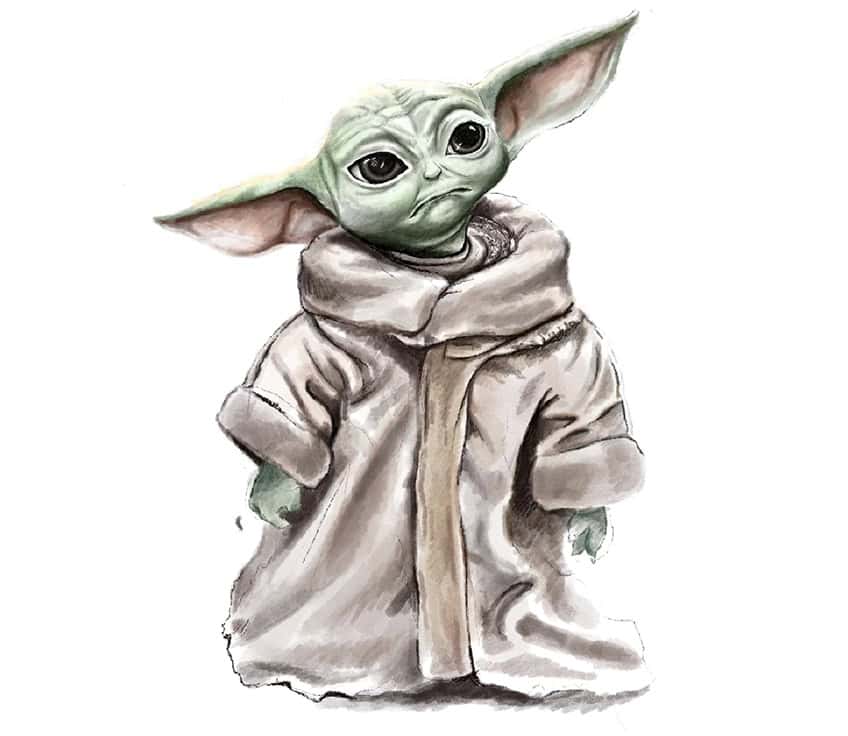
We can also add in the small shadows along the sides of the singular strap that runs through the center of the cloak.
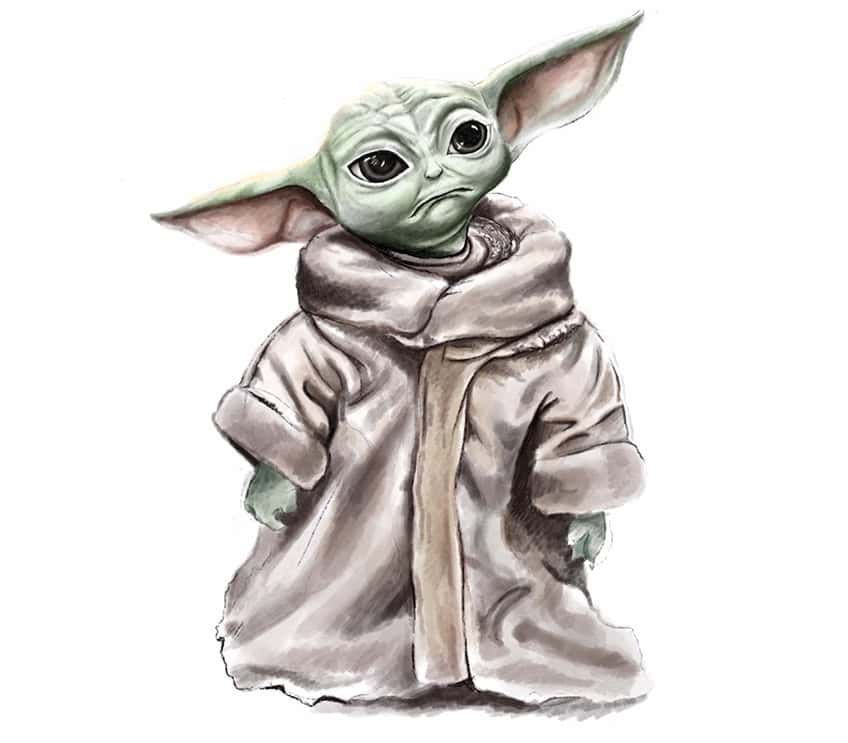
Step 5: Adding the Last Details
At this point, we should have a fairly finished Baby Yoda drawing, which we can now go over with some dark shading and line work. This is where we can add some linework to the face and the garment to shape it a little more. We can also come back to the face and enhance all the shadows with some darker shades of green. We can also define the outline of the face, cheeks, ears, and so on with some line work.
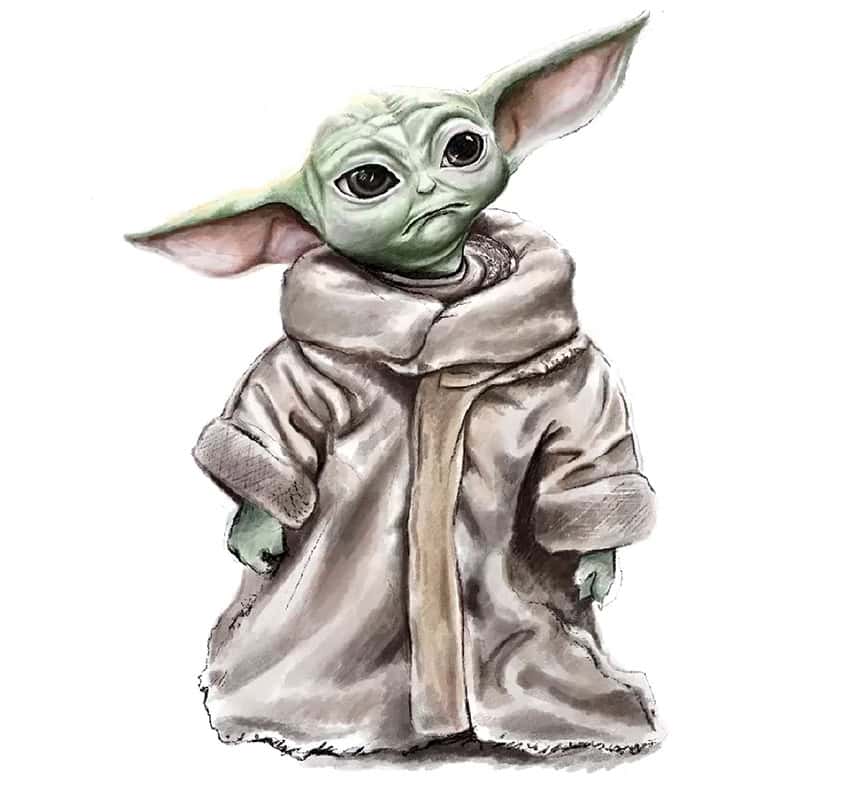
We can also enhance the outline of the cloak, perhaps adding some linework and detailing to the bottom edges of the garment to give it a more distressed look.

As you work your way through all the little details, try to utilize linework to refine the shapes of the iconic features, like the eyes, ears, hands, and so on.

That is how to draw Baby Yoda in a few simple steps. Yoda is a really cute and fun character to draw, which provides us with a unique opportunity to work on shading, layering colors, and developing our drawing skills overall.
Tips and Tricks to Remember
- Lightly shape the character. We always start with shaping the characters in their basic proportions.
- Build up the details with color. We can then build up the different features with colored layers of details.
- Take your time refining the features. Always make sure you go through all features with attention and patience.
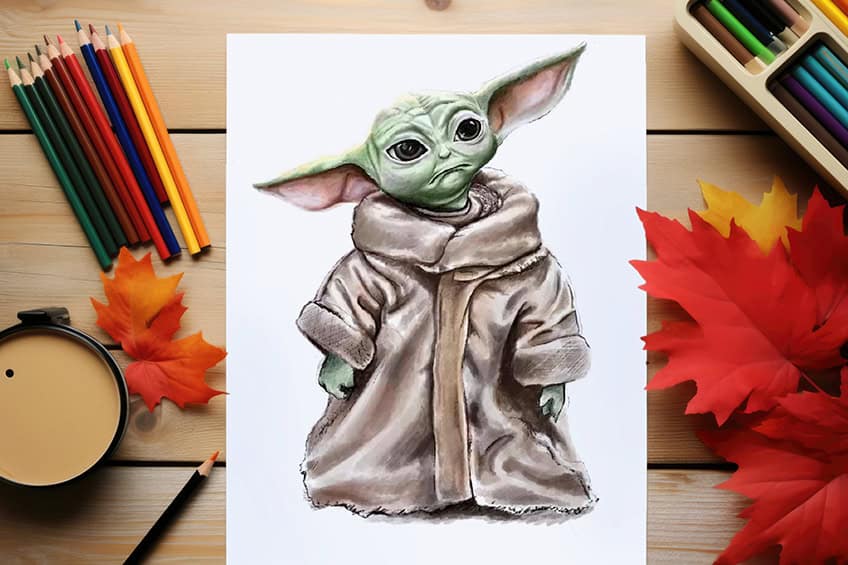
A Baby Yoda drawing is an enjoyable way to learn how to define details in colorful characters. We see that this Baby Yoda drawing provides the opportunity to understand tonal variation with very few colors through the process of layering. We learn a lot about drawing techniques, color, and details in this simple little character design.
Frequently Asked Questions
How to Draw the Eyes of Baby Yoda?
Baby Yoda has a very baby-like quality, which is seen in the largeness of his eyes compared to the surrounding features. Yoda’s eyes are large oval-shaped structures that are quite dark and glossy. We draw them as these two large oval shapes, with dark circular shapes inside. Baby Yoda also has subtle brown coloration in the iris of the eyes, which we can add around the pupils. The pupils are a distinctly large feature and take up most of the space in the eyes. From there, we can work on some highlights to define the glossy surface area of his massive eyes.
How to Draw the Ears of Baby Yoda?
Baby Yoda is a strange-looking character with animal-like qualities, such as extending ears similar to that of a cat or fox. We draw the ears as hollowed-out triangular structures that extend outwardly from the sides of his head. They are fairly hairless and green in skin color on the outer edges. The inside of the ears are slightly different in color, with a soft pink color near the inner ear and a soft green near the inner edges of the ear. We can also make the ridge on the top of the ears protrude significantly and develop a slight shadowing at the top inner section of the ear.
Matthew Matthysen is an educated multidisciplinary artist and illustrator. He successfully completed his art degree at the University of Witwatersrand in South Africa, majoring in art history and contemporary drawing. The focus of his thesis was to explore the philosophical implications of the macro and micro-universe on the human experience. Matthew uses diverse media, such as written and hands-on components, to explore various approaches that are on the border between philosophy and science.
Matthew organized various exhibitions before and during his years as a student and is still passionate about doing so today. He currently works as a freelance artist and writer in various fields. He also has a permanent position at a renowned online gallery (ArtGazette) where he produces various works on commission. As a freelance artist, he creates several series and successfully sells them to galleries and collectors. He loves to use his work and skills in various fields of interest.
Matthew has been creating drawing and painting tutorials since the relaunch in 2020. Through his involvement with artincontext.org, he has been able to deepen his knowledge of various painting mediums. For example, watercolor techniques, calligraphy and lately digital drawing, which is becoming more and more popular.
Learn more about Matthew Matthysen and the Art in Context Team.


