


How to Draw an Astronaut – Create a Realistic Astronaut Drawing
Astronauts, both brave men and women who venture into the final frontier of space, are among the most fascinating and daring individuals on the planet. They undergo intense physical and mental training to prepare for the extreme conditions they’ll face in space, including weightlessness, isolation, and radiation exposure. Their missions can range from conducting scientific experiments and repairing satellites to building space stations and exploring distant planets. Whether they’re walking on the moon or orbiting Earth, astronauts push the limits of human endurance and inspire us all to dream big and aim for the stars. As Neil Armstrong once said, “one small step for man, one giant leap for mankind”. So, today’s tutorial is one that is full of excitement and adventure as you learn how to draw a real-life astronaut!
How to Draw an Astronaut Step-by-Step
If you’re about to draw an astronaut and feeling a little unsure don’t fret! With our guidance, you’ll be able to create an amazing astronaut drawing in no time. By following our easy step-by-step guide, you’ll be able to break down the process into manageable pieces and focus on each detail, from the astronaut’s helmet to their space suit. You’ll learn how to use basic shapes to create the overall form of the astronaut, and then add details like the oxygen tank and tools they’ll use in space. With practice, you’ll gain the confidence to add your personal touch and make your astronaut drawing truly unique.
So grab your pencil and paper, and get ready to blast off into the world of astronaut art!By following each step demonstrated in the below collage, you will soon learn how to draw an astronaut.
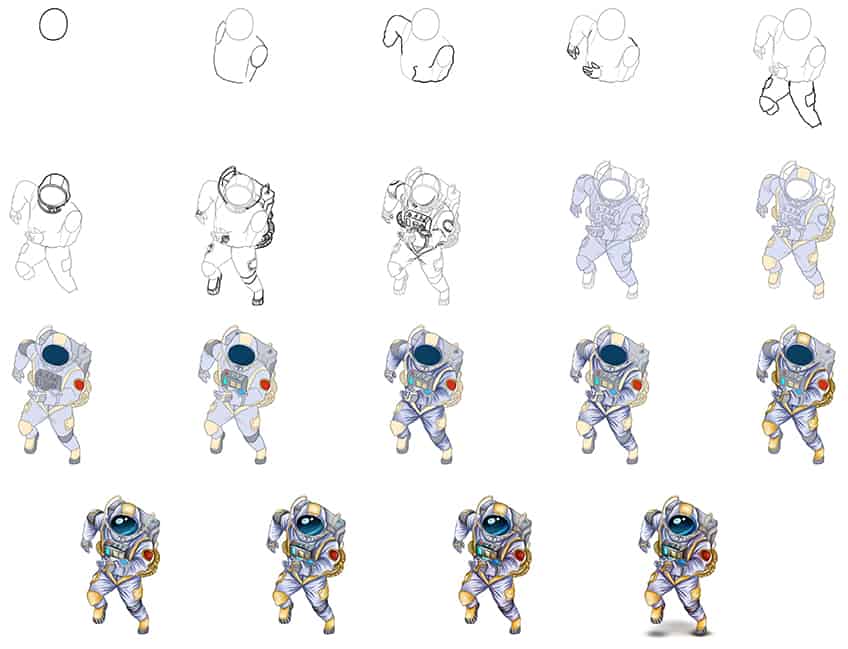
Step 1: Draw the Head
Begin your drawing by drawing an oval shape to represent the head of your astronaut drawing.

Step 2: Continue onto the Main Body
Attached to the head, draw the shoulders and shape of the main body.

Step 3: Outline the Body of Your Astronaut Drawing
Use the previously drawn construction lines to aid you, and begin to outline a more realistic body of your astronaut. Include arms that look like they are swinging in motion.

Step 4: Draw the Hands
Draw the hands attached to the swinging motion of each arm.

Step 5: Draw the Legs on Your Astronaut Sketch
Attached to the lower part of the body, draw two legs that look like they are running motion.

Step 6: Attach the Helmet to Your Drawing of an Astronaut
Surrounding the head shape you drew in step one, draw the astronaut’s helmet.
Note! The helmet should have a large visible window covering the majority of the astronaut’s face.

Step 7: Draw the Astronaut Suit
Toward’s the back of the astronaut, you are going to draw the oxygen container with two pipes that connect to the helmet. Add the smaller details, including the texture lines on the surrounding pipes. Continue to add details to the astronaut’s suit, focusing mainly on the legs and hands. Complete the step by drawing the boots on your astronaut drawing.

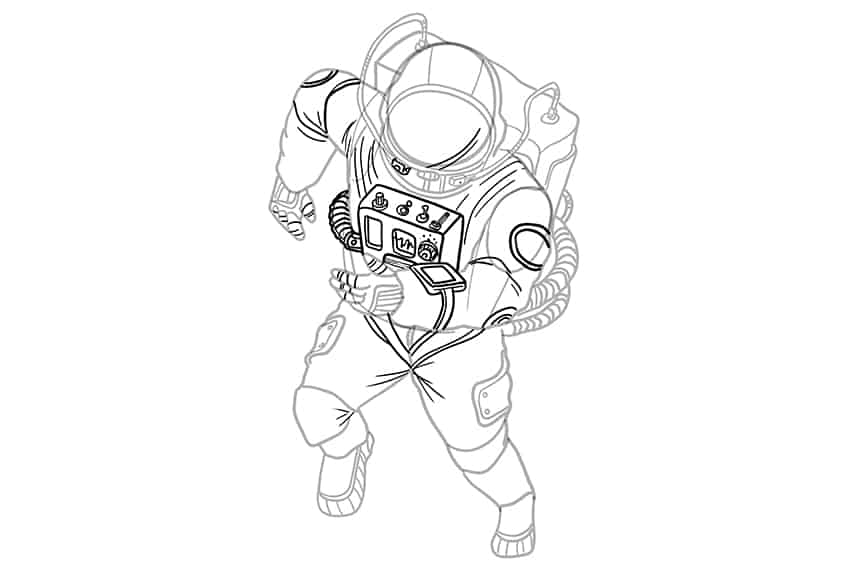
Step 8: Continue to Add Detail
Add final details to the suit which include the electronics computer box on the chest of the astronaut. Besides this, draw the texture lines and streaks or stretches on the suit.
After finishing this step, you can proceed to erase any remaining construction or overlapping lines.
Step 9: Apply the First Color Coat
Select a fine, sharp brush and a shade of light purple, and evenly coat the astronaut suit. Leave the boots, backpack, pipes, and face screen blank for now.

Step 10: Continue to Color Your Drawing of an Astronaut
Use the same brush as previously and switch to a light shade of peach paint, and fill the gloves, astronaut suit pattern, pipes, pant pockets, and boots.

Step 11: Apply the Third Color Coat
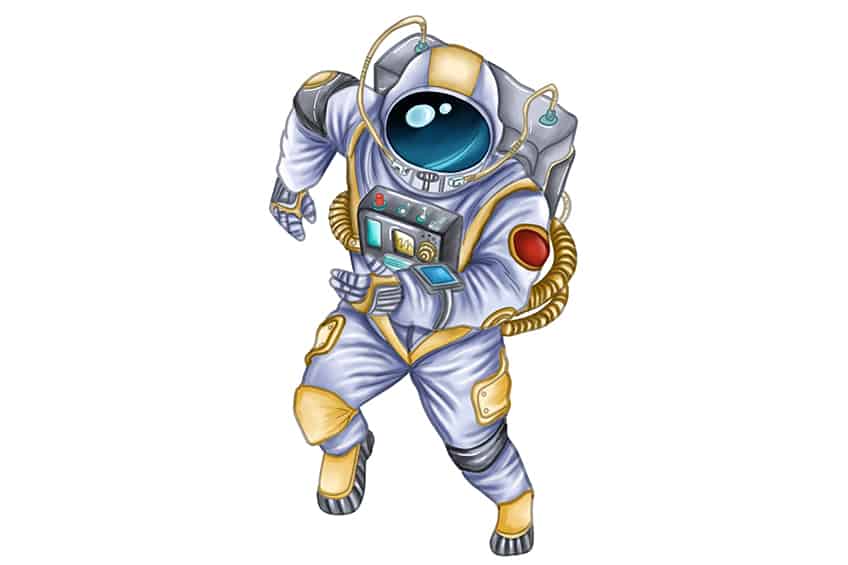
In this step, you will paint the soles of the boots, the computer box, the backpack, and the shoulder straps, using a thin brush and gray paint. Switch to gold yellow paint, and color the ring on the right shoulder patch. Repeat using red paint to color the inner circle. Complete the step using a thin brush and navy blue paint, and color the face screen.

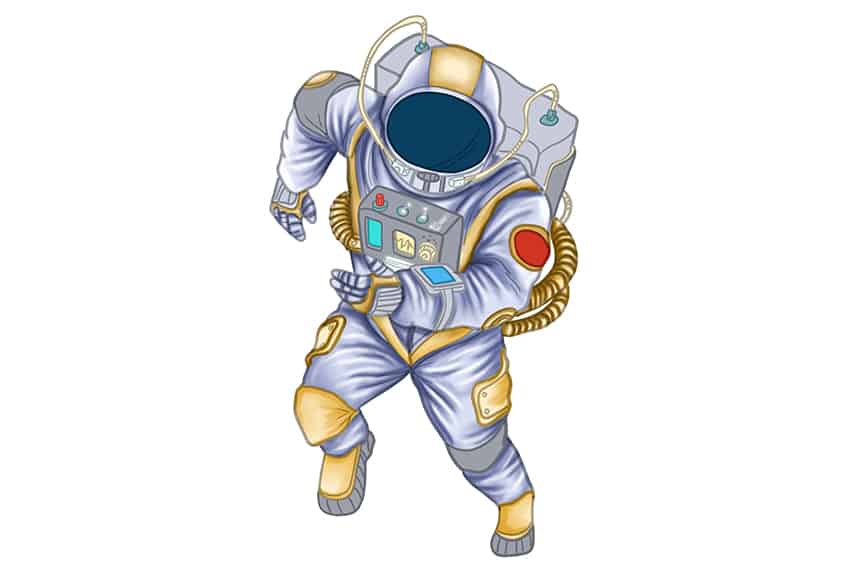
Step 12: Add Color to the Details
Begin this step, using a thin brush and tan paint, and color the computer box screen and the pipes. Continue using different shades of blue paint to color the digital screens, switches, and adaptors on the pipes. Finish this step and color the final red button on the computer box.

Step 13: Shade Your Astronaut Drawing
Trace the texture lines within the suit, using a soft brush and navy blue paint. This will enhance the shading on your astronaut sketch. Complete the step using a blending brush to smoothen and blend the newly shaded areas.

Step 14: Highlight the Astronaut Suit
Apply fine, yet subtle highlights along the previously shaded areas, using a thin brush and white paint.

Step 15: Enhance Your Drawing of an Astronaut
To do this, select a small, soft brush and a darker shade of yellow paint, and apply soft shading to the gloves, pipes, pant pockets, and boots. Switch to a blending brush to smoothen and blend these coats.
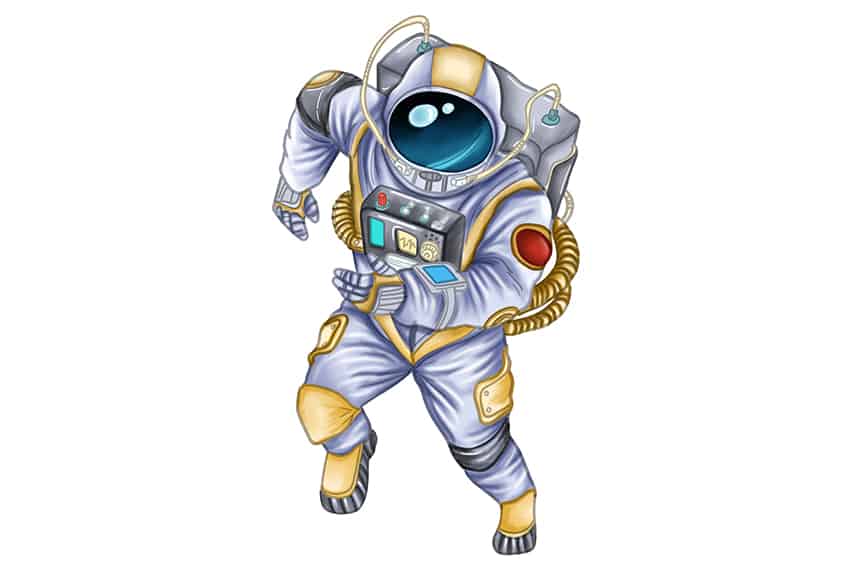
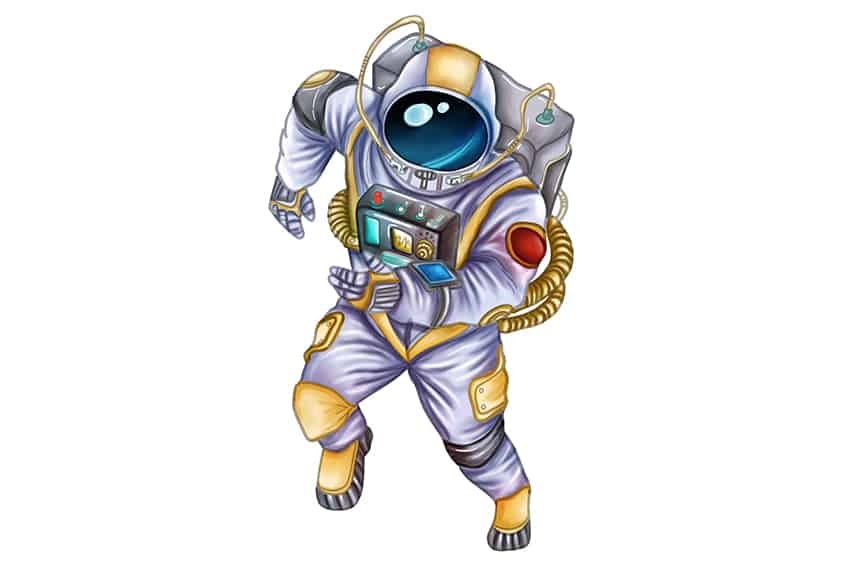
Step 16: Detail the Face Screen
Begin by using a soft brush and black paint, and softly shade the edges of the face screen of the helmet. Spread the shading with a blending brush. Follow this using a thin brush and teal paint, and add two small reflective ovals. Using a combination of white and bright blue paint, add a soft highlight on the screen.
Enhance the gray areas on the astronaut’s suit, using a soft brush and a dark shade of gray paint. Finish this step using a thin brush and white paint, and apply fine highlights along the darkened areas.
Step 17: Darken the Smaller Details on Your Astronaut Sketch
Use a combination of white and light gray paint and a soft brush, to apply gentle shading to the smaller details on your astronaut drawing. Continue to shade details such as the wrist strap, hand pads, dials, buttons, and switches.
Step 18: Apply a Color Fade
Use the same brush as previously and a light shade of red paint, and apply a soft color fade along the right side of the astronaut fading onto the left end. Switch to a blending brush to soften these color coats and create a seamless color fade and blend.
Step 19: Add a Ground Shadow
In this step, select a soft brush and black paint, and add a soft dark shadow directly underneath your astronaut drawing. With a blending brush, soften and spread the edges of the casted shadow.
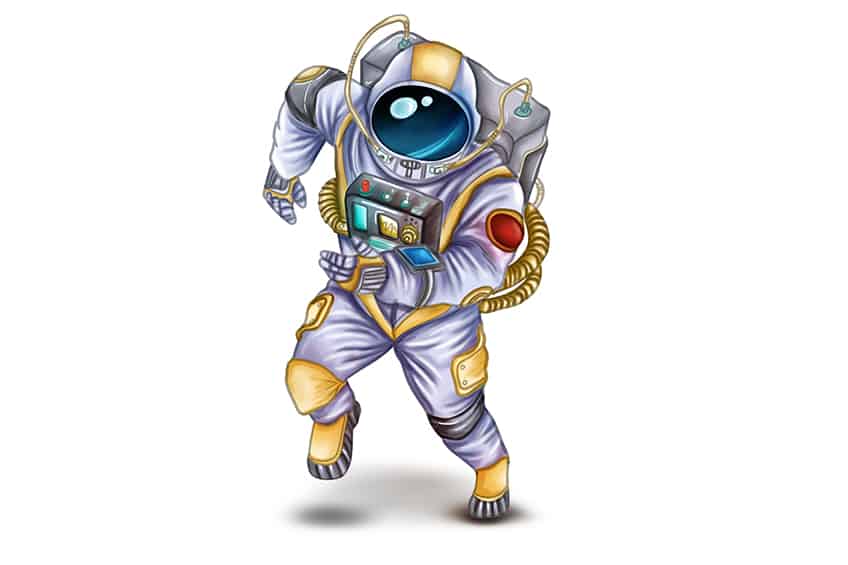
Congratulations! You’ve just finished drawing an astronaut, an impressive feat that requires a lot of skill and attention to detail. Take a moment to admire your work and appreciate the effort you put in. You’ve captured the essence of an astronaut, from the iconic space suit to the tools and equipment they use to explore the final frontier. Don’t worry if it’s not perfect – every drawing is unique and has its own charm. Keep practicing and experimenting with different techniques to improve your skills and create even more amazing artwork. Who knows, maybe one day you’ll be the one to venture into space as an astronaut yourself!
Frequently Asked Questions
What Are the Basic Shapes I Should Use When Drawing an Astronaut?
When drawing an astronaut, it’s best to start with basic shapes like circles, rectangles, and triangles. For example, the head of the astronaut can be drawn as a circle, the body as a rectangle, and the arms and legs as cylinders. From there, you can add details to make it look more like an astronaut. If you are unsure of how to do this, our drawing tutorial on how to draw an astronaut will take you through this process step-by-step!
How Do I Make Sure the Proportions of My Astronaut Drawing Are Accurate?
To ensure that the proportions of your astronaut drawing are accurate, you can use reference images or templates as a guide. Pay attention to the relative sizes of different body parts, like the head, torso, arms, and legs, and make sure they are in proportion to each other. You can also use basic measuring techniques, like comparing the length of one body part to another, to double-check your proportions. Don’t be afraid to make adjustments as needed to achieve the desired result.

Matthew Matthysen is an educated multidisciplinary artist and illustrator. He successfully completed his art degree at the University of Witwatersrand in South Africa, majoring in art history and contemporary drawing. The focus of his thesis was to explore the philosophical implications of the macro and micro-universe on the human experience. Matthew uses diverse media, such as written and hands-on components, to explore various approaches that are on the border between philosophy and science.
Matthew organized various exhibitions before and during his years as a student and is still passionate about doing so today. He currently works as a freelance artist and writer in various fields. He also has a permanent position at a renowned online gallery (ArtGazette) where he produces various works on commission. As a freelance artist, he creates several series and successfully sells them to galleries and collectors. He loves to use his work and skills in various fields of interest.
Matthew has been creating drawing and painting tutorials since the relaunch in 2020. Through his involvement with artincontext.org, he has been able to deepen his knowledge of various painting mediums. For example, watercolor techniques, calligraphy and lately digital drawing, which is becoming more and more popular.
Learn more about Matthew Matthysen and the Art in Context Team.


