How to Draw 3D Shapes – Learn to Draw 7 Different 3D Objects
Learning to draw 3D shapes is a fundamental skill to know as an artist, as this is the foundation of most subject matter. This is because, on many occasions, artists will be drawing three-dimensional structures in some sort of way, whether it is figure drawing, a still life, nature, or any other three-dimensional subject. Having a basic knowledge of the process of constructing three-dimensional structures is important to grasp. We will cover 7 different 3D shapes to draw, including detailed step-by-step tutorials.
A Step-by-Step Guide to Drawing 3D Shapes
In this tutorial on how to draw 3D shapes, we will begin by breaking down the fundamentals of a 3D shape drawing. To effectively start drawing 3D shapes, we need to know what 3D shapes drawings consist of.
From there, we will utilize these concepts as we pursue drawing 3D shapes, allowing us to explore the effects of the fundamental concepts of three dimensions within various 3D shapes. Now that we know what to expect, let us go through this tutorial on how to draw 3D shapes.
Fundamentals of Three-Dimensional Shapes
Before we explore variations of 3D shapes, let us go through the building blocks of three-dimensional shapes. To feel confident about drawing 3D shapes, we need to understand what constitutes a 3D shape drawing.
Creating Three Dimensions in a Shape
Let’s start with a simple object; a cube. We want to break down the fundamentals in the simplest way possible. The way we start is by drawing a simple square.
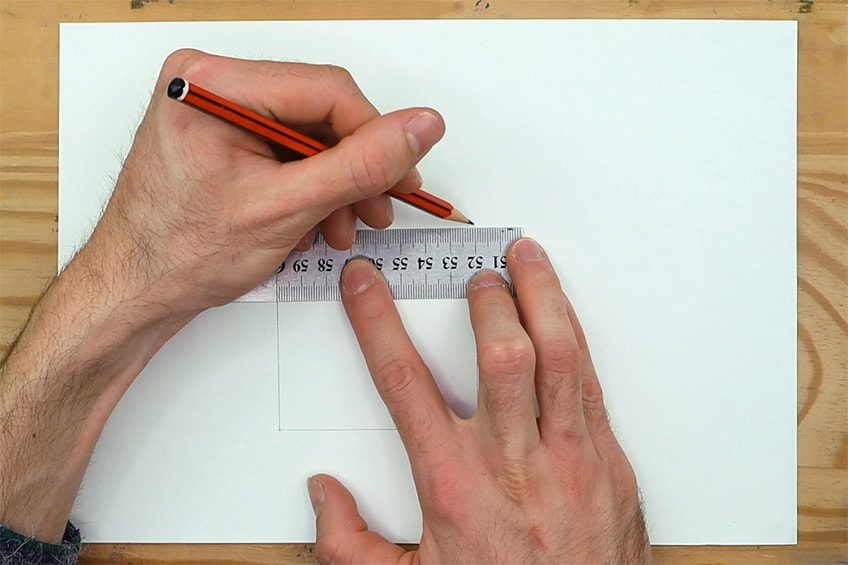
A two-dimensional square is made up of only length and width, but in this case, we can start with height and length.

We now have vertical and horizontal lines that represent height and length. However, to introduce the third dimension, width, we need to use a diagonal line.

Generally, you would start with length and width as the first two dimensions, but in the case of drawing 3D shapes, we work with height and length first so that the square is upright, just to make it easier.
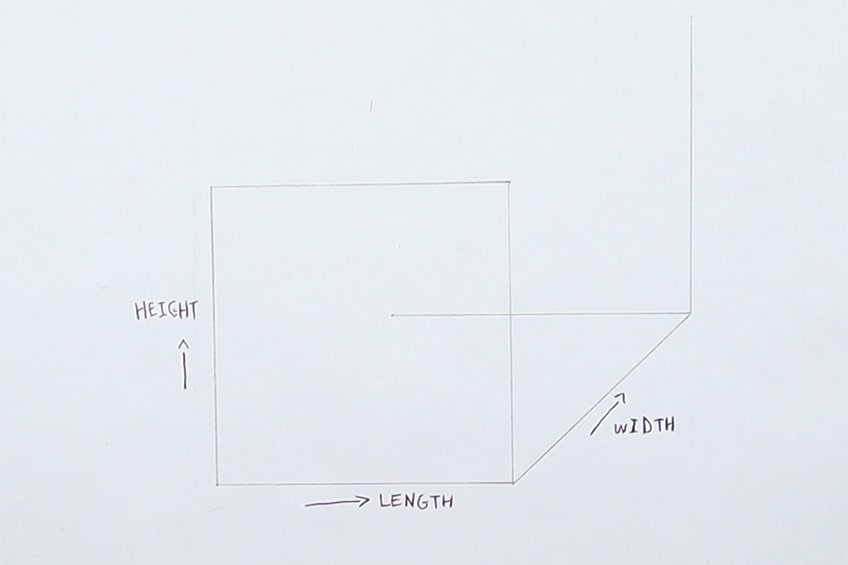
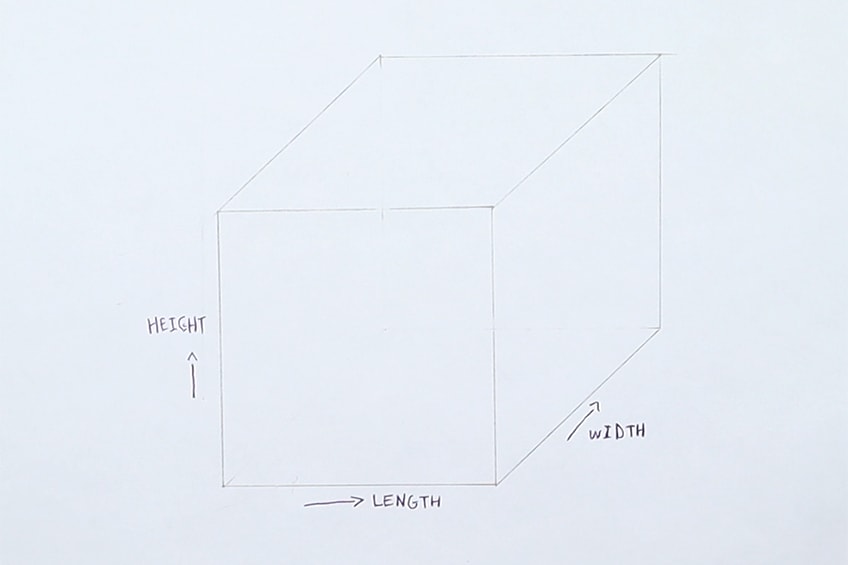
Once we have established all three dimensions, we can now proceed by drawing another square that starts at the end point of the diagonal line. This diagonal line should theoretically connect to the bottom right corner of each square.

The method to remember for 3D shape drawing is that, usually, all lines should connect to corresponding points. This means that if you draw two squares, you can make them three-dimensional by connecting all the same corners with straight lines.
Identifying the Light Source
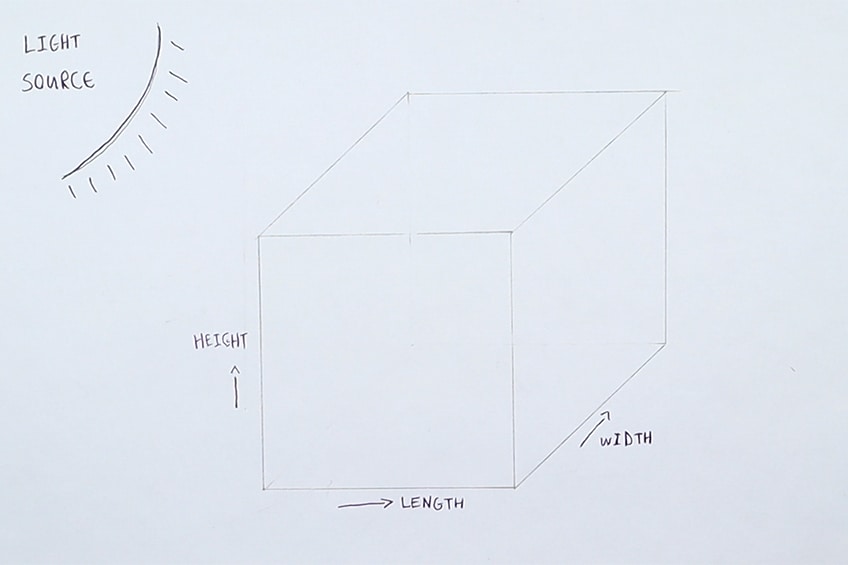
The next essential stage for drawing 3D shapes is knowing from which direction a light source is present. This is going to form shadows around our 3D objects drawing to emphasize its three-dimensional qualities.
Using Shading to Represent Light
Once we understand where the light source is coming from, we then can start to accurately shade in the object. The darkest parts of an object will always be the direct opposite side to that of the light source.

In the case of three-dimensional objects, you want to imagine that the light source is still capable of wrapping around the object slightly. This means there will be tonal variations in the shading.
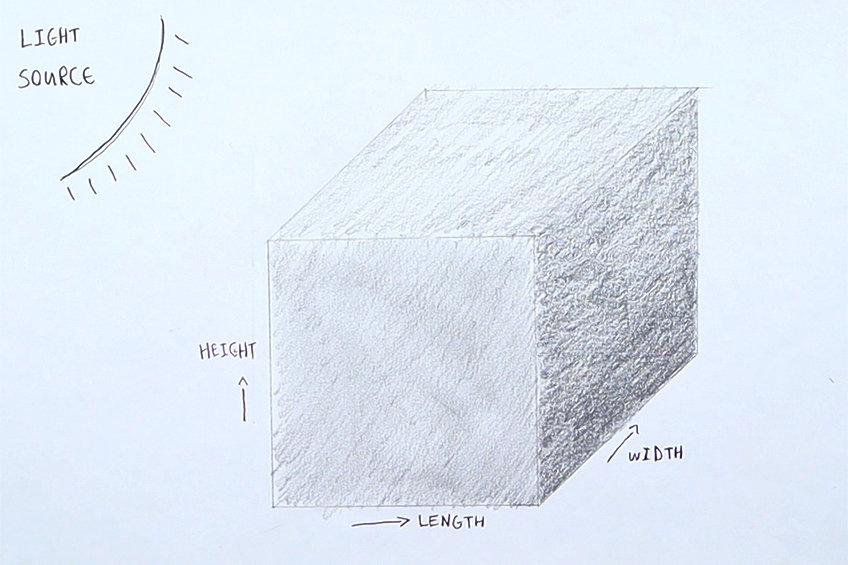
In the case of three-dimensional objects, we can use the rule of three tonal values to assist us in our shading process. This means we will have a dark, medium, and lighter tone in all visible surface areas of the cube.
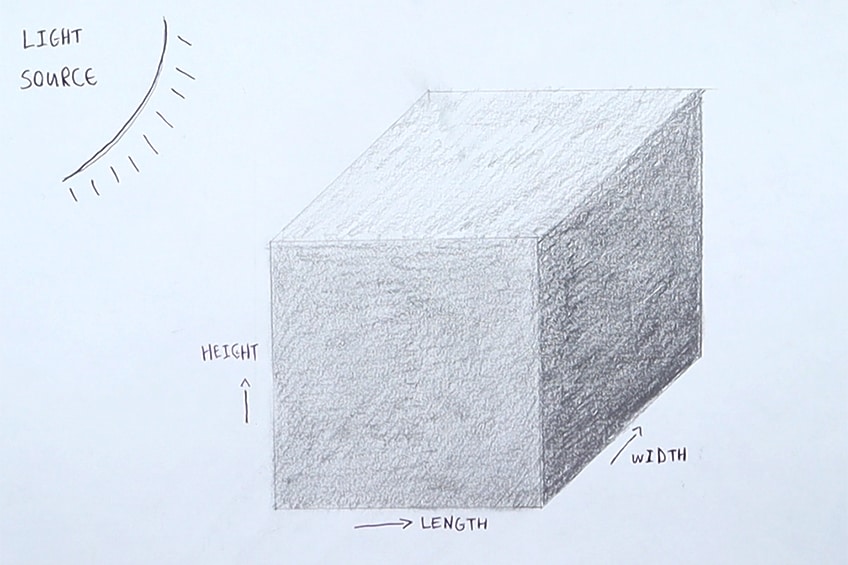
From there, it is a matter of refining your shading to have these three distinct qualities of shadow, which represent the three dimensions more clearly. This is the basic process of drawing 3D shapes.
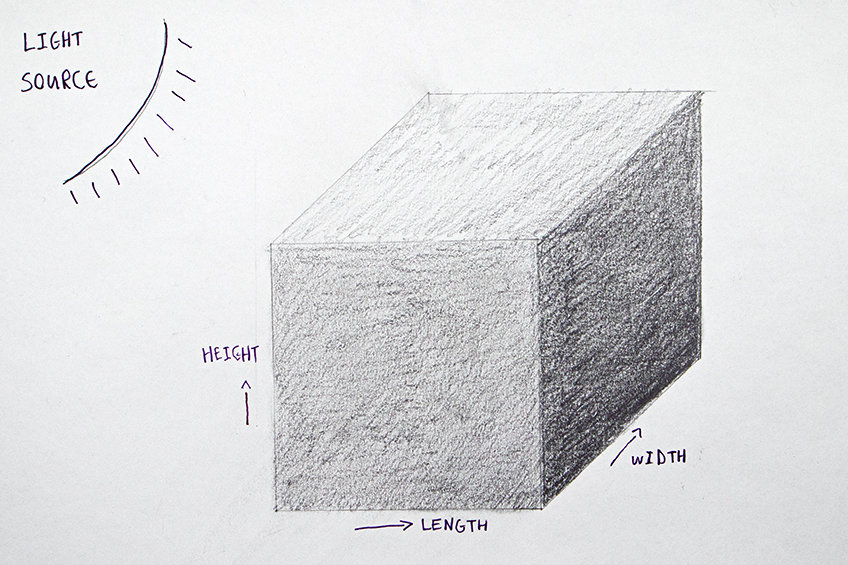
Drawing Different Three-Dimensional Shapes
Now that we understand the fundamental concepts applied to drawing 3D shapes, we can now create a variation of our own 3D shapes drawings.
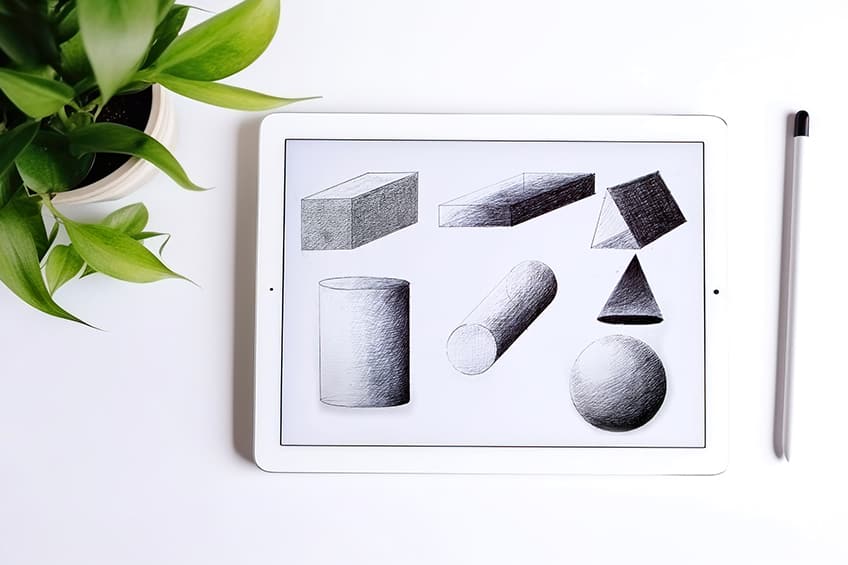
We will explore how to draw 3D shapes and slowly progress to more complicated and rounded objects, starting from the simple cube and ending with the sphere. We can do this on a single large piece of paper, allowing us to have a few shapes on one page so that we can see the progression.
3D Squares
Let’s start with some simple cube structures, where we explore two variations of cubes by using the same method for each 3D shape drawing.
Cube
Let’s start with a simple cube shape, where we work with the basic square shape. This is the best place to start as it is very simple in construction.
Step 1: Draw Two Evenly-Sized Squares
We begin by drawing two evenly-sized squares. We want to draw one of them slightly higher than the other to create more depth in the cube.
Step 2: Connecting the Squares
From here, we can use our rulers to draw connecting lines between the same corners of each square. This means we want to connect the right corners with a single line and do this for the rest of the corners for both squares.

Step 3: Shading the Cube
From here, we can choose where we would like to represent the darkest and lightest parts of the cube. Remember, we want to imagine a light source being present on one side of the cube. This way, we can add shading more effectively to our 3D shapes drawing.

We also want to work with three different tonal values within the shape. With cubes, they have distinct corners and edges, which makes it easy to break up the different tonal values into three distinct variations.
These tonal values can be as dark as you would like, but keep in mind that the darkest side will always be opposite the side of the light source.
Rectangular Cuboid
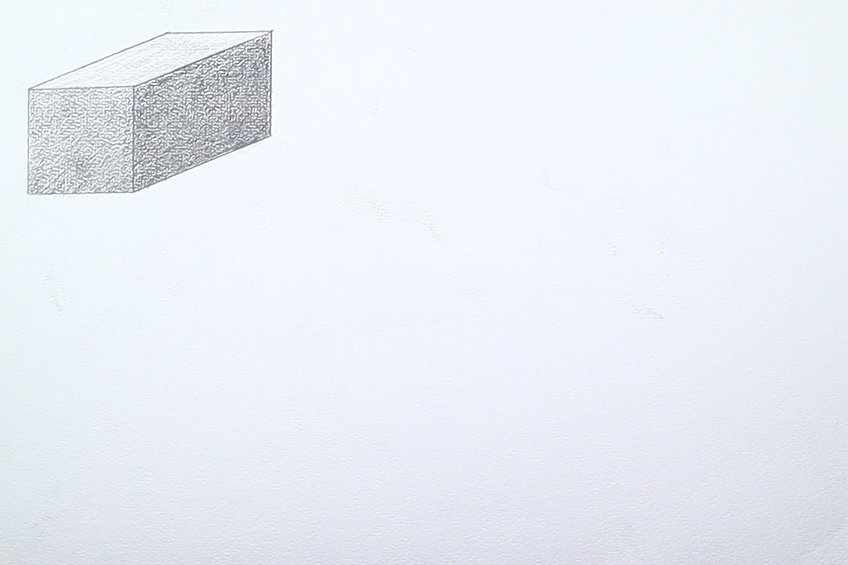
This time, we will use the same method, except we will create a more rectangular shape. We will find that the process is much of the same but with slight alterations.
Step 1: Draw Two Evenly-Sized Rectangles and Connect Them
Since rectangles have the same number of corners, we can follow the same process of drawing a rectangular cube. This means we can draw two rectangular shapes and connect the corresponding corners with straight lines.
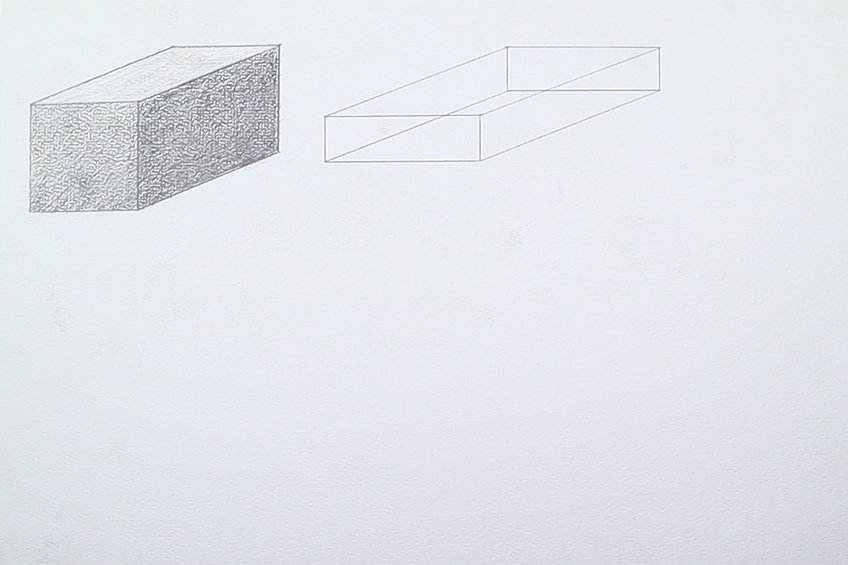
Step 2: Shading the Rectangular Cuboid
Once again, the process is the same for shading, whereby we imagine the side at which the light source is present and then shade in the shape strategically. We can do this with other mediums as well; perhaps consider using a pen.

You can also explore different shading techniques and styles within 3D objects drawings. Cross-hatching is a great way to create subtle variations with a pen.
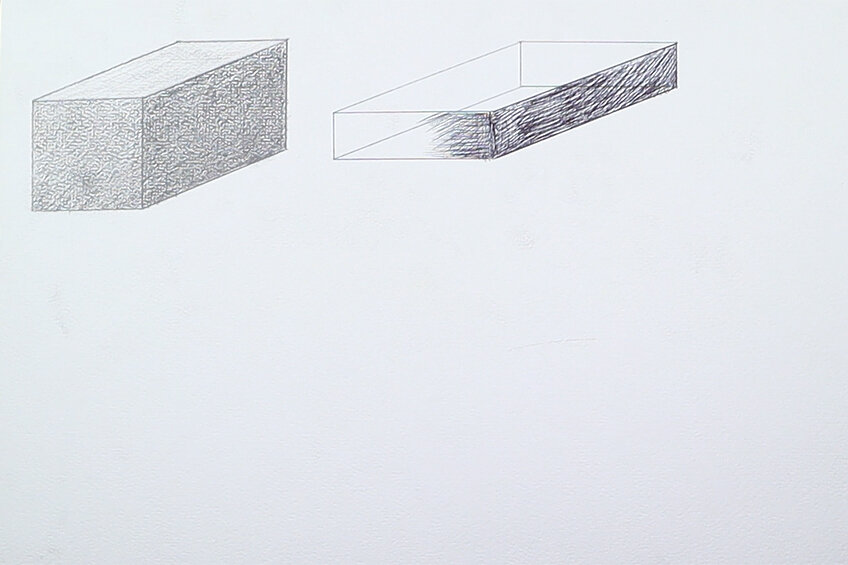
We also can explore different ways to emphasize three-dimensionality within shapes by using different shading styles. This means we can cover more surface area with shading or make the transitions between light and darker areas more seamless.

3D Triangles
A 3D triangle can be drawn in a few ways; however, in this tutorial, we will look at the basic prism and cone shape. Both of these are formed within the triangular formation but have different three-dimensional qualities.
Prisms
Starting with the basic prism, we will use the same method of drawing as we did for the cube, except this time, we will only be connecting three corners instead of four.
Step 1: Drawing a Triangle
Using your pen or pencil, proceed to draw a triangle. At this point, don’t worry too much about making a perfect triangle.
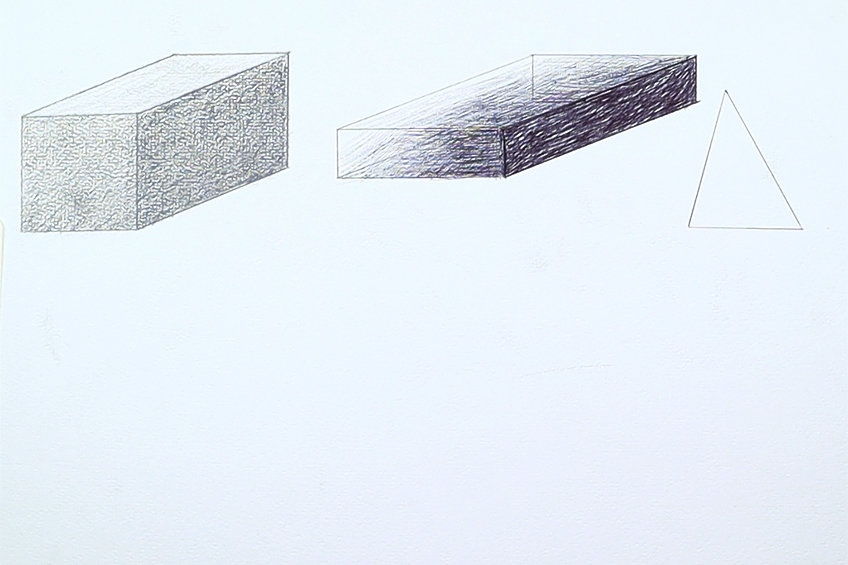
Step 2: Connecting and Shading the Triangle
You then can draw another triangle that is the same as the first, and then proceed to connect corresponding corners with straight lines. This means that we connect the top corner to the other top corner, and so on for each corner.

At this point, we know that we integrate shading into the drawing according to how we factor in the position of the light source. At this point, you can allow yourself to explore different shading variations using the imaginary light source to guide you.
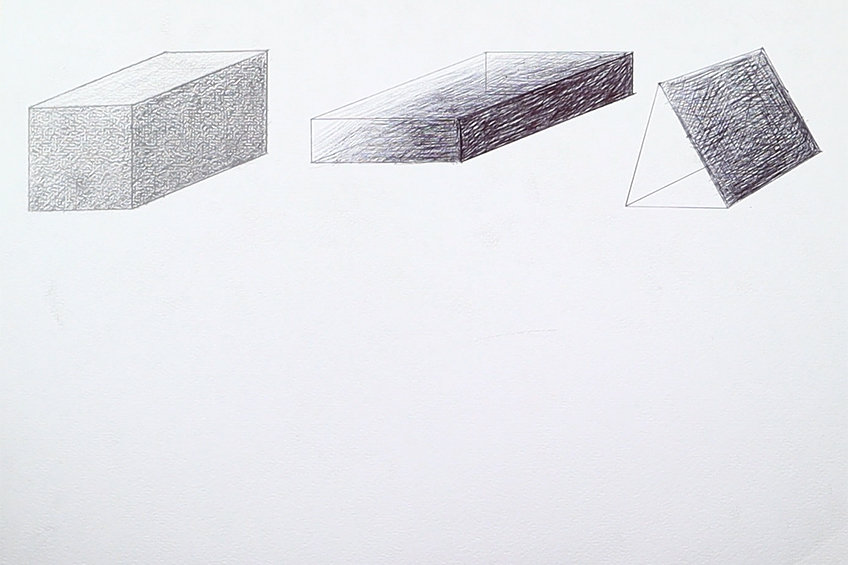
Either way, a three-dimensional triangle or prism will still represent three visible surface areas onto which you can add different tonal values.

Cones
We are slowly moving into rounded 3D objects drawing, where we start to explore how to draw 3D shapes with curved edges. The Cone is a great segue between triangular shapes and rounded shapes, so let us take a look at the drawing process.
Step 1: Drawing a Triangle and Oval
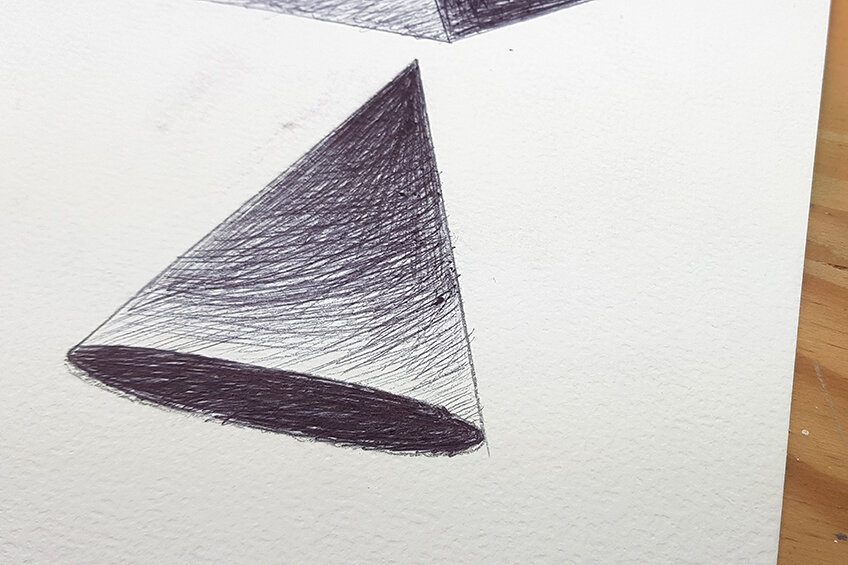
Using your pen or pencil, we simply want to draw a triangle, except we won’t have a flat base, but an oval base. The triangle will simply connect to either side of the oval’s most outer edges, and that’s the cone shape.

Step 2: Adding Shading to the Cone
What will give the cone its three-dimensionality is how we shade it in the cone. This can be done in all sorts of ways- you could create a gradient from the tip to the base of the cone starting from dark to light.

You could also color the inside of the cone dark to represent a lack of light inside the cone or to suggest it is solid. Cones are strange objects that are simple to draw but can be shaded in various ways.
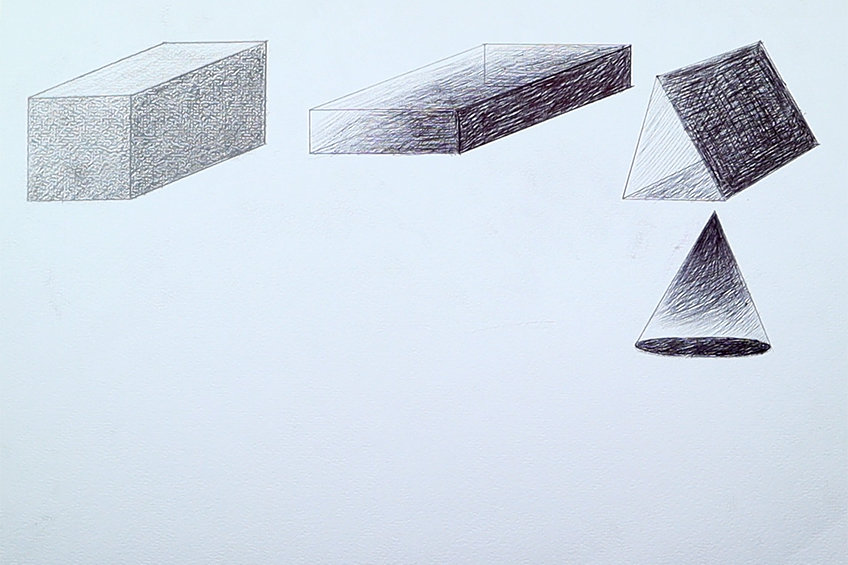
When it comes to shading rounded objects, we will find that we are relying more on our shading skills to create seamless transitions. These transitions should suggest a curvature between shaded and lit areas within a shape.
3D Circles
We have slowly transitioned from edged shapes to curved shapes. We will now explore drawing rounded three-dimensional shapes that can come in a few variations. We will look at three in particular. We will look at two cylinder views as well as a sphere as the most complicated rounded three-dimensional object.
Cylinder On its Side
Let’s start with a more basic cylinder view that depicts a cylinder laying on its side. We will find that the fundamental process of cubes and prisms still applies to cylinders. Let us take a look at how this 3D shapes drawing unfolds.
Step 1: Draw Two Circles
As we did with the cube by drawing two squares, we want to start by drawing two circles for our cylinder. We can draw these circles using a compass and can be drawn anywhere next to each other after which they will be connected with straight lines.
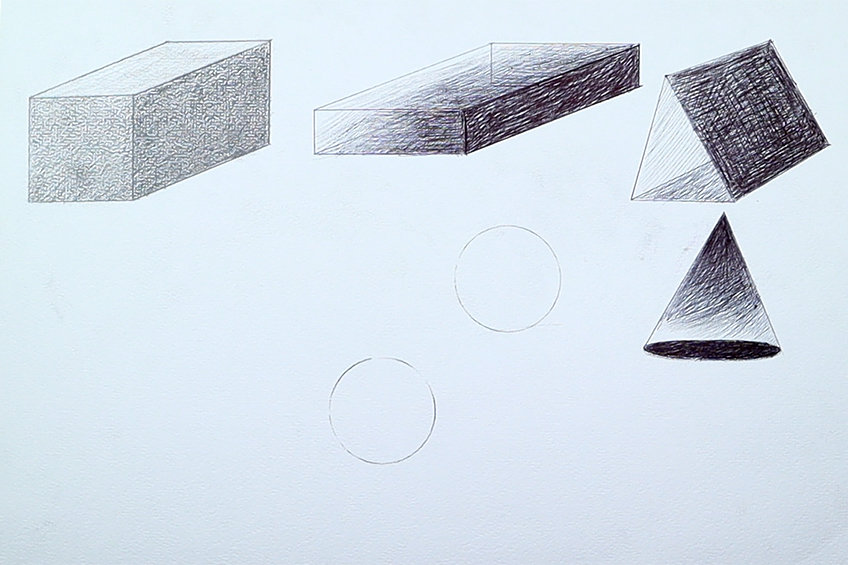
Step 2: Connecting the Circles with Straight lines
From there, we want to connect the same sides of each circle. We connect them with a straight line, making sure that the line connects to the most outer curved part of each circle. We can also make sure that the lines are perfectly parallel to create more accuracy.
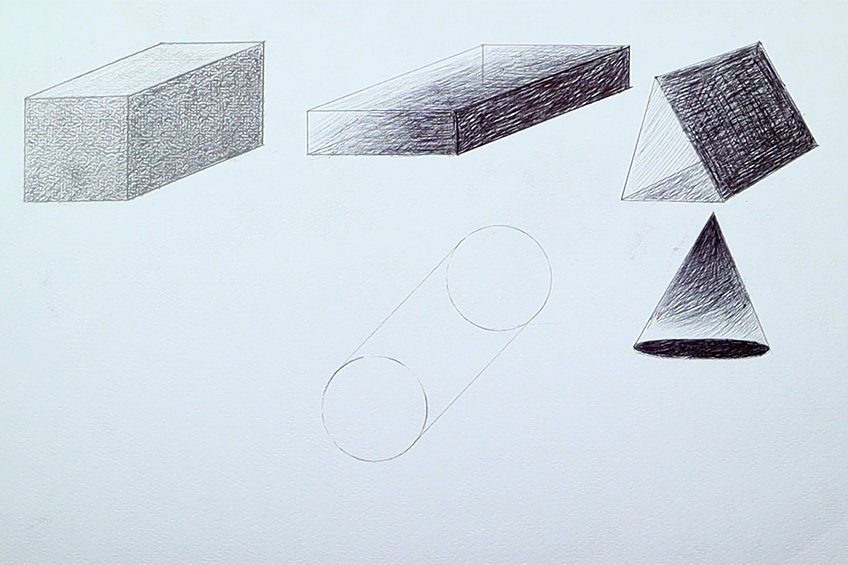
Step 3: Shading the Cylinder
With shading in curved objects, we still want to imagine the three tonal values, except this time, they are not separated by edges but by a seamless transition in the shading. This means that we want to be very cautious with our shading.

You want to layer your shading from light to darker layers, making sure you create a transition from the darkest side to the lightest side of the shape. This is all depending on where you have established the position of the light source.

Shading curved objects requires more attention than straight-edged objects. This is because the transition from dark to light should flow seamlessly from one to the other.

This is also a great opportunity to practice your shading skills, s it can be a great challenge to create these transitional moments in curved shapes.

Remember, we are still working with the idea of creating three tonal values within the shape, except this time, there is a subtle shift in the curved areas of the shape.

Cylinder Standing Upright
The same applies to drawing a cylinder from the side view, where the curvature is less visible. From this angle, the shading is especially important for establishing the subtle shift in the curved object and how shaded different sides are.
Step 1: Drawing Two Ovals and Connecting Them With Straight Lines
At this point, we can follow the same process as before, but this time, we want to draw flattened circles. How we do this is by drawing two ovals directly in line with one another in a vertical fashion.
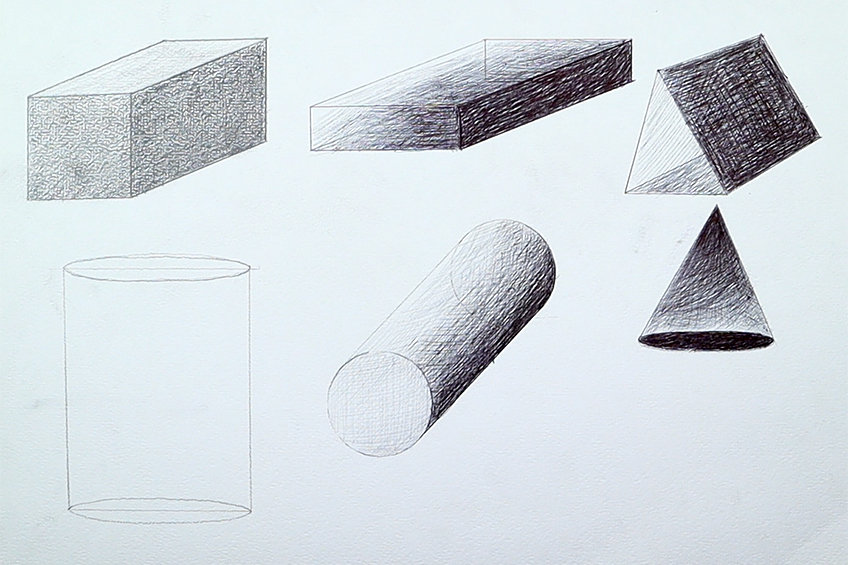
We then connect the outer edges of each oval with straight lines to the other oval’s outermost edges. Again, we can make it accurate by keeping the lines parallel to one another.
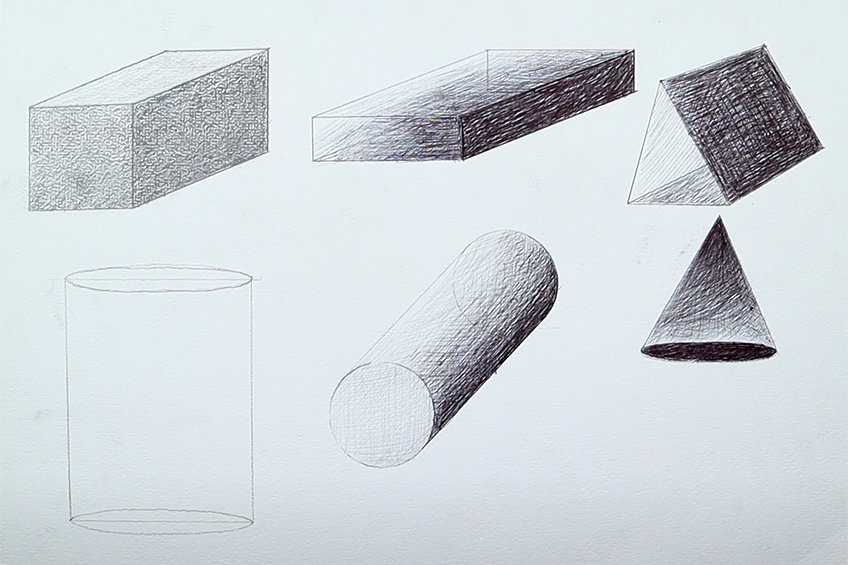
Step 2: Shading in the Cylinder
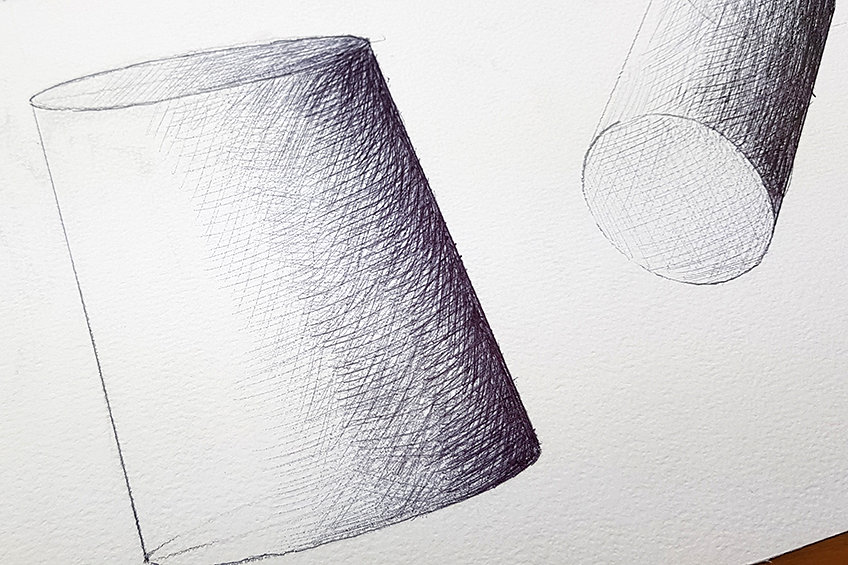
Again, we want to choose which side the light source will be present and begin shading from the opposite side. As we shade in the shape from the other side towards the lighter side, we will slowly start to establish the seamless transition within the curve.

Again, with curved shapes, it becomes more about shading and how to develop gradients between the darker and lighter sides of the shape.
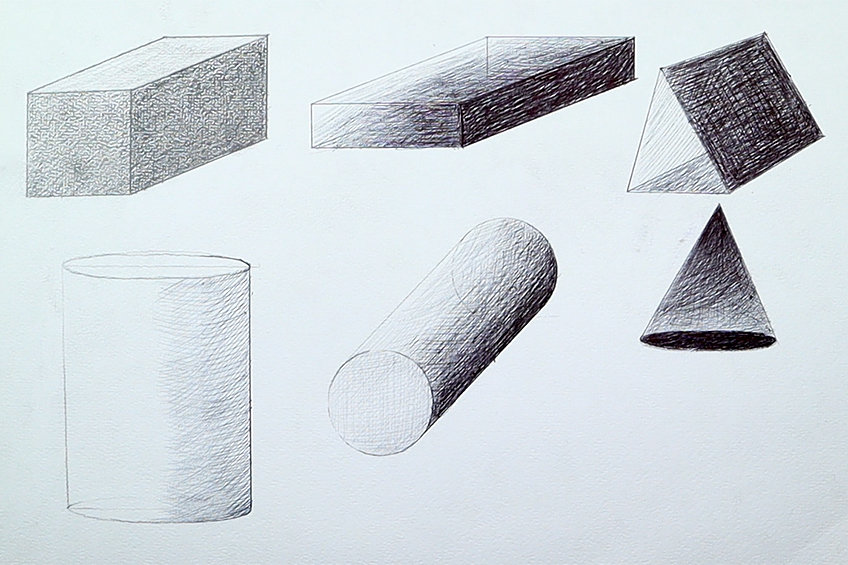
The intention with curved shapes should be to create layers with shading, each time working from the darkest side to the lightest side. This is a good way of preventing yourself from making silly mistakes with your shading.
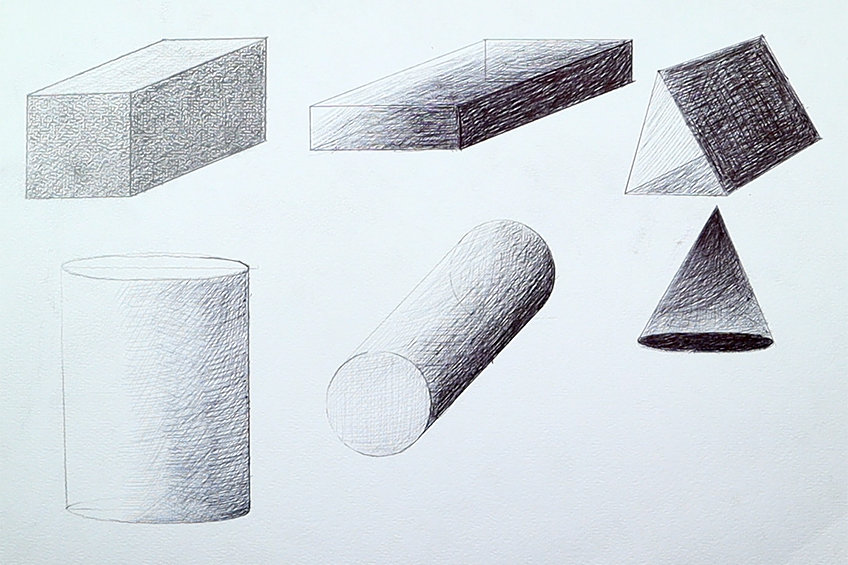
Slowly but surely, we will start to see how one side becomes darker than the other side, creating this cylindrical shape. We will also shade over one of the oval shapes to establish that the top or the bottom of the cylinder is in view.
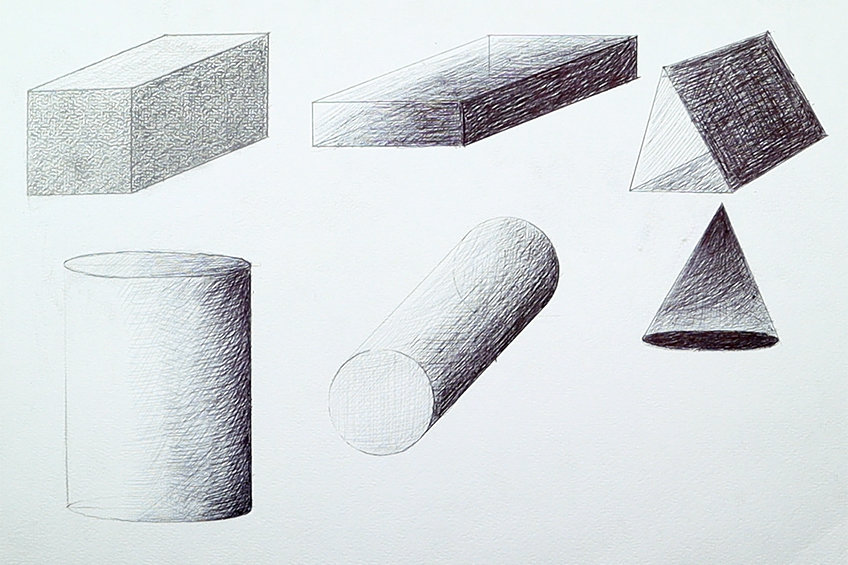
Allow yourself to explore shading styles- this can be with a pencil or with a pen. 3D shapes drawings are always a great way to practice your shading techniques, such as cross-hatching.
Sphere
Lastly, we have come to the most rounded three-dimensional object, which is the sphere. This object relies completely on shading, as the only thing that defines its three-dimensionality in a drawing is the idea of light being present.
Step 1: Drawing a Circle
We start by drawing a simple circle. Because spheres have an equidistant quality, meaning their lines are all perfectly the same in length from their center, it creates a round surface area.
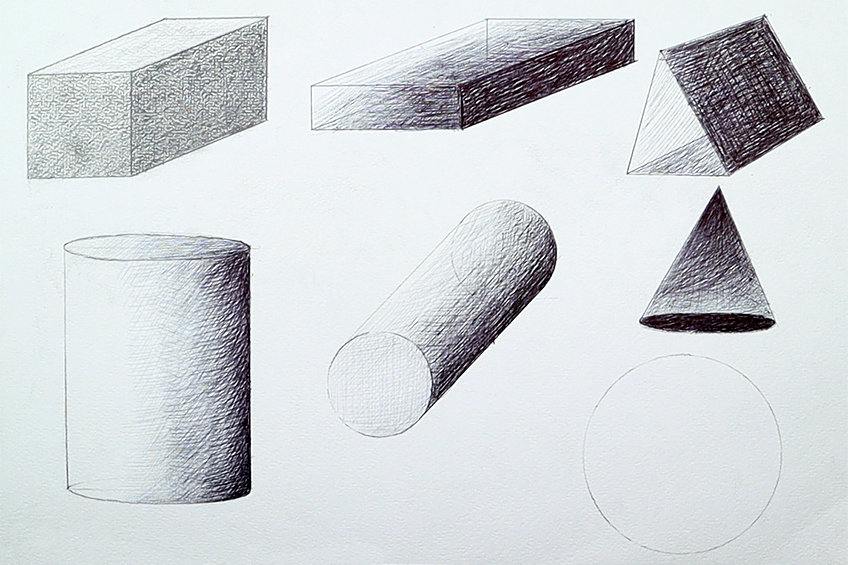
Step 2: Shading the Circle
Utilizing the same concept of a light source and seamless gradients along curved edges, we will proceed to do the same for the sphere. Again, we want to slowly layer shading marks over one another, working from the darkest to the lightest side of the object.
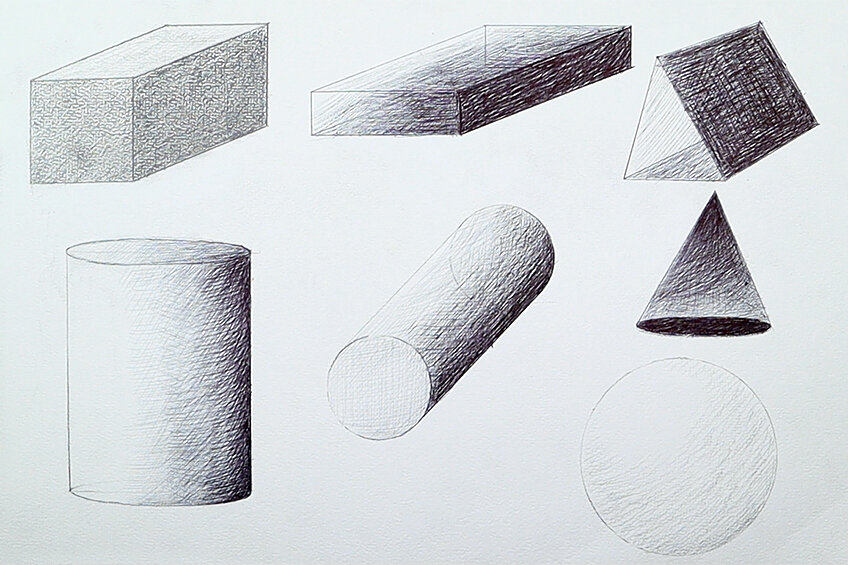
Keep working from one side of the sphere to the other, where you slowly build up layers of shading. You want to lighten your shading as you move closer to the area where the light source is most present.
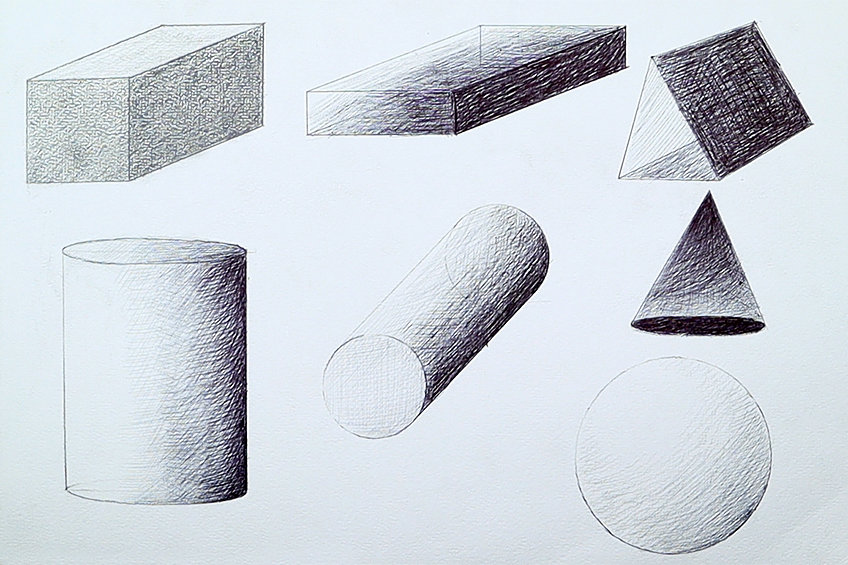
The idea is to still represent three tonal values, slowly transitioning from dark to mid-tone to the lightest area within the sphere. You can also allow the shading marks to curve around the sphere to create more rounding in the object.
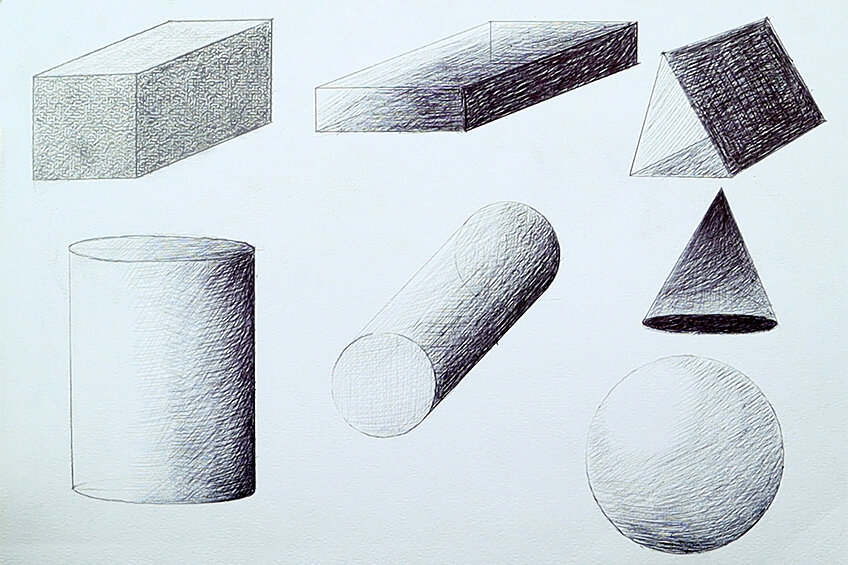
As you slowly add layer over layer, working from the darkest areas to the lightest areas, you will start to see how the spherical shape appears.
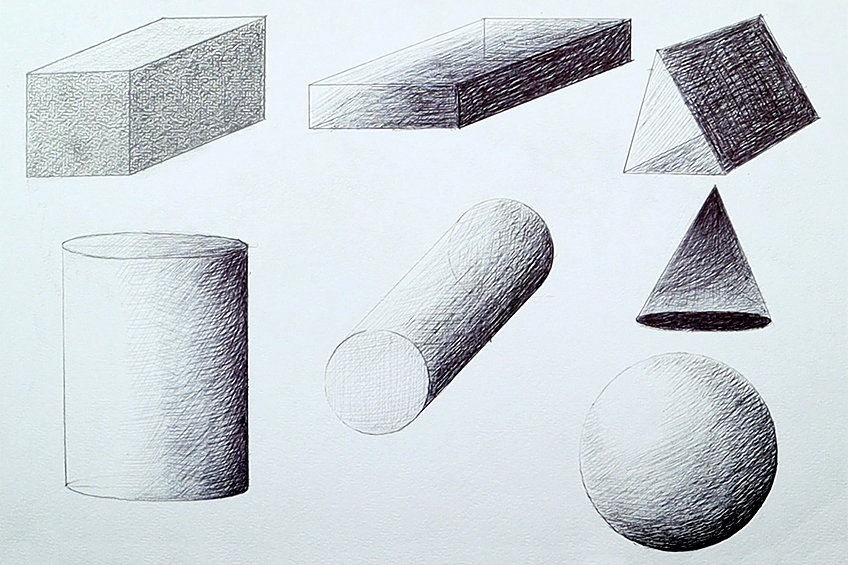
There you have it, a breakdown of how to draw 3D shapes! A 3D shapes drawing follows the same fundamental rules that have slight alterations to consider for different shapes.
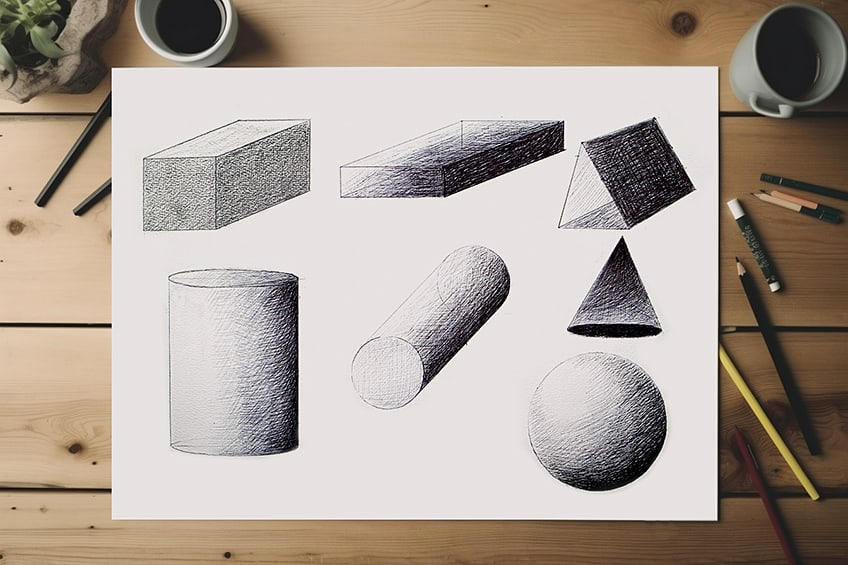
Tips to Remember
- Consider the light source and its effect on three-dimensional shapes.
- Consider curvatures and corners of different shapes. Remember, light shifts more seamlessly between darker and lighter areas within curved shapes.
- Consider shading styles. Explore different shading techniques and how they can be used to enhance different three-dimensional shapes.
- Take your time. Work through the different 3D objects drawings with patience and consideration of the different concepts.

Learning how to draw 3D shapes is a great way to develop your awareness of other real three-dimensional objects. This is a great way to enhance your observational skills and to consider light and shadows for other 3D shapes drawings.
Frequently Asked Questions
What Are the Three Features of Three-Dimensional Shapes?
3D objects are made of a combination of length, width, and height. In the case of two-dimensional objects, they would only have length and width. However, what makes objects 3D is that they extend from that two-dimensional surface into the UP direction, giving them height. This gives them a solid structure that allows them to interact with the space around them uniquely.
How Do You Shade in Three-Dimensional Shapes?
Since three-dimensional structures do not have only a single flattened surface, this allows them to interact and even change the environment around them. This is particularly true for light and how it interacts with three-dimensional objects. In many cases, the light will be more prevalent on one side of the object, which means the other side will be more shadowed. We represent the shadowed side of objects by shading them darker than the side that is exposed to the light source. In between the darkest and lightest sides will be a mid-tone, which is a middle ground between the darkest and lightest parts of the structure. The intention is always to create three tonal values, from light-tone to mid-tone to dark-tone.
Matthew Matthysen is an educated multidisciplinary artist and illustrator. He successfully completed his art degree at the University of Witwatersrand in South Africa, majoring in art history and contemporary drawing. The focus of his thesis was to explore the philosophical implications of the macro and micro-universe on the human experience. Matthew uses diverse media, such as written and hands-on components, to explore various approaches that are on the border between philosophy and science.
Matthew organized various exhibitions before and during his years as a student and is still passionate about doing so today. He currently works as a freelance artist and writer in various fields. He also has a permanent position at a renowned online gallery (ArtGazette) where he produces various works on commission. As a freelance artist, he creates several series and successfully sells them to galleries and collectors. He loves to use his work and skills in various fields of interest.
Matthew has been creating drawing and painting tutorials since the relaunch in 2020. Through his involvement with artincontext.org, he has been able to deepen his knowledge of various painting mediums. For example, watercolor techniques, calligraphy and lately digital drawing, which is becoming more and more popular.
Learn more about Matthew Matthysen and the Art in Context Team.


