

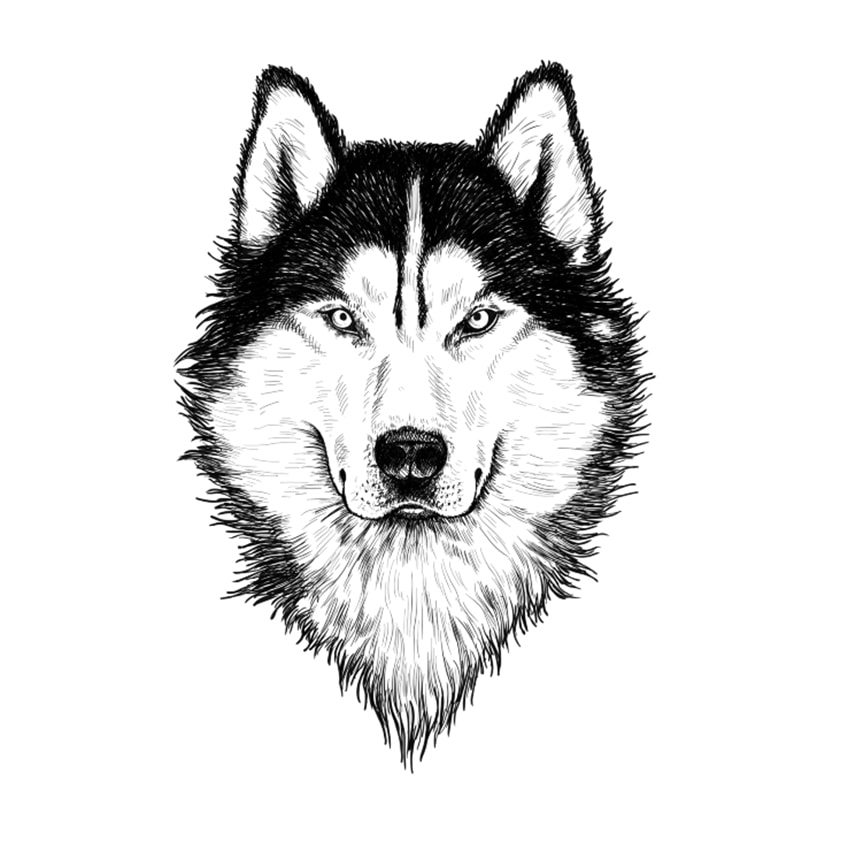
How to Draw a Wolf Head – A Guide That Makes Wolf Drawing Easy
Wolves, mysterious and magnificent creatures of the wild. Wolves are symbols of spirit, trust, guardianship, and loyalty. Humans should strive to learn the qualities of wolves, such as their sense of intuition, formation of strong emotional bonds, and ability to work together for the greater good of their communities. Concept artist IzzyBll created an easy-to-follow tutorial showing how to draw a wolf step by step. To draw your realistic wolf head and face, follow the steps and learn how to draw the facial features at the right angles and sizes, as well as how to add finishing touches with hair and shading to bring your wolf alive on paper. Either hand drawing on paper or a graphics tablet can be used.
The Meaning and Symbolism of the Wolf
Humans are likely to have associated wolves with symbolism since the early days of interaction between them. The symbols and their meanings have changed over the centuries, depending on the development of humans. The wolf was often negatively associated with darkness, aggression, and Chthonic powers, and positively because of their intelligence, excellent hunting skills, protecting their young, pack loyalty, and a well-defined social structure.
Wolves are believed to be closely linked to the sun, moon, light, and spirit. Some cultures believe wolves are guides to the dead and linked to Hades, God of the underworld.
Wolves have a history of being portrayed as evil in children’s stories such as the hungry wolf in The Three Little Pigs. The phrase, ‘’the wolf at the door’’ was a symbol of the fear of hunger and starvation, which was widespread during the Great Depression in America and Europe. Additionally, the tale of Little Red Riding Hood may have been the inspiration for symbolizing the wolf as a sexual predator in the 20th Century and later as a symbol of male aggression.
Although legends of werewolves go as far back as Greek Mythology, the concept was embraced by more recent popular culture – a man turning into a wolf every night of the full moon. Brought to life in comic books and horror movies, the legend of the man-wolf lives on.
How to Draw a Wolf: Step-by-Step Instructions
Most mammals have fur, except for whales, dolphins, and porpoises. The amount of fur on an animal depends on its habitat and climate. Wolves can survive harsh, freezing winters because their fur is plentiful and exceptionally thick, and some artists are sometimes daunted by the thought of drawing them. You do not need to stress, however, as our tutorial goes through every detail of drawing a wolf, step by step. We break down the various elements and the wolf’s facial features in detailed steps that make it easy for you to follow and complete your wolf drawing.
Step 1: Sketching the Shape of the Head
As a first step, we need to decide where on our sketch paper or canvas to position the head of the wolf. We chose to place the subject in the middle of the page in this tutorial to create a great focal point.
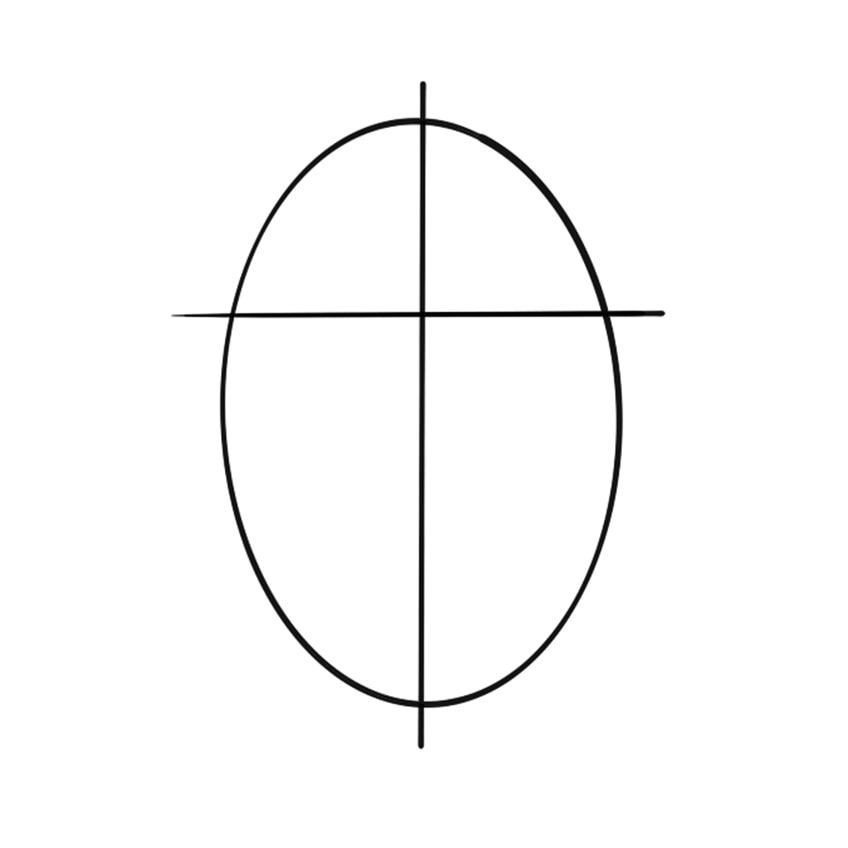
To begin, use a lightly shaded pencil to draw an oval shape. With a graphics tablet, use a brush. The oval signifies the wolf’s head shape, and we will be working in and around this oval shape. To assist you in finding the center points easier, you could also draw several blocks across the surface of your paper or canvas. These will help you find the right angles for your wolf face.
When placing your subject, make sure that there is enough space around the oval for additional steps, such as adding details and fur.

Step 2: Adding the First Construction Lines
Draw a line down the middle of the oval, from top to bottom, and then, about one-third below the top of the oval, draw a line across. This crossline will help you to decide where to draw the eyes and eyebrows, and will also give an indication as to where to center the snout and the ears. Once these features are centered, you will find it much easier to find the best position for the wolf’s mouth on your sketch.
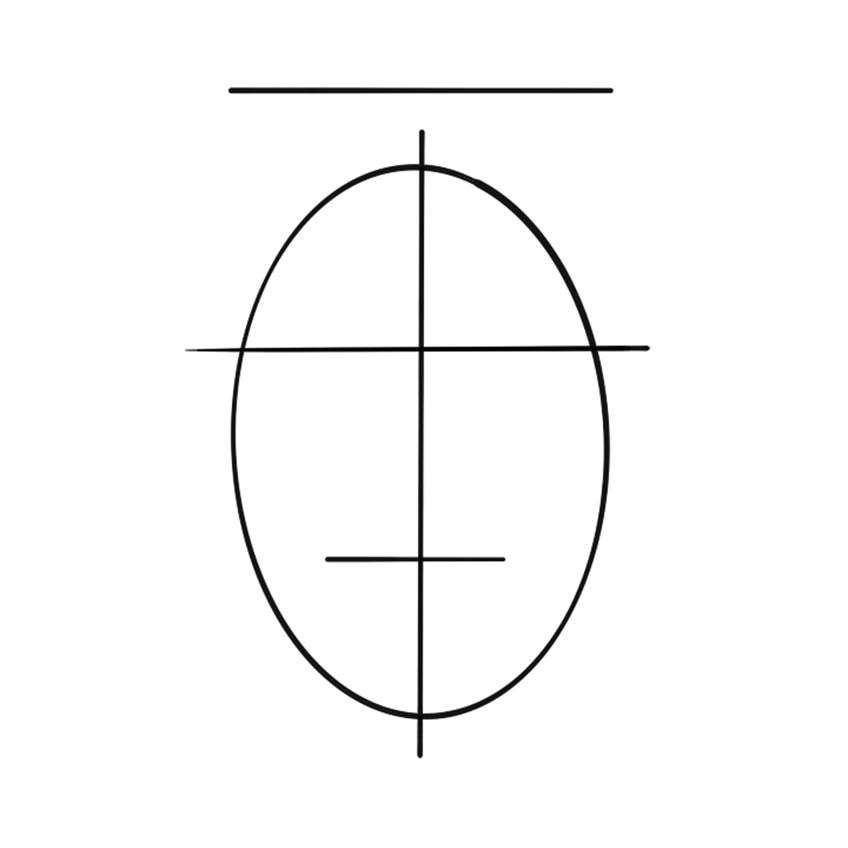
Step 3: Additional Construction Lines
Continuing from step two, draw another horizontal line above the oval shape. This line will help us to determine at which level to draw the ears as well as to find the right height for both ears. Drawing this line will also help with balanced placement. Now, draw a shorter horizontal line about one-third of the way above the bottom of the oval. We will be able to line up the nose and mouth with this line.
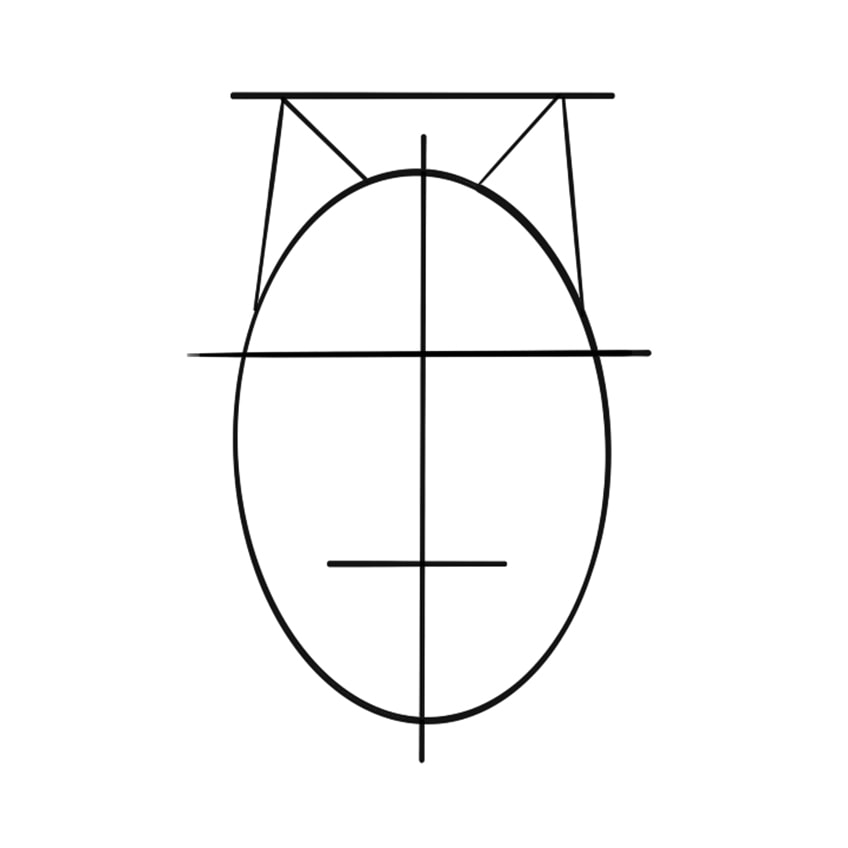
Step 4: Adding the Ears
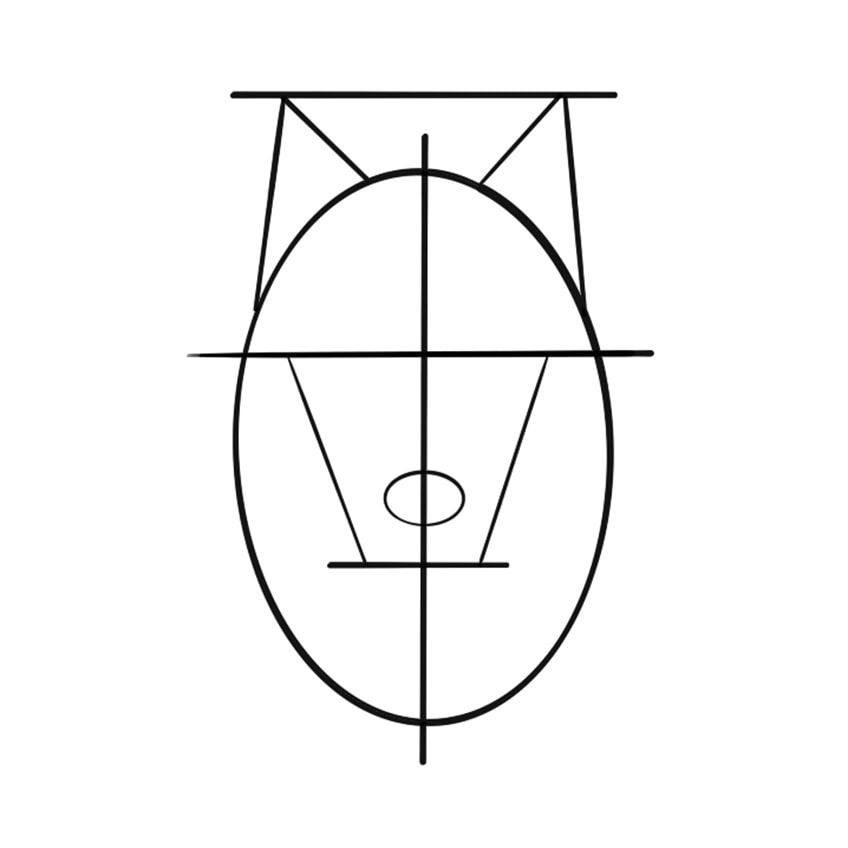
Now, we can start adding the wolf’s features, starting with the ears. Add an ear at the top of the oval on either side of the vertical line. Make sure that the tip of the ears reaches the horizontal line above the oval. Soon, we will transform these triangles into realistic wolf ears.
By dividing the oval shape into sections, drawing the wolf’s features will be much easier.
Step 5: Outlining the Snout/Nose
As close to the center as possible, draw an oval shape. You can use the centerline to help with equal proportions. Add a streaked line on either side of the centerline for the snout. To get the wider effect of the wolf’s snout, draw the lines from midway on the lower horizontal line up at an angle to reach the upper horizontal line closer to the oval edges.
Step 6: Shaping the Facial Features
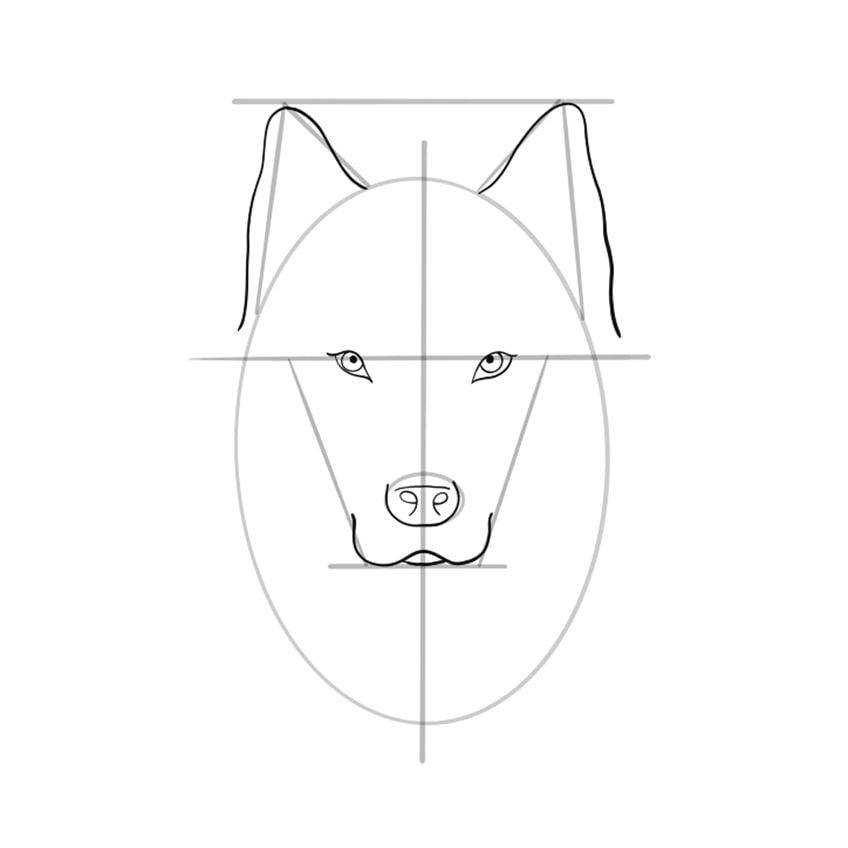
Draw softer, curved ear shapes over the construction lines. These shapes do not need to touch the lines of the oval, nor be perfectly symmetrical at this stage. When we add the fur later, the wolf features will become more realistic.
Next, we will draw the shape of the mouth, starting with the top lip curling up from the top of the bottom horizontal line, widening to just below the snout. Add detail with a hint of the bottom lip on the bottom line to emphasize this important facial feature.

Step 7: Detailed Facial Features
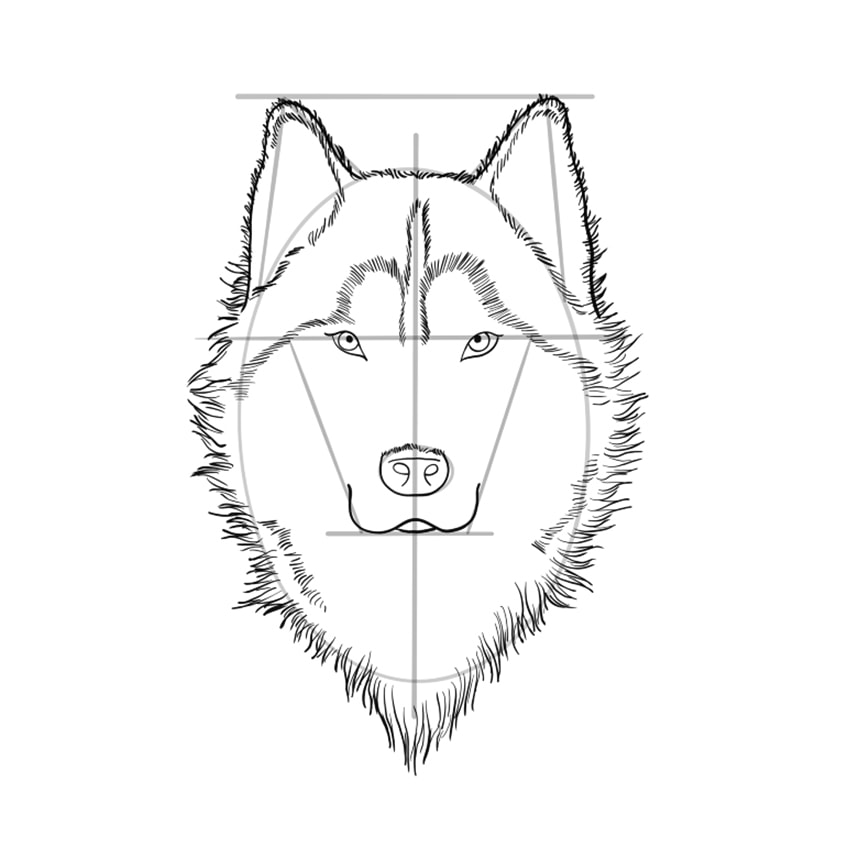
To start detailing your wolf’s facial features, begin with the eyes. Slope the eyes inwards, towards the centerline of the snout, just touching the top horizontal line. Draw two nostril swirls, then emphasize the construction line of the snout/nose with a darker shade pencil.
Step 8: Adding the Outer Fur
We can now start adding more details to our wolf drawing, such as the outer layers of fur. Begin by adding the outer fur just outside the oval construction lines, one side at a time. Both the outer and inner fur of a wolf spreads outwards, except for where it meets at connection points, such as the bottom of the neck. Here, the fur will flow together and frame the wolf’s face, comparable to an upside-down flame.
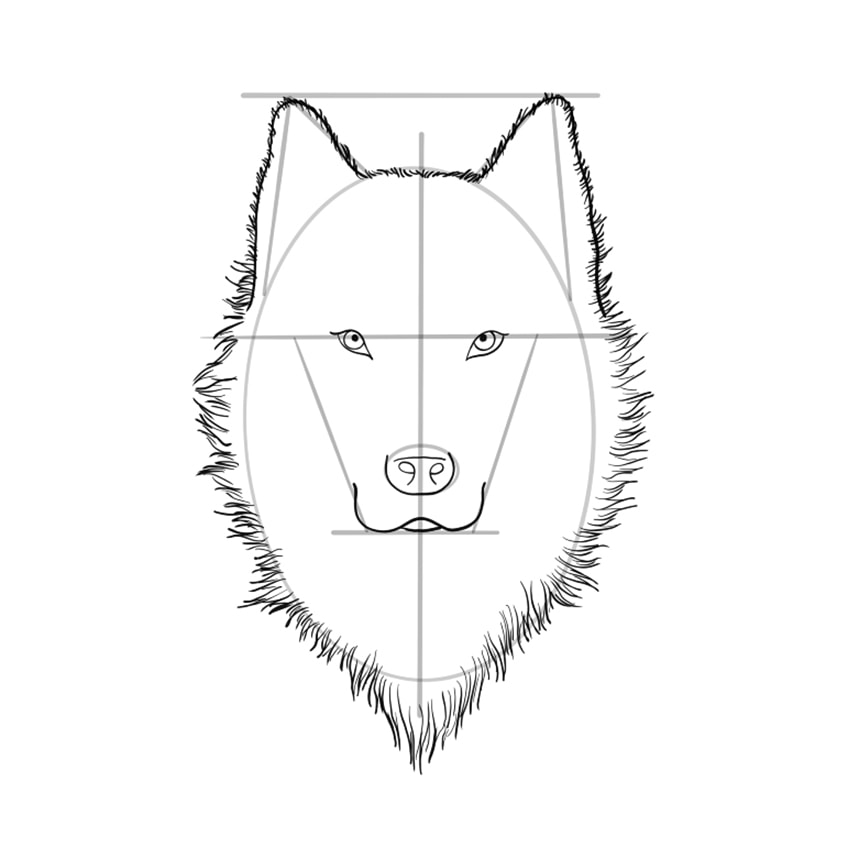
Usually called a winter coat, this fur has a puffed-up look which not only keeps the wolf warm but also makes it look bigger and protects vulnerable areas. To achieve a magnificent mane for our wolf drawing, outline the fur wider than the outside of the oval shape, narrowing the gap towards the bottom.
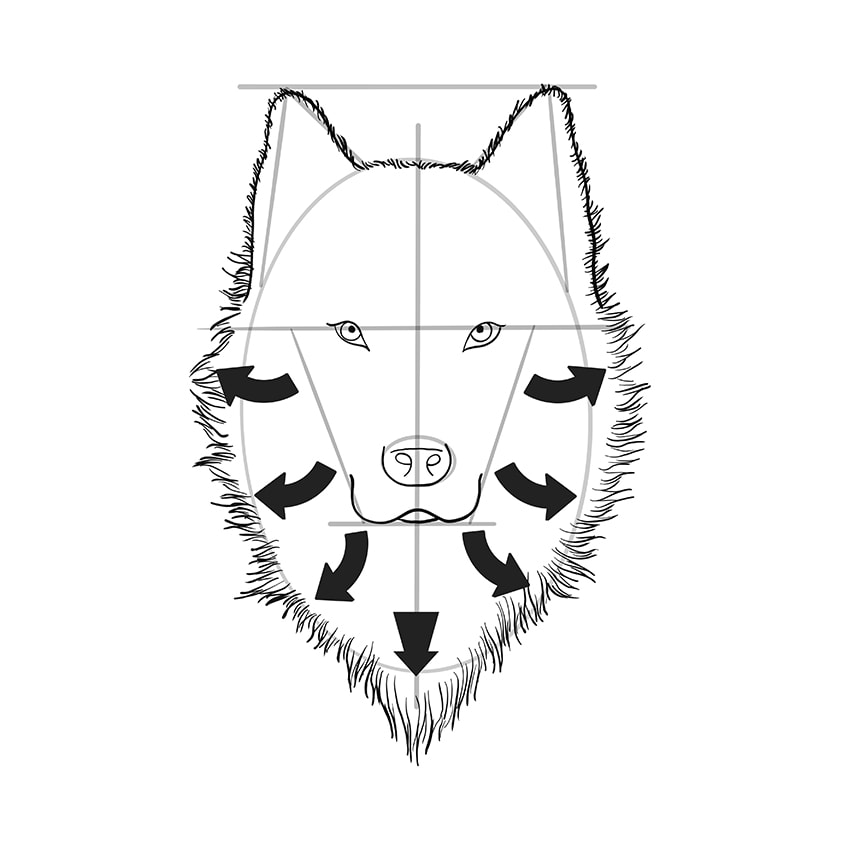
Step 9: Adding the Inner Fur
Start by drawing small strokes to add inner fur detail, following the construction lines of the ears. The inner fur should also be pointed outward as with the inner fur, but use smaller strokes, signifying thinner and shorter hairs.
On either side of the top part of the center face line, create inner fur lines down to the first horizontal line and up into a curve above and around the eyes. Continue and curve the lines as you follow the construction lines of the oval face. If your sketch shows the front of the wolf face, create a three-dimensional effect by adding smaller patches of inner fur along the face.
Step 10: Adding Shading and Details
Here, we will start using darker shades of pencils to add detail and shading. We will add a darker color to the outer fur on the top part of the wolf’s head and ears. The key elements of the wolf’s face, which include the eyes, nose, and snout as well as the curve of the mouth, will be emphasized by adding darker shades. As you work on this, you will start to recognize the wolf in your drawing.
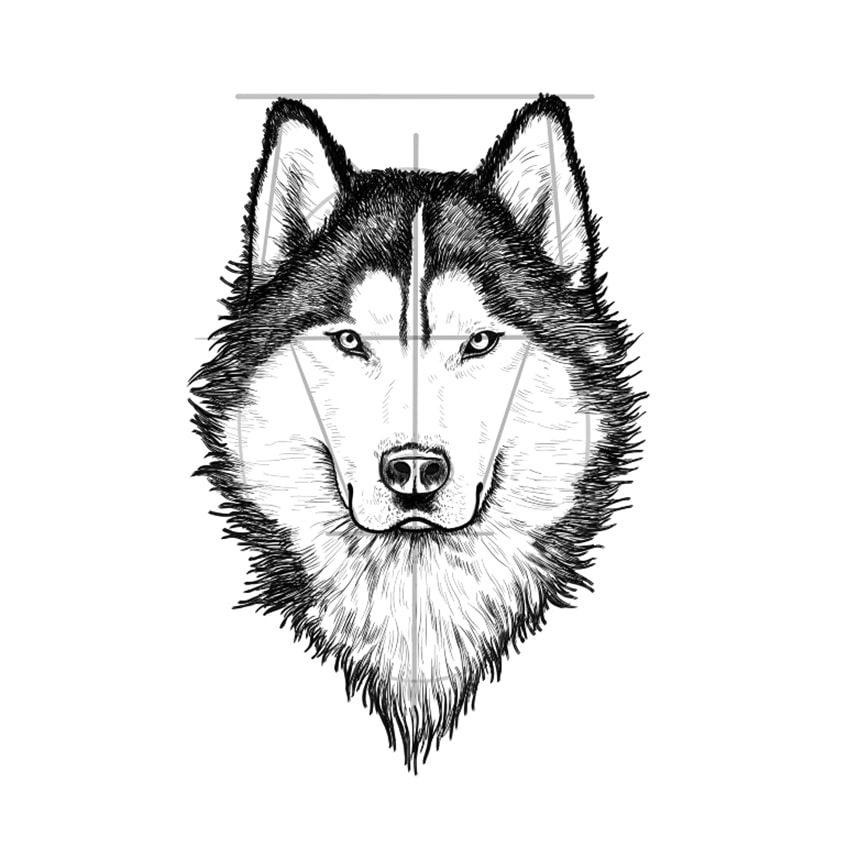
Once this has been finished, you simply need to fill in the inner fur with strokes to reach the outer fur. To help guide your fur direction outward on both sides, use the horizontal and vertical center lines. This will create a symmetrical look to the fur, and give the effect of a breeze blowing in the wolf’s face.
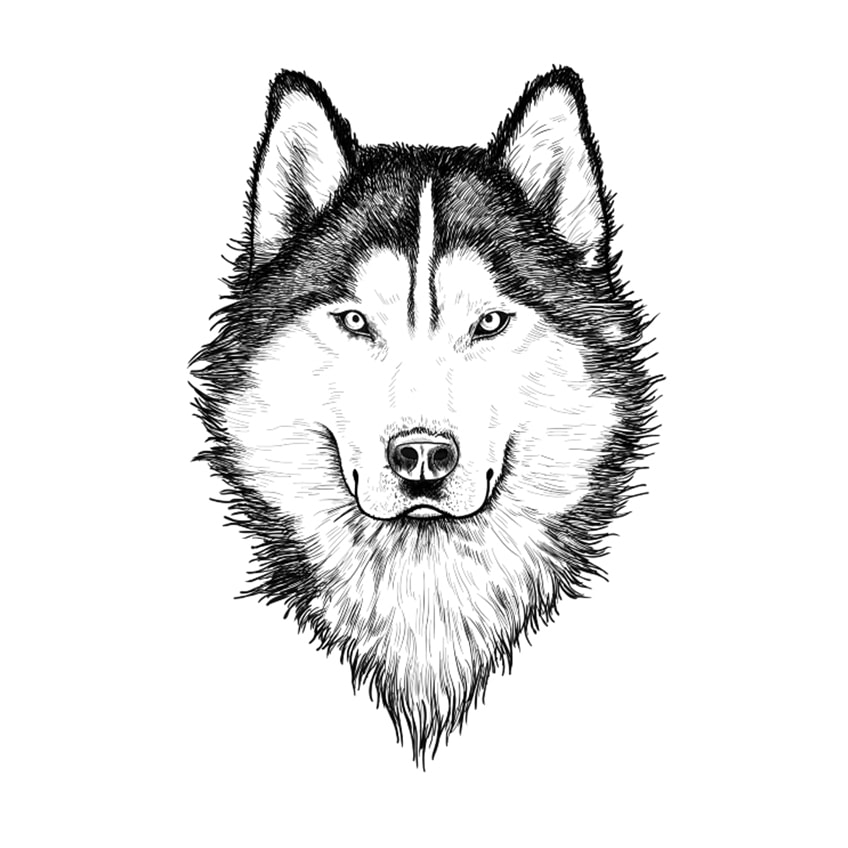
At this point, you can erase the construction lines and begin to add two to three layers of fur. Start at the top of the head with harder strokes to create denser fur, then change to softer and fewer fur strokes for a fading effect down to the neck. With the construction lines erased, further layers of shading added, and the key facial features darkened for emphasis, your wolf drawing will likely be instantly recognizable by everyone who sees it.
You can make your wolf even more realistic by adding details, fine lines, and shadows around the eyes, snout, nose, jawline, ears, as well as the fur surrounding your wolf’s face.
Motivation and Tips to Make Wolf Drawing Easy
- Most of us are not able to draw beautiful art without practice. Hard work, taking the time, and making an effort to practice will show in the improvements on each attempt. The experience and lessons learned with each artwork are how your skills and talent will grow.
- While it takes skill to create art, you will also need guidance to grow. Using a tutorial such as how to draw a wolf head can be instrumental in improving your skills and mastering different techniques.
- Find a space to work where you feel relaxed and able to express your creativity while you learn how to draw a wolf head. Keeping your space organized and your tools and materials within reach will help avoid distractions, resulting in a space of pure inspiration and creativity.
- As a traditional artist, get to know your pencils. Pencils being your main tool for drawing, using different shades and thicknesses can have a big impact on your artwork.
- Find challenging subjects to draw. For continued creative growth, try an online course for advanced drawing, or find different techniques to try and practice.
- Learning about color theory and blending will open up a whole new world of possibilities with the color shade combinations you could add to your art.
- For practice, draw from objects or references in front of you. Observing the world around you while drawing will result in more realistic artwork, and improve your skills in perspective and proportions.
- Use different materials, mediums, textures, and platforms. If you are unfamiliar with digital art, a switch from traditional drawing might provide an interesting challenge. You might even be able to combine the two and enhance your drawings with digital software.
While developing your skills your style will develop as well. Soon, you will find wolf drawing easy! By exploring and practicing different styles, techniques, materials, and mediums, your unique art style will be developing.

We have also created a web story on some of the wolf drawing working steps.

Matthew Matthysen is an educated multidisciplinary artist and illustrator. He successfully completed his art degree at the University of Witwatersrand in South Africa, majoring in art history and contemporary drawing. The focus of his thesis was to explore the philosophical implications of the macro and micro-universe on the human experience. Matthew uses diverse media, such as written and hands-on components, to explore various approaches that are on the border between philosophy and science.
Matthew organized various exhibitions before and during his years as a student and is still passionate about doing so today. He currently works as a freelance artist and writer in various fields. He also has a permanent position at a renowned online gallery (ArtGazette) where he produces various works on commission. As a freelance artist, he creates several series and successfully sells them to galleries and collectors. He loves to use his work and skills in various fields of interest.
Matthew has been creating drawing and painting tutorials since the relaunch in 2020. Through his involvement with artincontext.org, he has been able to deepen his knowledge of various painting mediums. For example, watercolor techniques, calligraphy and lately digital drawing, which is becoming more and more popular.
Learn more about Matthew Matthysen and the Art in Context Team.
Cite this Article
Matthew, Matthysen, “How to Draw a Wolf Head – A Guide That Makes Wolf Drawing Easy.” Art in Context. May 26, 2021. URL: https://artincontext.org/how-to-draw-a-wolf-head/
Matthysen, M. (2021, 26 May). How to Draw a Wolf Head – A Guide That Makes Wolf Drawing Easy. Art in Context. https://artincontext.org/how-to-draw-a-wolf-head/
Matthysen, Matthew. “How to Draw a Wolf Head – A Guide That Makes Wolf Drawing Easy.” Art in Context, May 26, 2021. https://artincontext.org/how-to-draw-a-wolf-head/.


