


How to Draw a Sphere – An Easy-to-Follow Sphere Drawing Tutorial
Circles are typically quite tricky to draw freehand, and the process may become even more daunting when you start considering adding three dimensions to your sphere drawing. Learning how to draw a sphere is actually much easier than you would imagine, the trick lies in creating realistic highlights and shadows to emphasize three-dimensionality. In this easy sphere drawing tutorial, we take you through all the basic steps and show you exactly how to shade a sphere.
How to Draw a 3D Sphere in 10 Easy Steps
Creating a sphere can be tricky when you attempt it the first time. As with all of our drawing tutorials, we find that it is best to take it slowly and set everything up before jumping into the shading. You can see in the diagram below, the outline of the ten steps in our sphere shading tutorial. We begin by drawing a simple circle, and then move on to creating a three-dimensional field before learning how to shade a sphere.

The best medium for this simple sphere sketch is a pencil, as this will allow you to create smooth and soft shadows and highlights. If you prefer to work with a graphic tablet, you can achieve a very similar effect, but we do not recommend any paint mediums.
For the sphere shading, we recommend a very soft and blendable graphite pencil.
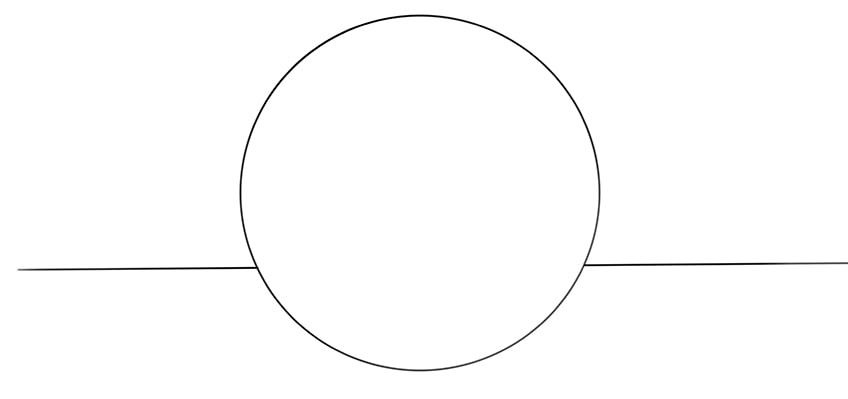
Step 1: Draw Your Base Circle
This first step is very simple and easy to achieve, but it may take a little practice if you are working freehand. If you do not want to waste time, then you can use a compass or a round object as a base for your circle.
Simply draw a large blank circle shape right in the center of your canvas.

Step 2: Creating the Field Base
When it comes to the question of how to draw a 3D sphere, it is important to create a visual field around your sphere. We do this by drawing a simple vertical line through the bottom third of the circle. This line immediately creates a sense of three-dimensionality in your sphere sketch by creating a contrast between the sphere and another surface.
In future steps, we will be creating shading around this new field, to emphasize our three-dimensional sphere drawings.

Step 3: Emphasizing Perspective
To create a more realistic perspective, we are now going to erase the vertical line that overlaps within the outline of your sphere sketch. In the final drawing, the baseline will sit behind the sphere and the shadows it casts, so we do not want it to overlap with the sphere itself.
At this stage of the tutorial, your sphere drawing should look something like the example below.

Step 4: Creating the First Layer of Sphere Shading
In this step, we are going to add the first touch of sphere shading. As with all shading in drawing, we want to start off as light as possible, and gradually build it to create a realistic effect that is not overwhelmingly dark. Use the side of a very soft pencil to gently shade the interior of your sphere drawing, leaving light patches of white throughout.
To make your shaded sphere smooth, you can use a piece of soft paper towel or a soft brush to gently smear and smudge the graphite.

Step 5: Begin Shading the Perspective Line
Now that we have created the first layer of shading in our sphere drawings, we are going to do the same for the perspective line. This is where you will see the magic of three-dimensionality really coming to life. Using the same pencil and the same shading method as you did for the sphere, begin to add a light shadow below the perspective line that curves down and around the bottom of the sphere. You want the shadow on the left of the sphere to be ever-so-slightly darker than that on the right.
Once again, you can smudge out this shadow with a clean paper towel or brush to make it smoother and softer.

Step 6: How to Shade a Sphere with a Light Source
Another essential aspect of three-dimensional drawing is deciding on a light source within your shaded sphere. In our sphere drawings, the light is coming from the front right corner of the drawing, which casts a highlighted spot on the upper right part of the shaded sphere. This point of light is responsible for the left side of the perspective shading from the last step being slightly darker than the right because the sphere casts a shadow backward to that side. To create this highlighted spot, add another light layer of shading within the sphere, leaving this light spot a little barer.
Smooth out your blending once again, ensuring that the transition from the darker parts of the shaded sphere and the highlighted spot is smooth and subtle.

Step 7: Adding the Second Layer of Shadow
In the last step, we added some more shading to the sphere itself, and in this step, we are going to emphasize the shadow around the perspective line further. The most important part of this step is taking into account the light source, and making the shadow on the left of the sphere significantly darker than the right. Add the darker shadow close to the perspective line and the shaded sphere, and gently blend it out to the first layer of shading. You want the shadow to fade slightly, to the point where the first shadow layer is visible around the edges.
You can then repeat this process within the sphere, adding shadow around the frame only, and gently blending this in toward the center. Remember the light source, and ensure that the left side of the shaded sphere is ever-so-slightly darker than the right.
As always, finish up the shading by using your chosen material to smooth and smudge out the shadows.

Step 8: Continue Building the Shadows
We are doing nothing new in this step of our sphere sketch tutorial. Simply repeat the process of the previous step, adding another layer of shading within the sphere and on the left side of the perspective line. As you did in the last step, you want to gradually reduce the size of the darkest shaded part, and blend it out to the point where the previous layers are still visible. In this step, you can begin to focus your sphere shading on the left bottom edges, leaving the top-right edge significantly lighter.
For realistic sphere shading and a three-dimensional look, you want to achieve a smooth and soft gradient in your shadows.

Step 9: The Final Shading Step for Your Sphere Drawing
In this final shading step, we are going to apply a final, darker layer of shading to the sphere and the perspective line. You can darken the edges of the sphere and the point of the perspective line on the very left of the sphere quite a lot. For this final shading step, in particular, you want to make sure that you blend the dark shadow into the lighter layers very smoothly with your soft paper towel or blending brush.
When it comes to creating three-dimensional sphere shading, smoother is always better.

Step 10: Finishing Your Shaded Sphere Drawing
In this final step of our easy sphere sketch tutorial, you are going to erase the outlines of the sphere and perspective line, and add some final touches of highlight to the center of the shaded sphere. Begin the step by erasing the outlines of the baseline and the sphere. You will see in our example below, that erasing the outline on the bottom left side of the sphere creates a beautiful highlight that separates the sphere from the field behind it.
Next, take a soft eraser – a putty eraser is best – and gently erase the graphite from the center of the main light source area within the sphere.
Using circular motions, gently erase other areas surrounding this main light point, to create a bright and vibrant highlight. Finally, add the finishing touches to your sphere drawing by smudging together all the shadows and highlights to create a smooth and sleek finish. Use your chosen method and rub the sphere in circular motions to blend everything together slightly.

Just like that, in 10 easy-to-follow steps, you have created a beautiful three-dimensional shaded sphere drawing. With time and practice, you will quickly become an expert at finding a light source and creating realistic shading and highlights. We hope that you have enjoyed this quick tutorial and that you feel more confident in shading sphere drawings.
Take a look at our sphere drawing webstory here!
Frequently Asked Questions
Is Sphere Shading Difficult?
Shading a sphere sketch may seem intimidating when you first approach it because we have long believed that drawing a circle is hard enough, let alone learning how to draw a 3d sphere. Our tutorial takes away all of these concerns, as we lead you through a very simple and easy-to-follow tutorial for creating stunning sphere drawings in only 10 steps.
Can the Tutorial Show me How to Draw a 3D Sphere?
Absolutely! In this easy sphere drawing tutorial, we take you through all the necessary steps to help you create realistic and three-dimensional sphere drawings. The key lies in knowing where to create shadows and highlights.

Matthew Matthysen is an educated multidisciplinary artist and illustrator. He successfully completed his art degree at the University of Witwatersrand in South Africa, majoring in art history and contemporary drawing. The focus of his thesis was to explore the philosophical implications of the macro and micro-universe on the human experience. Matthew uses diverse media, such as written and hands-on components, to explore various approaches that are on the border between philosophy and science.
Matthew organized various exhibitions before and during his years as a student and is still passionate about doing so today. He currently works as a freelance artist and writer in various fields. He also has a permanent position at a renowned online gallery (ArtGazette) where he produces various works on commission. As a freelance artist, he creates several series and successfully sells them to galleries and collectors. He loves to use his work and skills in various fields of interest.
Matthew has been creating drawing and painting tutorials since the relaunch in 2020. Through his involvement with artincontext.org, he has been able to deepen his knowledge of various painting mediums. For example, watercolor techniques, calligraphy and lately digital drawing, which is becoming more and more popular.
Learn more about Matthew Matthysen and the Art in Context Team.


