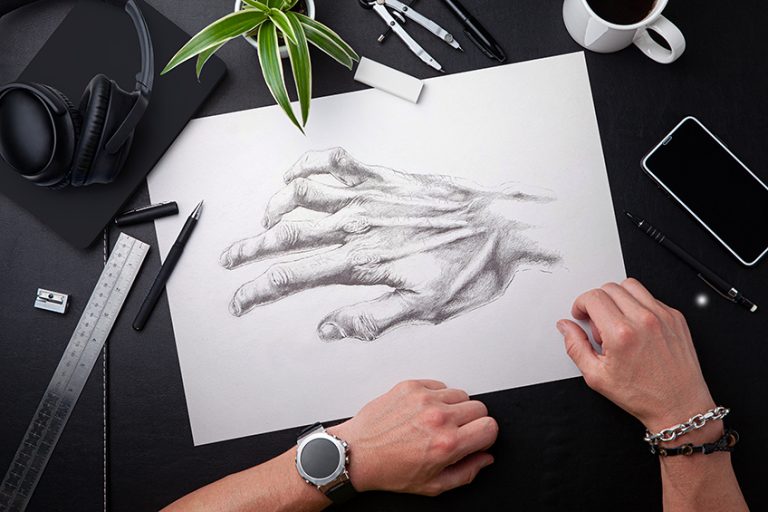
How to Draw a Skeleton Hand – Creepy Bone Hand Drawing Steps
A skeleton hand is a unique anatomical structure that is a great entry point into human anatomy. When learning how to draw a skeleton hand you are essentially learning how to draw a hand as well. Understanding the foundational underlying bone structure of a hand gives you a better understanding of the size of fingers compared to one another. Skeleton hand drawing also provides good insight into the mobility of the hand’s structure. In this tutorial on how to draw skeleton hands, we will take a close look at the different bones that form the hand. This can also be a great addition or feature in various other drawings as the skeleton hand provides an interesting connotation associated with life and death. A bone hand drawing will also provide you with a good knowledge of the unique forms and shapes of different bones that are found in the hand. Ultimately, the process of drawing a strange structure such as a skeleton hand drawing will also help your drawing and observational skills.
An Easy Guide to Drawing a Skeleton Hand
Learning how to draw skeleton hands is a simple and fun activity. A skeleton hand tutorial provides a very interesting perspective into the structure of a hand and describes the bone structures of each finger in detail.
Learning how to draw skeleton hands gives good foundational knowledge for drawing hands, by providing you with the information about how a hand is formed in its skeletal structure.

Let us see what materials we will need for the drawing process.
Necessary Materials
We want to make sure we have the right materials for our skeleton hand tutorial. In this tutorial, we will be drawing in both pencil and pen. We will establish the skeleton hand sketch with a light pencil drawing, which we will then in later steps go Oliver in pen. We will want to have an eraser, as we will inevitably encounter some mistakes along the way.
We also want to make sure the pencil skeleton hand sketch is as correctly drawn as possible before moving on to drawing with a pen in the later steps.
We will also want a sharpener to keep our pencils sharp when drawing in pencil. We will want some good paper for our drawing and lastly, we will be using a reference image to guide the drawing process. All materials can be found in the links below.
- Pencils
- Ballpoint pen
- Eraser
- Sharpener
- Good paper (200 g/m – 250 g/m recommended)
- Source image
Step-by-Step Instructions on How to Draw a Skeleton Hand
The process of a skull hand drawing is quite simple. We begin by developing a light pencil skeleton hand sketch, as we constantly refer to our source image for guidance. We will spend some time here as we will erase and redraw until the skeleton hand resembles an accurate structure of a skeleton hand. From there we will carry on using our pencils to add some light shading to the skeleton hand drawing.
Once we are satisfied with the pencil drawing, and we feel that it accurately resembles the source image, we then may move on to the next step.
The next step requires some patience, as we will proceed to draw with a pen, using our pencil marks to guide us. Now that we know what we are to expect, let us get into the tutorial on how to draw skeleton hands.
Step 1: Making a Rough Sketch
We want to begin by taking a moment to analyze our reference image. The reference image is an illustrative depiction of a skeleton hand; however, it does resemble an accurate representation. We want to begin by taking a light pencil, such as a 2H pencil, and proceed to draw the bones found in the palm.
Take your time, focusing on the placement of each bone in the palm.

One thing to pay attention to is the length of the finger bones, remember this tip as you draw.

This step intends to figure out the form and scale of all the bones in the hand.

At this step, we must try to capture the size of each bone as correctly as we can.

Don’t be afraid to use your eraser and redraw until you feel that your drawing correctly mimics the reference image.
Step 2: Refining the Pencil Sketch
Skeleton hand drawing is a great way to practice a variety of mark-making styles. For instance, in the reference image, we can see that there is a combination of lines and different shading styles that makes the texture of the bone clear. Let us proceed with our pencils to add some line work, stipples, and shading in our skeleton hand.
Begin with the thumb as we move along the hand toward the pinky.

Pay close attention to the areas where the joints and knuckles are. These areas have combinations of lines, stippling, and fully colored areas.
As you work through the fingers, moving from one side of the hand to the other, make sure you go through the bones found within the palm area. We can see that in between the bones, there are darker areas, giving the effect of dimension within the bones.

Feel free to use your eraser, as you add details and tweak them as you go, whilst referring to the reference image.
As you add in details, going through each finger, try to explore your line work. Drawing different types of lines, some thick, some thin, can create different qualities within the bones. Thicker lines can give the quality of more contrast and harsher indentations within the bones. Whereas thin lines can give the bone a grainy texture. Play around with your linework, as you analyze your reference image throughout the drawing process.

This is especially useful near the knuckle areas of the fingers, as the bulge of the bone creates a dissipating shadow that moves along the fingers as they smoothen out.

Take your time, as you draw a series of lines and gradients, as you attempt to create different qualities within each finger.
Step 3: Drawing and Shading With a Pen
Once we are satisfied that we have completed our skeleton drawing in pencil and that it resembles the reference image adequately, we can now proceed to draw with a pen. We want to take our time, now using both the reference image and pencil marks as a guide.
Using your ballpoint pen, cautiously begin to go over your pencil marks.

Go over the lines, the smooth shading, and the dark gaps in between the bones with your pen. Try not to redraw during this step.
Again, make sure you focus on the areas near the knuckles and joints. You want to utilize the pencil marks as a means of guiding your pen drawing process. Take your time with the indentations within each finger and spend time on each finger as you move from one side of the hand to the other.

Another addition to the drawing is by adding little moments of stippling.
By adding some dots here and there, we add to the quality of a bone-like texture. You can be more playful with this step during this stage of drawing with a pen. However, try to not overdo it, always use the reference image to give you a good indication of balance.

Take a break if you need to, as the drawing process requires concentration and can easily get exhausting.
As you go through each finger of the skeleton hand drawing, you can add any little details you feel that might enhance the drawing. However, make sure you use pencil marks to help you through the drawing process. Drawing with a pen can easily go wrong, so we want to make sure we use pencil marks to help us as much as we can.

Remember this is a guide, so allow yourself to play around with how you approach the drawing process in each step. There you have it! A tutorial on how to draw skeleton hands.
Tips to Remember
- Always refer to the reference image. Constantly referring to the reference image through the drawing process is a great way to achieve a more accurate drawing of a skeleton hand.
- Try to make your pencil marks as accurate as possible. You want the pencil drawing to be as accurate as possible, making it easier for yourself once you move on to drawing in pen.
- Take your time with the tutorial. Drawing is a skill that takes time so try to be patient with the process.
- Use your eraser. The tutorial intends for you to draw and erase in the earlier steps, intending to tweak the skeleton hand drawing until it resembles the reference image.
- Take a break when you feel tired. Remember to take a break and then reengage when you feel refreshed.
- Most importantly, have fun! Perhaps listen to some music through the process for a more enjoyable experience.
Learning how to draw a skeleton hand is a great way to familiarize yourself with the concept of bone formation. Bone hand drawing provides you with a unique approach to shading and mark making. In this tutorial, we referred to an illustrative image for reference, helping us understand how to define the texture of bone by using both linework and moments of shading. This skeleton hand tutorial gives you a good insight into the bone structure of a hand, which can be a valuable resource when learning how to draw hands.
Frequently Asked Questions
How to Accurately Draw Skeleton Fingers?
The first thing you will want to do is make sure you have a good reference image to refer to throughout the drawing process. Drawing anatomical structures, especially skeletal structures can become complicated and hard to remember, so make sure you have a reference image. The next thing you will do is develop a light pencil skeleton hand sketch. By doing so you want to go through each finger of the hand, comparing the size of each bone. By completely drawing each finger you will find that once you move on to the next one, you can compare the completed finger in scale and proportion to the finger next to it. Remember to keep your sketch light, as you will erase and redraw until the whole hand is complete to your satisfaction. From there on you can proceed to add more details with shading and line work. The most important thing is to develop a light skeleton hand sketch before adding details.
How Do You Draw a Realistic Skeleton Hand?
You begin with finding a reference image to refer to. Once you have a reference image, you want to develop a light pencil sketch, by constantly referring to the reference image for guidance. As you refer to your reference image and go back and forth between the image and your drawing, you will work with a pencil and an eraser, slowly going through each component of the hand. Once you have completed a light skeleton hand sketch, you can then proceed to add more details and shading with your pencil. You want the previous marks to always guide your current mark-making process. Once you have added shading and more details to the drawing, you can proceed to add more with either darker pencils or a pen. Again, you would allow the previous marks you made to guide you in the drawing process. Especially when drawing with a pen, make sure the pencil marks are as correct as possible. This will make it easier for you when you draw with a pen. Ultimately, it’s about slowly adding layer over layer until the drawing is completed t your satisfaction.
How Do You Shade in a Skeleton Hand?
Shading is what makes an object look realistic, as it indicates shadow and light, which are elements associated with real-life objects. Adding shading into a skeleton hand drawing can be done by taking a few approaches. You can add both linework and smooth shading methods into the structure, however, it is essential to understand where the light source is coming from. If there is light coming from the right of the page your, darkest marks will be present on the left side of the structure. This concept can be applied in reverse; however, you just want to keep your shading most prominent on the opposite side of the light source. Adding line work can be a more playful application, as lines can indicate texture. So, remember to understand the direction of the light for smoother shading, but remain playful with linework as means of defining texture within the skeleton hand drawing.

Matthew Matthysen is an educated multidisciplinary artist and illustrator. He successfully completed his art degree at the University of Witwatersrand in South Africa, majoring in art history and contemporary drawing. The focus of his thesis was to explore the philosophical implications of the macro and micro-universe on the human experience. Matthew uses diverse media, such as written and hands-on components, to explore various approaches that are on the border between philosophy and science.
Matthew organized various exhibitions before and during his years as a student and is still passionate about doing so today. He currently works as a freelance artist and writer in various fields. He also has a permanent position at a renowned online gallery (ArtGazette) where he produces various works on commission. As a freelance artist, he creates several series and successfully sells them to galleries and collectors. He loves to use his work and skills in various fields of interest.
Matthew has been creating drawing and painting tutorials since the relaunch in 2020. Through his involvement with artincontext.org, he has been able to deepen his knowledge of various painting mediums. For example, watercolor techniques, calligraphy and lately digital drawing, which is becoming more and more popular.
Learn more about Matthew Matthysen and the Art in Context Team.
Cite this Article
Matthew, Matthysen, “How to Draw a Skeleton Hand – Creepy Bone Hand Drawing Steps.” Art in Context. July 18, 2022. URL: https://artincontext.org/how-to-draw-a-skeleton-hand/
Matthysen, M. (2022, 18 July). How to Draw a Skeleton Hand – Creepy Bone Hand Drawing Steps. Art in Context. https://artincontext.org/how-to-draw-a-skeleton-hand/
Matthysen, Matthew. “How to Draw a Skeleton Hand – Creepy Bone Hand Drawing Steps.” Art in Context, July 18, 2022. https://artincontext.org/how-to-draw-a-skeleton-hand/.