


How to Draw a Monkey – Create an Adorable Monkey Drawing
Monkeys are fascinating creatures that have captured our imagination for centuries. These intelligent primates are known for their playful antics, nimble agility, and human-like behavior. From the mischievous capuchin monkeys of South America to the majestic mandrills of Africa, there are over 250 species of monkeys found all around the world. Whether swinging through the trees of the rainforest or lounging in the hot springs of Japan, monkeys never fail to entertain and captivate us with their curious nature and unique personalities.
How to Draw a Monkey Step-by-Step
Well done on embarking on the journey to master the art of drawing a monkey! This thrilling and enjoyable task will not only enhance your artistic abilities but also enable you to produce intricate and lifelike depictions. This tutorial will cover fundamental concepts such as perspective, shading, and proportions, all of which are crucial for budding artists. By the end of this tutorial, you will have the expertise to draw a monkey that appears to be ready to swing from tree to tree!
The below monkey sketch collage shows each step taken to achieve the final realistic result of a monkey!

Step 1: Draw the Head of Your Monkey Sketch
To begin your drawing of a monkey, draw a circle in the center of your drawing page. This will represent the head of your monkey drawing.

Step 2: Draw the Main Body
Overlapping the head, draw a vertical rectangle to represent the main body.

Step 3: Add the Arms to Your Monkey Sketch
Attached to the main body, draw two oval shapes that represent the arms.

Step 4: Draw the Center Area
In the center of the main body, draw an oval shape to represent the center area that will later be split.

Step 5: Add the Monkey’s Legs
Draw a single oval shape on either side of the main body to represent the legs.
Note! The left oval should be smaller in size compared to the right.

Step 6: Shape the Face of Your Monkey Drawing
In this step, you will draw a protruding cone shape within the circle to aid in shaping the face of the monkey.

Step 7: Draw the Facial Features
Within the face, draw a curving vertical line. Continue by drawing three crossing horizontal lines.

Step 8: Add Additional Facial Features
Use the previously drawn lines to aid you in the placement of the eyes and nose to ensure they look symmetrical. The eyes and nose should be represented by small circles. Finish this step by drawing the ear to the side of the head.

Step 9: Draw the Feet of Your Monkey Drawing
Attached to the end of each arm and leg, draw the construction lines for the hands and feet.

Step 10: Add the Fingers
Make use of the previously drawn construction lines to aid you in drawing the fingers on the hands and feet of your drawing of a monkey.

Step 11: Outline the Head of Your Monkey Sketch
Outline the monkey’s head, with rough hairy edges, using your previously drawn construction lines.

Step 12: Begin to Outline the Main Body
In this step, you will outline the main body of your monkey drawing, including the shoulders and arms. using the previously drawn construction lines.

Step 13: Outline the Legs of Your Monkey Drawing
Drawn construction lines to aid you in outlining the legs of your monkey drawing.

Step 14: Outline the Ear and Neckline
Begin by outlining a more realistic-looking ear for your monkey. Draw the inner lobe of the ear, and continue by drawing the neckline patch area.

Step 15: Begin to Outline the Ears
Using the construction lines to aid you, outline each of the eyes including the surrounding eyelid lines.

Step 16: Outline the Nose
In this step, outline and detail the nostrils of your monkey drawing.

Step 17: Draw the Mouth of Your Monkey Sketch
At the bottom area of the cone shape within the face, draw fine, curving lines for the mouthline. Below each eye, draw the wrinkle lines and curve lines around the nostrils to enhance the cone shape.

Step 18: Outlining the Facial Features
Draw the surrounding facial outline of the monkey within the bounds of the cone shape. Above the eyes draw the lengthy brow.

Step 19: Outline the Hands and Feet
Finalize the outlining of the hands and feet of your monkey drawing.

Step 20: Draw the Tail of Your Monkey
To the right side of the monkey, draw the curving tail starting wide and ending with a narrow curve.
Once completed, erase any visible construction lines.

Step 21: Draw the Ledge
On each end, draw the hill-like ledge leading to the monkey’s feet and hands.

Step 22: Add the First Color Coat
Select a fine, sharp brush and dark olive green paint, and evenly coat the monkey, except the face.

Step 23: Color the Face
Use the same brush as previously and switch to a shade of dark gray paint, and begin to evenly coat the face of the monkey.

Step 24: Add Color to the Ledge of Your Monkey Drawing
With a thin brush and brown paint, evenly paint the ledge your monkey drawing is sitting on.

Step 25: Color Blend the Main Body
In this step, you will select a small, soft brush and a bright shade of brown paint, and softly apply brush strokes along the arms, shoulders, and legs of your monkey.
Continue using a combination of white and brown paint and lightly blend the colors. Switch to a blending brush to soften and spread the color coats.
Complete the step using a soft brush and black paint, and paint the edges of the main body.

Step 26: Color Blend the Hands and Tails
Repeat the previous step, this time onto the fingers of the hands and feet, and the tail. Complete the step using a thin brush and white paint to fill the fingernails of the monkey.

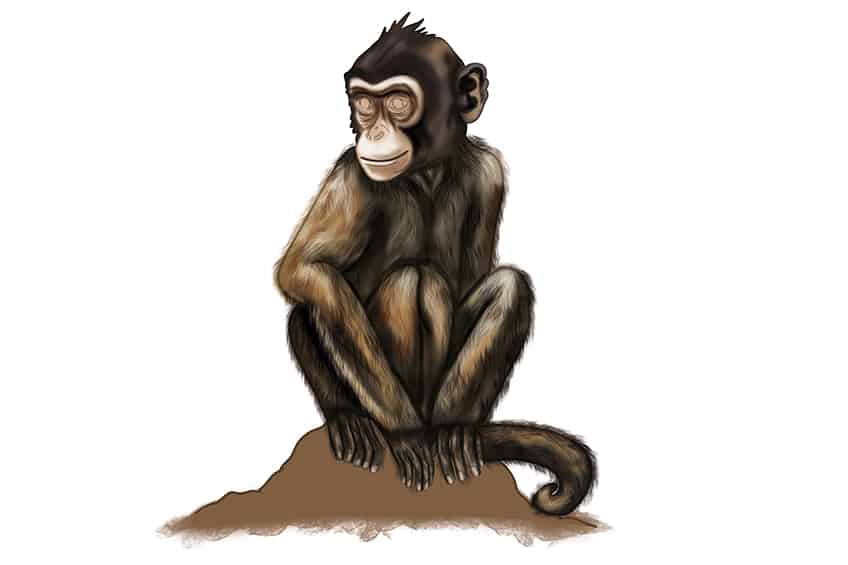
Step 27: Add Color to the Head and Face
Select a small brush and light khaki paint, to coat the face of your monkey drawing. Continue by softly adding sports along the head and ear. Switch to black paint, and go over the monkey’s coat to darken and blend the colors. Use a blending brush to soften and spread the layers.

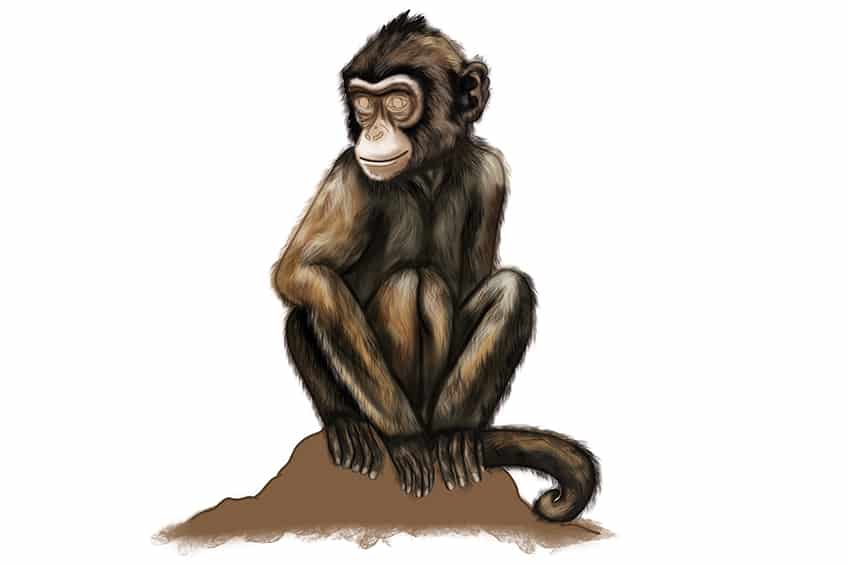
Step 28: Shade and Highlight the Face
With a thin brush and black paint, add shading around the eyes and forehead. Continue to trace the mouthline. Switch to a soft brush and white paint, and add highlights to the face of your monkey.

Step 29: Texture the Body
Select a fine, sharp brush and a combination of black, white, and brown paint, and add fine hairlines brushstrokes leading downwards with the curvature of the monkey outline. Covering the entire main body with texture.
A tip to know where to put add texture to your monkey, simply follow the color pattern layers from step 25.

Step 30: Add Texture to the Hands, Feet, and Tail
Use the same brush as previously and switch to black paint, and add fine hairline brushstrokes onto the fingers of the hands and feet. Continue the hairy texture within the tail. Complete the step using a small, soft brush and white paint to add fine hairline brushstrokes to the end of the tail.
Step 31: Texture the Head of Your Monkey Sketch
Select a fine, sharp brush and a combination of black, cream, and brown paint, and add fine hairline brushstrokes leading downwards with the curvature of the monkey’s head shape. The hairy texture should spread away from the face.
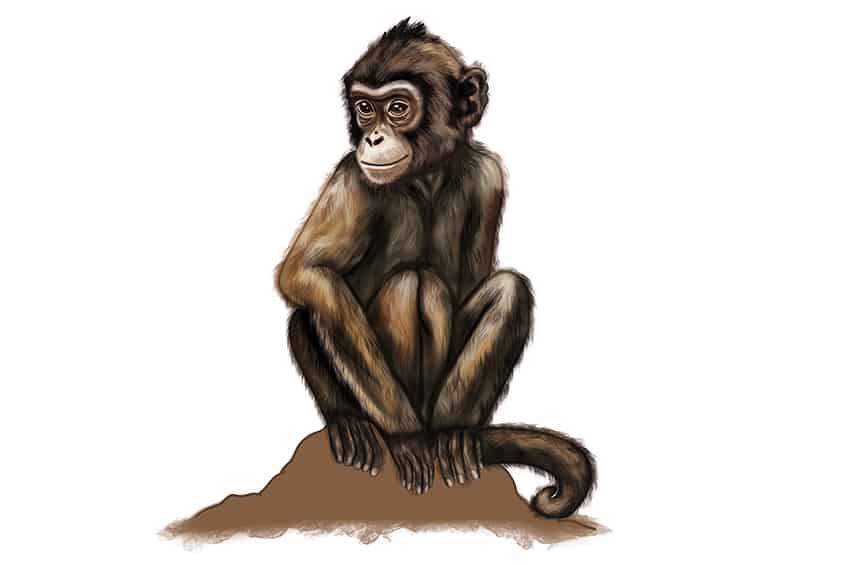
Step 32: Add Texture to the Face
Begin by using the same brush as previously and black paint, trace the eyes and facial features and fill in the pupil, and nostrils. Continue using brown paint to color the iris of each eye. Switch to white paint, and add fine dots to create a shimmer in each eye.
Complete the step using light gray paint, and add soft hairline brushstrokes within the face area.
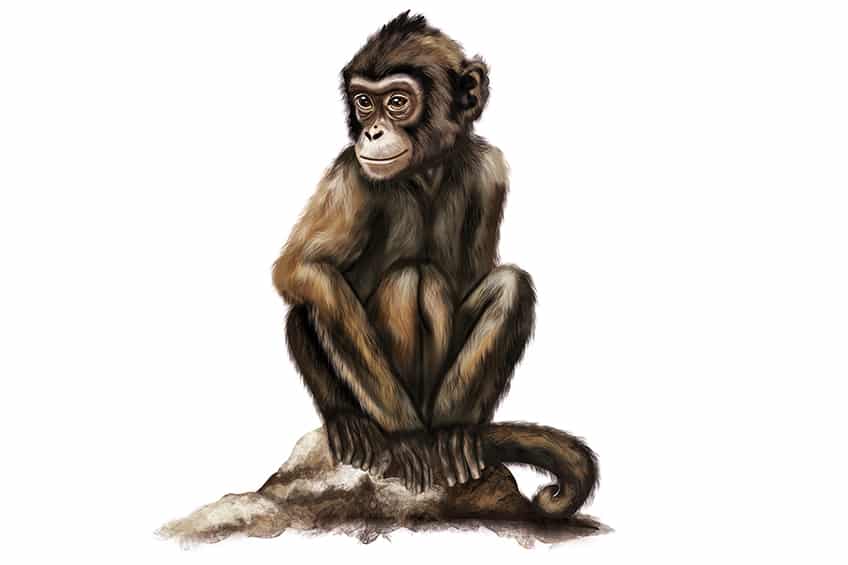
Step 33: Texture the Ledge
Use a rough brush and black paint, and add rough patterns within the ledge. Repeat this step with white paint and light brown paint.

Step 34: Finalize Your Drawing of a Monkey
Whew! You have reached the end of our tutorial on how to draw a monkey. To finish your drawing, select a fine, sharp brush and the corresponding colors to trace any harsh visible outlines. This will help us achieve a realistic and seamless final result!
Congratulations on finishing our tutorial on how to draw a monkey! You have done an incredible job and should feel immensely proud of your achievement. This tutorial has been valuable in teaching you new drawing skills and techniques that you can utilize in your upcoming projects. Remember, drawing necessitates practice and experimentation, so don’t be hesitant to explore new ideas and challenge yourself.
Frequently Asked Questions
How to Draw a Monkey Realistically?
To draw a monkey realistically, start by observing and studying the monkey’s features, and proportions. Begin by sketching a rough outline of the monkey’s basic shape and structure using light lines. Pay attention to the position and placement of the head, arms, legs, and tail. Once you have a basic outline, add more details to your sketch, such as the facial features, hands, and feet. Use shading to create depth and texture in the monkey’s fur, paying attention to the direction of the hair. Consider using a variety of shades to add dimension to the fur.
What Are Some Tips for Drawing Monkey Fur?
When drawing monkey fur, it’s important to first study the texture and direction of the hair. Pay attention to areas where the fur may be longer or thicker, such as around the neck or on the arms. Use short, quick strokes with your drawing tool to mimic the direction of the fur. Vary the pressure of your strokes to create depth and texture, and consider using multiple shades of a similar color to add dimension to the fur. You can also try using a blending tool to smooth out any harsh lines or edges. Remember to step back from your drawing frequently to check your progress and make adjustments as needed!

Matthew Matthysen is an educated multidisciplinary artist and illustrator. He successfully completed his art degree at the University of Witwatersrand in South Africa, majoring in art history and contemporary drawing. The focus of his thesis was to explore the philosophical implications of the macro and micro-universe on the human experience. Matthew uses diverse media, such as written and hands-on components, to explore various approaches that are on the border between philosophy and science.
Matthew organized various exhibitions before and during his years as a student and is still passionate about doing so today. He currently works as a freelance artist and writer in various fields. He also has a permanent position at a renowned online gallery (ArtGazette) where he produces various works on commission. As a freelance artist, he creates several series and successfully sells them to galleries and collectors. He loves to use his work and skills in various fields of interest.
Matthew has been creating drawing and painting tutorials since the relaunch in 2020. Through his involvement with artincontext.org, he has been able to deepen his knowledge of various painting mediums. For example, watercolor techniques, calligraphy and lately digital drawing, which is becoming more and more popular.
Learn more about Matthew Matthysen and the Art in Context Team.
Cite this Article
Matthew, Matthysen, “How to Draw a Monkey – Create an Adorable Monkey Drawing.” Art in Context. March 16, 2023. URL: https://artincontext.org/how-to-draw-a-monkey/
Matthysen, M. (2023, 16 March). How to Draw a Monkey – Create an Adorable Monkey Drawing. Art in Context. https://artincontext.org/how-to-draw-a-monkey/
Matthysen, Matthew. “How to Draw a Monkey – Create an Adorable Monkey Drawing.” Art in Context, March 16, 2023. https://artincontext.org/how-to-draw-a-monkey/.


