How to Draw a Penguin – A Step-by-Step Penguin Drawing Guide
If you have never drawn penguins accurately before, then do not stop reading! This is a tutorial that will explain how to draw a penguin in a step-by-step manner. We will show you, with drawn examples, just how easy a penguin drawing can be. You might find it easier to draw each step out as we go through them, so let us whip out our pencils, pens, tablet for drawing, or whatever medium you wish to work with, and we can begin.
A Quick Look at Penguins
Unless you live in a country that has penguins naturally occurring on the shoreline, you will not have the privilege of seeing these ocean birds very often. This is because they only reside within the southern hemisphere, which means that the entire northern hemisphere is seriously lacking in these very unique, tuxedo-wearing, and slightly dorky animals.
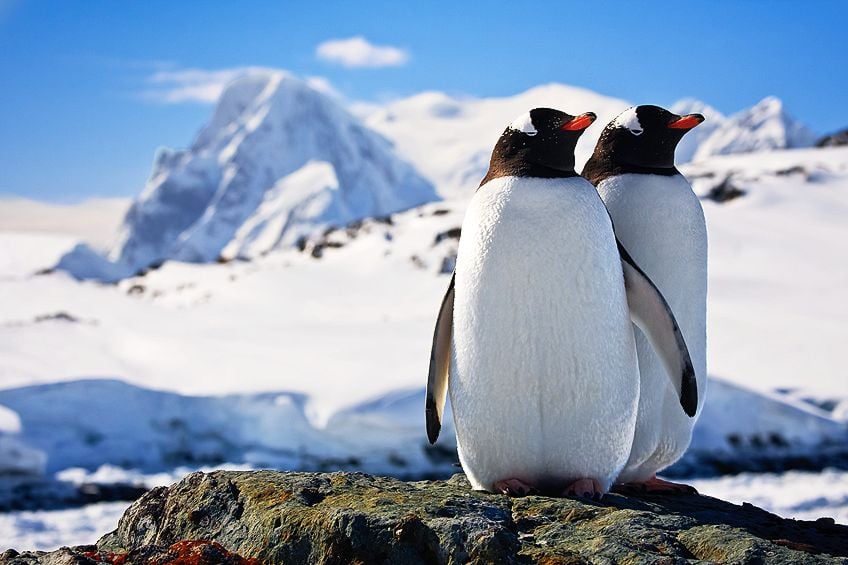
These wondrous creatures hide from predators by camouflaging themselves against the ice and rocks with their feathers’ coloring. Few birds cannot fly, and penguins are one of them. However, they are unbelievably good swimmers, using their streamlined bodies to zip in and out of the water, staying wary of sea lions and whales.
Because penguins have such unique bodies, you might not have realized just how easy penguin drawing can be. Continue reading for our easy step-by-step instructions on how to draw a penguin.
Step-by-Step Instructions for Penguin Drawing
Learning how penguins use their coloring to camouflage away from harm is just the start; now is the time for you to learn how to draw a penguin, from its head to its wings and body. Take each step slowly – do not rush this process. The more you practice penguin drawing, the more skilled you will become.
Step 1: Constructing the Penguin’s Body
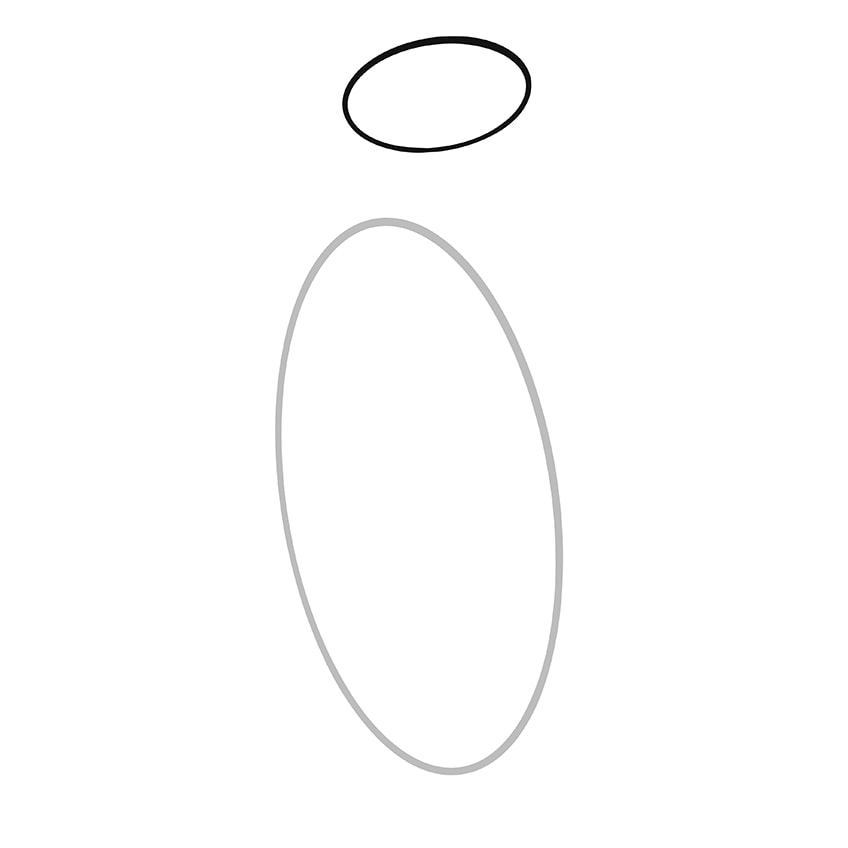
To start your penguin sketch, it is best to begin with light construction shapes. Be sure to draw these shapes using a light pencil with no heavy lines, as these shapes will be erased or drawn over later on. A penguin has a long body, so we will start with an elongated oval shape that is slightly tilted to the left, meaning that the bottom of the oval will lean more towards the right-hand side of your page. Take a look at our example below. You can, of course, change which side the penguin leans on by changing the way the oval leans.

Step 2: Constructing the Penguin’s Head
For the penguin’s head, add another oval right above the first one. If you made your original oval lean to the left, like in our example below, your oval for the penguin’s head should be tilted more to the right. This smaller oval should be horizontal with the right-hand side tilted upwards, although only slightly. The head’s oval should only be one-fifth of the body’s oval size. See our example below as a reference.
Step 3: Constructing the Penguin’s Flippers
We will now flip over to the construction of the penguin’s flippers! This easy penguin drawing requires two curved lines on either side of the elongated oval for the body. If the body’s oval that you drew is leaning to the left (as in the example below), your curved line for the flipper should be longer on the same side, starting slightly higher than the other flipper. However, if it leans towards the right, it will then be the right flipper that has a longer curved line.
The curved line should go out from the body’s oval and curve back towards it, being sure to end the tip of the flipper before it touches the body.

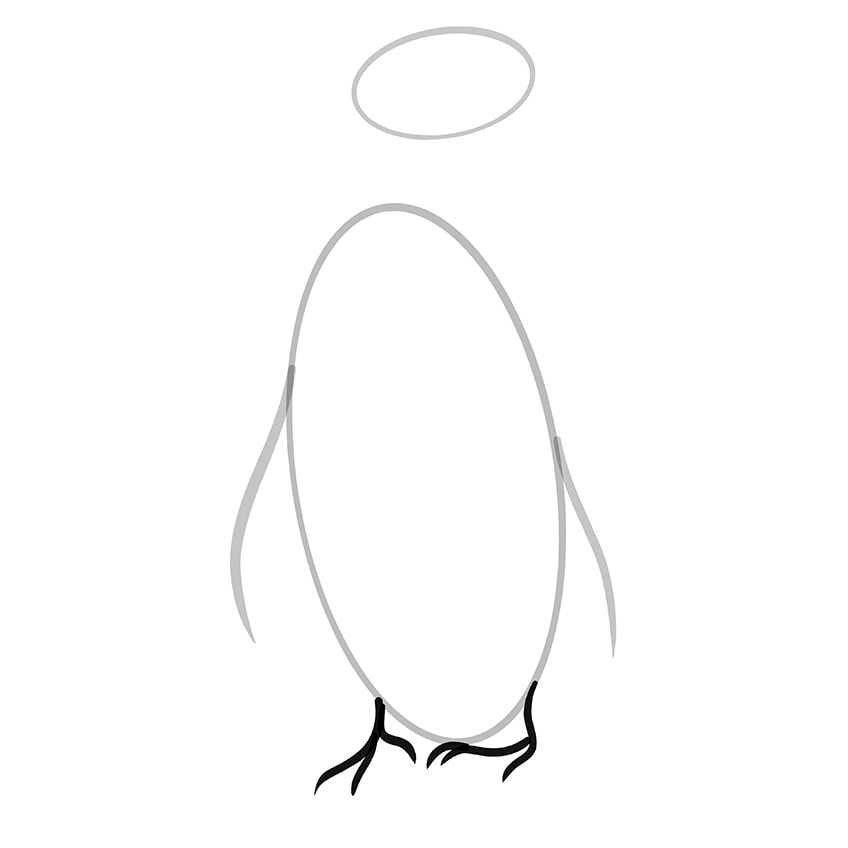
Step 4: The Feet of the Penguin
Now for the feet. These may seem complicated at first because they are webbed, but they are simpler than you may expect. Located at the bottom of the oval, perfectly on either side, you will start by drawing one long curved line for the foot, followed by other smaller curved lines branching off of the main line, forming the toes. If your penguin’s body is leaning towards the left, the curved lines for the feet should lean towards the left as well, and vice versa for the right. The feet can have a bit of artistic freedom – you can draw the toes in any position, and not just like in our example.
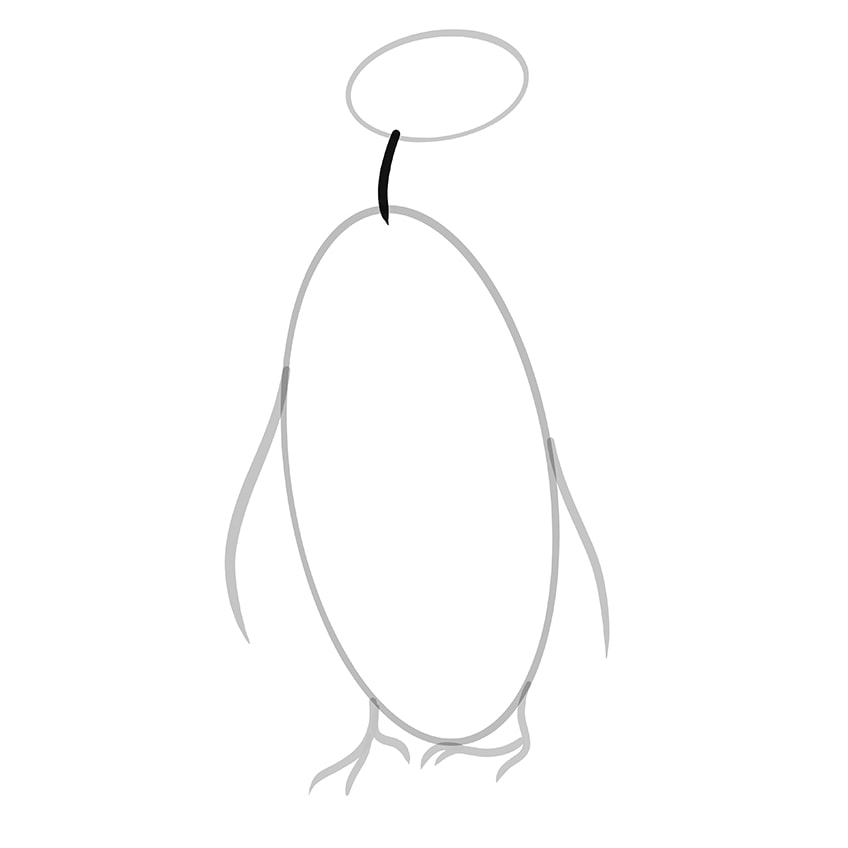
Step 5: Connecting the Head to the Body
You will now need to connect the head to the body by means of a short neck. There is not much to this part of your penguin drawing – all that is required is a gently curved line going from the oval of the head and connecting it to the oval of the body. Make sure that the line is bent in the same direction as the tilt of the body.
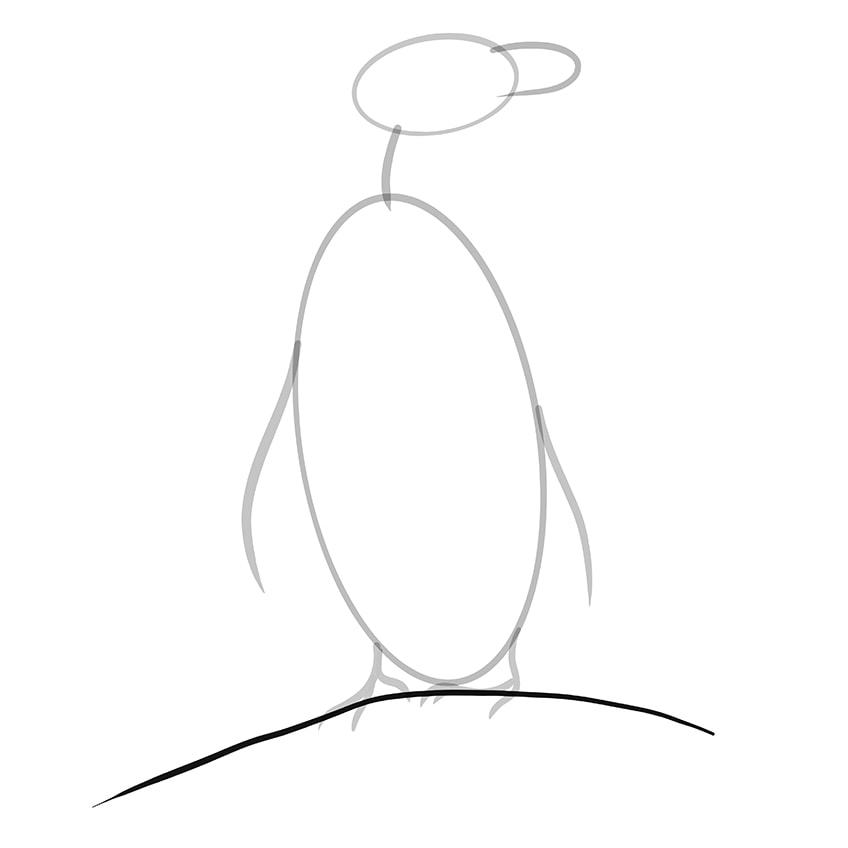
Step 6: Constructing the Beak of the Penguin
To draw the construction lines of the beak, draw a horseshoe-shaped line protruding from the head’s oval. The beak should be on the right-hand side of the head if the body is leaning to the left, and on the converse side if it is leaning towards the right.
Once you are finished with this section, you should start to see the resemblance of a penguin through the construction lines.

Step 7: Adding Ground
We are drawing a penguin standing on land, not swimming in the ocean. To make this more realistic, it would seem more fitting if the penguin was standing on something instead of floating in the middle of your page. The ground it stands on might not be exactly flat, so feel free to draw a curved line in any manner you please, running right through the toes of your penguin.
Step 8: Fleshing Out the Penguin’s Body
In this step, we are adding substance to the construction lines in order to get a realistic outline of the penguin. Using the construction lines as a guide, draw a line with a much darker pencil to form the shape of a penguin. Try not to let the construction lines persuade you to follow them, as they are only guiding lines. When you draw the penguin’s neck, the construction line should sit in the middle. If the penguin’s body is facing the left, like the one below, the line on the left-hand side of the neck should curve up and bend to the right, connecting to the beak with one graceful curve. You can use our example as a reference for this one.
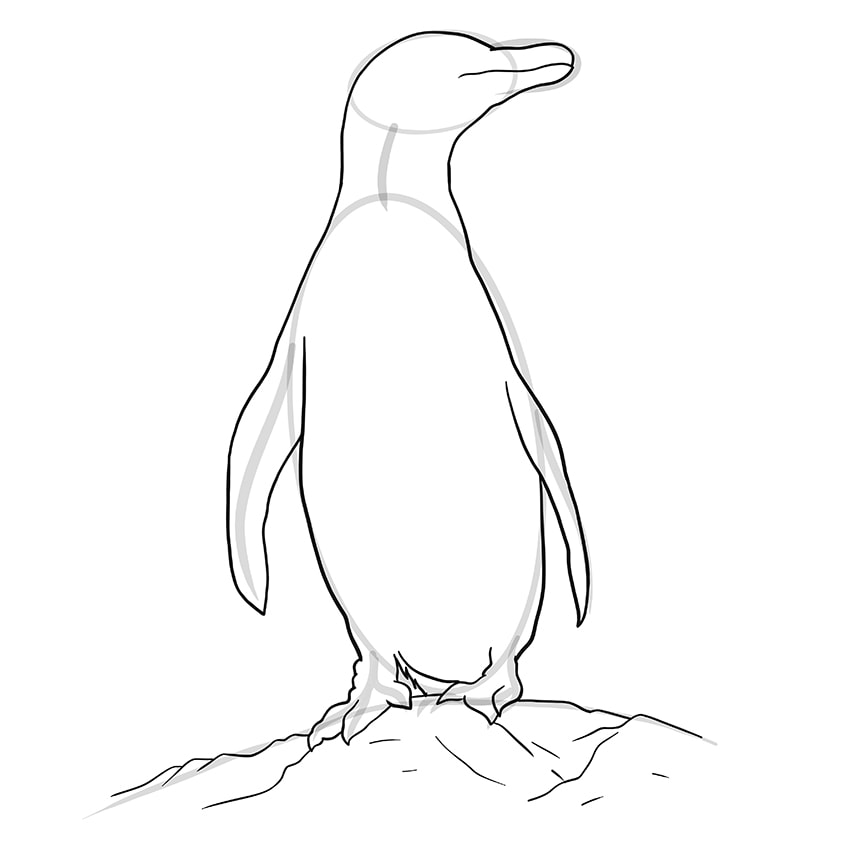
Penguins have three toes in the front, with fairly bulky feet adapted to their semi-aquatic lifestyle. This means that you do not need to be shy with the thickness of each toe and how wrinkly you make them. With regards to the flippers, the longer curved line placed higher up on the body should also be slightly thicker in width.
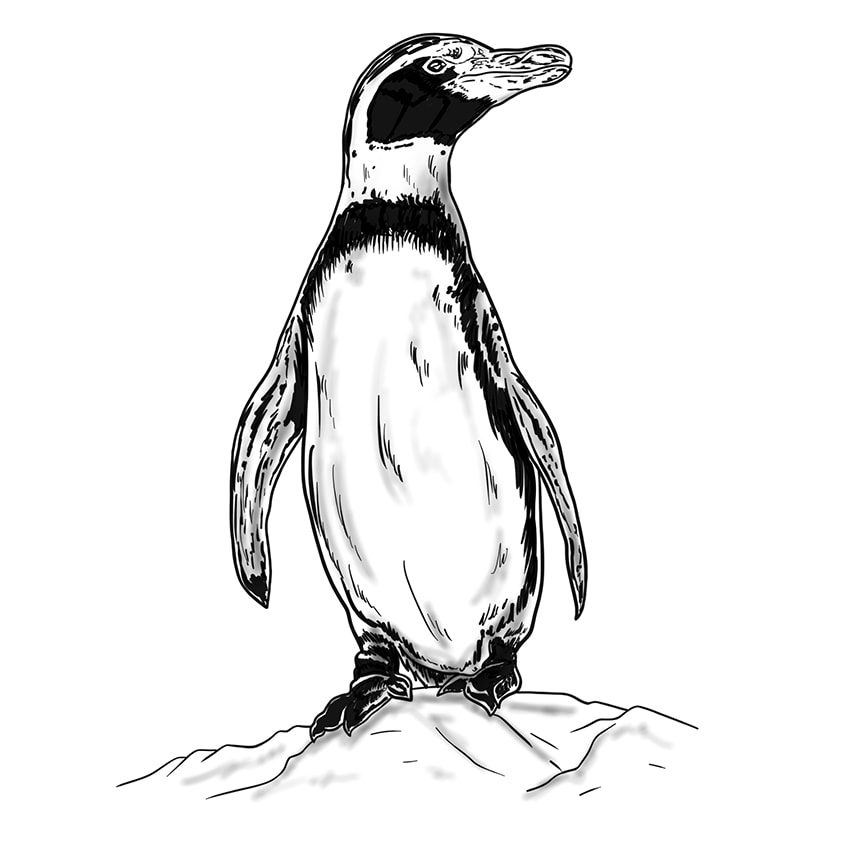
Step 9: Adding Realistic Detail
In this next section, we make use of some fine lines to add some realistic detail. If you look at our example of the beak, we added lots of small curved lines going along the length of the beak, making it look more textured – we made the top side of the beak more detailed so that it can be differentiated better. The eye has three white specks and is colored black with a white oval ring around it, but you can color this later.
Penguins have quite contrasting colors on their body – literally black and white.
Use black to draw and color a patch that goes around the beak, leaving a gap of white curving with the head of the penguin. Leave a white space for the neck, including some small detailing flecks, and then start another black patch that goes across the penguin’s chest and down the sides of the body. This black patch should be feathered slightly to make it look more textured. Do not forget to include some curved lines going vertically to replicate the ruffles of the penguin’s feathers.

For the wings, you must add some detailing lines, ensuring that they go in the same direction as the wings. Allow these detailing lines to be more ruffled, because it is the penguin’s flipper, after all. The penguin’s feet are colored in black, leaving a white outline around the edges to show the difference between the toes.
And finally, add some detail to the ground. Take a look at our example above: We have placed our penguin in its natural habitat and it is standing on a patch of snow or ice. We have detailed our ground accordingly with lots of curved lines.
Step 10: Highlights and Shadowing
Here is where you get to add some seriously realistic depth to your penguin. This step requires the addition of shadows and highlights to indicate parts that more in the foreground and those further back. It also helps to show from which direction the light is coming.
Adding the shadows will enhance the depth you added to your penguin in the previous step.
You can do this by shading over all of the detail lines with a much lighter pencil than the one you used for the outline. Then, take a cotton bud and use it to lightly blend and spread the shadows. A good tip is to put a separate, clean sheet of paper under the hand that rests on the page when smudging your shadows – this will help to prevent those annoying smudges.
Step 11: Final Details
Here is the final step in your penguin drawing. You have come this far, so do not stop now! This step is where you can bring all of the detailing lines and the soft shading together. The head must be a much darker grey than the chest and the belly of the penguin. Emphasize the effects you made in step nine, filling out the feathers and paying more attention to the shadows.
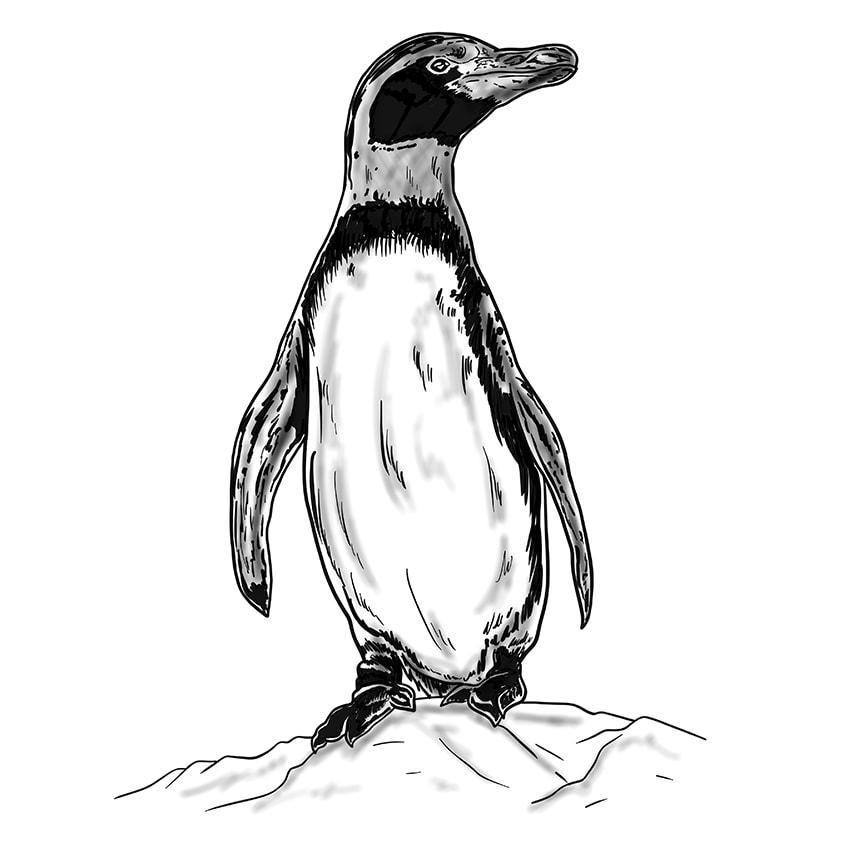
Et voilà! You have a beautifully drawn penguin sitting on the page (or graphics tablet) in front of you. The finer details of the penguin are a little tricky to get the first time around, especially if you are new to drawing or have not picked up a pencil in while. Practice will bring perfection!
Frequently Asked Questions
Are Penguins Hard to Draw?
You may have thought that drawing any bird is hard, but drawing a penguin is actually quite simple. This tutorial will set that record straight, proving that penguin drawings are not as hard as you first thought. We will guide you through a step-by-step process to help you get all of your proportions, shadows, highlights, and details right.
Does This Tutorial Require Any Special Tools?
This tutorial is a simple drawing that requires only a few pencils and an eraser. You do have the option to use a cotton bud for the shading, but it is not essential. If you are working with a tablet for drawing, you can also use that.

Matthew Matthysen is an educated multidisciplinary artist and illustrator. He successfully completed his art degree at the University of Witwatersrand in South Africa, majoring in art history and contemporary drawing. The focus of his thesis was to explore the philosophical implications of the macro and micro-universe on the human experience. Matthew uses diverse media, such as written and hands-on components, to explore various approaches that are on the border between philosophy and science.
Matthew organized various exhibitions before and during his years as a student and is still passionate about doing so today. He currently works as a freelance artist and writer in various fields. He also has a permanent position at a renowned online gallery (ArtGazette) where he produces various works on commission. As a freelance artist, he creates several series and successfully sells them to galleries and collectors. He loves to use his work and skills in various fields of interest.
Matthew has been creating drawing and painting tutorials since the relaunch in 2020. Through his involvement with artincontext.org, he has been able to deepen his knowledge of various painting mediums. For example, watercolor techniques, calligraphy and lately digital drawing, which is becoming more and more popular.
Learn more about Matthew Matthysen and the Art in Context Team.