How to Draw a Hat – Learn to Create Various Drawn Hats
Learning how to draw a hat is a great little detail to learn for various character drawings. Hats in an artwork can often contextualize an artwork by being present in a landscape or as a choice of wardrobe for different characters. There are many different ways to learn how to draw a hat, such as learning how to draw a beanie, cowboy hat, flat cap, baseball cap, and many others. All of these different hat drawing ideas can be used in various time periods, and help to define various settings in a drawing. Character design and a character drawing is a great genre of drawing for art, where exploring a simple item such as a hat, can really help to define the personality of a character. There are many ways to use a hat, whether it is on the head of a character or an item lying in the background. In this tutorial, we will explore some simple hat drawing ideas that can be used in various ways for different artwork ideas.
Step-by-Step Tutorial How to Draw Different Hats
Learning how to draw a hat is a really fun exercise because there are so many different shapes and forms of hats. In this tutorial, we will learn how to draw some classic hat shapes, which include the baseball cap, the cowboy hat, the beanie, and a bucket hat. Each hat drawing will be broken up into a few simple steps that help you to develop a simple hat sketch into a hat drawing that is a little more realistic. Now that we know what we are to expect in this tutorial on how to draw a hat, let’s get into it!
How to Draw a Baseball Cap
A baseball cap is probably the most classic hat that can be used in so many different contexts. The hat has also existed for almost a century and has subtly changed through the years. However, the shape of the hat has retained its classic snapback, soft material, and hard peak aesthetic. We are going to draw a baseball cap, looking at it from the right perspective, so that we can capture the qualities that are unique to a baseball cap.
Step 1: Sketch the Basic Shapes
We begin by sketching out a simple dome shape. We can also add a curved vertical line in the dome, dividing the dome shape. This will help to define the front of the hat.
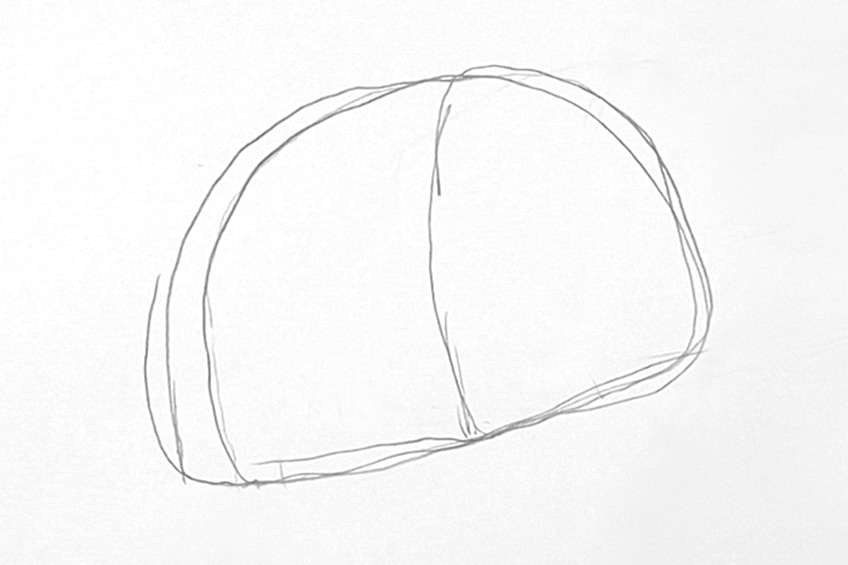
Once we have the dome shape divided into two, we can draw the peak on the right side of the hat. The peak should sit on the side of the dome shape, starting from the bottom of the vertical indicating the side of the cap. We can also add a little downward arch or curve at the tip of the cap to indicate the shape of the cap.
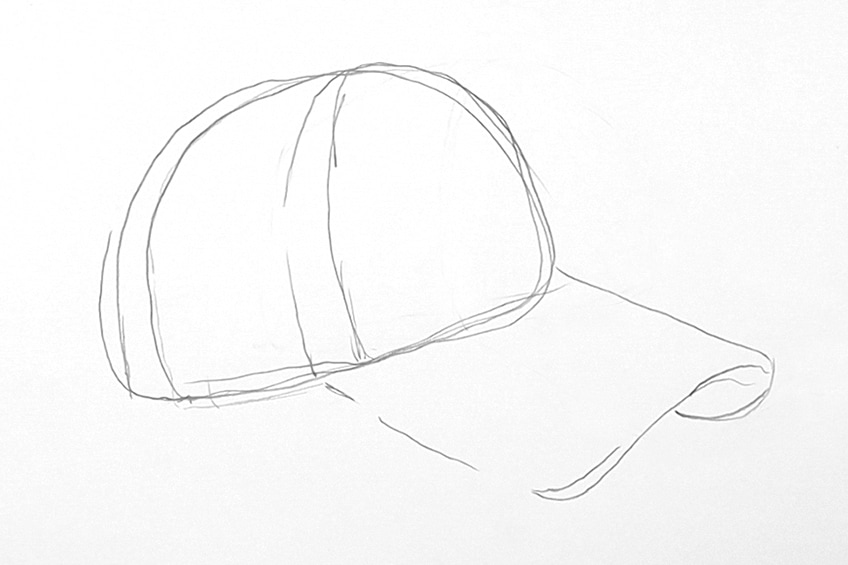
Step 2: Refine the Shape
Once we have the basic shape of the cap, we can start to use our erasers and pencils to alter and tweak the cap’s form. We do this to give the cap a little more material-like movement so that it is not a perfect circle.
Play around with how you form the baseball cap, and how you would like to have the dome of the hat shaped. Adding little kinks and a change of direction in line work can make the hat look a little more worn and realistic.
You can also have a little feature or badge on the front of the hat. Remember, as you draw the hat from the right angle, you want the feature to wrap around the hat. This means part of it will be present, as it forms with the shape of the hat.
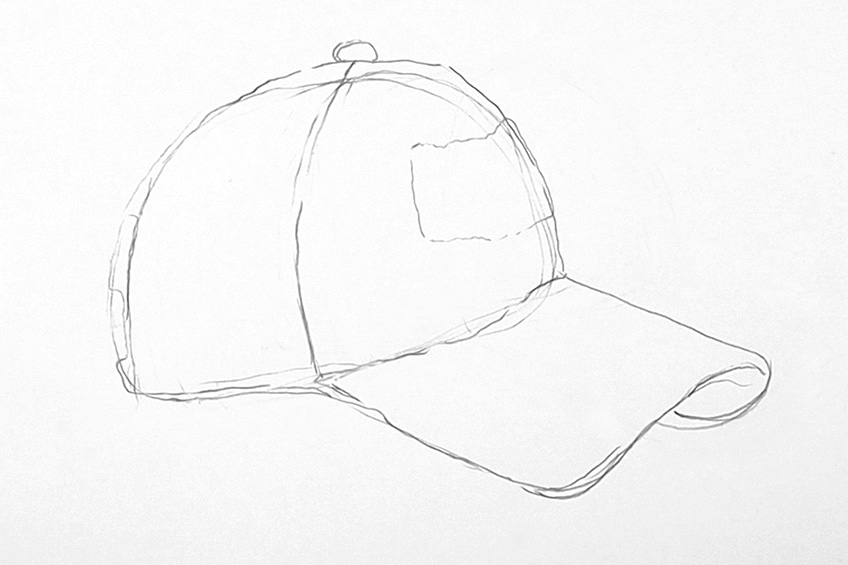
Step 3: Light Shading
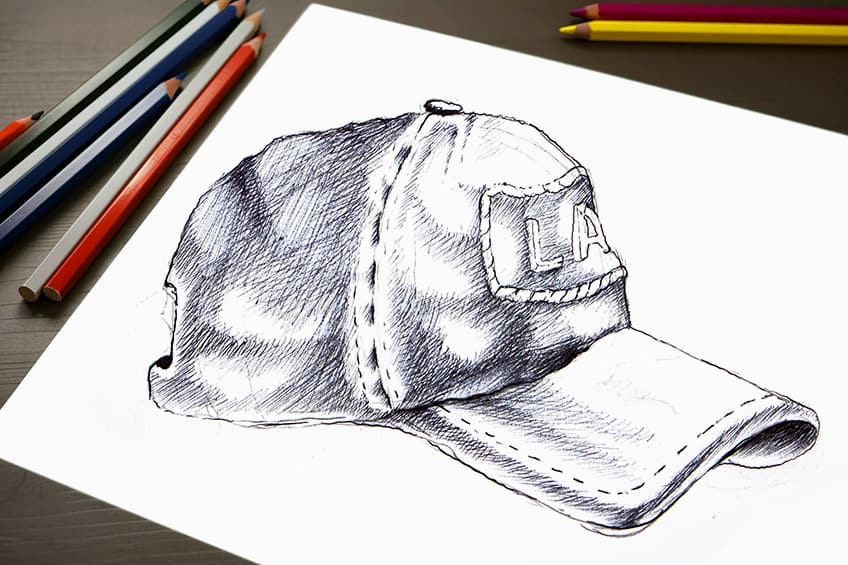
Once we have the form of the hat drawn and we are satisfied with its structure, we can now begin to add some light shading to the hat drawing. We do this by adding some light shading to the dome of the hat in obscure shapes. You can also add in features like stitching and the button on the top of the hat.
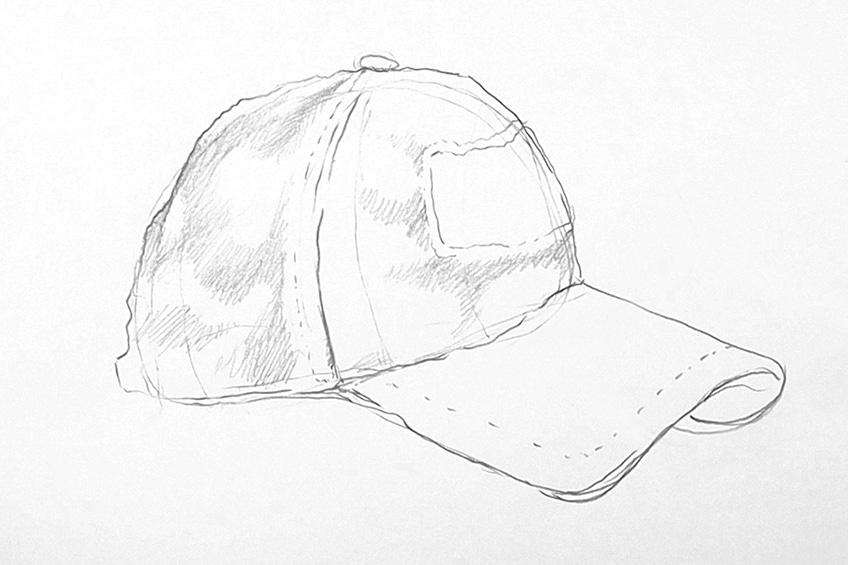
The material of a baseball cap is generally quite sturdy, which means the fold will have sharp edges. This means we want to create a set of triangular shading patches in the dome of the hat. By doing this, we give the hat dimension and a more realistic quality of the material. You can also add light shading under the peak of the hat.
Step 4: Darker Shading
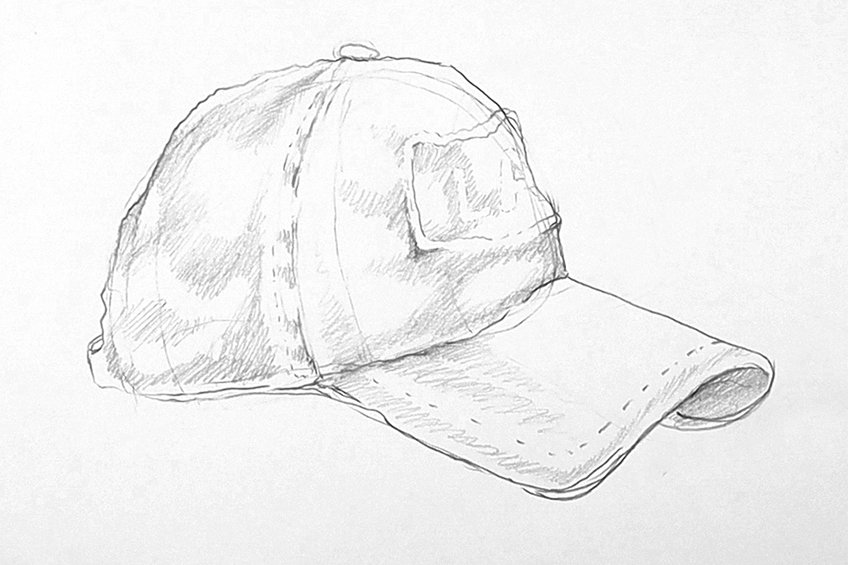
Since we have shaded in the hat drawing lightly with pencil, we can now darken the shading using our ballpoint pens. Light interacts with material quite strangely, as the folds in the material can define light and darker moments in the hat. Use the pencil shading to guide you in where you add your darker shading.
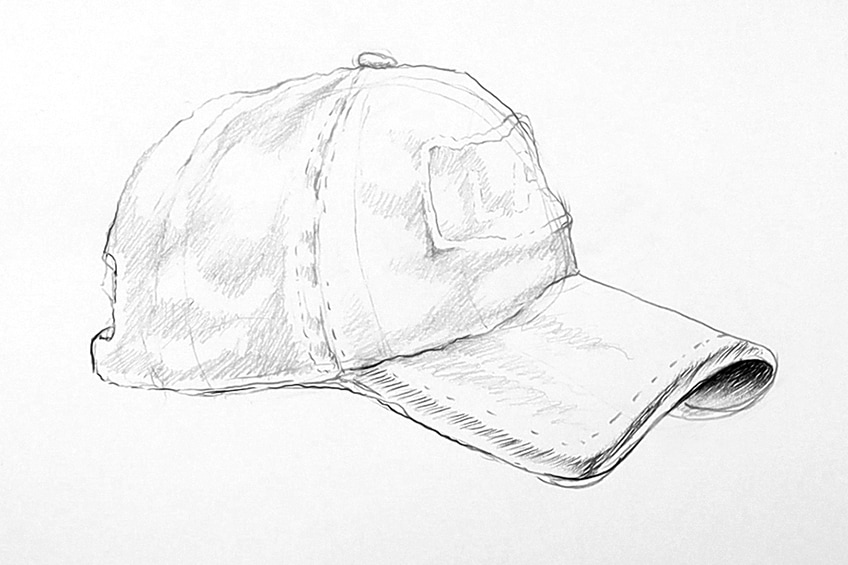
Remember to keep the shading more straight on the peak of the hat, making the surface of the peak seem straight as it would be on a real object. Remember to darken the area under the peak, as light wouldn’t be able to reach this area as well as the other sections of the hat.
As you shade in the hat drawing using your ballpoint pen, try to maintain a style like cross-hatching, to give the hat a consistent illustrative look. Play around with how you add a detail on the front of the hat. This can be anything, however, it must form along with the shape of the hat.
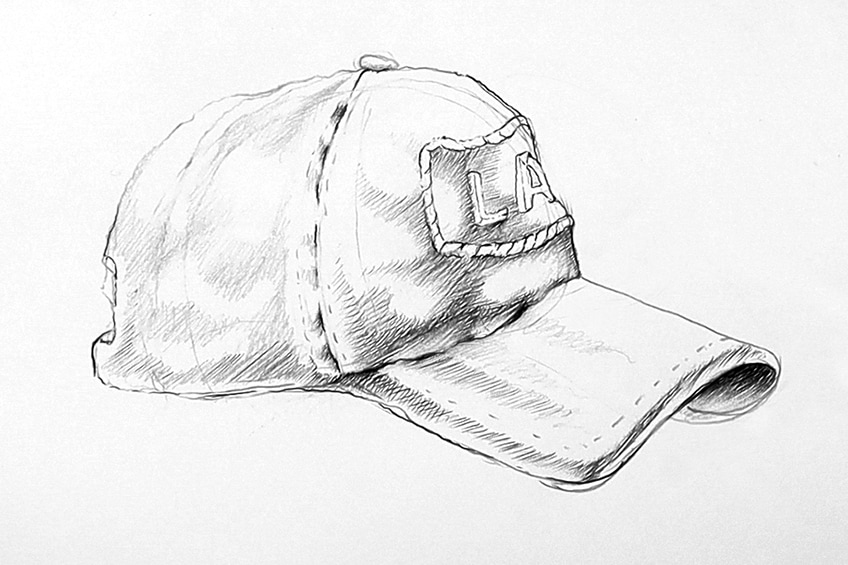
Take your time when shading a drawing with a pen. See how you can emphasize different features of the hat using the contrast of black ink. Consider how the stitching can be a detail that sticks out and causes shadowing around it as it causes a bulge in the hat’s material.
Consider the back of the hat and how the snap-back feature of the hat is slightly present. You also want to consider where the shadows will form on the hat predominantly. In this case, adding most of the shadowing to the back of the hat gives a good dimension to the hat. Making the front light and the back of the hat darker.

Using your shading can also be a way to define edges and details, not just shading. This means that you can use the darkness of the ballpoint pen to define edges in the peak of the hat as well as stitching and shadows.
You can also play around with adding larger and smaller creases in the hat. Adding little subtle creases with your shading can also give the hat more texture.
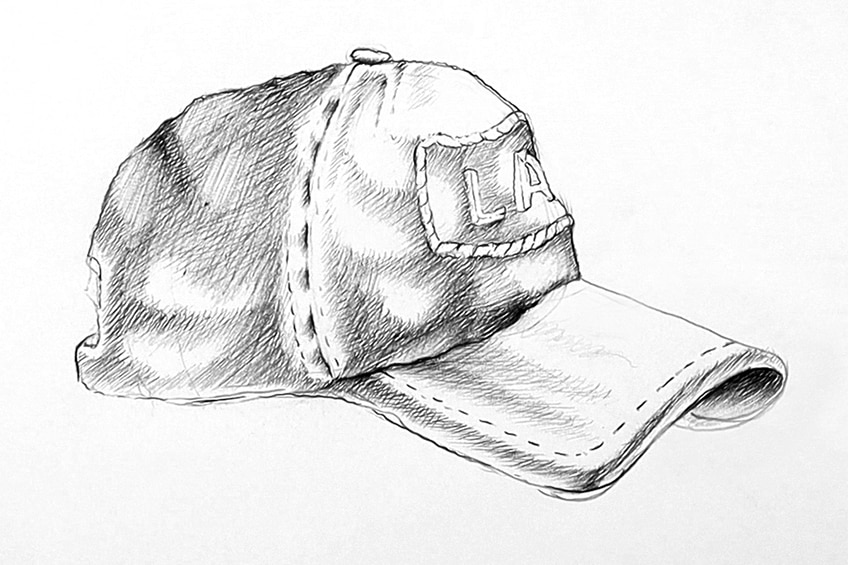
Carry on adding more shading to your hat drawing until you are satisfied with how dark or light it is. A good rule of thumb is to not overshade, sometimes it can be helpful to add maximum contrast, and other times not so much. There you have it! A basic process of drawing a baseball cap.
How to Draw a Cowboy Hat
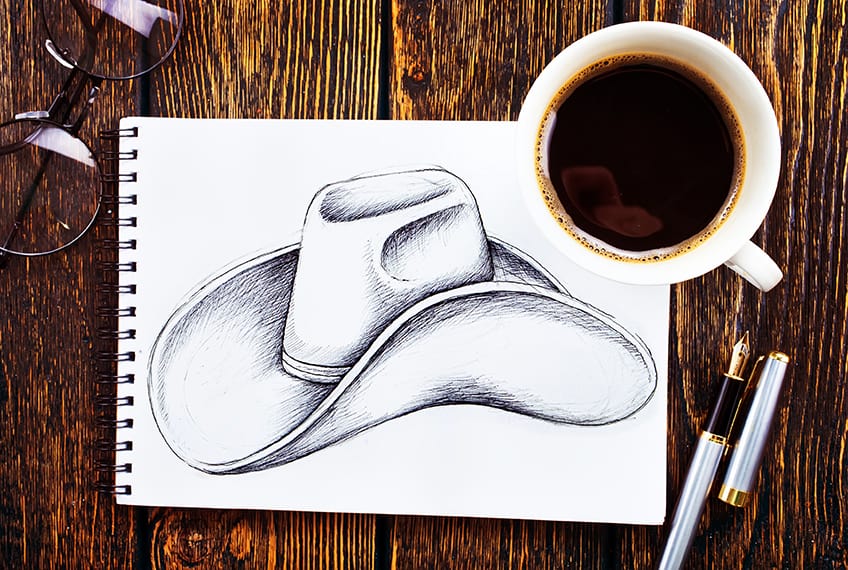
If there is any hat that is iconic and has retained a strong visual statement for the past two centuries is the cowboy hat. Learning how to draw a cowboy hat is a great feature to know how to draw that can be utilized in various time period artworks. The cowboy hat is an iconic shape and a really fun shape that can give such a profound effect to character drawings. Let’s go through the basic process of creating a cowboy hat drawing from a side angle.
Step 1: Sketch the Basic Shapes
We start by drawing a simple cone shape. We want to break down the shapes first, bu doing so we have a better chance of tweaking and editing the hat into a more realistic cowboy hat shape.

Once we have our cone shape, we will draw an infinity sign or an infinity shape that overlaps with the cone shape. We want the right side of the infinity sign to overlap with the bottom right side of the cone shape.
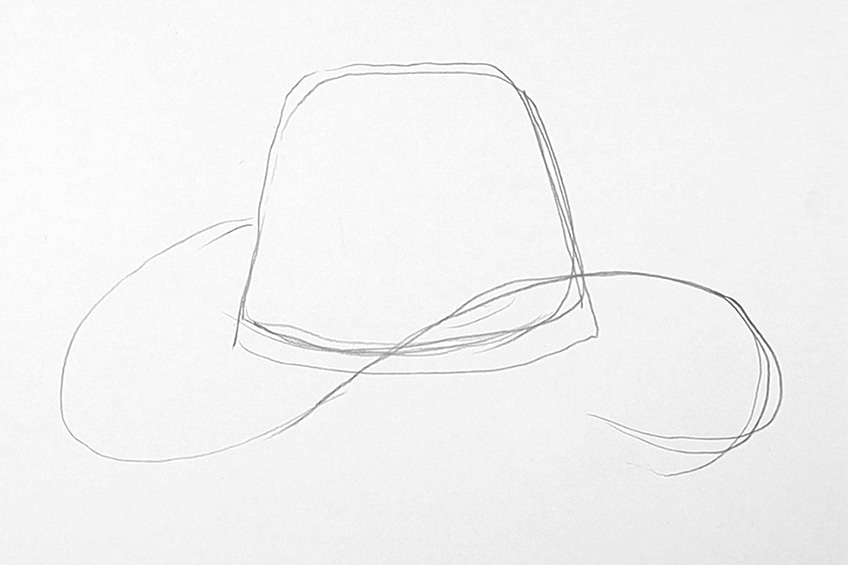
From here, if we start to erase the bottom of the infinity sign, we will slowly start to see how the cowboy shape is becoming more visible.
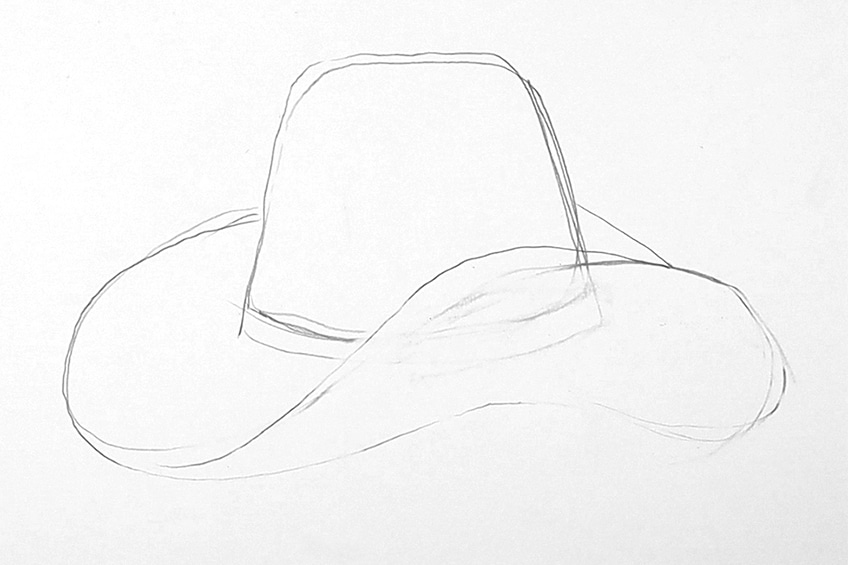
Step 2: Refine the Shape
We can now begin to tweak and change the cowboy hat, making sure that the different features are sized and placed correctly in the hat drawing. The rim of the cowboy hat is quite large, we want to make sure that we have the rim adequately sized to the cone of the hat.
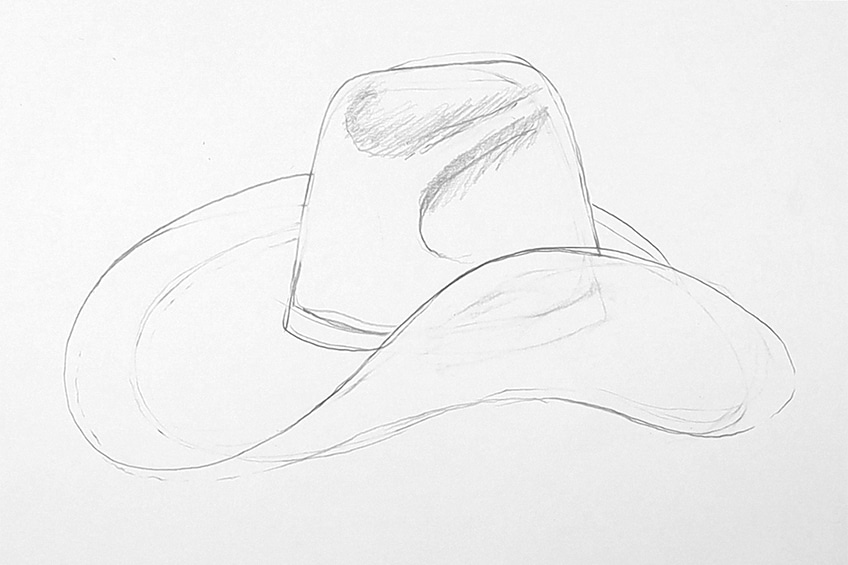
We also want to make sure that the indentations are placed correctly on top of the cone of the hat. The cone of the hat should be flattened a bit, making it a little more square. We should have two indentations in the cone, one on top of the hat and one on the side of the hat, with a little protrusion in between them.
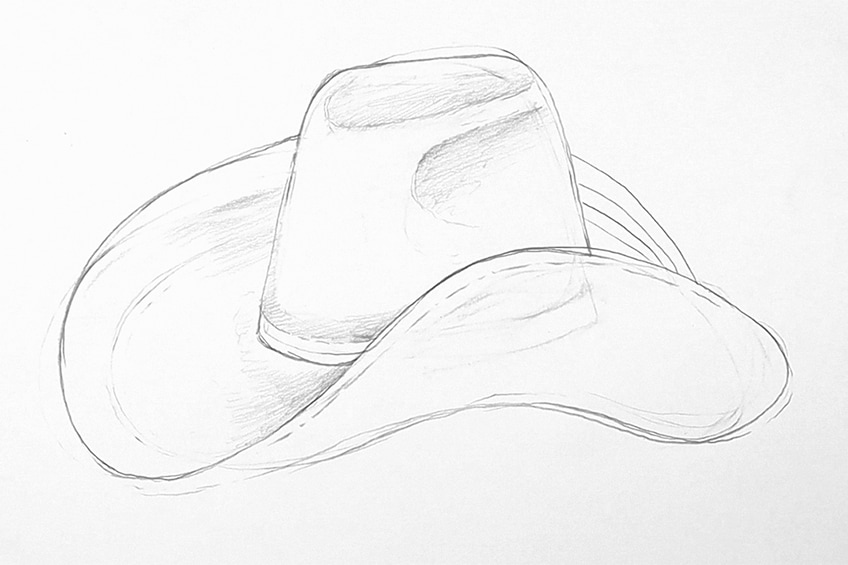
Step 3: Light Shading
We can now add a little shading with our HB pencils, giving the shape and indentations of the hat a little more significance. The hat has a curved peak, that lifts on each side of the hat, this means that there will be shadowing in between them on the front of the hat.
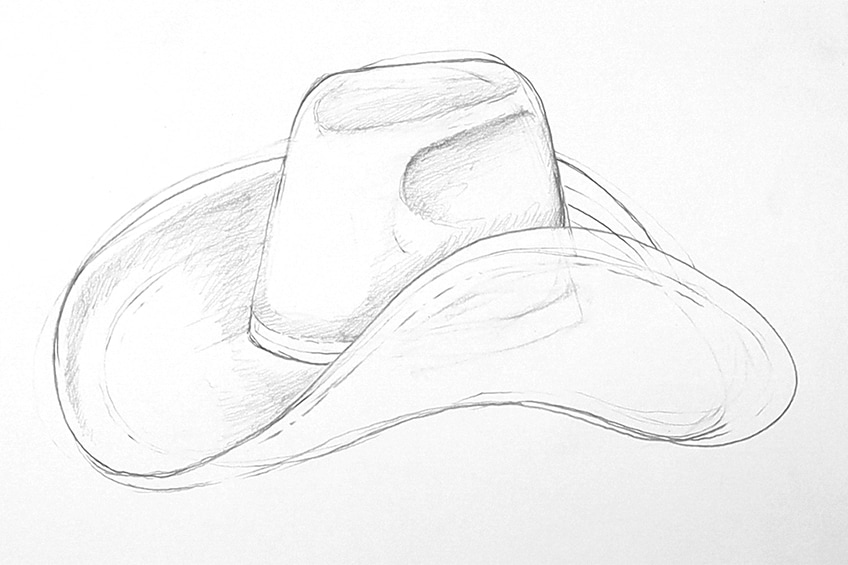
We can also add a little more shadowing to the indentations in the cone of the hat. We can also add some light shadowing to the bottom center area of the peak that curved toward us. Drawing a cowboy hat from the side gives us the best opportunity to see all the interesting qualities of the hat.
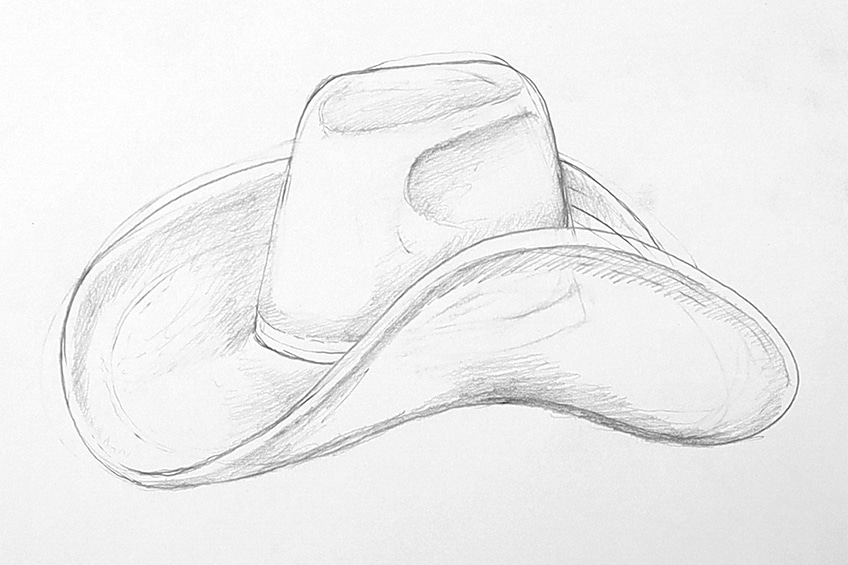
Step 4: Darker Shading
Once we have added some light shading to the hat, we can now use our ballpoint pens to over the shading, giving the hat drawing a little more contrast. Remember, keep a single shading style, using a cross-hatching method with a pen is a great way to achieve smooth gradients.
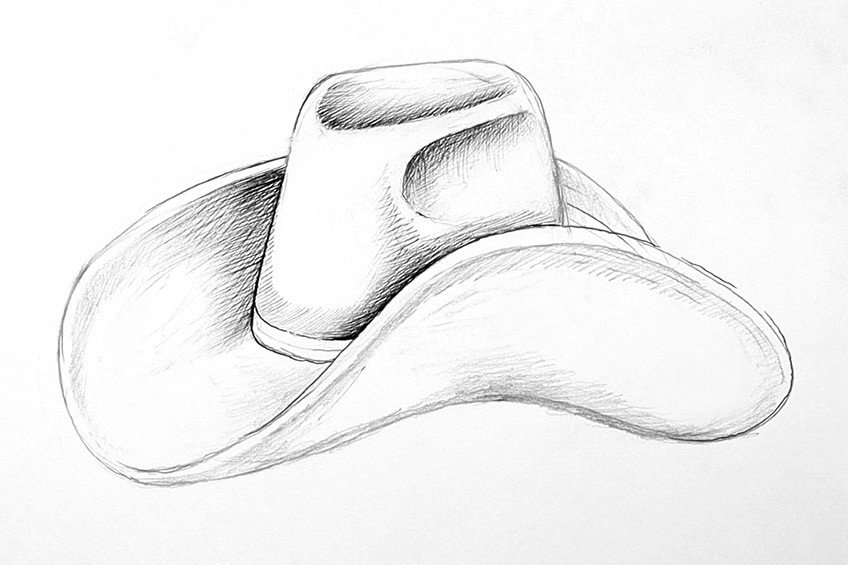
We want to make sure that we are adding shading to the curvature in the rim, that moves around the cone of the hat. We do this by shading lightly with our ballpoint pens over the pencil shading. We want there to be a seamless transition from the curves in the hat to the exposed area in front of the peak of the hat.
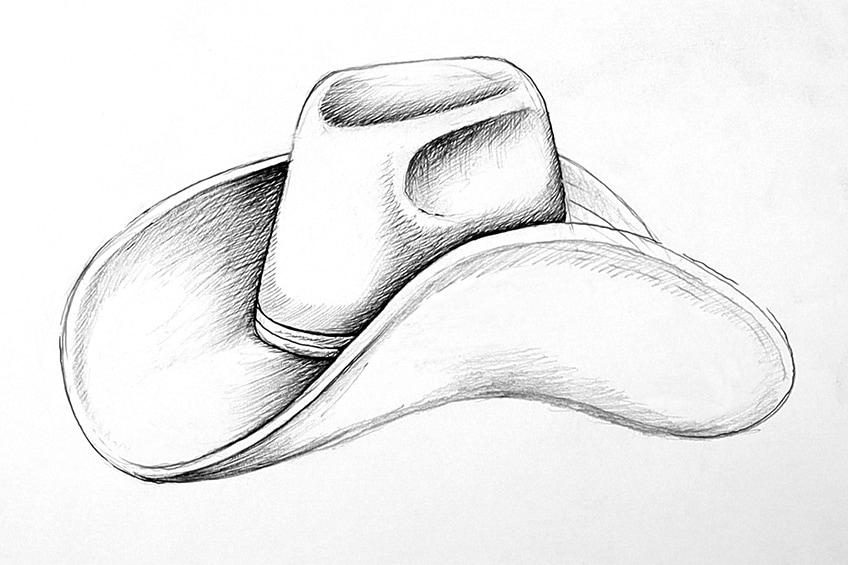
We want to simply go over the shading in each area of the hat that we did with our pencils. We want to also spend time, lightly adding pen shading to the different features of the hat. Make sure to take your time, especially on the indentations in the cone of the hat.
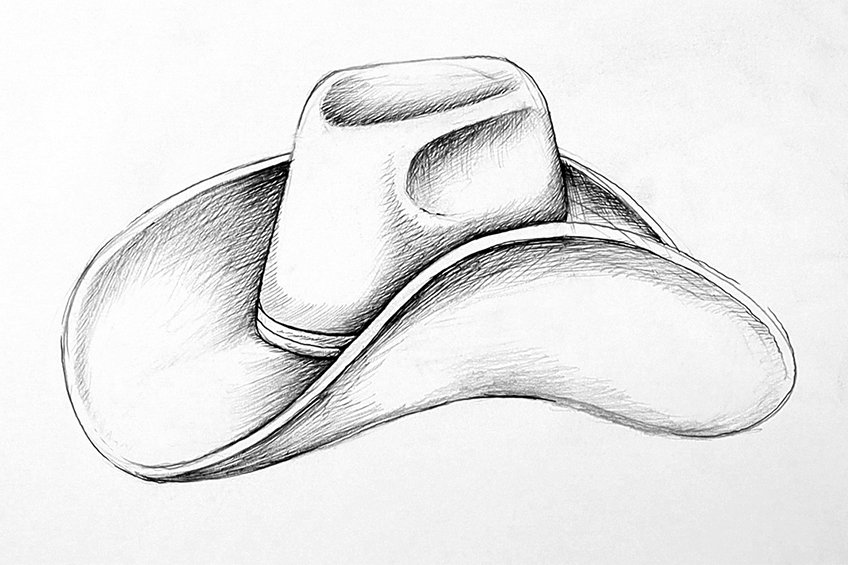
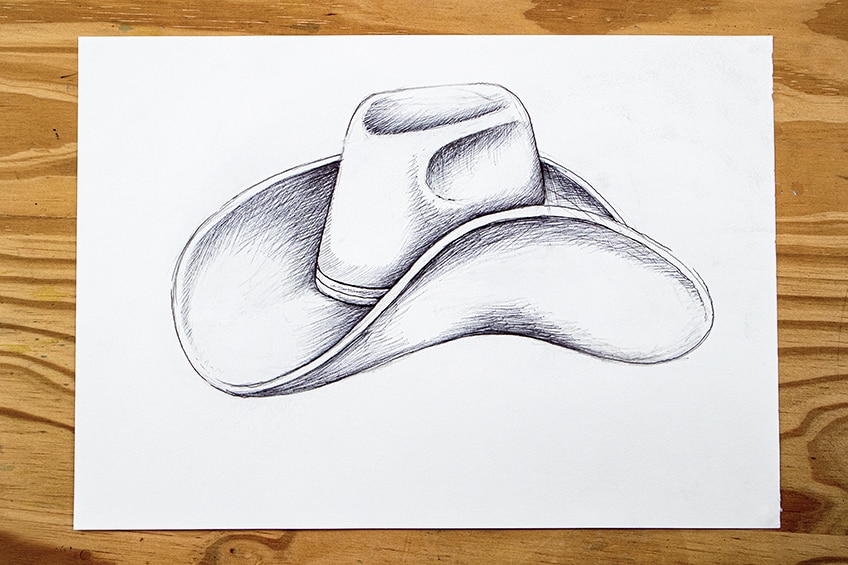
Slowly work through the shading process until you have attended to each area where shadows would be present. From there, you will carry on this process until completion. that is the simple process of how to draw a cowboy hat.
How to Draw a Beanie
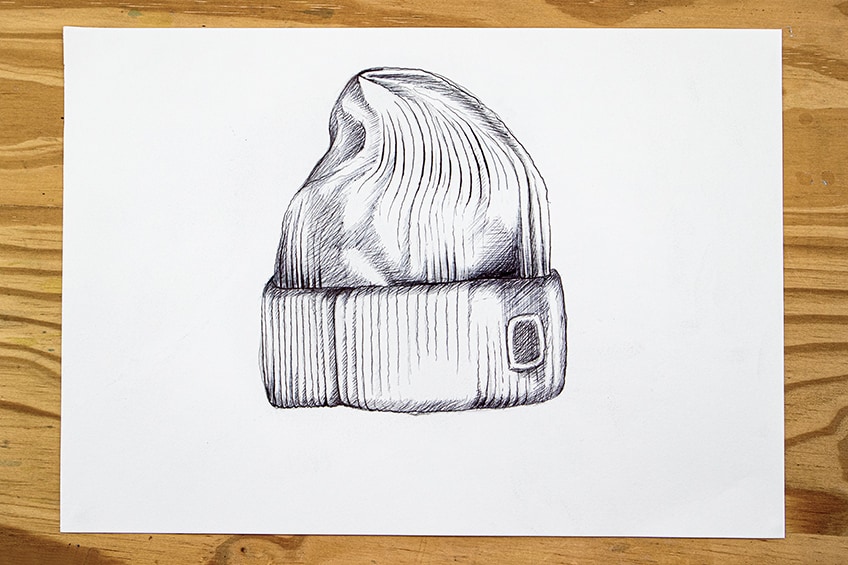
A Beanie is a classic hat that is very unique to a modern hip-hop style. What’s unique about the beanie is that it is a thicker knit woven hat that is primarily associated with colder climates. This hat style has been adapted over the years with different little additional features. However, in this tutorial on how to draw a hat, we will be drawing the basic beanie shape, where we can work out the knit qualities, this hat can be utilized in various ways and to know how to draw a beanie is a great skill to have in the drawing repertoire.
Step 1: Sketch the Basic Shapes
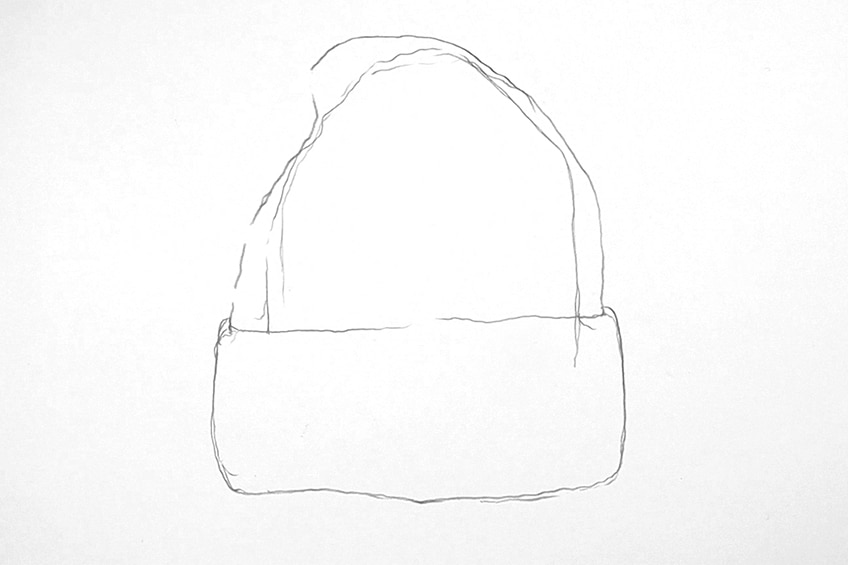
We can begin by drawing a triangular shape, like a cone or a spearhead. However, we want to keep the body of the beanie quite wide, so bear that in mind.

From here, we going to draw the sketch out the base shape of the beanie, which we can do by drawing a rectangular shape at the bottom of the beanie. We want this shape to e quite thick, as it will define the fold of the beanie.

From here we can refine the cone shape at the top of the beanie and the rectangular shape near the base of the beanie. These two components will make up the shape of the beanie, defining the two distinct sections of a beanie hat.
Step 2: Refine the Shape
From here, we can begin to add in the detailing that defines the knit of the beanie. This can be however thick you would like, as long as they are vertical lines in the base. The lines in the cone shape of the beanie will bend a little to indicate movement in the fabric of the beanie.

As we add in these lines, we can refine the shape of the beanie to have subtly curves near the tip of the beanie. By doing this, we give the beanie a little more realistic movement in its shape. We can also add a little badge on the fold of the beanie, as well as a distinct line in the base to define the main stitching in the hat.

Step 3: Light Shading
Once we have drawn some lines that are indicative of the knit quality in the beanie, we can add some light shading to indicate folds in the material. We don’t need to draw many lines to define the knit of the hat, but rather do some in different areas of the hat to gesture at the quality of knitting.

Step 4: Darker Shading
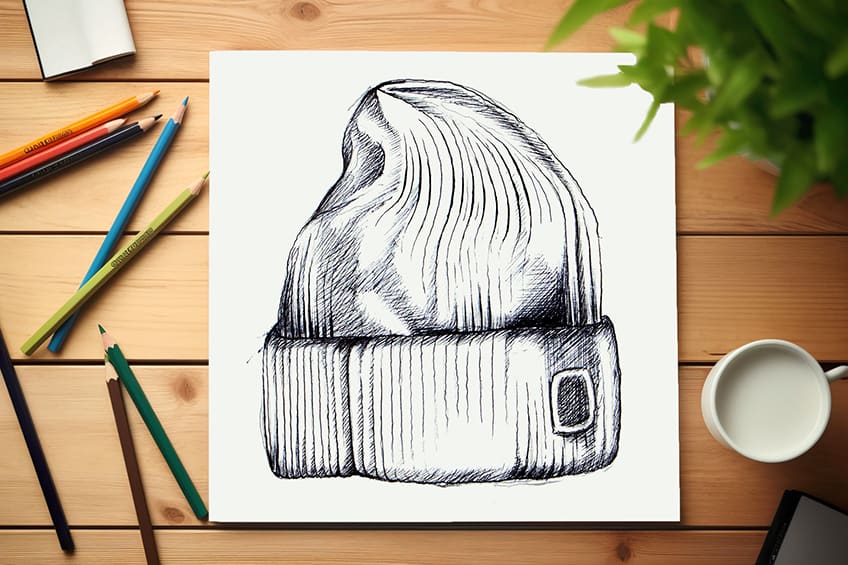
Once we have drawn our lines and added some light shading to the drawing, we can begin to darken the lines and shading using our ballpoint pen. Take your time going over the lines with your pen. You can also add shading around the lines to give the knit of the beanie more dimension.

You can also darken the shading in the cone of the beanie to give the material more shadow. The tip of the beanie also has more distinct knit lines, which we can darken using our ballpoint pens. Shading along the edges of the fold in the beanie also gives the fold a little more depth and protrusion.

We can also thicken some of the lines that flow into the cone of the beanie, as well as add shading around the badge. The badge should form with the shape of the beanie. We can add some darker shading where the beanie folds in itself to define the distinction between the cone and the base of the beanie. There you have it, a simple process on how to draw a beanie.
How to Draw a Bucket Hat
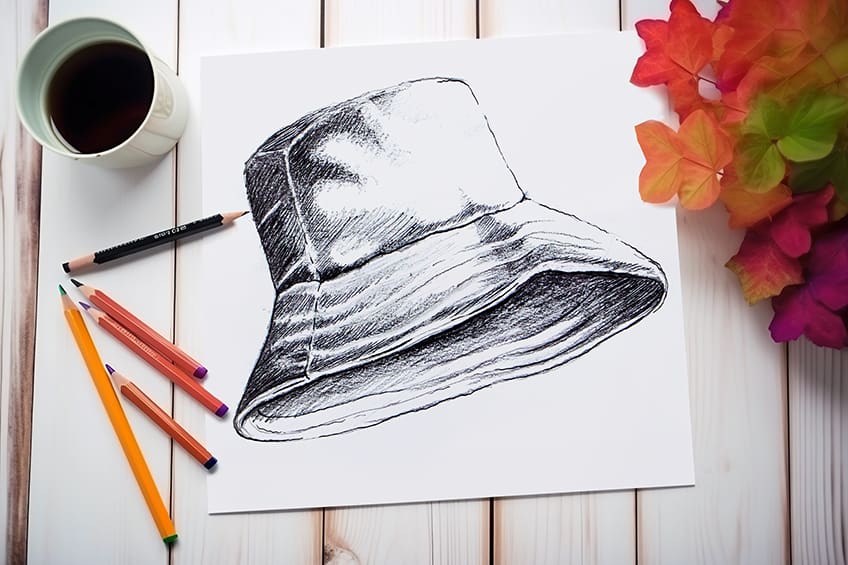
A bucket hat has also become a common hat that is unique to the era of the 90s and the early 2000s. However, the fashionable garment has made its way back into mainstream canonical fashion attire and can be associated with the modern era of fashion to this day. The bucket hat is used in various contexts and can be a defining period piece for character drawing. Let us go through the basic process of how to draw a bucket hat from a side view.
Step 1: Sketch the Basic Shapes
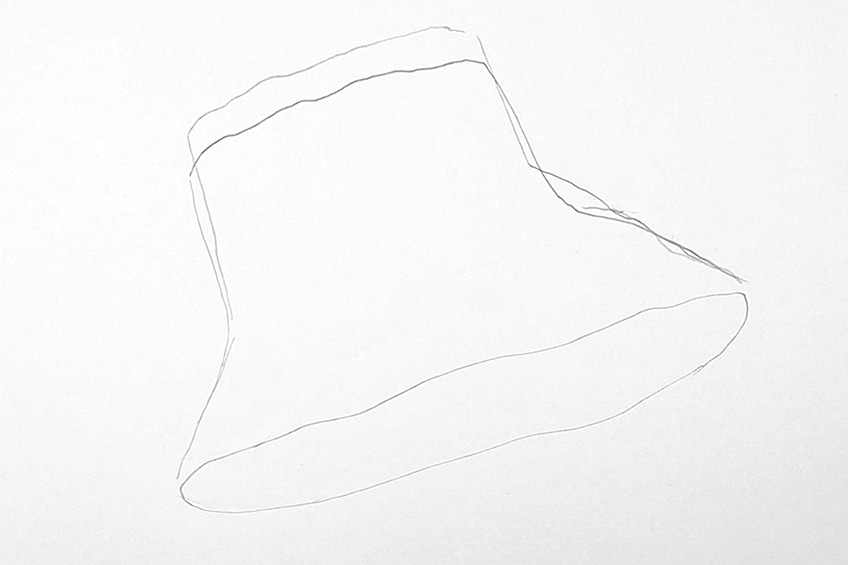
We want to start by drawing an elongated oval-like shape on the page. This can be at a slant which will make the inside of the hat slightly visible.
From here we can create a UFO-like shape, where the base of the hat connects to a square-like shape at the top of the hat. This should have a triangular-like form, where there is an oval connected to a triangular UFO-like shape.
Step 2: Refine the Shape
Once we have this basic shape drawn, we can contextualize it a little with some linework and basic pencil marks. We can add some lines inside the hat that curve into the hat to define the depth of the bucket hat. We can also begin to add some basic stitch lines to distinguish the base and top of the hat.

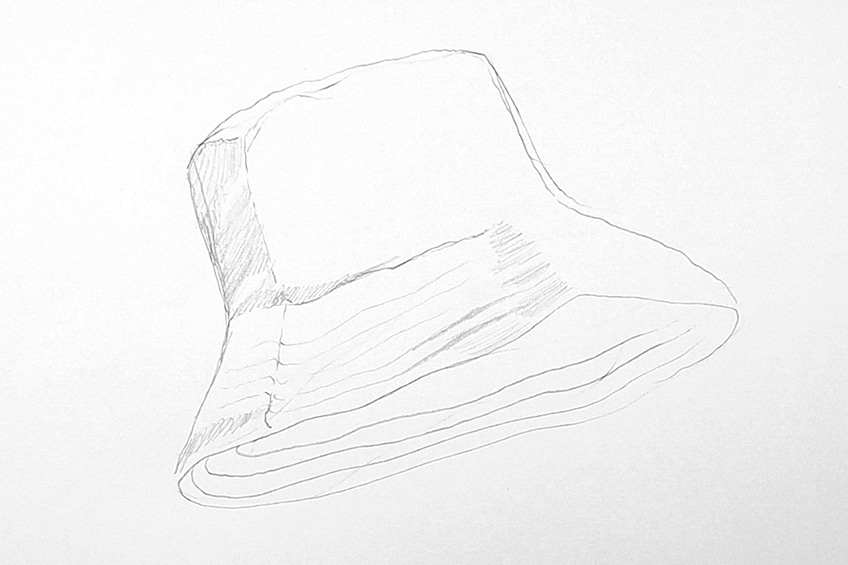
We can start to add some horizontal lines which describe the stitching in the hat. We can add this to the base of the hat to give the bucket hat its iconic look. These lines can be gestural as opposed to solid lines going from one side of the hat to the other.

Step 3: Light Shading
We can now use the structure of the hat, as well as the linework to guide us as we add in some light shading. We want to add shading along one side of the hat more, to give the idea of light being present on the other side of the hat. We want to shade around the stitching in the base of the hat to define the stitching qualities more significantly.

We want to use the stitching qualities in the hat to be defined by the shading around it. We want our shading to move from one side to the other, making it starker on one side to define the qualities of light and shadow. Make sure to shade around the stitching, this will give the stitching a more three-dimensional quality.

As we shade, we also want to make sure we shade inside the bucket hat, making the hat seem darker inside. This shading can be more present on the opposite side to that of the shading on the outer surface of the bucket hat. By doing so we give the hat more movement and realistic interaction with light.
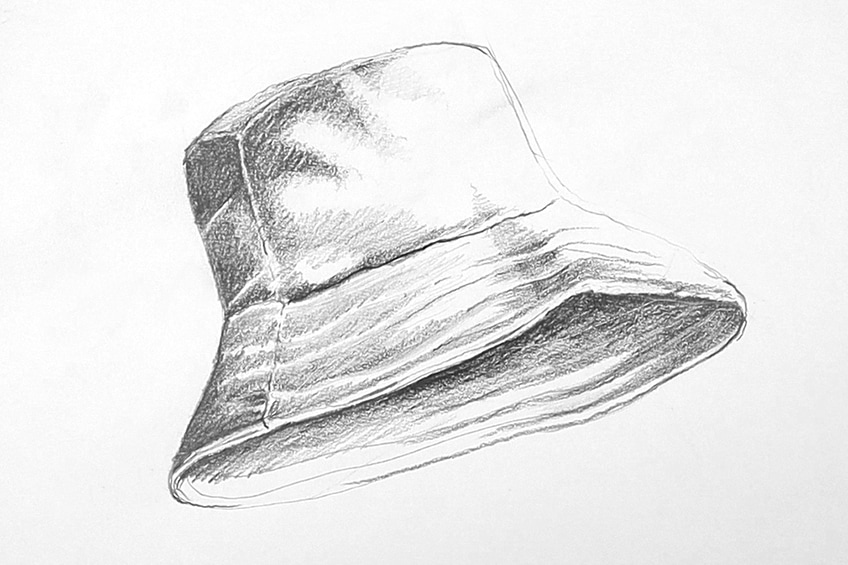
From here, we want to overlay our shading with a 2B pencil, slightly darkening our shadows. We want our shadows to have a gradient from dark to light, as they move from the shadows into the present light source. We can also then proceed to slightly darken the stitching with our ballpoint pens.
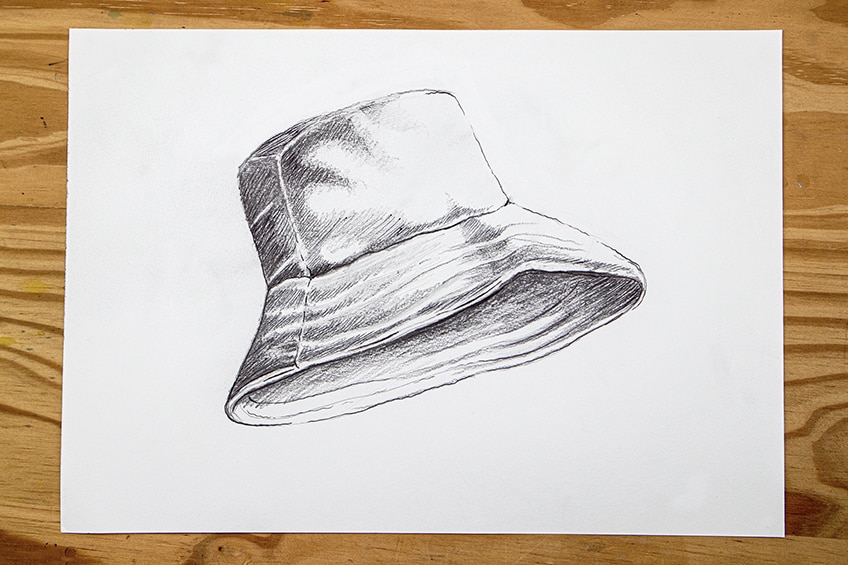
We can also add some pen shading to the darkest areas in the shadows of the hat. By doing so, we give the hat more contrast from where the shadows begin to where they end. Take your time working out the shading process until you have completed the entire hat. From there, you should be left with a well-drawn bucket hat. This concludes the tutorial on differently drawn hats.
Tips to Remember
- Take your time. Work out the drawing in the early stages as best you can before moving on to using a pen.
- Choose your angle. There are many angles to choose to draw a hat from, consider which angle is going to give you the result you want
- Work out the shape of the hat first. Remember, hats are fundamentally made of simplistic shapes, which we then can alter and rearrange to look more realistic.
- Use your eraser as a tool. You will need to tweak your drawing here and there, so use your eraser to assist you.
- Have fun. Learning how to draw a hat is a fun and simple task, enjoy the process.

Learning how to draw a hat is an interesting process because some hats are easier than others. Learning how to capture materials through the use of shading is also an interesting challenge, as hats have different materials. Choosing which mediums to work with can be all the difference. Using a ballpoint pen to add contrast in shading can give a hat drawing a more vivid quality. This gives the hat more dimension and texture, which works well when drawing material. Most importantly, always take your time with each step and you will come out with a beautiful hat drawing.
Take a look at our hat drawing webstory here!
Frequently Asked Questions
How Do You Draw Shade in a Beanie?
Learning how to draw a beanie is interesting because it is made of a woolen-like texture, which gives the beanie a ribbing due to the knit itself. This, however, can easily be shaded using the rule of light and shadow. Like any three-dimensional object, a beanie is no exception, which means that if the light source is present on one side of the beanie the shadowing is going to be present on the other side of the beanie. However, capturing the rib-like qualities of a beanie is achieved by using lines. Drawing a variety of lines in the shape and form of the beanie is essential. A beanie will always be folded and curled in some sort of way, drawing lines in the beanie following that form and shape will give the beanie its knit-like quality. From there, we can simply add shading in the bends and folds to indicate three-dimensionality in the object.
How Do You Draw a Cowboy Hat?
Cowboy hats are so fun to draw and really easy to do so. You start by creating a light sketch of the hat using your HB pencil, the aim is to capture the basic shapes first. The hat is made of an oval and square-like shape that intersects, which is what you want to draw using your pencil. Hat drawings should always start with a light sketch to figure out the shape of the hat first, which you then can proceed to tweak and refine using your eraser and pencil. This is where we begin to add in the subtle details of the hat, like the little curves in the top of the hat as well as the bends. From there, we will simply decide from which direction the light source will be present in the image, allowing us to know where exactly we can add some shading into the hat drawing. Remember, start with the generic shapes, tweak them until the shape is that of the cowboy hat, and then add shading last.
Matthew Matthysen is an educated multidisciplinary artist and illustrator. He successfully completed his art degree at the University of Witwatersrand in South Africa, majoring in art history and contemporary drawing. The focus of his thesis was to explore the philosophical implications of the macro and micro-universe on the human experience. Matthew uses diverse media, such as written and hands-on components, to explore various approaches that are on the border between philosophy and science.
Matthew organized various exhibitions before and during his years as a student and is still passionate about doing so today. He currently works as a freelance artist and writer in various fields. He also has a permanent position at a renowned online gallery (ArtGazette) where he produces various works on commission. As a freelance artist, he creates several series and successfully sells them to galleries and collectors. He loves to use his work and skills in various fields of interest.
Matthew has been creating drawing and painting tutorials since the relaunch in 2020. Through his involvement with artincontext.org, he has been able to deepen his knowledge of various painting mediums. For example, watercolor techniques, calligraphy and lately digital drawing, which is becoming more and more popular.
Learn more about Matthew Matthysen and the Art in Context Team.


