How to Draw a Flag – Easy American Flag Drawing Tutorial
Drawing flags is an interesting task because, for one, they are essentially a way of learning how to draw fabric. Secondly, they teach you how to shade in a flowing structure, which refines your shading skills. This skill is a great visual addition to many artworks and can be utilized in various contexts, such as in garments and fabric drawings. This easy flag drawing tutorial will show you the basic process of a flag drawing, demonstrating how to create a flag blowing in the wind. What makes a beautiful flag drawing is playing around with how the fabric can flow and seem as if it is blowing in the wind. Learning how to draw a flag also helps your perspective skills, as you use your shading to make a beautiful flag drawing, we will see how the flag gains dimension in its form.
An Easy Guide to Drawing a Flag
As we learn how to draw a flag, we will see that the process is quite simple and easy to follow. This tutorial shows you how to develop an easy flag drawing, starting with simple sketch work, which we will then develop with some details and shading. We will be creating an American flag drawing, as the American flag is quite tricky as it comes with a few details.
What’s nice about learning how to draw a flag is our depth perception is challenged. This is because we will add ripples into the drawing, which will slightly distort details on the flag. We don’t need to worry about this, as it also gives us the freedom to get away with a lot of strange line work which will seem normal by the ripples in the flag.
Necessary Materials
Learning how to draw a flag is quite a simple task that doesn’t require many materials. As we go through this easy flag drawing, we will start by lightly sketching which we can use a simple HB pencil. From there we will add some darker shading using a 2B pencil and a ballpoint pen. The ballpoint pen is also a great way to give a flag a graphic look, as it is a really dark medium. For this flag drawing, all the materials can be bought online through the links below:
- HB pencil
- 2B pencil
- Ballpoint pen
- Eraser
- Sharpener
- Good paper (200 g/m – 250 g/m recommended)
Preparation
Once we have all our materials ready, we can begin to prepare ourselves by finding a space where we can engage and concentrate on the tutorial. This is quite an easy flag drawing tutorial, however, there are moments where we want to pay attention which means we want to remain engaged without any distractions. That being said, try to relax and go through the process slowly and attentively, taking breaks when you need them.
A good suggestion is to put on some relaxing music, perhaps make a cup of tea, and try to put aside a good portion of time for this tutorial on how to draw a flag. Now that we are ready, let us see what we are to expect from this tutorial on how to draw a flag.
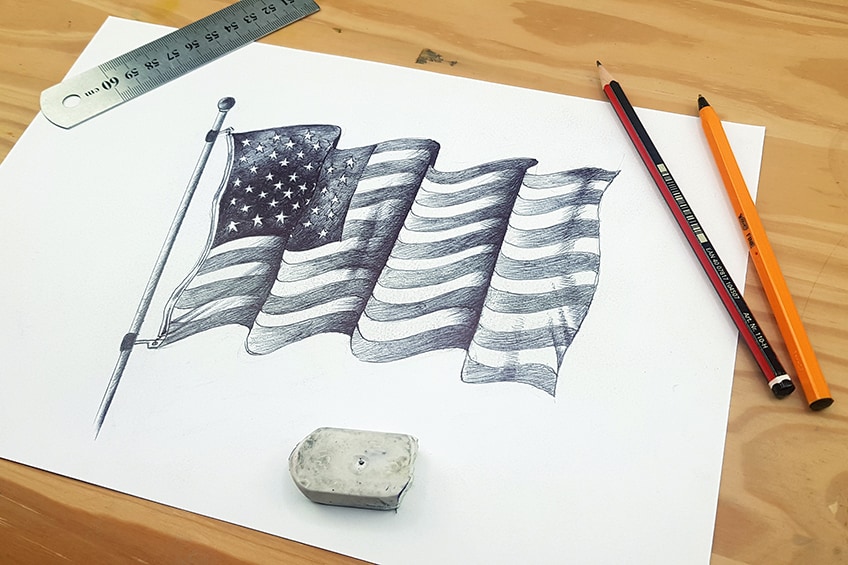
Step-by-Step Instructions on How to Draw the American Flag
In this tutorial on how to draw a flag, we will break down the process of turning a simple sketch into a realistic beautiful flag drawing. We will be learning how to draw the American flag, which will provide us with the challenge to create little distortions in the flag as if it were flowing in the wind. We will work out these details using pour pencils, which we will then proceed to refine with our pens. This tutorial is a simple and easy flag drawing tutorial that will help guide you through the process of making a beautiful flag drawing. Now that we know what to expect, let us get into this tutorial on how to draw a flag.
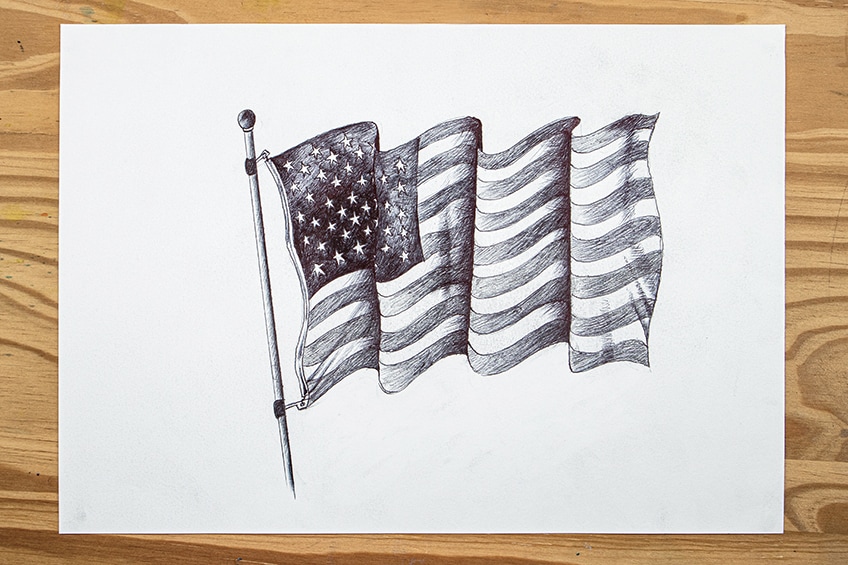
Step 1: Sketching the Flag Shape
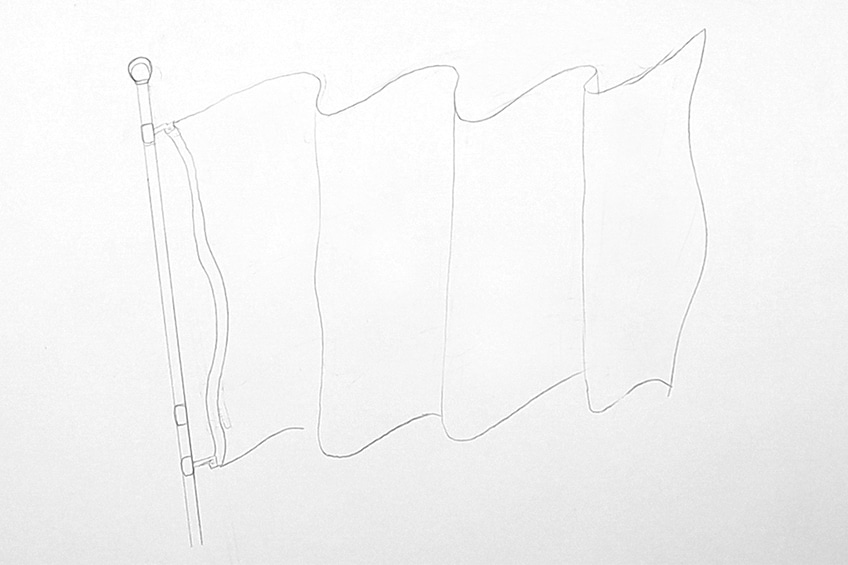
We begin our flag drawing by creating a light pencil sketch of the flag. We want to start with the pole as this will determine how large the flag will be on the page. You can do this by using your ruler to draw a vertical line, you can slant your pole to give it a more interesting perspective.

From there you can proceed to draw a parallel line next t your vertical line to create a pole. Try not to make it too thick, it will look more realistic than a thinner pole. From there you can draw a little detail on the top of your pole as well as draw little straps at two ends of the pole that will determine where the flag would be connected to the pole.
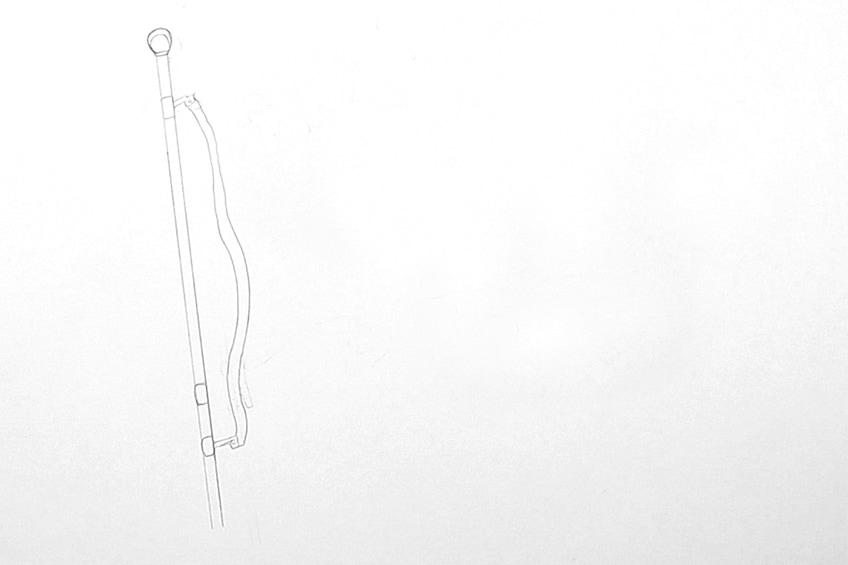
As we lightly sketch out our flag, you can make some indicative marks with your pencil that would determine where the flag would end. We just want to get a sense of how large the flag will be from the pole to the other side of the page. You can do this by drawing marks that determine the end corners of the flag.
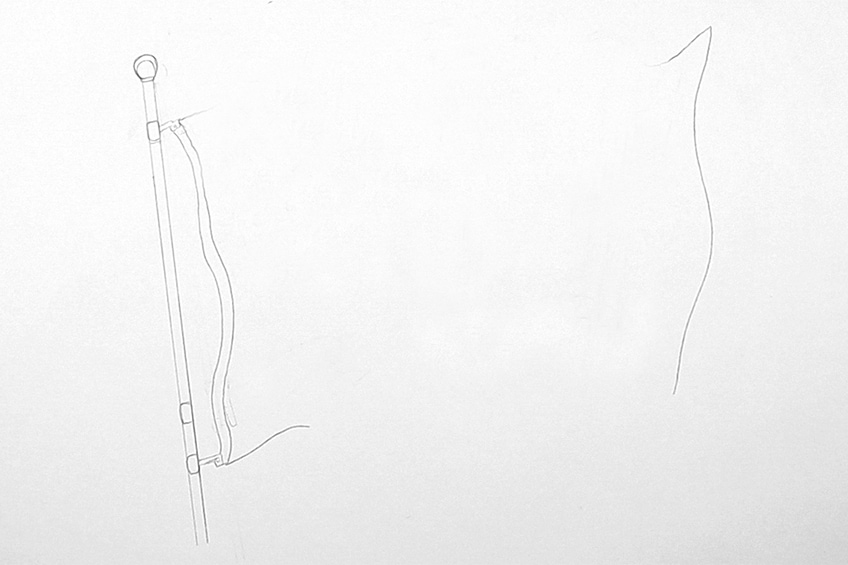
Once we know how large our flag will be we can proceed to draw the flag to those edges. We can do this by drawing the top line of the flag in a wavey formation. We want to do the same for the bottom line of the flag, drawing the exact same wavey formation as that of the top of the flag. From there we can connect each curve with a vertical line to define ripples in the flag.
Step 2: Sketching the American Flag Details
Since we will be creating an American flag drawing, we want to proceed to add the square shape on the top left corner of the flag. Since we have drawn ripples in the flag, this means that details on the flag will be distorted. As you proceed to draw the square in the flag, you want to make sure that it flows in the same formation as the flag’s ripples.
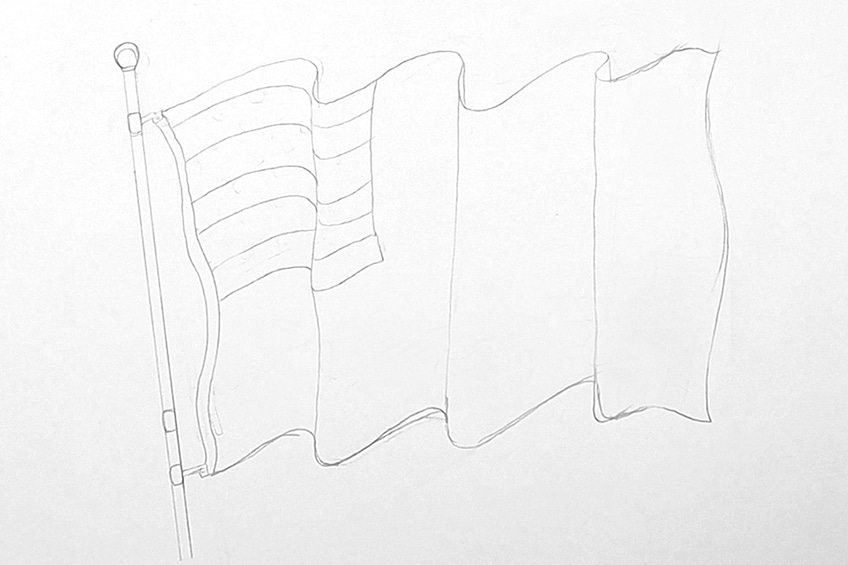
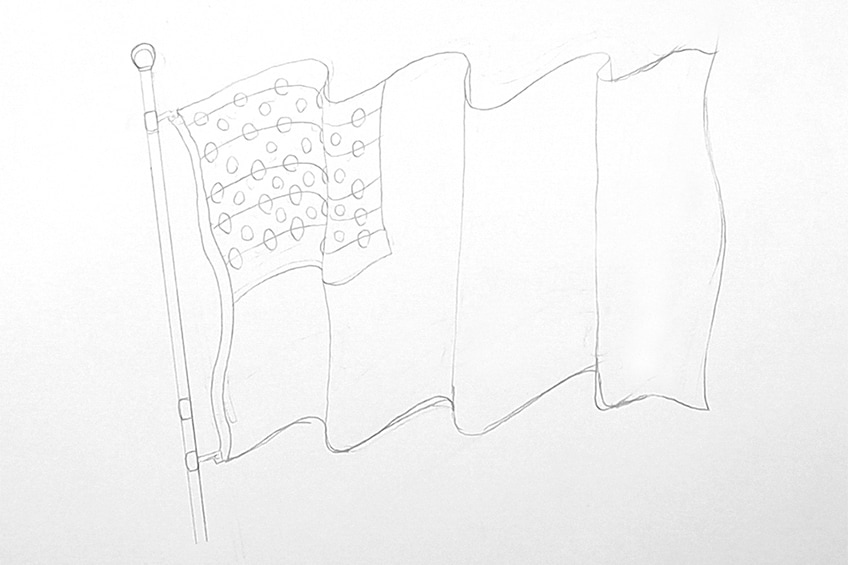
In our American flag drawing, we want to capture the details as correctly as possible. This means we’ll be drawing 50 stars in the square of our flag. The easiest way to do this is by creating six horizontal lines in the little square, which will help guide you in drawing the stars.
On the horizontal lines in the square, you can draw little circles that will help you to place the stars. We will also have extra space in Inbetween the horizontal lines which will give you more space to add in extra stars, to fill your American flag drawing. We will also proceed to draw the 13 horizontal stripes.
As you proceed to draw in the lines that represent the 13 stripes of the American flag, take your time. You don’t have to worry too much about making each stripe the exact same. The ripples in the flag allow us to play around with distorting the details subtly. This will actually work in our favor and result in a more realistic quality of motion and perspective.
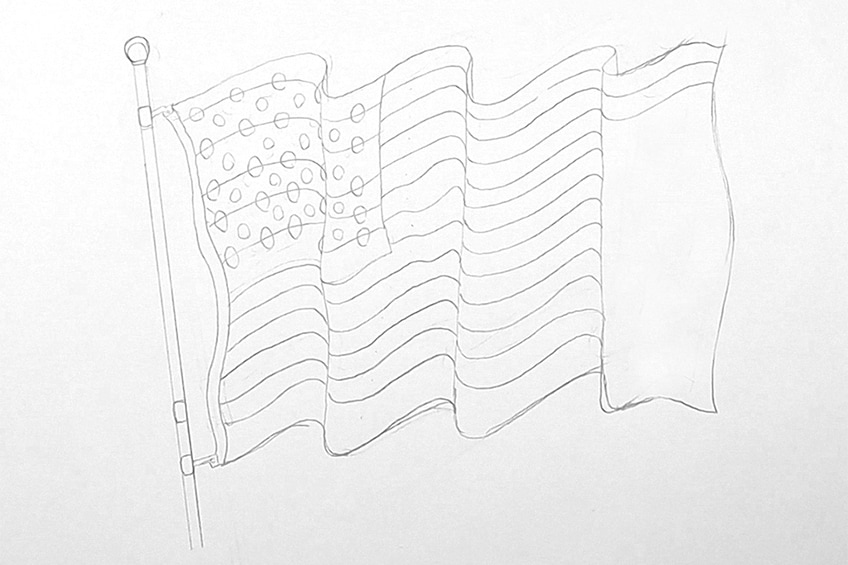
A good suggestion would also be to add the stripes in sections divided by the ripples of the flag. This means you can go through each ripple of the flag adding in 13 stripes. Don’t forget, it is not 13 lines but rather we are creating 13 stripes with 12 lines.
Once our 13 stripes are completed, we can begin to shade them in. we want to shade in the parts that would represent the red, as the red is the darker color between red and white. The best way to start is by shading the full stripe at the top of the flag. This will help to navigate which stripe to skip, moving from the top to the bottom of the flag.
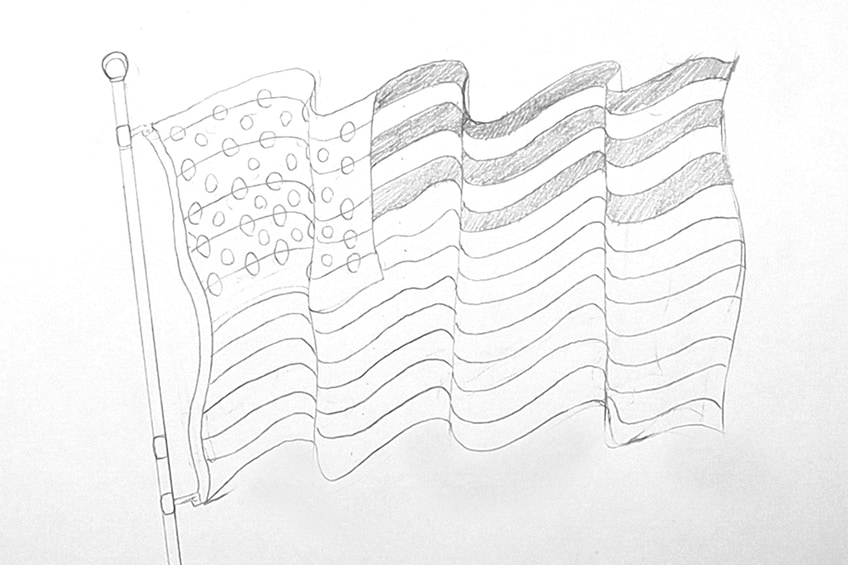
Remember, we want to shade in the first stripe at the very top of the flag. From there we can move down the flag skipping one as we shade in every second stripe. We should have seven colored-in and six white.
Once our stripes are completely colored in, we can proceed to draw our stars. Again, we don’t need to worry about each star looking perfectly the same. The distortions in the flag allow us to have little distortions in the details of the flag. This gives the flag more realistic qualities in the flag drawing.
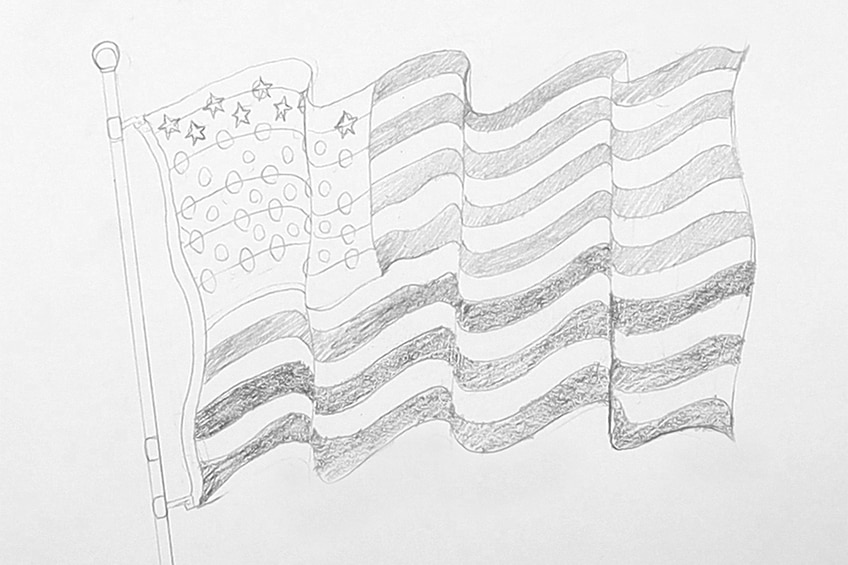
Make sure you keep your pencils sharp when drawing starts as their shapes are quite intricate and fine in detail. You want to go slowly working your way through each row of stars, using the pencil horizontal lines to guide your drawing process. Take your time drawing the stars.

Step 3: Shading Around the Stars With Pen
We should be left with a light sketch of an American flag, which we can now begin to color using our pens. Working with a pen is a great way of providing contrast to a drawing, that being said we want to approach the drawing process with some caution. We can begin to color in around the stars.
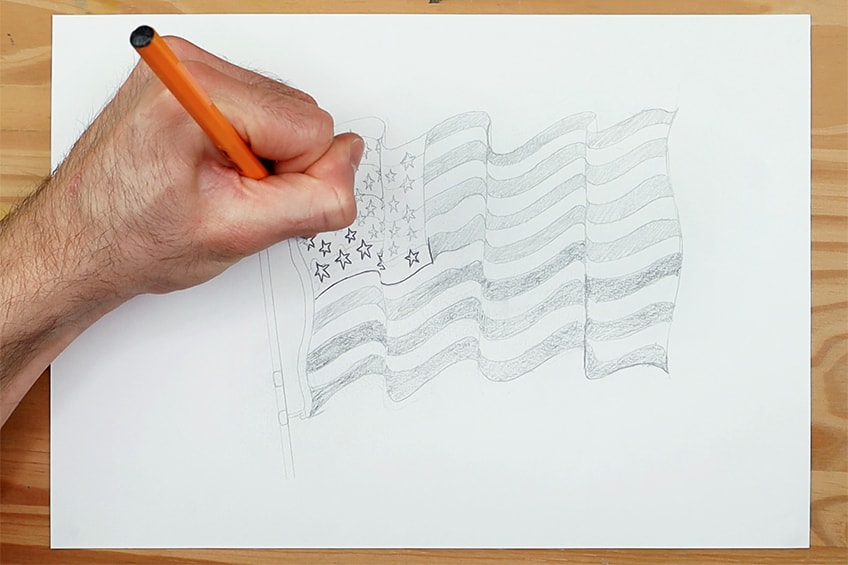
We want to start by outlining the stars with our ballpoint pens. By doing this, we thicken the outline of the stars, thus making it easier for us to color around them.
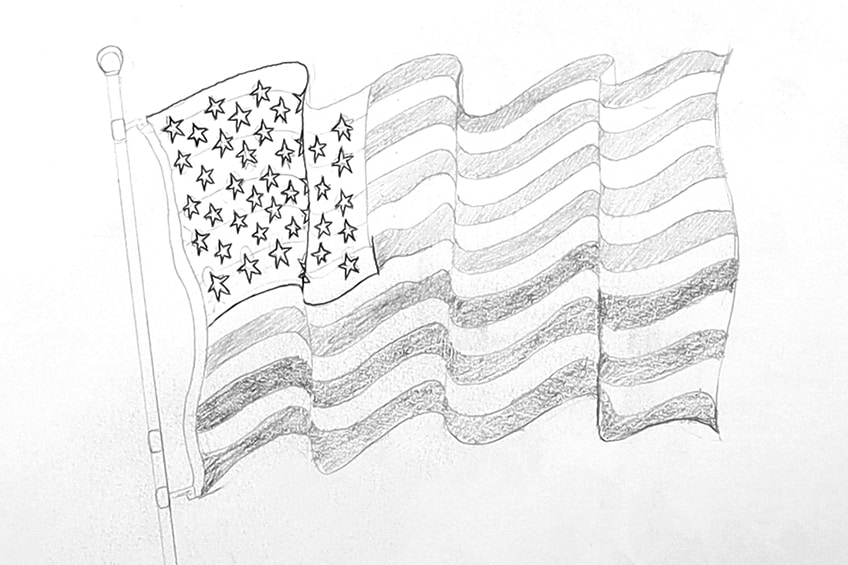
Coloring in the stars should take some time as coloring around little details like stars can easily be messed up. As you shade the flag around the stars you want to pay attention to the pressure you apply to the pen, making some areas lighter in tonal value. However, we do want most of the square to be dark, allowing the vivid contrast to represent the blue of the flag.
We can also add shading to the pole, where we add a shadow that is more prominent on one side running down the pole. By doing this we give the pole a shadowed effect, making the pole seem a little more three-dimensional. We can also add shading to the feature at the top of the pole. As you color in the stars, you want to go around the stars slowly, making sure you don’t color in the star itself, making sure you leave them white.
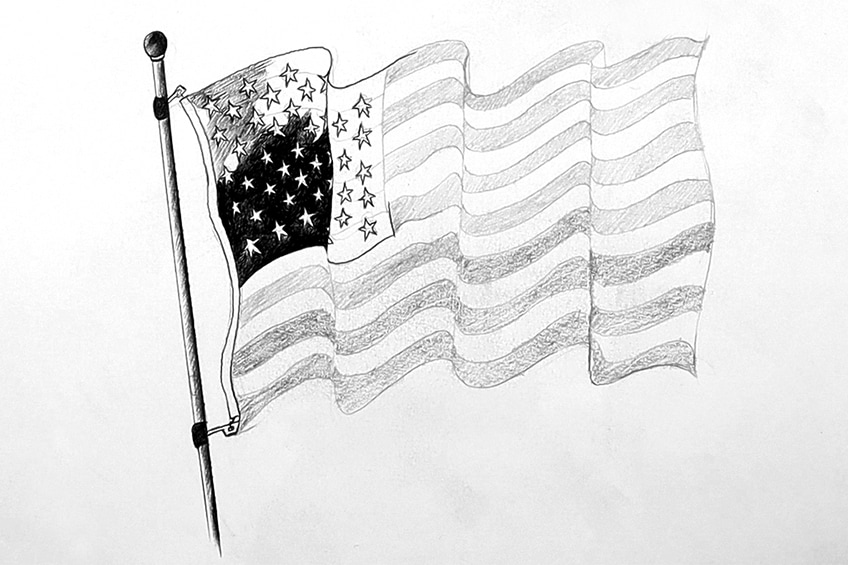
As you shade in the square and around the stars, try to make some areas a little lighter. We do this by softening the pressure that we apply to the pen. This will result in a softer and lighter mark. Working with a cross-hatching method is also a great way to create seamless gradients between dark and lighter moments.
As you proceed to shade in the flag with your pen, make sure you lighten the tonal value as you come to the protrusion of the ripples in the flag. By doing this we create a darker shade that’s present in the inner indentation of the ripple and lighter tonal value on the outer protrusion of the ripple in.
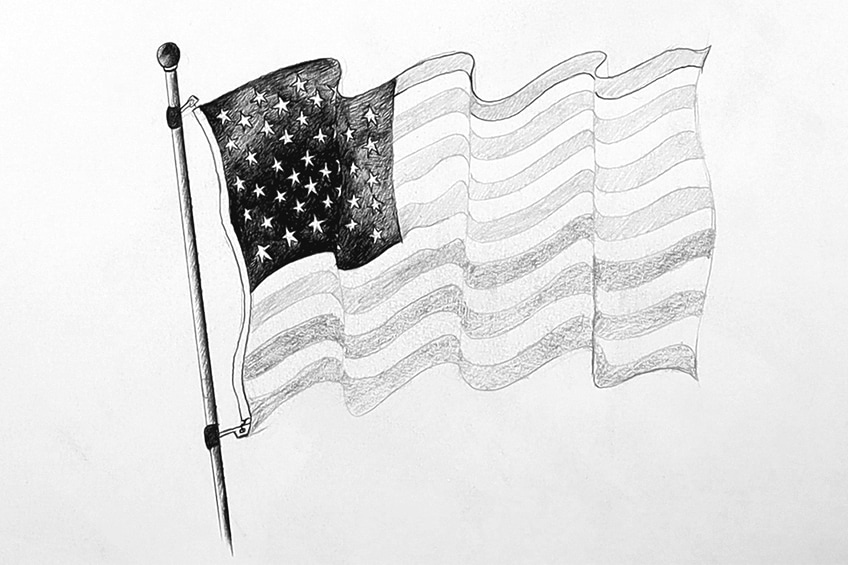
Step 4: Shading the Stripes With Pen
Once we have successfully completed the section around the stars, we can move on to shading in the stripes. Again, the process of shading is the same, however, this time we want to add shadows on the inner sections of each ripple in the flag. We can do this section by section, whereby we shade one side of each ripple of the flag to give it more dimension.
As we shade in the stripes section by section, we are aiming to do two things. Firstly, we want to shade in the correct stripes. Secondly, we want to add shading along the side of each ripple, resulting in a shadow that is cast by the ripples as they protrude.
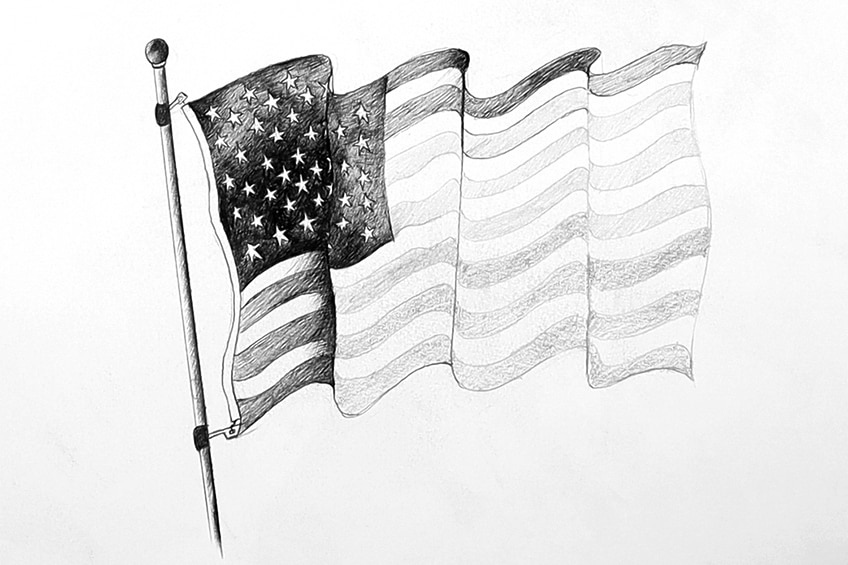
As you move on to the next section of the flag, start by adding shading along the side of the ripple. Each ripple should have shading on the same side to have an accurate effect of a light source coming from one direction.
Once you have added shading along with the ripple, you can then proceed to shade in the stripes of the flag. Remember, the strips are slightly lighter than that of the square, to create a tonal difference in the flag. The stripes should also be slightly darker near the ripples as if the ripple is casting a shadow on them.
Take your time when shading each stripe of the flag, making sure that you use the cross-hatching method to create an even tone in the stripe. As you carry on creating your flag drawing, we want to make sure that each stripe is the same in tone, going from dark to light as they move out from the ripple.
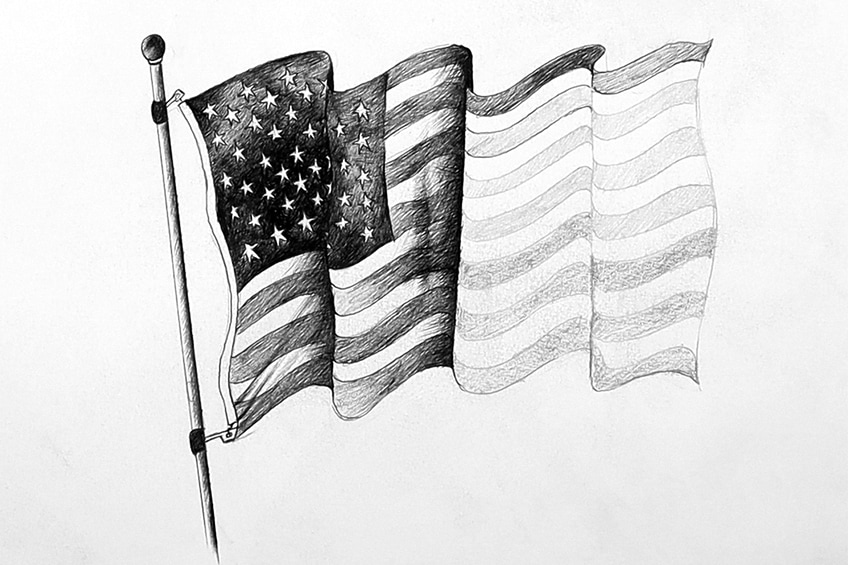
This process you will carry on, working through the American flag drawing section by section divided by each ripple in the flag. You can add smaller ripples in the flag as you go through the shading process, by adding smaller lines of shading in various directions. However, keep it relatively light to avoid any silly mistakes.
Remember that, ripples in the flag are going to cast shadows on the flag. This means that if we have various sections in the flag divided by ripples, on each side of those ripples should be a shadow. This means that there is a light source coming from one direction, allowing the ripples to cast shadows and look more three-dimensional.
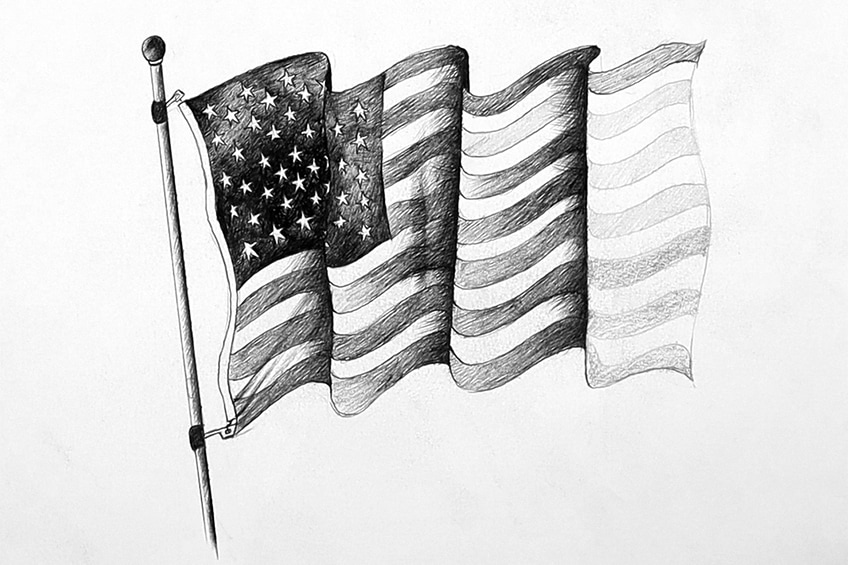
We can simply carry on this shading process, taking pour time as we work through the entire flag. Again, we can add some subtle small ripples and shadows in the flag as we go. Remember to take your time, adding in the shading slowly. We don’t want to rush working with a pen.
As you come to the end of the flag, remember that it will be the most exposed to light, which means that there will be less shadowing. Take your time with the flag drawing process, perhaps look at some reference images to get an idea of how light interacts with the structure.
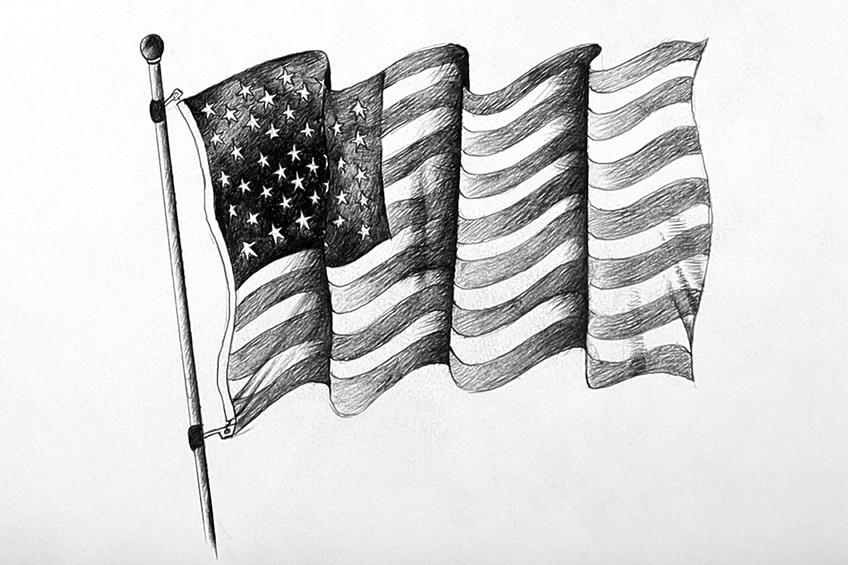
Make sure you work on the shading process slowly. If you need to, take a break, that way you can come to your flag drawing with a fresh approach. Carry on this process until you have completed your flag, and there you have it, an easy flag drawing tutorial.
Tips to Remember
- Take your time. You want to make sure you take your time with each step, working out the sketch in pencil is very important before moving on to drawing with a pen.
- Work on the details. An American flag drawing can be tricky because of the stars, take your time drawing them and shading around them.
- Work on your pencil sketch before moving on to drawing in pen. A Pen can easily be messed up, make sure your pencil sketching is as best as can be before using a pen.
- Play around with the ripples. You can add larger ripples, but try to add smaller ripples, to give the flag drawing more dimension.
- Utilize the technique. This flag drawing gives you insight into how to draw fabric and how light interacts with ripples. You can use this technique in different artworks.
The process of drawing a flag is really about creating ripples in the flag and capturing the shadow effect with your shading process. As you learn how to draw a flag, you will find that the process is about establishing the shape, and, from there you will spend time on the shading process. The more time you spend on the shading process, the higher the chance you will be left with a beautiful flag drawing. With an American flag drawing, you can allow yourself to distort the details a little, as this is an effect of real fabric flowing in the wind.
Take a look at our flag drawing webstory here!
Frequently Asked Questions
How Do You Shade in a Flag?
When learning how to draw a flag, you are essentially learning how to draw fabric flowing in the wind. The way in which you achieve this flowing quality within a drawing is by creating ripples in the material. Each ripple in the flag will cast a shadow on the material, which means that there will be shadowed areas on the same side of each ripple in the flag. This means that once we understand from which direction the light source comes, we can then add the shadows on the correct side of the flag. When working with shading we give the flag dimension which will turn it into a more realistic beautiful flag drawing. You can shade in these shadows using a pencil or pen to give your flag drawing more contrast.
How Do You Draw Ripples in a Flag?
When you create a realistic flag drawing, you want to work ripples into the fabric, to give it a more realistic motion as if it were flowing in the wind. The way in which we draw ripples in a flag is by working with linework and then how we shade around the linework. We can do this by making wavey lines at the top of the flag, which should be replicated at the bottom of the flag. This means that the top and bottom of the flag have lines that curve in the same way. From there you can create a set of vertical lines that connect the top and bottom curves, which will result in flowing fabric quality. As you shade on the same side of each ripple, it will give the impression that the ripples are three-dimensional, and cast shadows on the flag. Adding ripples to a flag drawing will give it more dimension and will result in a more realistic and beautiful flag drawing.
Matthew Matthysen is an educated multidisciplinary artist and illustrator. He successfully completed his art degree at the University of Witwatersrand in South Africa, majoring in art history and contemporary drawing. The focus of his thesis was to explore the philosophical implications of the macro and micro-universe on the human experience. Matthew uses diverse media, such as written and hands-on components, to explore various approaches that are on the border between philosophy and science.
Matthew organized various exhibitions before and during his years as a student and is still passionate about doing so today. He currently works as a freelance artist and writer in various fields. He also has a permanent position at a renowned online gallery (ArtGazette) where he produces various works on commission. As a freelance artist, he creates several series and successfully sells them to galleries and collectors. He loves to use his work and skills in various fields of interest.
Matthew has been creating drawing and painting tutorials since the relaunch in 2020. Through his involvement with artincontext.org, he has been able to deepen his knowledge of various painting mediums. For example, watercolor techniques, calligraphy and lately digital drawing, which is becoming more and more popular.
Learn more about Matthew Matthysen and the Art in Context Team.


