How to Draw a Fairy – 18 Steps to Create Your Own Fairy
Learn to draw a fairy with our straightforward step-by-step tutorial. We guide you from the initial sketches to the final details, making it easy to capture the magic and grace of these ethereal beings in your artwork.
Learn How to Draw a Fairy Step-by-Step
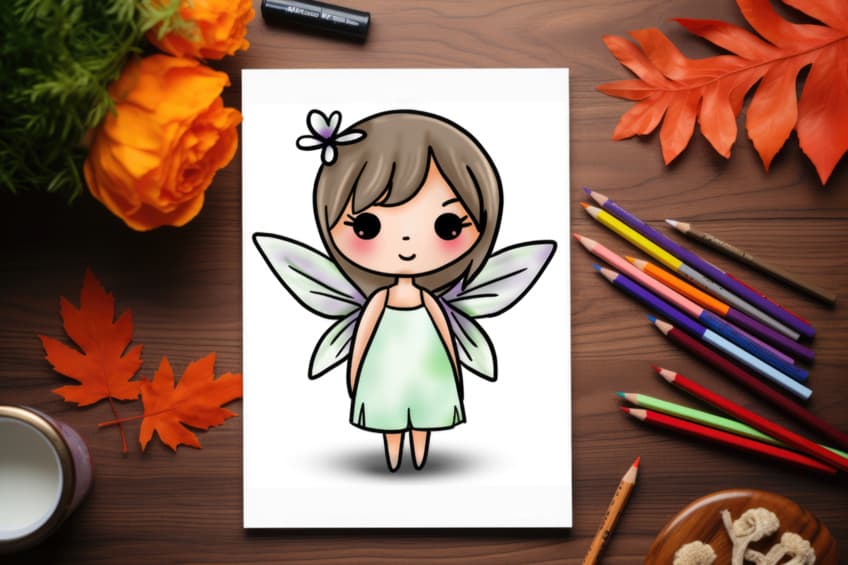
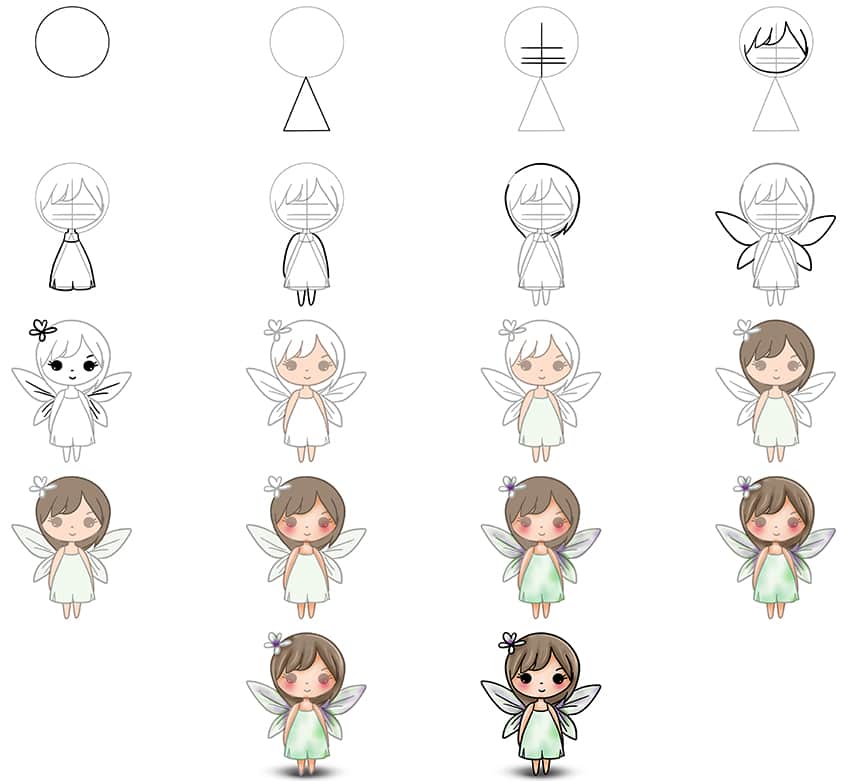
The collage below illustrates each stage of the process leading to the outcome. Follow the steps, and you’ll also gain the ability to create a charming fairy through drawing and painting!
Step 1: Begin Your Easy Fairy Drawing
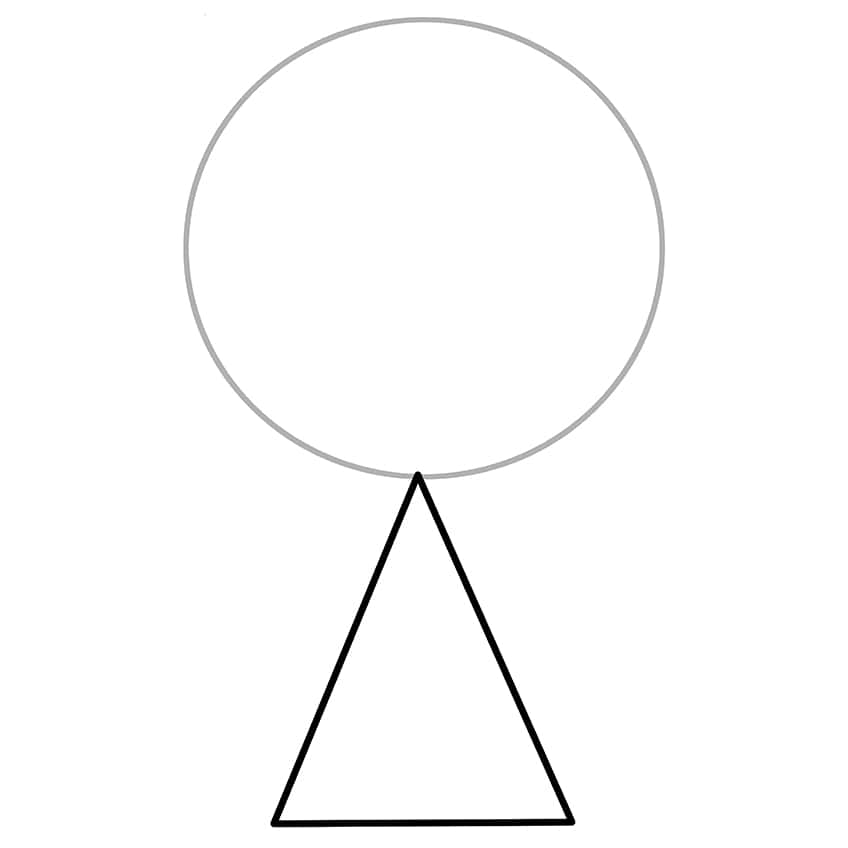
To start our tutorial on how to draw a fairy, begin by drawing a circle above the center area to represent the head of the fairy.

Step 2: Draw the Main Body
Draw a triangle beneath the head of your fairy sketch. The tip should touch the circle previously drawn.
Step 3: Add the Facial Guidelines to Your Fairy Sketch
Draw a vertical center line within the head and three horizontal cross guidelines in your easy fairy drawing.

Step 4: Outline the Face on Your Fairy Sketch
Outline the face within the fairy head, leading to the front hair outline.

Step 5: Continue to Outline the Main Body
Utilize the construction lines drawn earlier to assist you in outlining both the main body shape and the dress positioned above it.

Step 6: Draw the Arms in Your Easy Fairy Drawing
Draw each of the arms leading behind the dress. Complete the step by drawing the legs.

Step 7: Outline the Head and Outer Hairline
Utilize the construction lines drawn earlier to help outline both the head and the outer hairline.

Step 8: Draw the Wings on Your Fairy Sketch
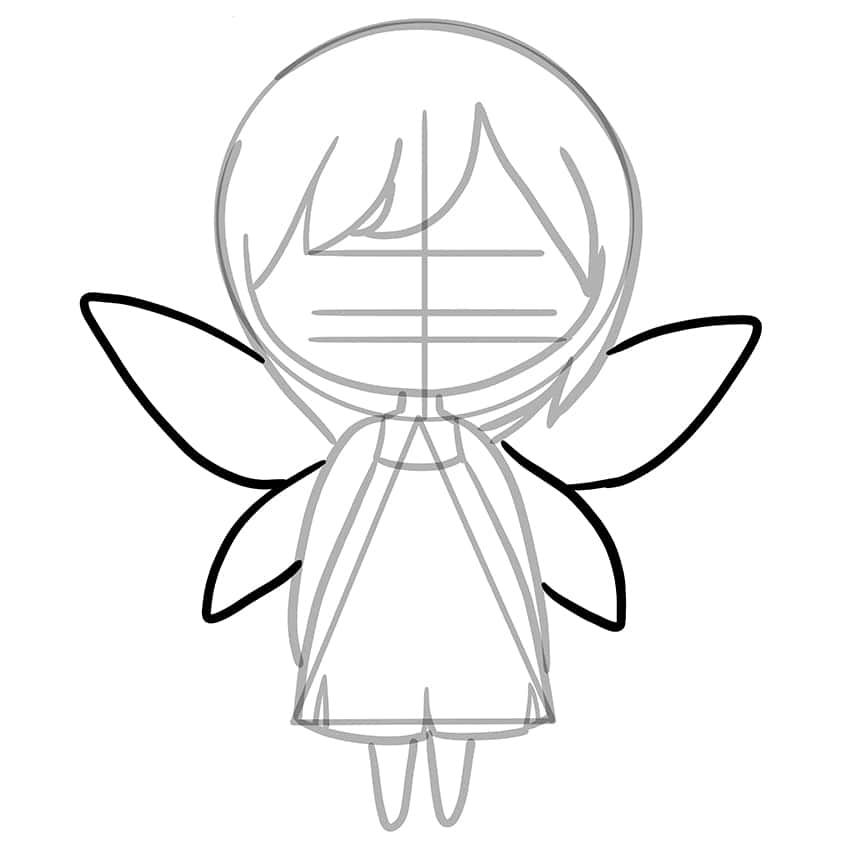
A fairy must have wings, which is why we draw each of the curving wings on the fairy in this step! The top wings should be wider and longer than the two bottom wings. Upon completion, eliminate any lingering visible construction lines.
Step 9: Add the Details to Your Adorable Fairy Drawing
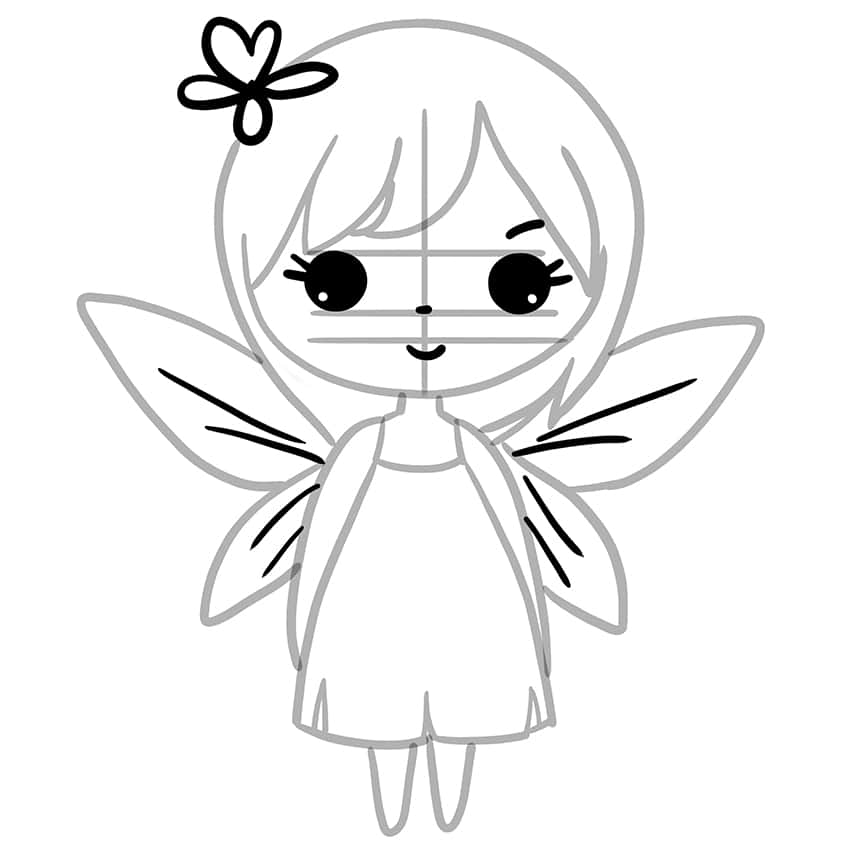
Using the facial guidelines previously drawn, draw the eyes, eyebrows, nose, and mouth on your fairy sketch. Draw the flower above the head. Complete the step by adding structural lines within the wings and erase any remaining visible guidelines once finished.
Step 10: Begin to Add Color
Utilize a fine, sharp brush and a light peach paint to evenly cover the exposed skin area.

Step 11: Continue to Color Your Fairy Sketch
Continue with the same brush and a light shade of lime green, and evenly coat the dress.

Step 12: Add Color to the Hair
Coat the hair evenly by using a fine, sharp brush and brown paint.

Step 13: Continue to Color Your Easy Fairy Drawing
In this step, continue with the same brush and a shade of light lime green, and begin to coat the wings.

Step 14: Tone the Skin
Employ a smaller, soft brush along with a darker shade of orange-peach paint to gently contour the skin around the edges. Utilize a small, soft brush or blending brush to soften the layers. Apply a soft cheek blush using a small, soft brush and red paint.

Step 15: Begin to Color Blend
Add several spots and patches within the dress and wings using a small, soft brush and a darker shade of green paint. Repeat the process using white paint. Apply purple paint onto the wings and hair flower, repeating this step once more.

Step 16: Shade and Highlight the Hair
Shade the edges of the hair with a small, soft brush and a darker brown paint. Add fine, soft highlights using white paint and a fine, sharp brush, repeating this step once more.

Step 17: Draw a Ground Shadow for Your Fairy Sketch
Shade beneath the fairy using a soft brush and black paint. Employ a blending brush to spread the shading in a wider, circular motion.

Step 18: Finalize Your Easy Fairy Drawing
In the final step of this drawing tutorial, grab a fine, sharp brush and black paint to trace all visible outlines and any inner texture lines, completing your personal rendition of the fairy.

Congratulations on completing the journey of learning to draw a fairy! Your dedication and creativity have truly shone through in each stroke and contour. It’s incredible to witness the transformation from the initial steps to the final, personalized fairy you’ve brought to life on paper. Your unique touch, whether in the shading, detailing, or overall composition, has made this artwork truly yours. Cherish this moment of artistic achievement, and remember that each stroke tells a story of your progress. Keep exploring and expressing yourself through art—there’s no limit to what you can create.
Frequently Asked Questions
What Fundamental Methods Can Be Employed to Grasp the Step-by-Step Process of Drawing a Fairy?
Start by sketching the basic proportions of the fairy, outlining the body and wings. Break down the drawing into simple shapes, gradually adding details. Experiment with delicate poses, incorporate flowing hair and expressive gestures and consider using vibrant colors to enhance the magical aspect of your fairy illustration. Utilize our online tutorial to learn how to draw a fairy step-by-step and practice regularly to refine your skills.
How to Make My Fairy’s Wings Look Realistic or Fantastical?
Pay attention to wing anatomy, but also feel free to add fantasy elements like shimmering details, patterns, or gradients. Experiment with translucent effects to convey a magical quality.
How to Avoid Common Mistakes When Drawing Fairies?
Start with basic shapes to establish proportions and use guidelines for symmetry. Pay attention to details like the placement of facial features and the size of the limbs to maintain balance.
Matthew Matthysen is an educated multidisciplinary artist and illustrator. He successfully completed his art degree at the University of Witwatersrand in South Africa, majoring in art history and contemporary drawing. The focus of his thesis was to explore the philosophical implications of the macro and micro-universe on the human experience. Matthew uses diverse media, such as written and hands-on components, to explore various approaches that are on the border between philosophy and science.
Matthew organized various exhibitions before and during his years as a student and is still passionate about doing so today. He currently works as a freelance artist and writer in various fields. He also has a permanent position at a renowned online gallery (ArtGazette) where he produces various works on commission. As a freelance artist, he creates several series and successfully sells them to galleries and collectors. He loves to use his work and skills in various fields of interest.
Matthew has been creating drawing and painting tutorials since the relaunch in 2020. Through his involvement with artincontext.org, he has been able to deepen his knowledge of various painting mediums. For example, watercolor techniques, calligraphy and lately digital drawing, which is becoming more and more popular.
Learn more about Matthew Matthysen and the Art in Context Team.


