How to Draw a Donkey – The Best Donkey Sketch Drawing Tutorial
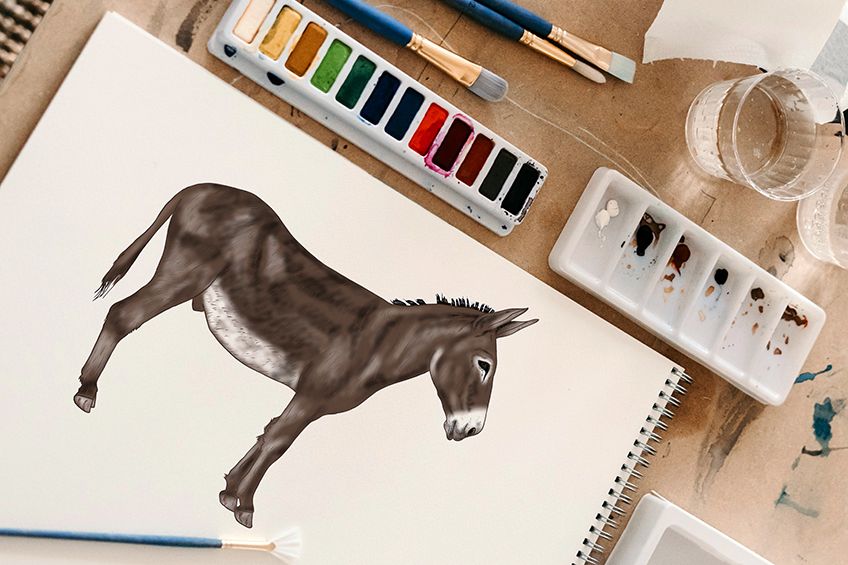
Have you ever looked at a donkey and wondered how to draw one? If this sounds like you, then you have come to the perfect place. In this easy-to-follow guided tutorial, we take you through all the steps that you need to create a realistic donkey drawing. From getting the proportions and dimensions on point to capturing realistic texture and coloring in your donkey sketch, we guide you through the whole process. If you are ready to get going, gather your drawing supplies, get comfortable, and let us dive right into it.
Our Step-by-Step Donkey Drawing Tutorial
Donkeys are wonderful creatures and they have countless fans throughout the world. While they are beloved, many artists may steer away from donkey drawing because they believe that donkeys, like horses, are difficult to draw. Our primary aim with all of our animal drawing tutorials is to make the process as easy and enjoyable as possible, that is why we have created this easy donkey sketch tutorial.
Another thing we aim for in our drawing tutorials is versatility. As such, this tutorial is suitable for a range of different mediums and techniques. Whether you are a graphic artist or you prefer to work with coloring pencils or acrylic paint, you can easily follow and adapt our coloring steps to create the realism we are after. We also aim to make animal drawings and in this case donkey drawings, as simple as possible, which is why we always begin by using construction lines and shapes to lay down the basic shape of our animal. Below you can see an outline of the steps in this tutorial, including all of the construction steps.
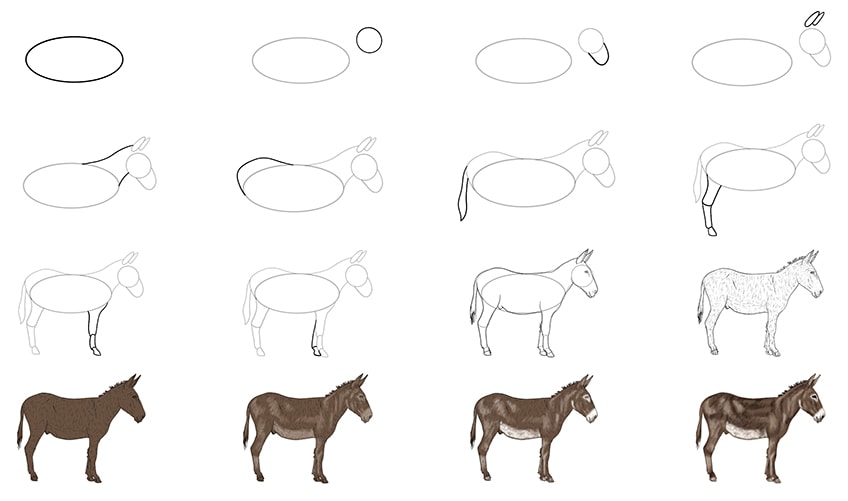
Step 1: Constructing the Main Body
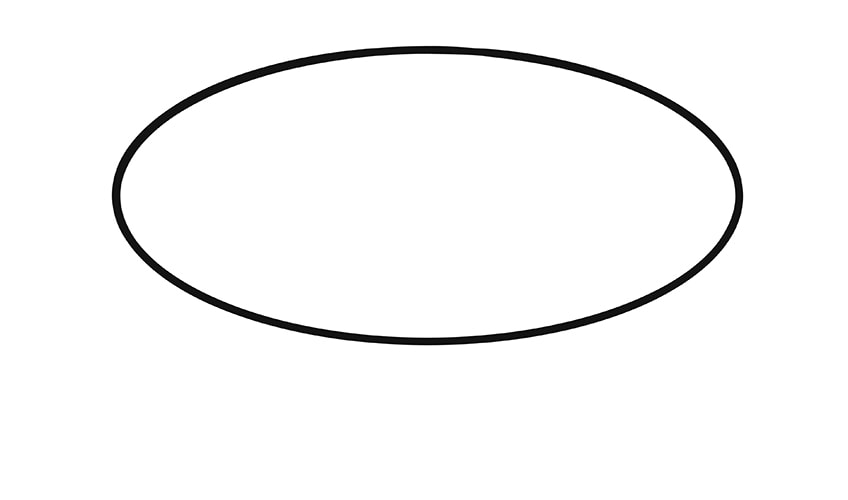
We begin by using construction shapes and lines to create the foundation of our donkey drawing. The largest part of the donkey’s body is the main torso, so we will start construction here. For the main body, you are going to use a long and narrow horizontal oval to create the base shape.
Our top tip for this first step is to pay attention to the placement of your main body oval. Make sure that the oval is at the very center of the canvas and that there is plenty of space on all sides of it.
Step 2: Creating the Head of Your Donkey
The next largest part of the donkey’s body is the head, and that is what we are going to construct in this step. You are going to use a circle shape to represent the shape of the donkey’s head.
This circle should be slightly higher than the main body oval and a small distance away.

Step 3: Laying the Shape for the Donkey’s Nose
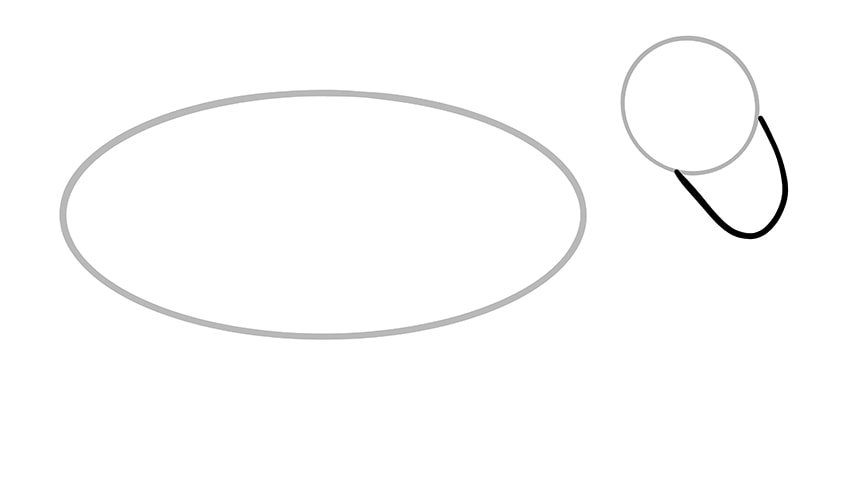
In the last step, you may have thought that it was strange to use a circle to represent the head of a donkey because the donkey’s head is not circular but much longer. Now, we are going to outline the shape of the donkey’s nose to create a more realistic and recognizable base shape for the head. For the donkey’s nose, simply draw a “U” shape extending down towards the bottom right corner from the head circle.
The “U” shaped nose should be as wide as the head circle for a smooth transition.
Step 4: Constructing the Donkey’s Ears
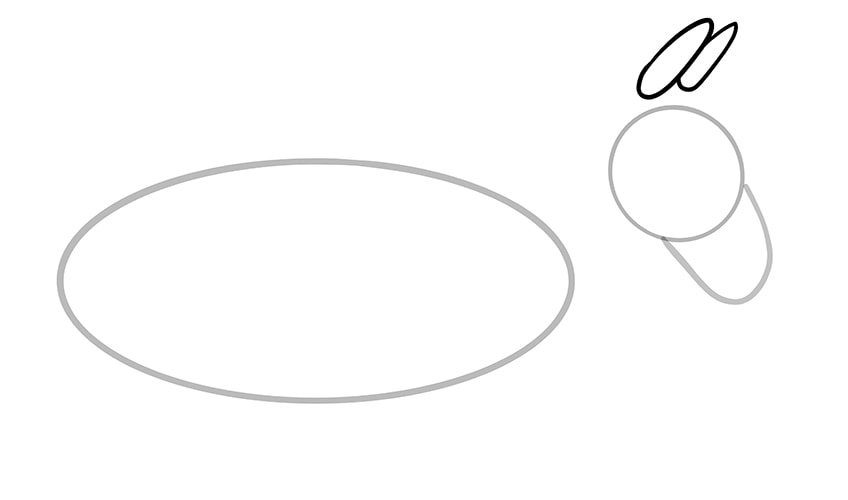
For the ears of your donkey sketch, you are going to draw two different sized carrot-shapes that hover just above the head construction circle.
Perspective in this step is very important and can be achieved by differing the size of both ear shapes. The front ear is the one furthest away from our perspective, so it should be a little smaller than the other.
Step 5: Connecting the Head and Body of Your Donkey Sketch
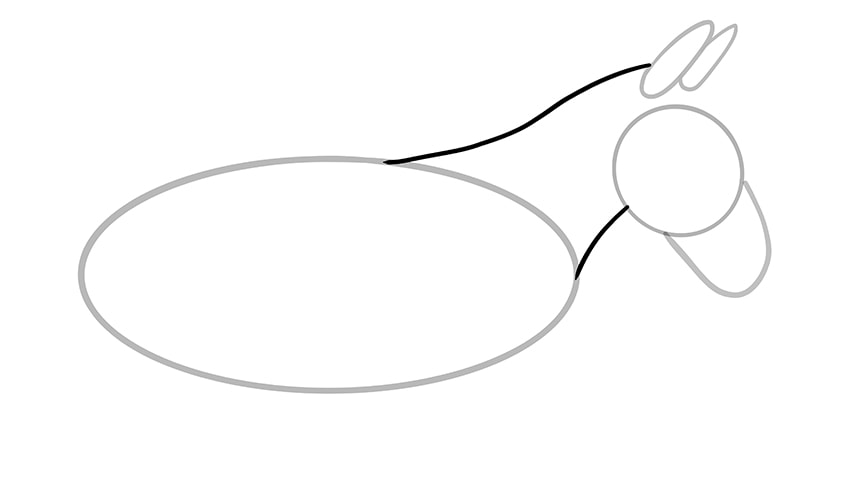
In this step, we are going to construct the shape of the donkey’s neck and use it to join the head and body construction shapes. This step involves two curved lines on either side of the head. Begin drawing the top of the neck at the back of the larger ear, curving the line slightly up and then down to join the top of the main body oval.
For the bottom of the neck, simply draw a short curved line between the bottom side of the head circle and the very right point of the main body oval.
Step 6: Creating the Shape of the Donkey’s Rump
To create a more realistic base shape for the back of your donkey drawing, draw a slightly uneven arching line from the very top of the main body oval to a point just below the back end. The top of the arch should be slightly flattened out, as you can see in our example drawing below.
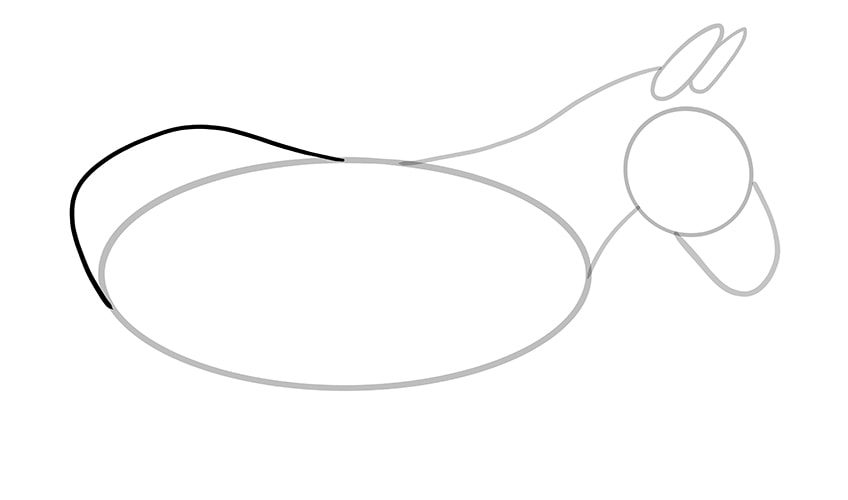
Step 7: Laying Down the Shape of the Tail
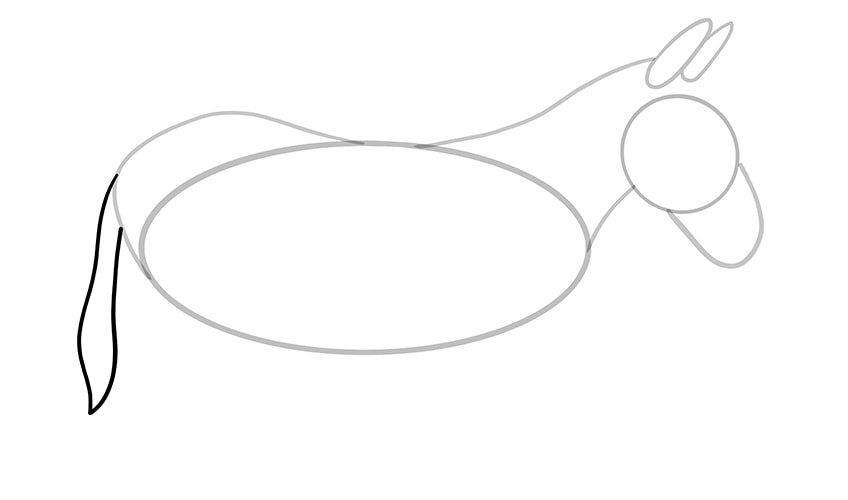
The last step was an essential prerequisite to creating the shape of the tail in your donkey drawing. From the back of the donkey’s rump, draw a freehand tail shape that drops straight down towards the bottom of the canvas. The point of the tail should be fairly sharp and end below the bottom of the main body oval.
Our donkey drawing is not of a donkey in motion, therefore we are drawing the tail in a resting state, simply hanging straight downward.
Step 8: Constructing the Donkey’s Back Legs
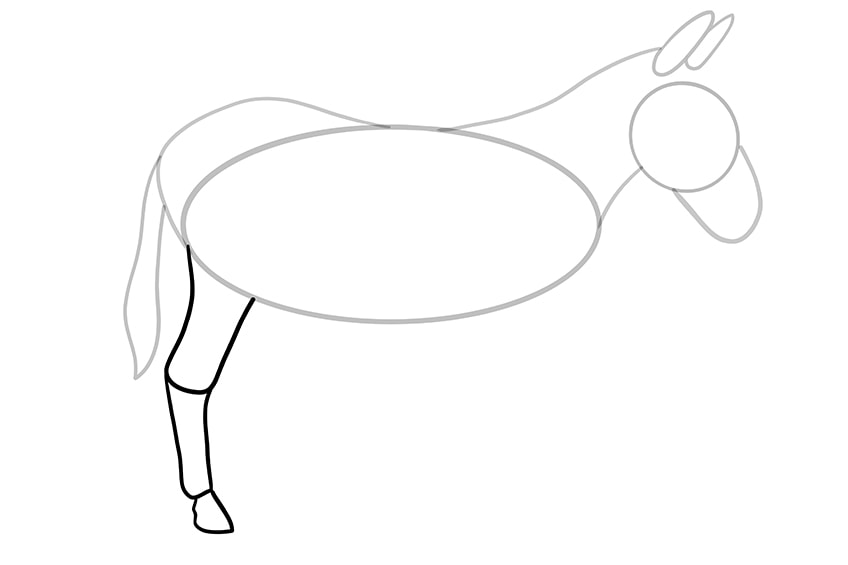
As a result of the way that your donkey is standing, only one of the back legs is visible in our perspective. We are going to separate the donkey’s legs into three segments to help us get the proportions right. Begin by creating the upper thigh of your donkey sketch, starting the backline at the point where the rump shape meets the main body oval. Draw a line that curves towards the front of the canvas slightly and ends in line with the bottom of the tail.
Finish this top segment with another line that ends at the same level and join the two with a small curved line.
After this joint, draw the second leg segment of almost the same length but slightly thinner and angled more towards the front of the canvas. Finally, finish the back leg by adding a slightly square-ed-off triangular hoof.
Step 9: Outlining the Shape of the Front Leg
For the first front leg, you are going to follow exactly the same steps as you did in the last step for the back leg. There are a few differences to take note of, however. Firstly, all the lines of this front leg should be more rounded and smoothly curved than the back leg. Secondly, the front thigh is slightly longer and the bottom leg segment is shorter than the back leg.
Finally, the hoof should be a little smaller and more pointed than the back leg.
Step 10: Adding the Second Front Leg
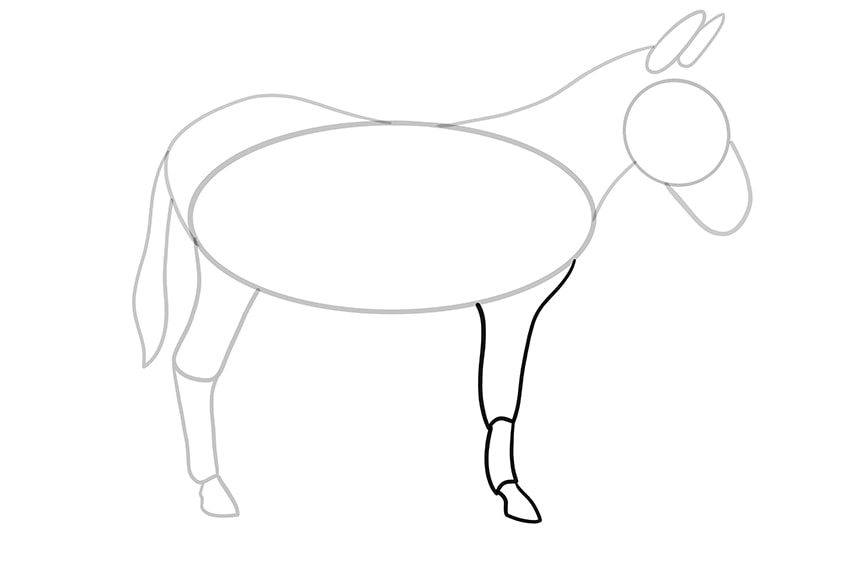
As a result of the way that our donkey is standing, perspective only grants us a glance at the second front leg. To capture this, we are going to partially draw in the bottom of the second front leg poking out from behind the first. Begin this second leg at the midway point of the thigh segment, and slowly bring the line out behind the first front leg.
At no point should the other side of the leg be visible, and you are also going to only draw a partial hoof at the base of the second leg.
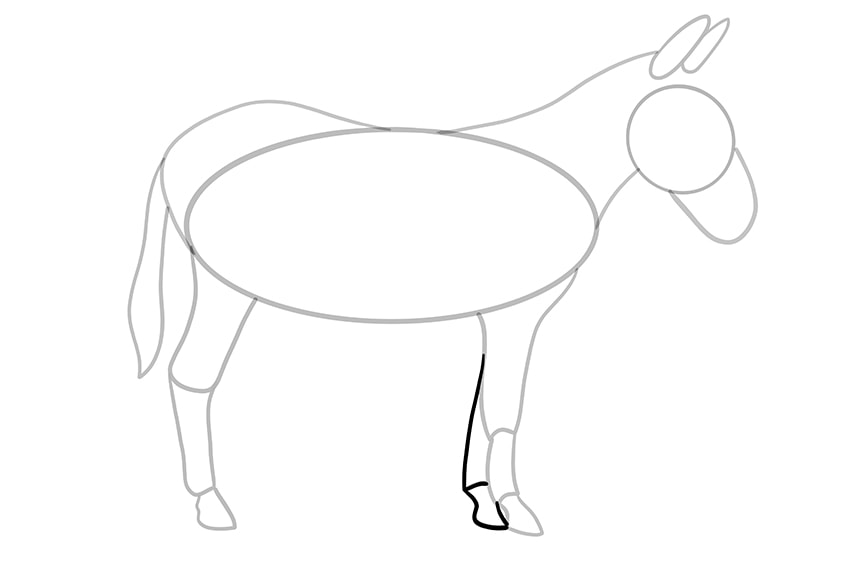
Step 11: Drawing the Final Outline of Your Donkey Sketch
In this step, you are going to use all of the construction lines we have drawn thus far to create the final outline of your donkey drawing, and you are going to add a few details to the donkey’s face.
Let us begin at the head, using a flatter line to create the top of the nose from between the two ear construction lines all the way down to the tip of the nose construction shape. There should be a slight bulge just above the eye in this outline. At the base of the nose, you can create quite a square but curved corner and dip it in slightly before outlining the lip separation and details.
While you are drawing the face outline, you can also add in nostril details by drawing a small oval and a little curved line above the lip. You can also draw a lemon-shaped eye and then create a tear line around it near the top of the donkey’s head.
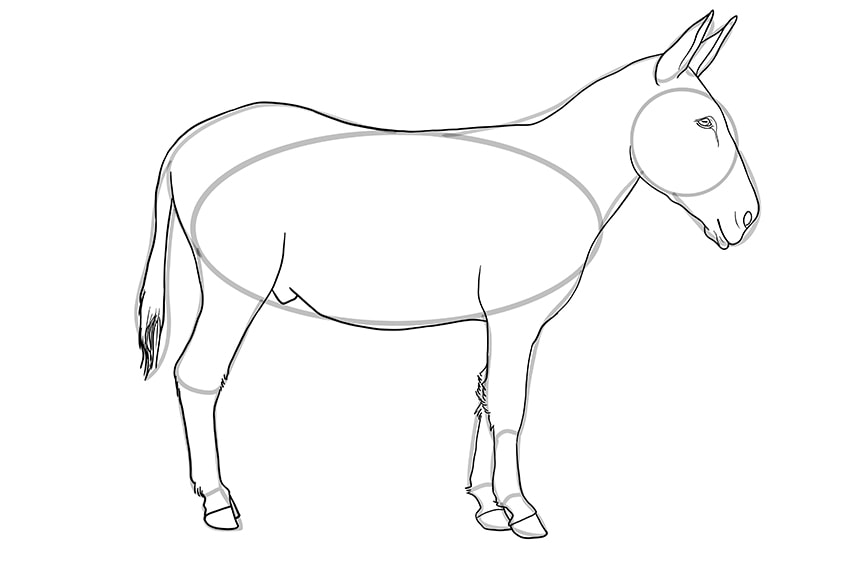
For the ears, you can follow the construction shapes quite closely, bringing the sides of the ear closest to use down into the head shape. Add a little line at the front of each ear to create a three-dimensional appearance and show that both ears are facing forward. You can then take the outline down the neck, over the back, and around the rump of your donkey drawing, following the construction shapes closely. At the end of the tail, you can use lots of little lines to create a fluffy end.
For the most part, you can follow the construction lines very closely for the rest of the donkey’s outline. For the legs, you do not have to outline the joint between the thigh and lower leg, but you can use short lines to create the impression of fur around these joints.
When you have completed your outline and you are happy with the final result, you can erase any remaining construction lines.
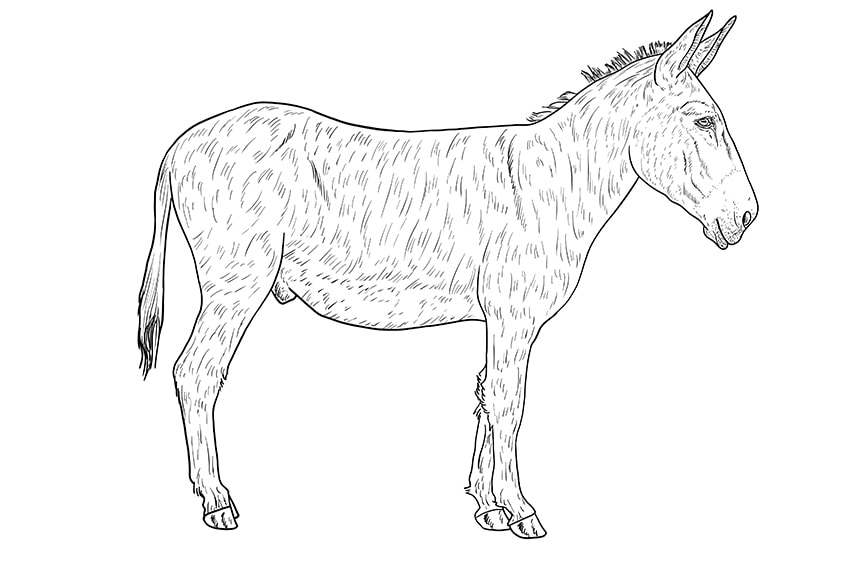
Step 12: Creating Fur and Other Details
This step may look a little intimidating, but it is actually very simple to complete. We begin covering the donkey’s entire body with fur textures at the top of the neck. Using short hair strokes, create the short main on the donkey’s neck, continuing up until it meets the ears.
For the textural detail on the face, use very short lines and dots to add depth and texture in a circular pattern wrapping around the facial features. Use the shape of the donkey’s head and body to guide the direction of your fur texture lines.
Continue to add texture in this way throughout the rest of the donkey’s body, using long lines on the top half of the donkey and shorter ones along the belly and legs. Add long lines within the tail and add a few scribbled lines down the three visible hooves.
Step 13: Painting the Base Color Coat
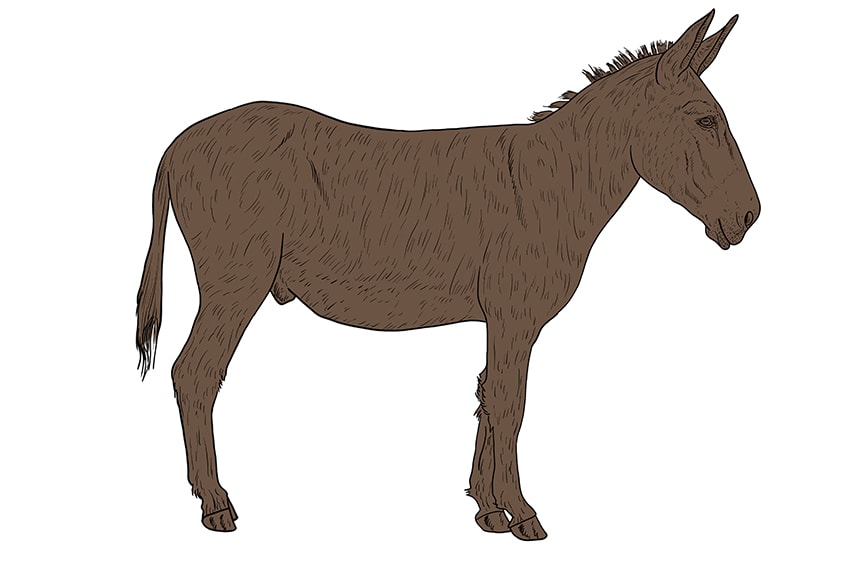
To get a realistic coat color, it is best to build up the shades and textures in different layers. We are beginning the coloring process by using a medium shade of brown as the base coat for the entirety of the donkey’s body.
Use a normal brush to apply an even coat of this brown shade throughout your donkey drawing.
Step 14: Applying the Second Coat of Color
For the second color layer, you are going to use a fairly sheer layer of white paint to add highlights to different areas of the fur coat. The donkey’s nose and belly, in particular, are a different shade to the rest of its body, so you can color these areas fully with the white shade.
You can now use the same white shade to add highlight patches throughout the rest of the donkey’s body, including down the top of the neck, on the rump, on the legs, around the eyes and ears, and in any other place where the light would naturally hit.

Step 15: Lightening the Second Coat
In this step, you are going to go over the white coat of color again, making them brighter and more distinct. In particular, you want to emphasize the highlight color of the donkey’s muzzle and belly. You can use a medium-soft brush to apply and blend this second layer of white paint across the previously highlighted areas.
You want the central points of each highlight to be bright and then to fade into brown.
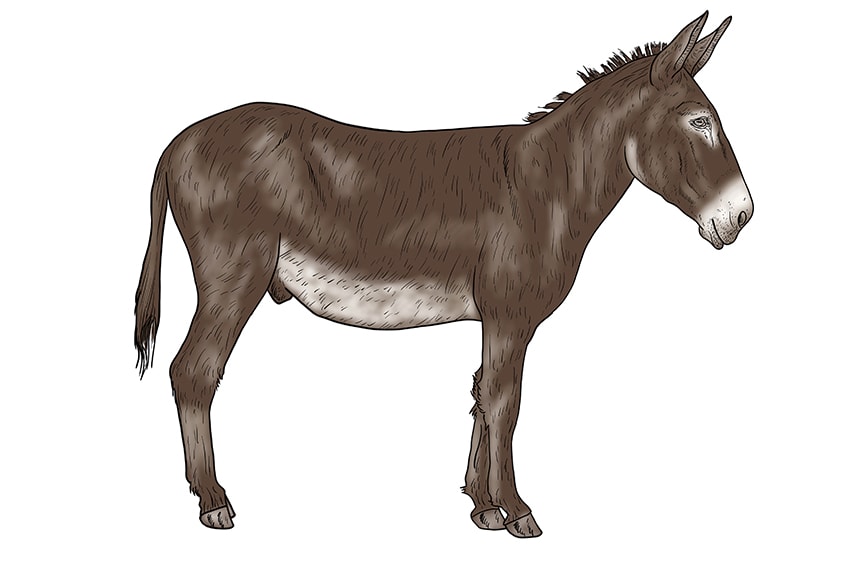
Step 16: Using Black to Add Shadows and Contours
We have now added some highlights to our donkey drawing and it is time to add the other side of the dimension coin, namely the shading. Use a medium brush to gently and lightly apply black paint to the parts of the donkey’s body that would naturally be hidden from the light source.
These areas include the underside of the muzzle, between the ears, around the base of the ears, on the very tip of the muzzle, in the eye, the underside of the neck, the edges of the belly around the legs, on the joints of the legs, the back of the rump, and around the donkey’s back.
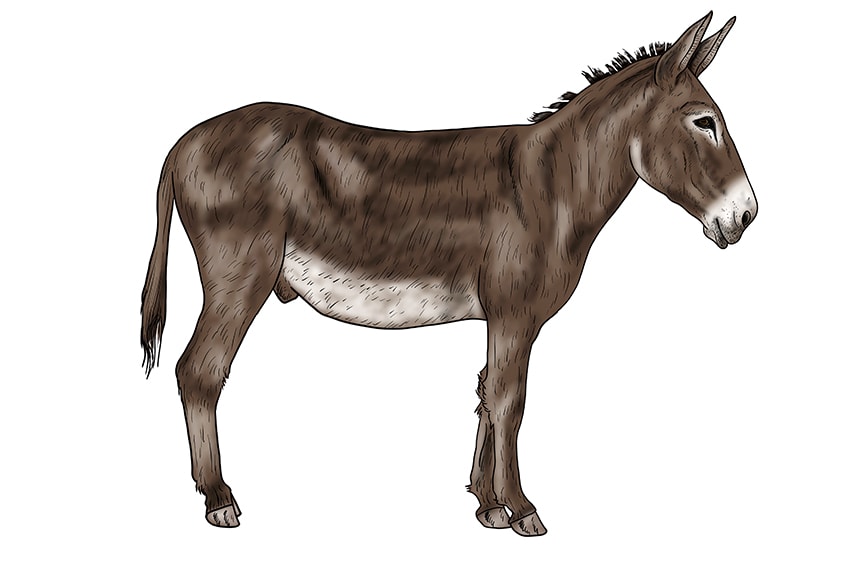
Step 17: Adding the Finishing Touches to Your Donkey Drawing
This last step is optional, but it creates a smoother and more seamless drawing. All you need to do is erase the outline and some of the texture details by tracing over them with a sharp brush and the corresponding color. This method is an easy way to take your donkey sketch from beautiful to stunning!
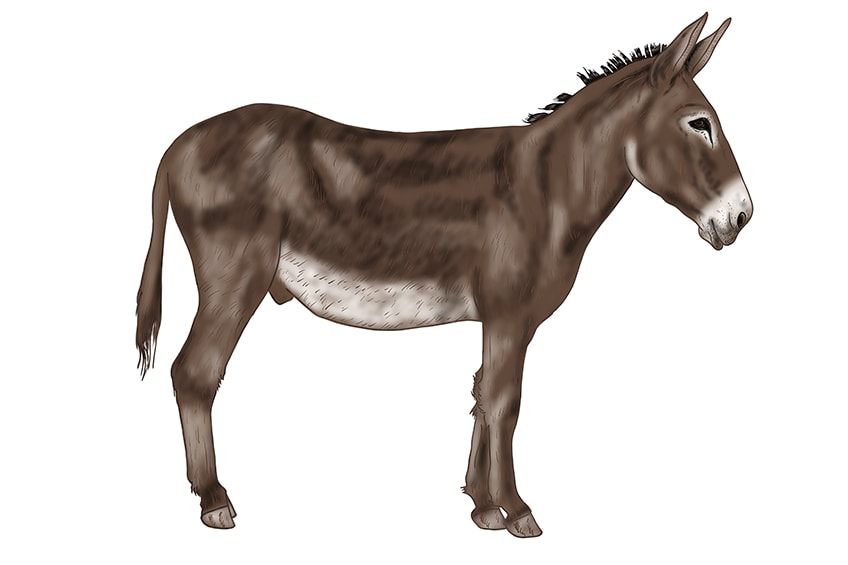
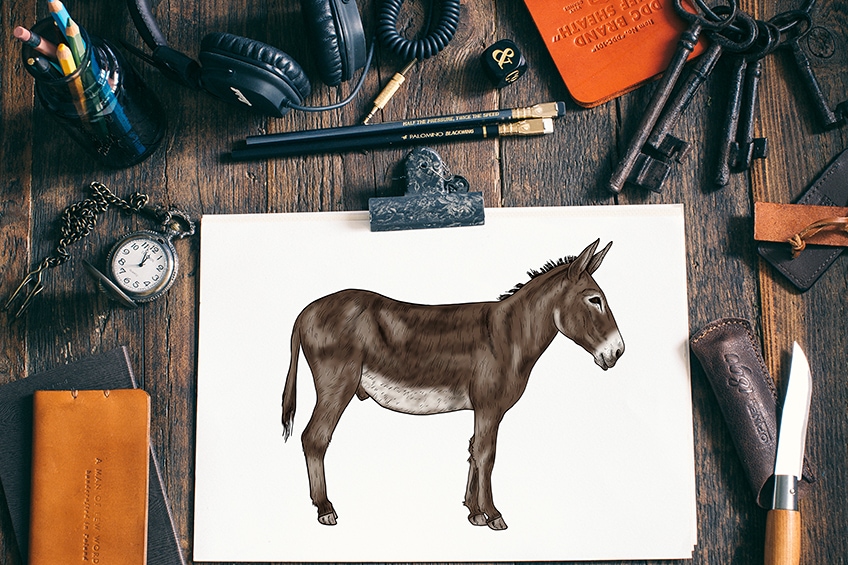
Well done for making it all the way through our how to draw a donkey tutorial! We are hopeful that you have enjoyed the donkey drawing process and that you now feel more confident in your construction, outlining, and coloring skills.
Frequently Asked Questions
Can I Learn How to Draw a Donkey?
Of course you can! Learning how to draw a donkey may seem like a daunting task, but with our really easy-to-follow donkey sketch tutorial, you will have all the knowledge to create beautiful and realistic donkey drawings.
Is Donkey Head Drawing Similar to Drawing a Horse?
Donkeys and horses are certainly related and they share similar shapes throughout their bodies. Donkey head drawing is only slightly different from drawing a horse’s head, but it is simpler.
Matthew Matthysen is an educated multidisciplinary artist and illustrator. He successfully completed his art degree at the University of Witwatersrand in South Africa, majoring in art history and contemporary drawing. The focus of his thesis was to explore the philosophical implications of the macro and micro-universe on the human experience. Matthew uses diverse media, such as written and hands-on components, to explore various approaches that are on the border between philosophy and science.
Matthew organized various exhibitions before and during his years as a student and is still passionate about doing so today. He currently works as a freelance artist and writer in various fields. He also has a permanent position at a renowned online gallery (ArtGazette) where he produces various works on commission. As a freelance artist, he creates several series and successfully sells them to galleries and collectors. He loves to use his work and skills in various fields of interest.
Matthew has been creating drawing and painting tutorials since the relaunch in 2020. Through his involvement with artincontext.org, he has been able to deepen his knowledge of various painting mediums. For example, watercolor techniques, calligraphy and lately digital drawing, which is becoming more and more popular.
Learn more about Matthew Matthysen and the Art in Context Team.


