How to Draw a Cardinal – A Realistic Tutorial for Beginners
Cardinals are fascinating birds that have a strikingly vivid aesthetic. Their red feather coat is unmistakable and stands out within any environment. A cardinal bird drawing is a great challenge for color exploration, as it teaches us how to achieve light and shadow in a monochromatic way. That being said, cardinals also have subtle hues of other colors in different parts of their wings, making it a great exercise for practicing color application. Cardinal birds are beautiful birds that serve as a great addition to your drawing repertoire and they provide us with a good set of learning curves and work as a great feature in many artworks. There is a lot to gain from learning how to draw a cardinal, both in drawing techniques and a way of understanding how to represent the unique features of a bird.
Step-by-Step Guide on How to Draw a Cardinal
In this tutorial on how to draw a cardinal, we will start by shaping the bird in its basic features. From there, we will proceed by refining the bird through layers of colored details. As we do this, we will take our time slowly working on the different features with the linework and shading. As we work our way through adding layers of color details, we will take our time with each of the features. In doing so, we will see how the bird drawing comes together as all the details work collectively to define a realistic representation of the cardinal bird.
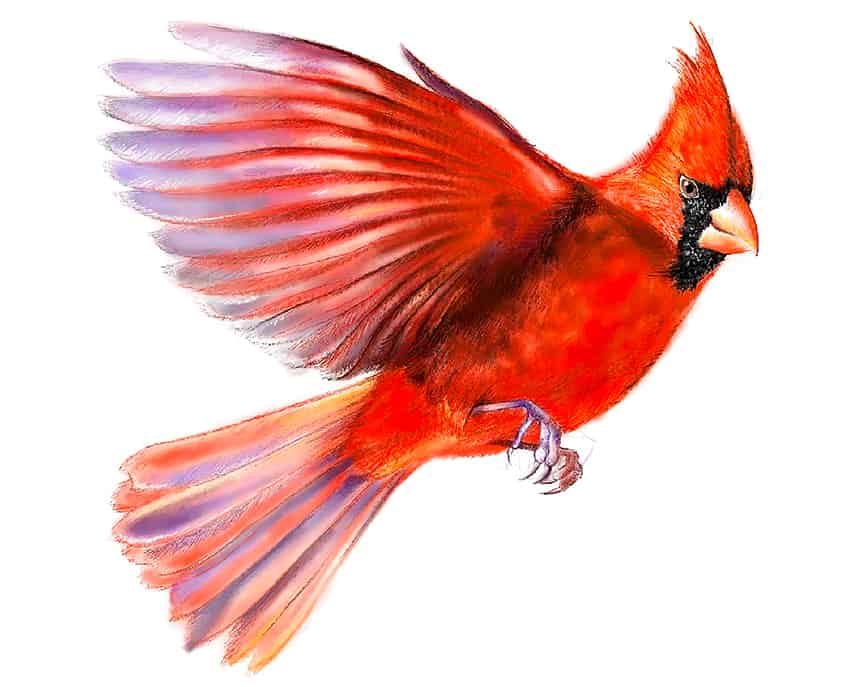
Step 1: Shaping the Bird
Let us start by shaping the cardinal with a light sketch, this is where we determine the position and perspective of the bird. We can start by considering how the position of the bird is defined by its different features.
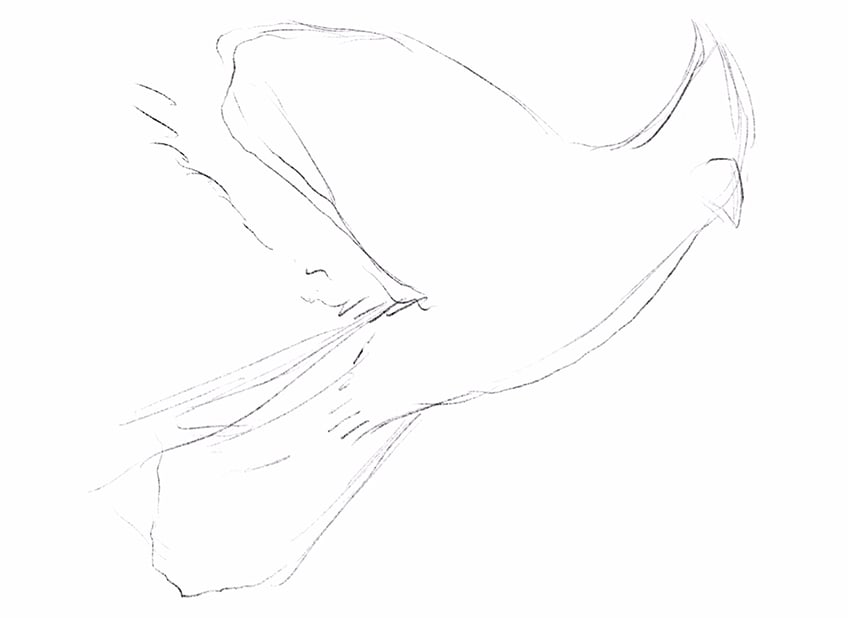
We can proceed by bringing more form to the different features, such as the striations in the feathers and tail as well as the positioning of the eye. Take your time with establishing the placement of the different features.
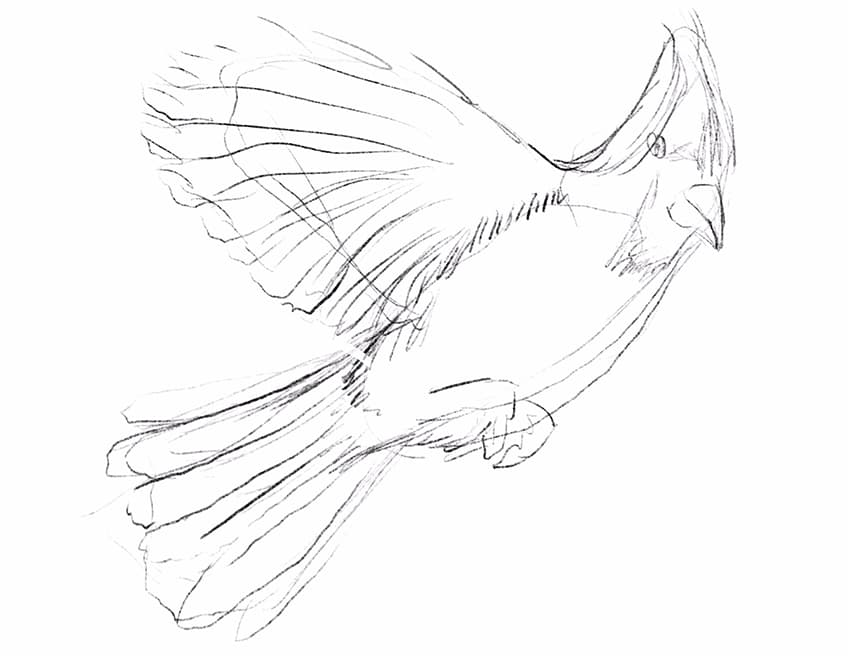
Once we have a light sketch established, we can continue by lightly erasing our drawing.t this will leave some ghost lines to assist us in refining the cardinal bird drawing with colored details.
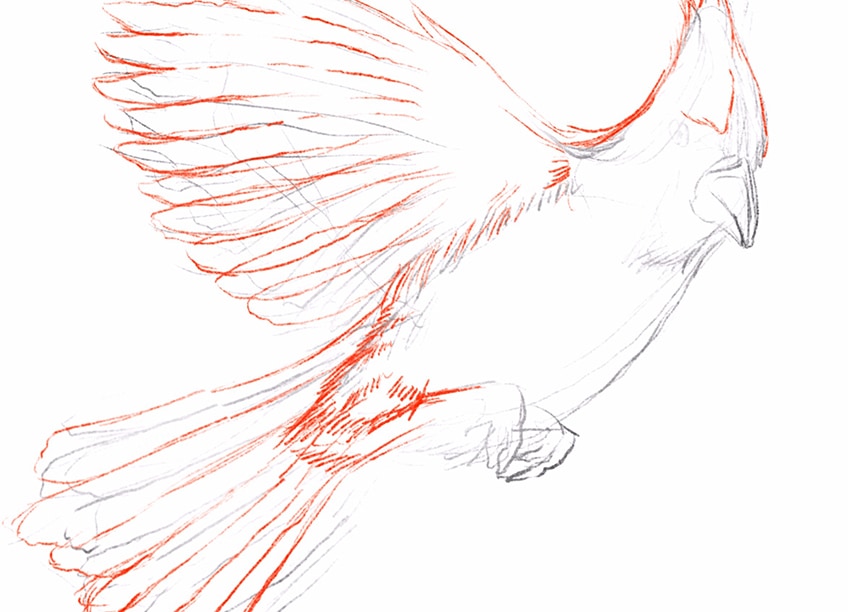
Step 2: Refining the Bird With Colored Details
We can start using red linework to define the shape of the different features, this is where we take our time to capture the form of the bird. We can slowly bring more of the triangular shape to the head as well as define the feathers in the wings. We can start integrating some light colors of red shading into the body of the bird, making sure to keep our shading quite light.
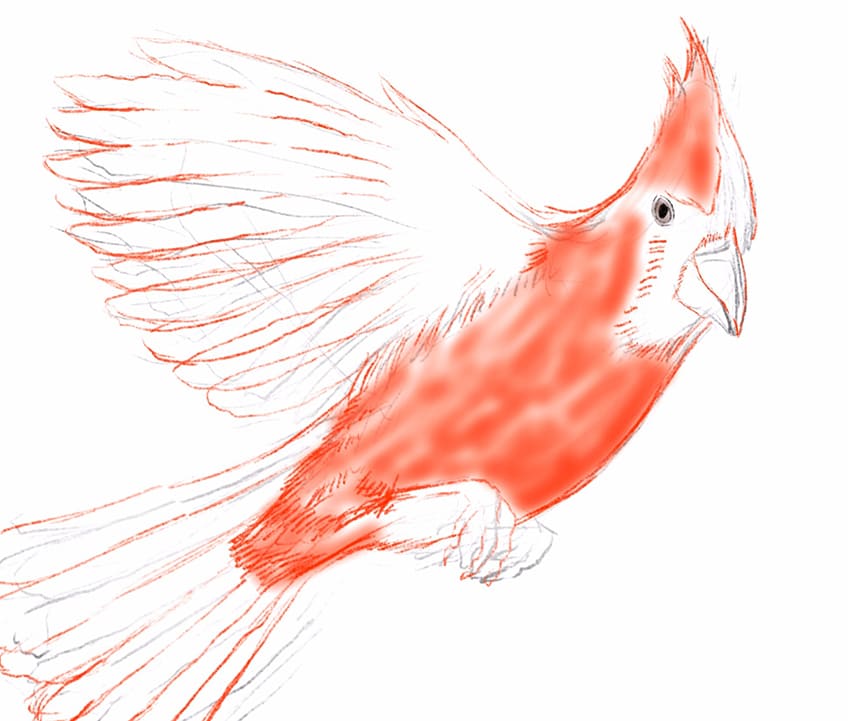
We want to start considering the spectrum of reds we want to use to determine highlighted and darker areas in the feather coat. For instance, we can use darker reds to determine the placement of shadows in the bird.
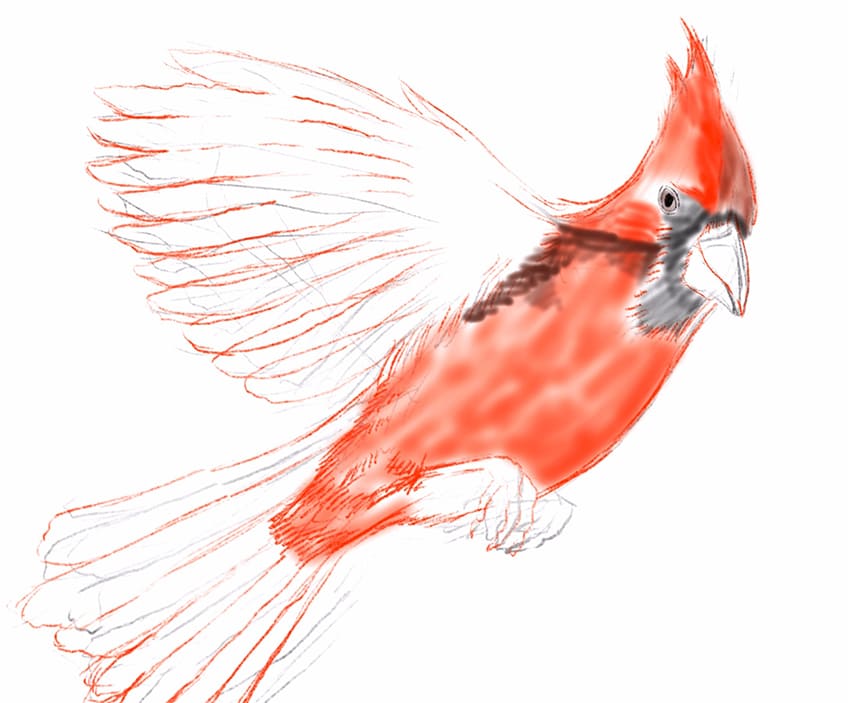
A good idea is to consider looking at a reference image to assist you in the drawing process of your cardinal bird. As we integrate shadows in the bird drawing, we want to make sure that we are working with a darker red color.
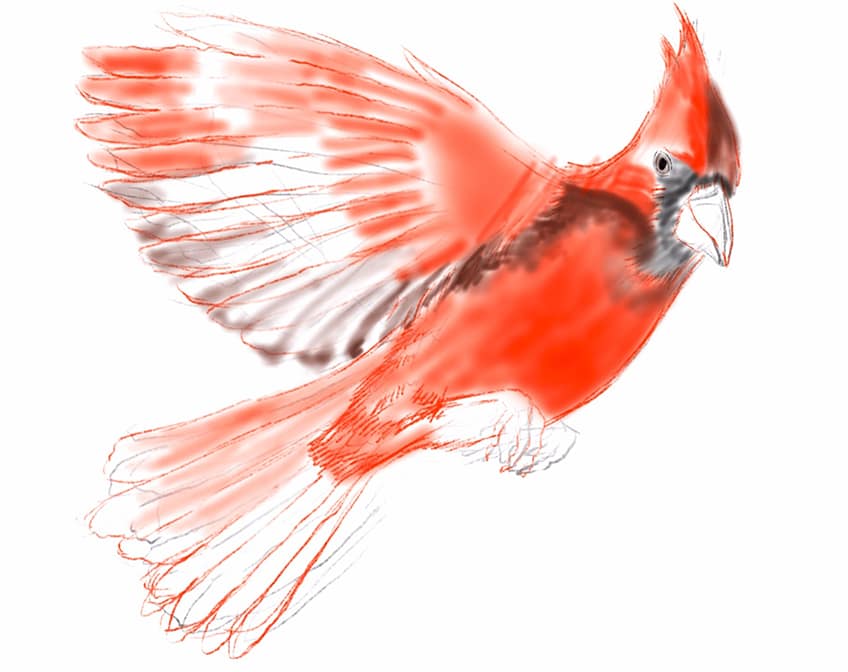
At this point, we can also add some light layers of black around the face to define the black patch in the face.
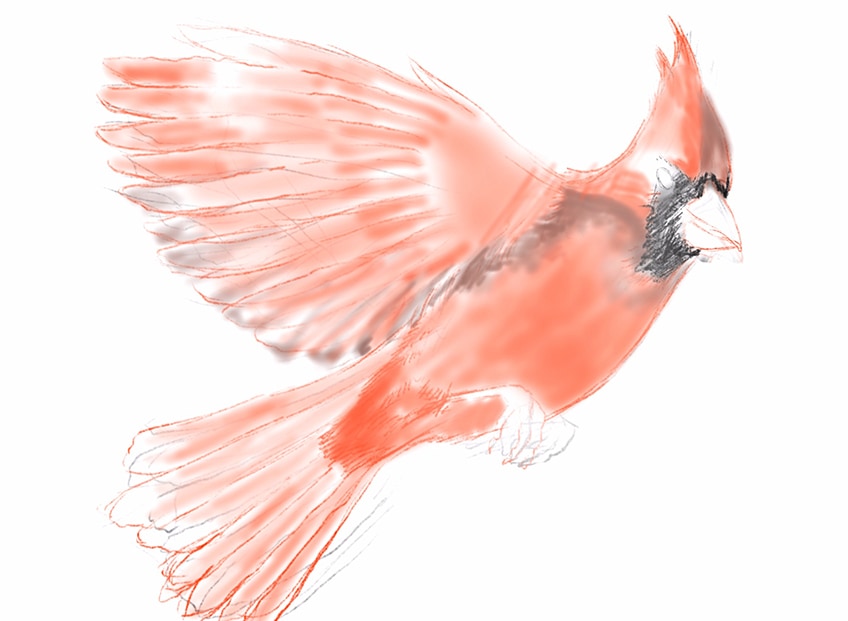
Step 3: Building Up Our Layers of Color in the Head
From here, we can start working in some darker mid-tones of color into the different features. We want to use the light layers as a means of determining where we can build up different layers of color.
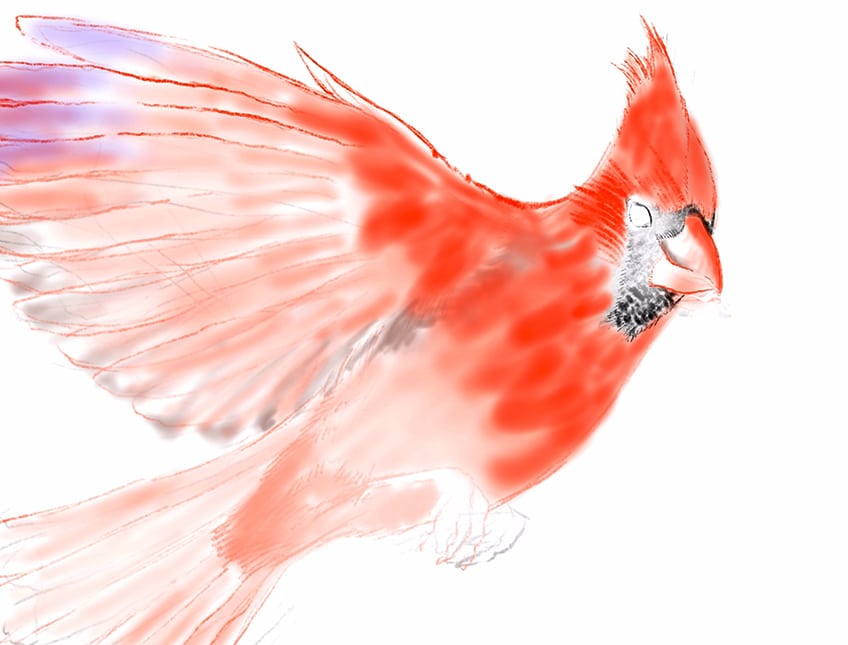
We can start making the reds more vivid and warm within the head and the body of the cardinal bird drawing. We can also darken the black patch around the face, making sure we work around the beak and eye.
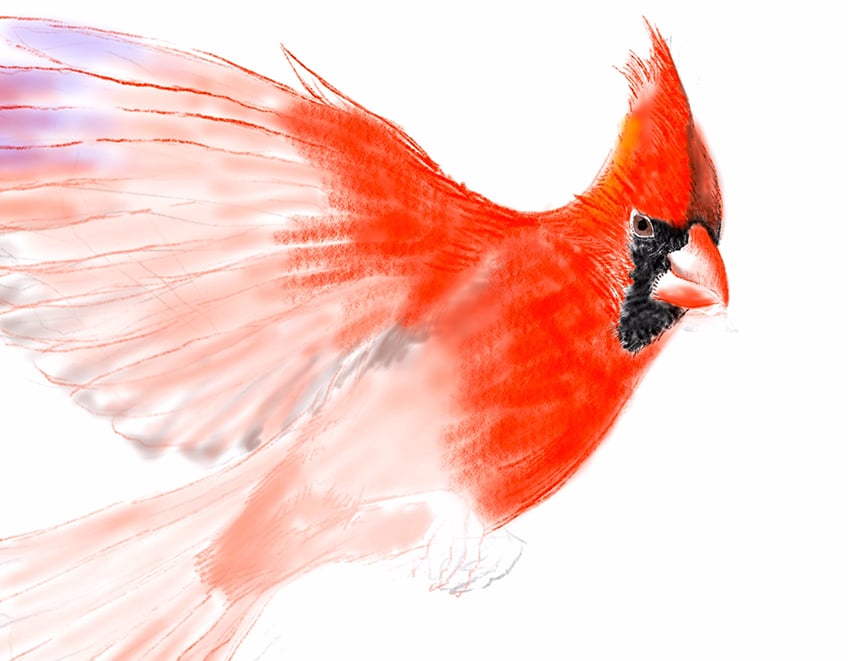
As we continue to integrate color into the bird, we can also refine the shape of the eye and the beak. We want to keep the beak as this triangular structure in the center of the face, with a small circular eye placed near the middle of the beak.
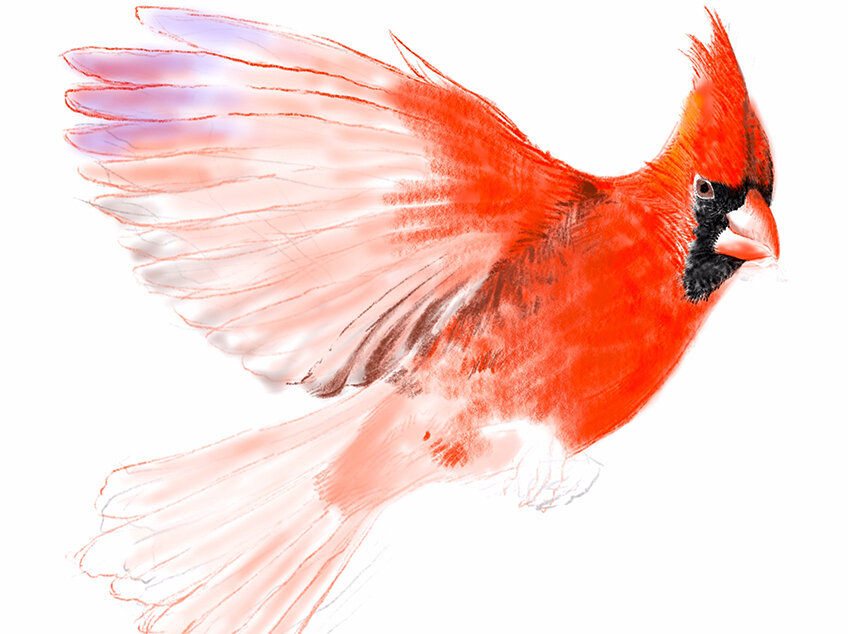
The beak is a hard structure, which means light will reflect off its surface causing it to be quite light in tonal value. The eye is made up of a small black hole or pupil in the center of the oval-like shape.
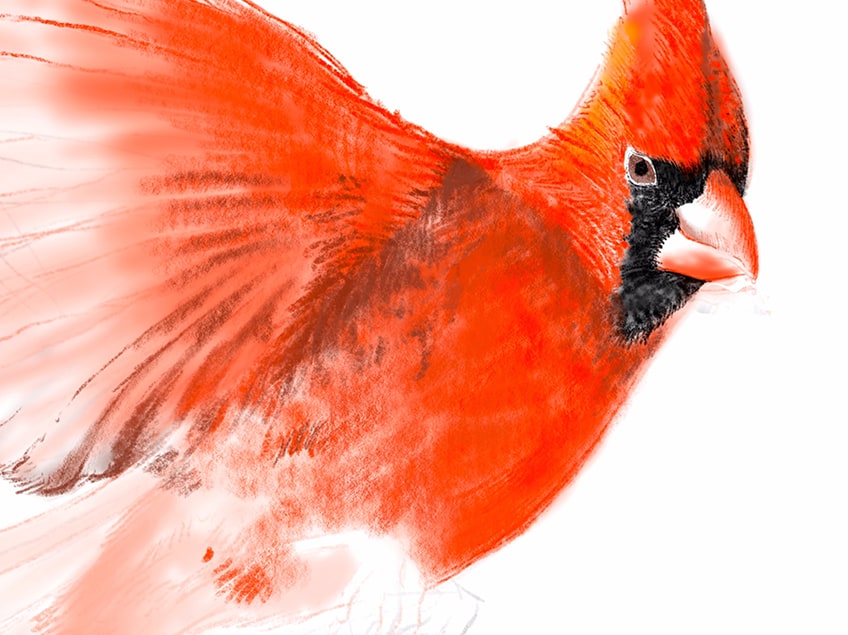
We can start integrating some highlights into the head to give it more dimension and a natural quality of highlights. We can use yellows and oranges to define these highlights within the head of the bird
Step 4: Adding Colored Details to the Feathers
As the feathers extend, they will change in color, shifting from a vivid red near the body to a soft blue and purple at the edges of the wings. We can also start adding darker shadows near the base of the wings where it connects to the body. We can build up these shadows with darker reds to define a three-dimensional quality in the body and how the wings cast shadows on the bird’s body.
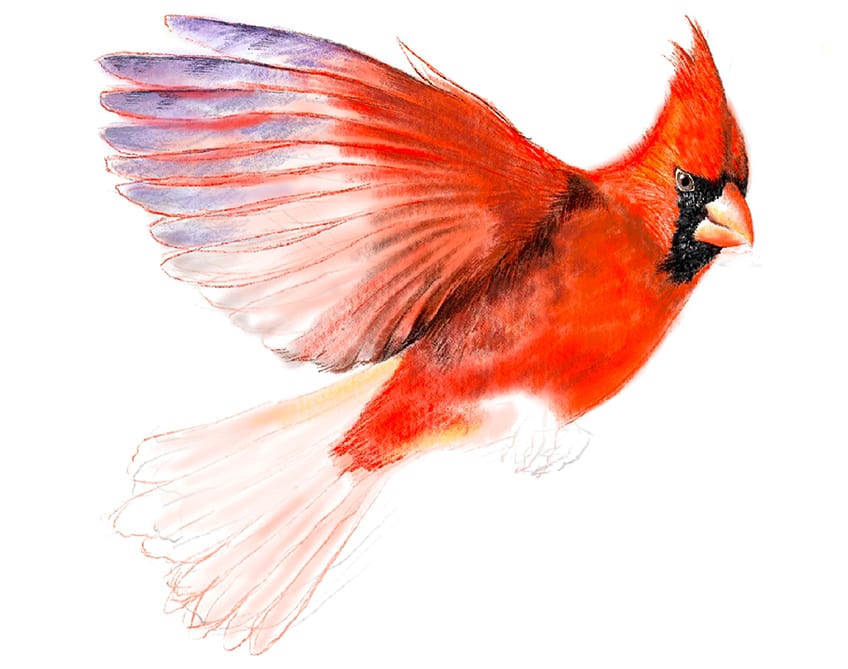
We want to make sure we work with red linework to define the striations of the different feathers in the wings. We can also continue by using darker blue linework to define shadows along the edges of the wings.
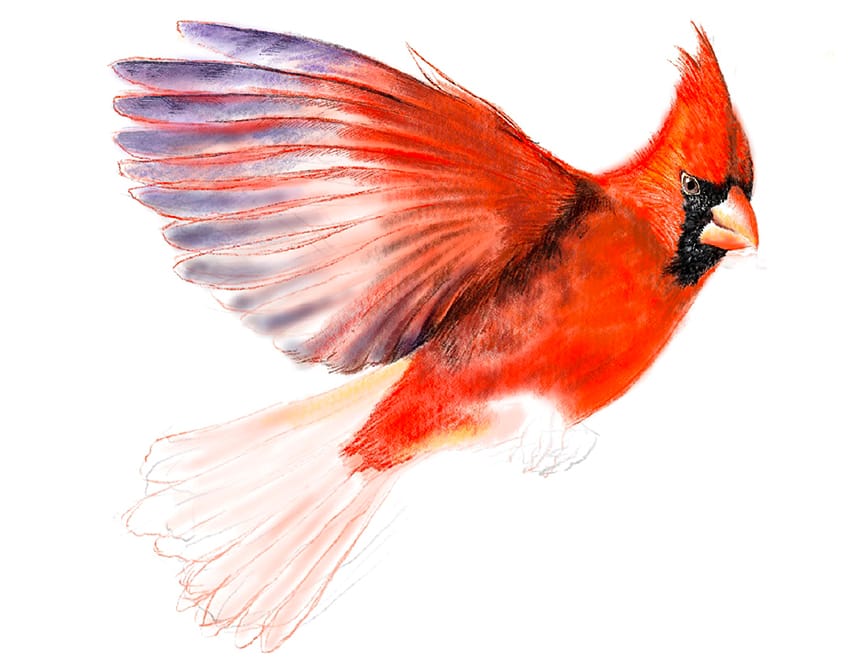
We want to take our time building up these moments of dark red shading near the body of the bird where it connects to the wings. while we are busy with this, we can add some white highlights to the black patch on the face and the eye of the bird.
Step 5: Adding Color Details to the Lower Features of the Bird
As we work our way to the tail feathers of the bird, we can continue extending the vivid red coloration into the lower section of the body’s feathers.
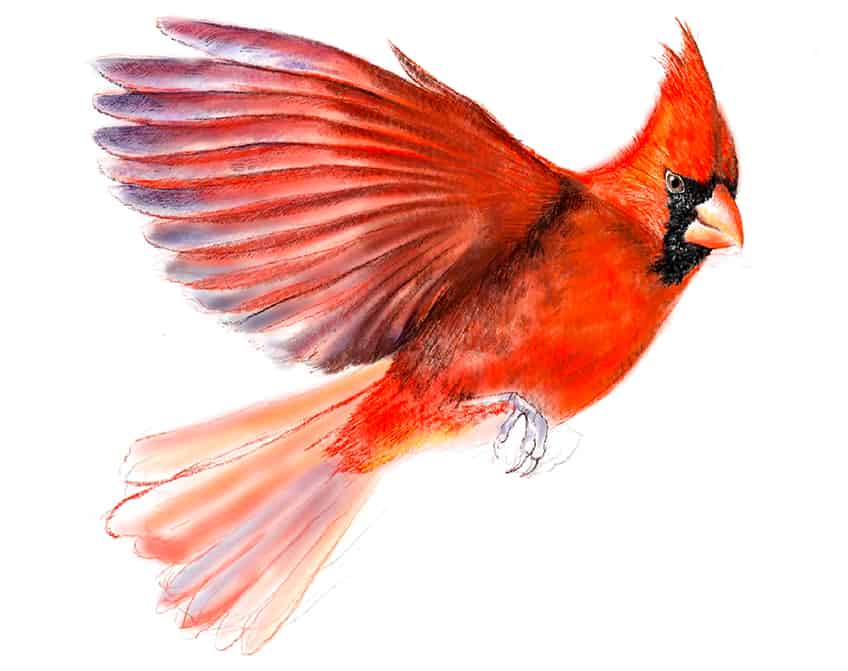
We can also extend these shadow formations into the lower section of the body to bring more structure to the body. We want to keep a distinction of tonal value between the head and all the features that wings would cover.
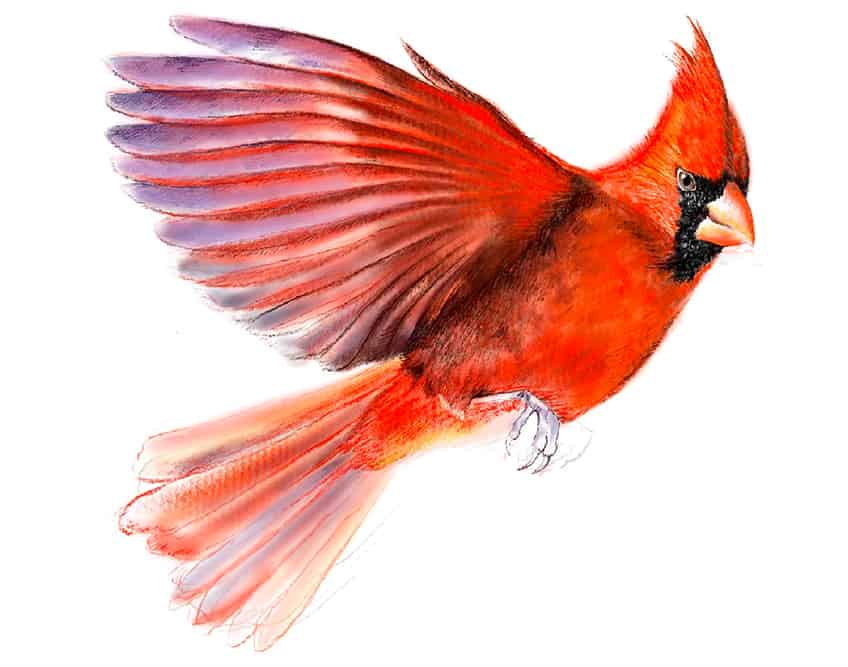
Naturally, the tail feathers would also be exposed to a light source, meaning that they will have a transparent-like quality. We can define this quality by establishing soft shading with blues and oranges into the tail feathers. Remember that the shadows will be greatest near the base of the body where the wings connect to the body of the bird. We can also bring more structure to the legs and talons of the bird.
We want to make sure we define the striations in the tail feathers as well, keeping them similar in shape to that of the wings.
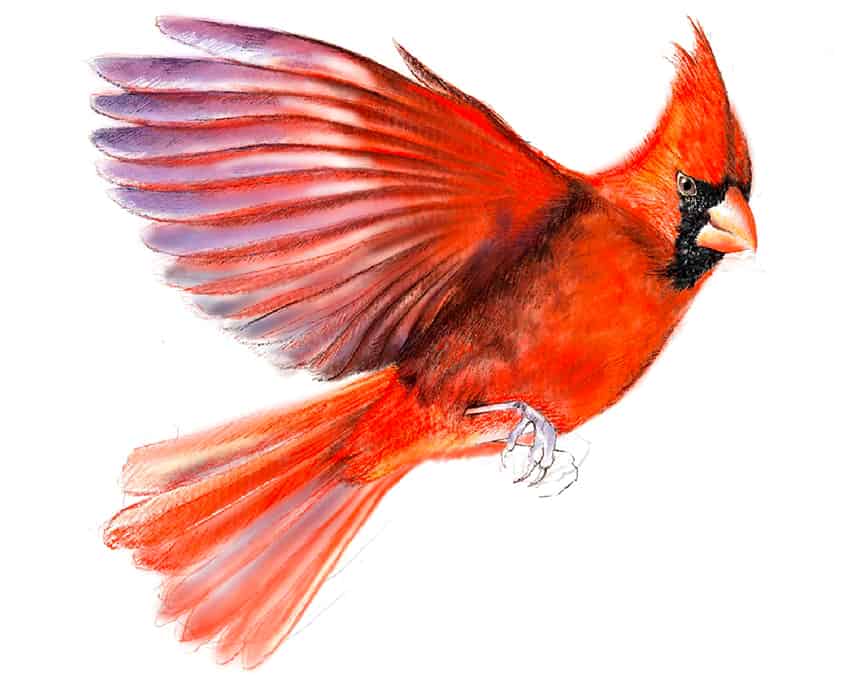
We can continue by integrating some soft blue shading qualities that flow through the different sections in the tail feathers.
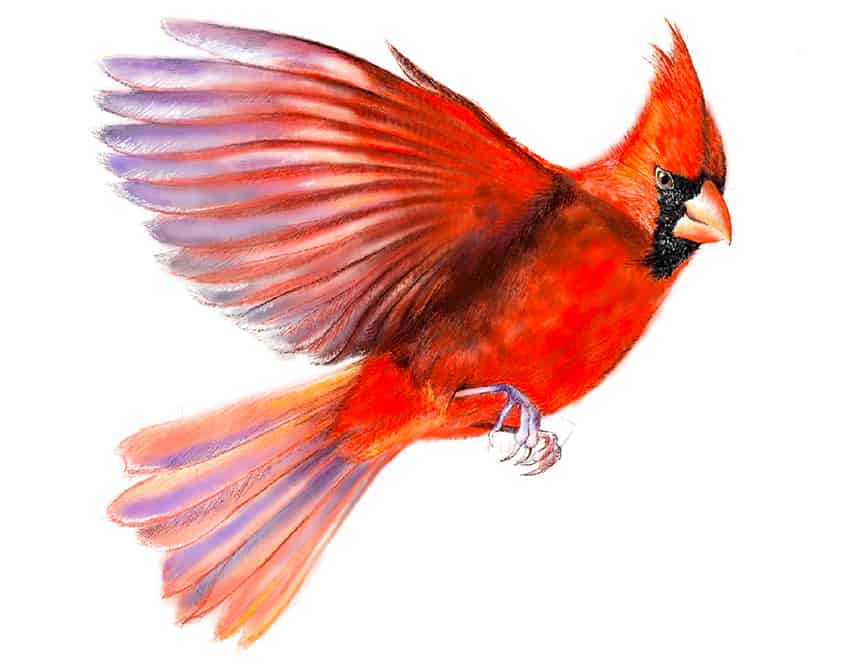
We can also start adding some light purples and blues into the talons. We want to ensure we also represent each talon’s claws to define a more realistic shape in these features.
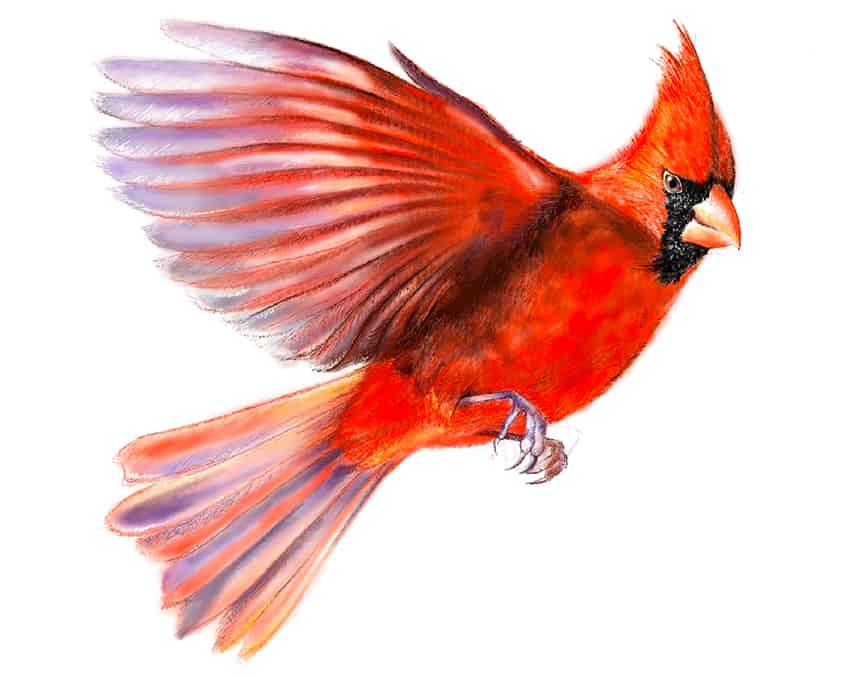
Try to take your time defining the form of the talons, we can also use some linework to define how to feather texture around the talons as they connect to the body.
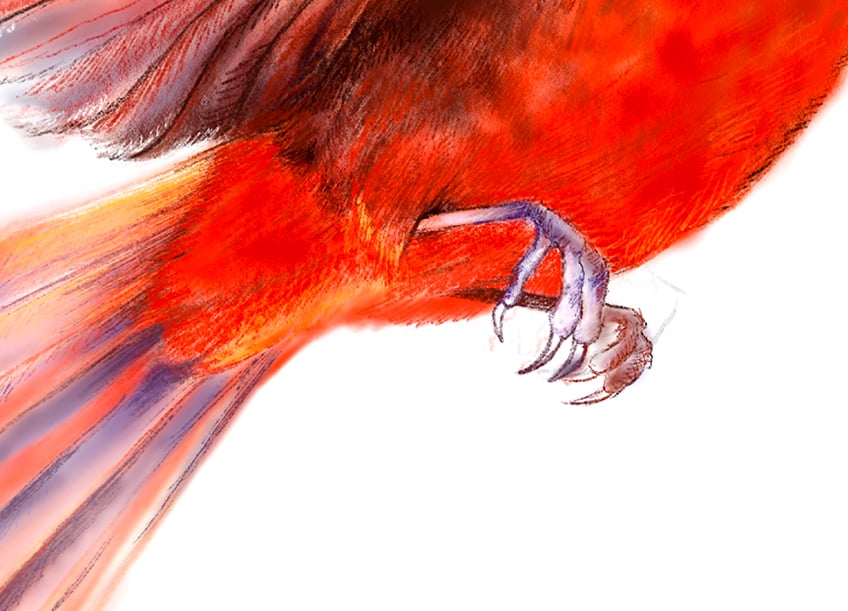
Make sure you keep the shadow formations defined with darker reds rather than black details, this way we maintain the right color spectrum in the cardinal bird drawing.
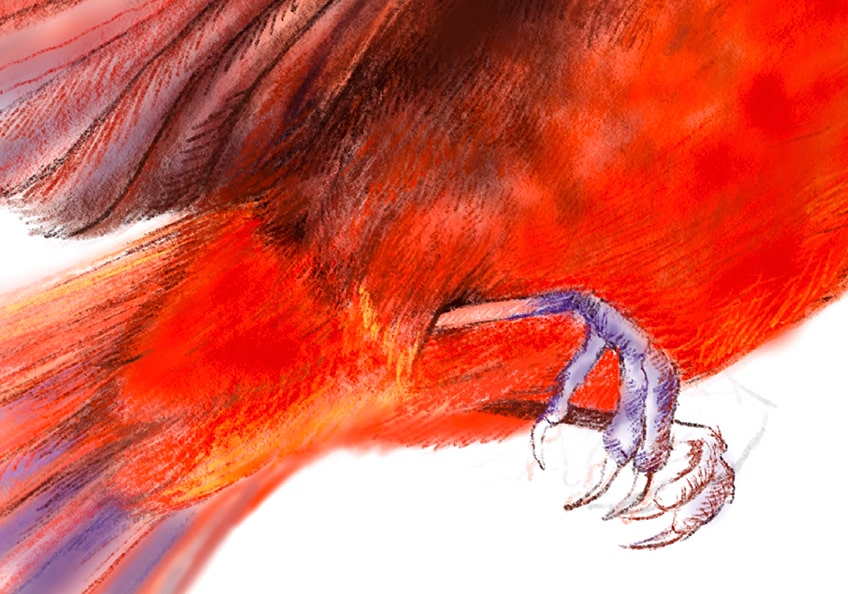
We can also add in moments of highlights along the side of the bird that is more exposed to the light source.
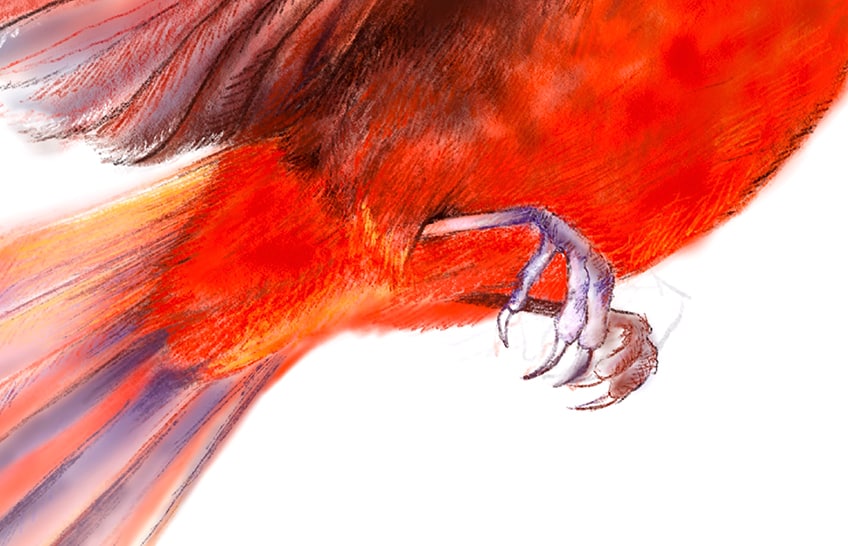
Take one last moment to go over your bird, and remember to stop and not overpower the bird drawing with too much shading. And there you have it! How to draw a cardinal through a few simple steps.

Tips and Tricks to Remember
- Shape the bird. Take your time capturing the form of the bird and its proportions.
- Use color details strategically. Define the different features by layering color details and work from lighter layers to darker layers.
- Use line work and shading. These can be used in combination to achieve the right color and texture for different feathery qualities.
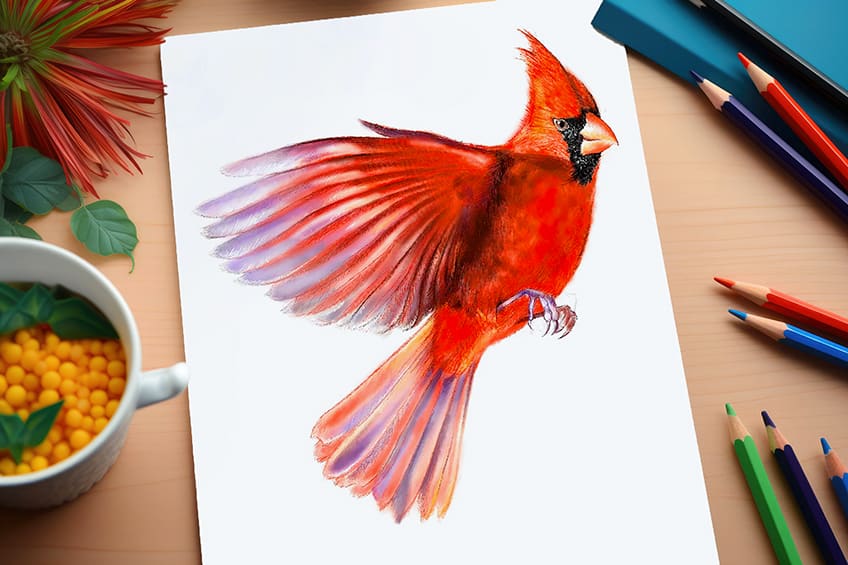
Learning how to draw a cardinal is a great exercise for exploring how to define unique features with color details. Birds always have unique textural qualities, providing us with the opportunity to understand the effectiveness of using line work and shading as combined drawing techniques that achieve unique results.
Frequently Asked Questions
How to Draw Wings on a Cardinal Bird?
Cardinal birds have quite a small wingspan compared to their bodies, with a set of fairly transparent feathers. This causes a light blue or purple-like quality to appear in the wings as they spread. We draw the wings with a set of feathers that fan out from the body and curve towards the tail. As the feathers extend from the body, their color shifts from reds to blues and purples near the tips of the wings. We can use line work to define the rows of feathers that extend through the wings and some light soft shading to define the color within the feathers. Try to think of the shape of the wings as a fan, with striations that define the segments of feathers.
How to Add Color to a Cardinal Bird?
Cardinal birds are predominantly red, with subtle moments of different colors throughout various features. The cardinal bird also has an iconic black patch that is positioned around the orange/reddish beak. This black patch flows around the beak and eye of the cardinal bird. The wings have a subtle blue coloration near the tips due to their thin quality causing the wings to be slightly transparent. We can also integrate moments of orange and yellow into the areas that are more illuminated to suggest highlights along the surface area of the bird’s feathers. Most importantly, take your time building up the colors through a set of layers, making sure you always start with lighter layers and then build up to darker layers.
Matthew Matthysen is an educated multidisciplinary artist and illustrator. He successfully completed his art degree at the University of Witwatersrand in South Africa, majoring in art history and contemporary drawing. The focus of his thesis was to explore the philosophical implications of the macro and micro-universe on the human experience. Matthew uses diverse media, such as written and hands-on components, to explore various approaches that are on the border between philosophy and science.
Matthew organized various exhibitions before and during his years as a student and is still passionate about doing so today. He currently works as a freelance artist and writer in various fields. He also has a permanent position at a renowned online gallery (ArtGazette) where he produces various works on commission. As a freelance artist, he creates several series and successfully sells them to galleries and collectors. He loves to use his work and skills in various fields of interest.
Matthew has been creating drawing and painting tutorials since the relaunch in 2020. Through his involvement with artincontext.org, he has been able to deepen his knowledge of various painting mediums. For example, watercolor techniques, calligraphy and lately digital drawing, which is becoming more and more popular.
Learn more about Matthew Matthysen and the Art in Context Team.
Cite this Article
Matthew, Matthysen, “How to Draw a Cardinal – A Realistic Tutorial for Beginners.” Art in Context. April 9, 2024. URL: https://artincontext.org/how-to-draw-a-cardinal/
Matthysen, M. (2024, 9 April). How to Draw a Cardinal – A Realistic Tutorial for Beginners. Art in Context. https://artincontext.org/how-to-draw-a-cardinal/
Matthysen, Matthew. “How to Draw a Cardinal – A Realistic Tutorial for Beginners.” Art in Context, April 9, 2024. https://artincontext.org/how-to-draw-a-cardinal/.


