How to Draw a Camera – An Easy Step-by-Step Drawing Tutorial
Cameras are the ultimate tool for capturing life’s moments and turning them into timeless memories. With the ability to freeze time, cameras have revolutionized the way we see and experience the world around us. From the classic film cameras of the past to the modern digital marvels of today, cameras have come a long way in capturing life’s precious moments. Whether you’re a professional photographer, a hobbyist, or just someone who loves to snap photos with your smartphone, cameras give us the power to document our lives in vivid detail and share them with the world. So, grab your camera and start capturing your story today! Let’s dive right into today’s simple tutorial on drawing a camera. We’ll guide you through every step of the process to create a splendid camera illustration!
Create an Aesthetic Camera Sketch Step-by-Step
Congratulations on taking the first step toward learning how to draw a camera! Drawing is a rewarding activity that allows you to express your creativity and imagination in a unique way. In this tutorial, you’ll be guided through every step of the process to create a beautiful and realistic camera drawing. You’ll learn how to sketch the basic shapes and proportions of the camera, add details such as buttons and lenses, and shade the drawing to give it depth and dimension. Drawing a camera can be challenging, but with patience and practice, you’ll be amazed at what you can achieve. So get your pencils and paper and follow along with today’s tutorial!
Follow the steps depicted in the collage below and have fun bringing your vision to life on the page!
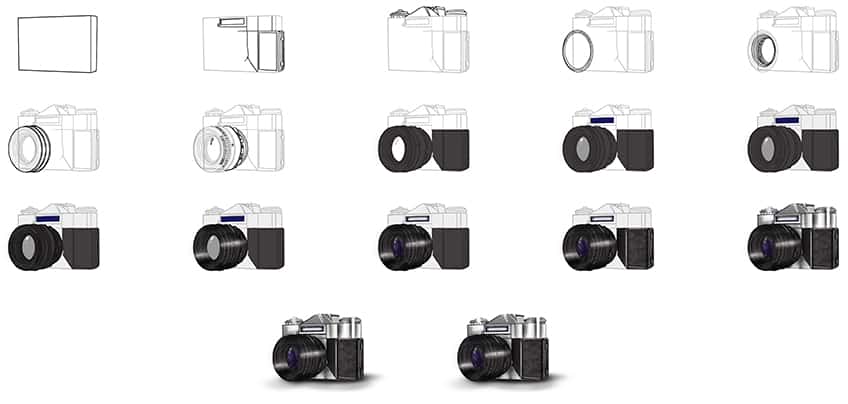
Step 1: Drawing the Main Body of Your Camera Drawing
Begin your camera drawing, by drawing the rectangular body shape of the camera. Draw an additional line on the left side of the main body. This will add a three-dimensional perspective to your drawing.

Step 2: Detail the Camera Sketch
To the right side of the camera, draw a rectangular battery compartment wrapping around the corner of the camera body. Follow this by drawing the additional vertical and horizontal body lines.

Step 3: Draw the Adjustment Dials
At the top left side of the camera, draw the shutter button and the adjustment setting knobs on a ring of larger dials. Besides this, draw a pyramid shape known as the “hot shoe” which is where a detachable flash or microphone would be.
Complete the step by drawing the final dial to the right end of the camera body to represent the rewinding dial.
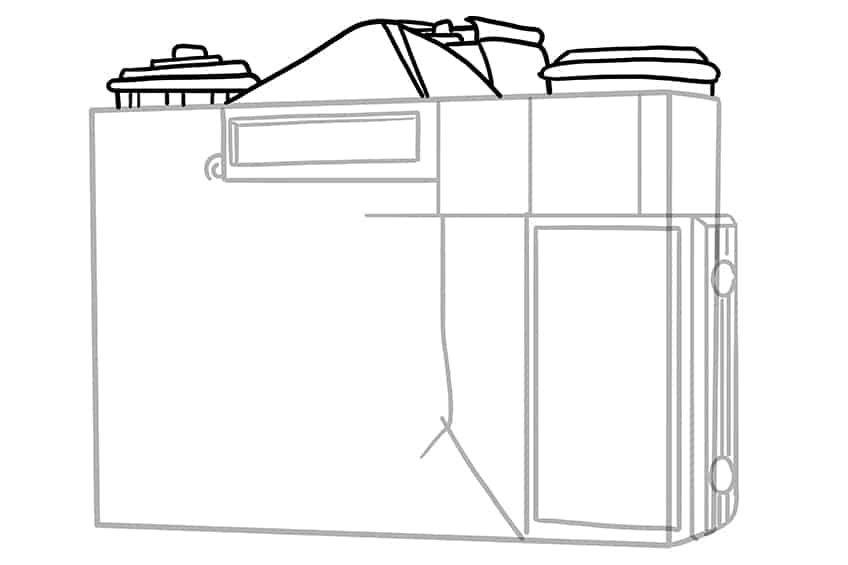
Step 4: Begin Drawing the Lens on Your Camera Sketch
In this step, draw the first lens line as a large ring surrounding two smaller rings.
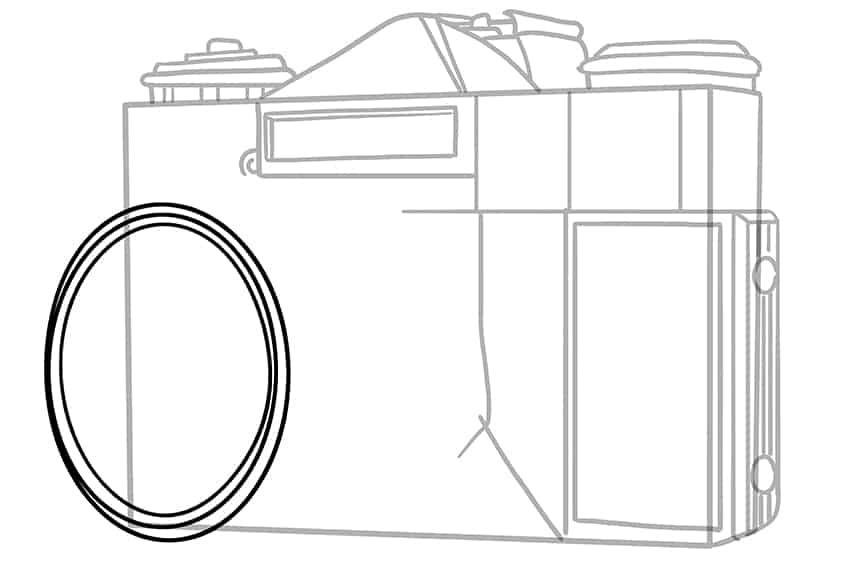
Step 5: Continue to Draw the Camera Lens
Continuing from the previous step, simply fill more rings within the lens shape. Each ring that gets further into the lens, must get smaller. Keep in mind the angle of perspective so the entire ring of the lens should not be visible.
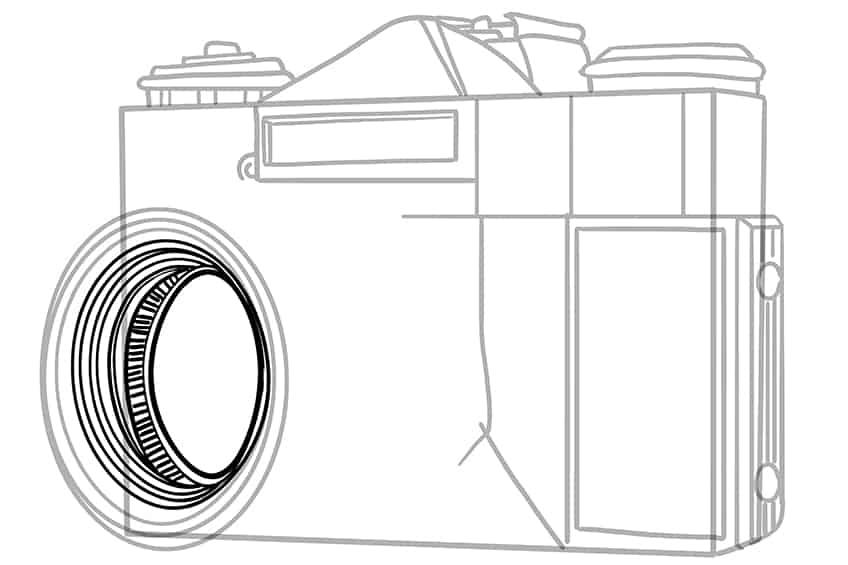
Step 6: Draw the Outer Rings on Your Camera Illustration
Surrounding the previously drawn rings, now draw a series of three thick and inward leading rings around the outer area of the lens.

Step 7: Detail the Lens of Your Camera Drawing
Begin by drawing fine reflection dots on the glass of the lens. Continue by adding fine horizontal lines around the outer rings of the lens. Finish the step by adding the final rear end of the lens and connecting it to the camera body.
Note! The rear end of the lens should also have several horizontal lines within the last ring.
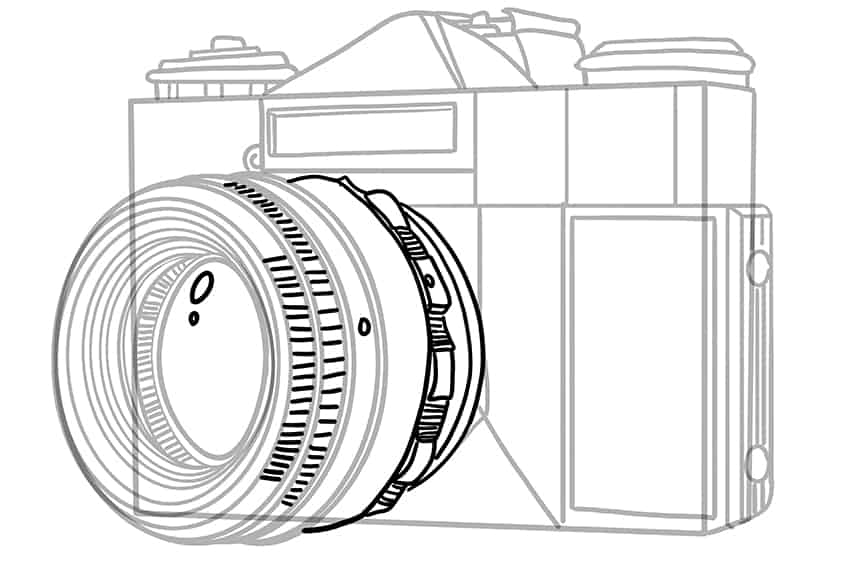
Step 8: Apply the First Coat of Color
Select a fine, sharp brush and dark gray paint, and evenly coat the battery compartment on the camera body. Continue to paint the entirety of the lens leaving out the lens glass.
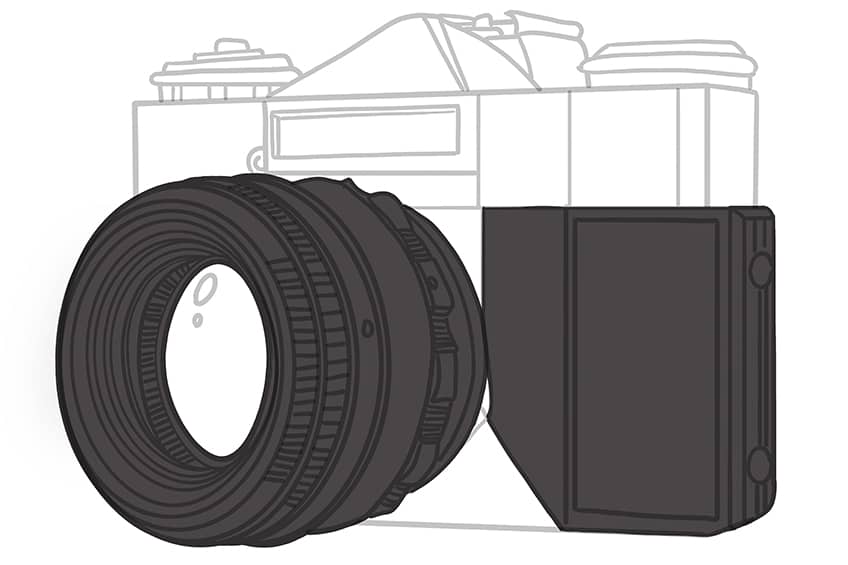
Step 9: Color the Lens Glass
Continue to use the same brush as previously and switch to light gray paint, and evenly color the lens glass. Switch to white paint, and fill the reflection spot on the lens glass. Complete the step using navy blue paint, and color the branding area on your camera drawing.

Step 10: Add Color to the Camera’s Body
In this step, evenly paint the camera’s body using a thin brush and a very light shade of gray paint.
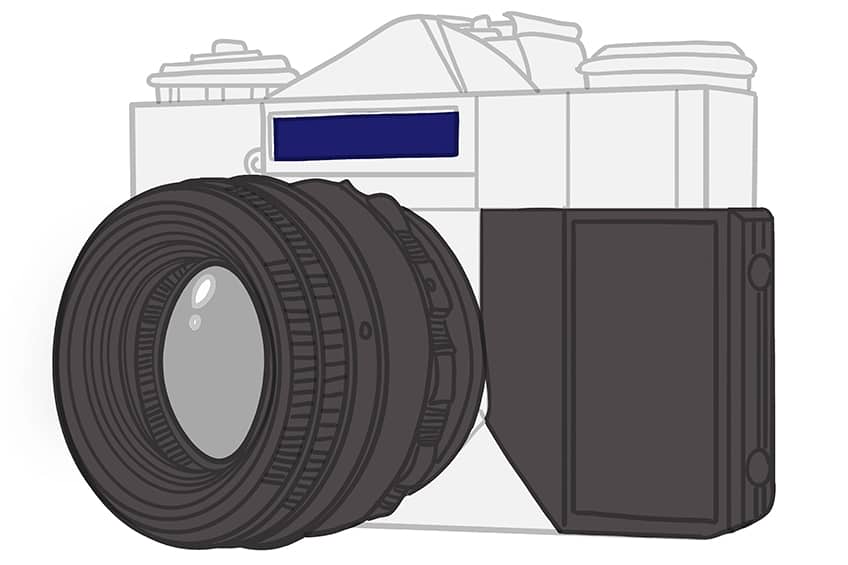
Step 11: Shade the Lens of the Camera Sketch
With a small, soft brush and black paint, add soft shading around each ring of the camera. Make sure that the first color coat is still visible. Repeat using a fine, sharp brush and add shading between the fine horizontal ring lines.
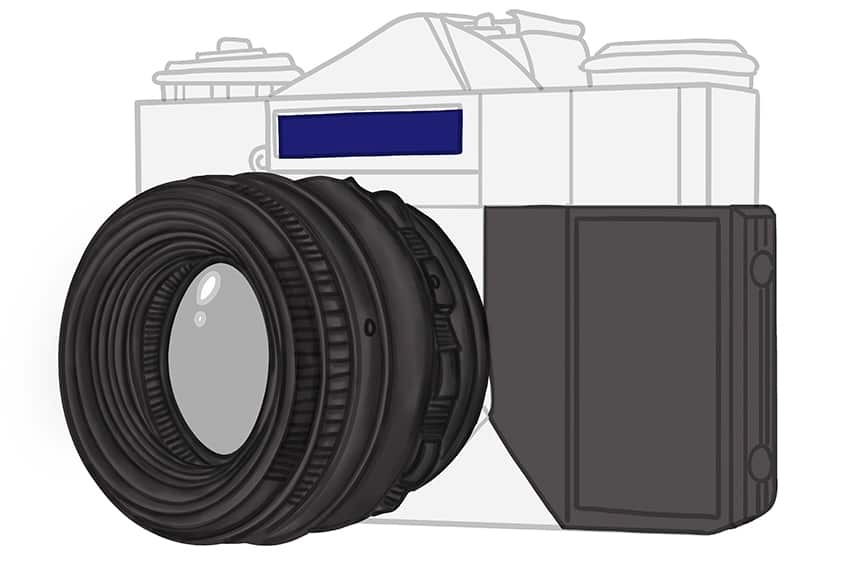
Step 12: Highlight the Lens
Begin to add fine highlights between the horizontal ring lines and the rings themselves with a thin, sharp brush and white paint. Switch to a soft brush and continue to add soft highlight streaks along and inside the lens.

Step 13: Add Color to the Lens Glass
With a small, soft brush and dark purple paint, lightly coat the lens glass. Repeat using a fine, sharp brush and a combination of orange, pink, and white paint, and paint fine hairline streaks on the glass. Finish this step using black paint to add a border around the branding area. Repeat using white paint for the center area.

Step 14: Texture the Grip and Battery Compartment
Begin this step, by adding shading to the grip and battery compartment area using a soft brush and a combination of black and dark gray paint. Switch to a thin brush and white paint, and add fine highlights along the edges.
To complete this step, select a rough texture brush and white paint, and simply dab patches along the entire grip and battery compartment.

Step 15: Color the Body on Your Camera Illustration
Select a small, soft brush and silver paint, and add soft brushstrokes within the camera body, however, do not color the entire camera body. The first color coat should still be visible. Complete the step using white paint to add soft highlights to your camera drawing. Finish off using a blending brush to soften and spread the color coats.
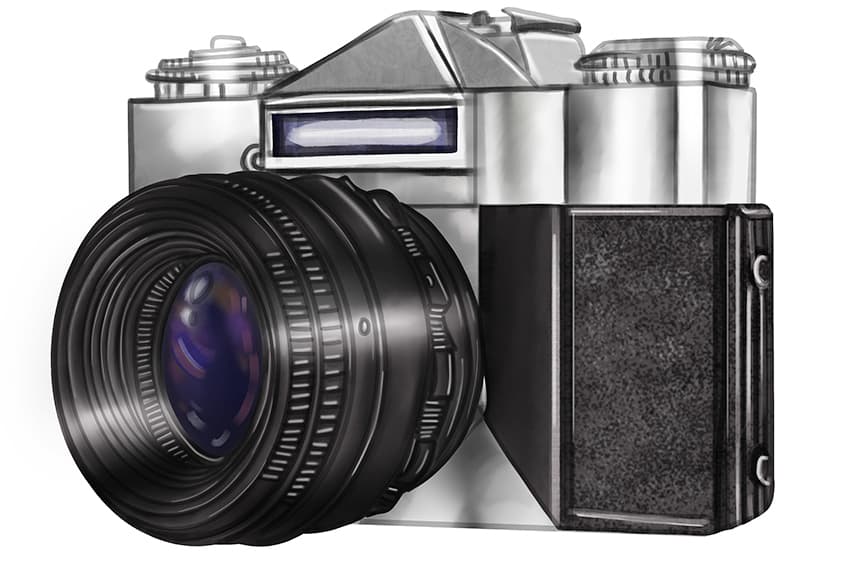
Step 16: Add a Ground Shadow
Add shading beneath the camera using a soft brush and black paint. Continue using a blending brush, and spread the shading outwards and sideways mimicking the camera’s body shape.
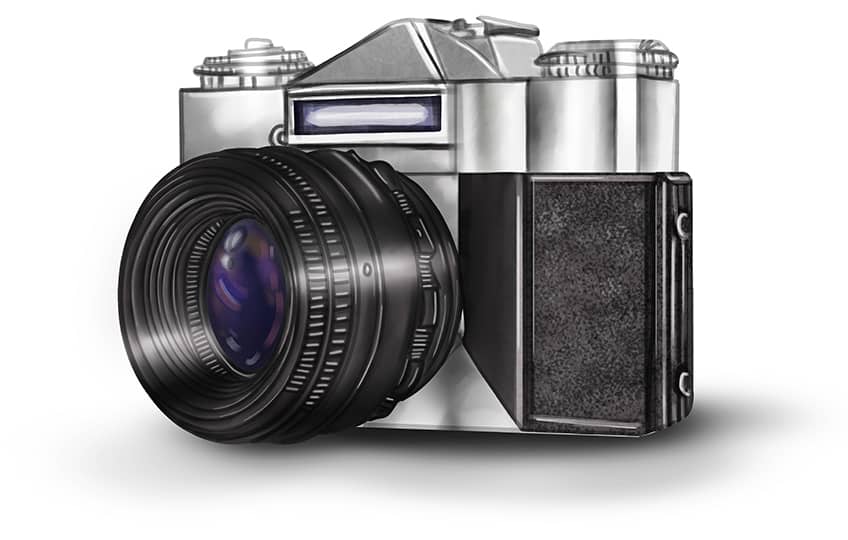
Step 17: Finalize Your Camera Sketch
This is an optional step if you would like a create a seamless result without any harsh visible outlines. To do this, use a fine, sharp brush and the corresponding colors to trace these visible outlines or texture lines.

Congratulations on completing your camera drawing! You have now acquired a valuable skill that can be applied in many different ways. Drawing a camera can seem daunting at first, but with practice and patience, you have successfully brought your vision to life on paper. Now that you have learned how to draw a camera, you can use this skill to create illustrations for photography blogs and social media posts, or even design your own custom camera. You can also experiment with different perspectives, angles, and lighting to create unique and captivating compositions. Keep practicing, and who knows, your camera drawings may inspire you to explore photography in a whole new way!
Frequently Asked Questions
How to Draw a Camera Realistically?
To draw a camera realistically, it’s important to pay attention to the basic shapes and proportions of the camera. Start by sketching the main body of the camera, and then add details such as the lens, buttons, and viewfinder. Pay close attention to the placement and size of each element to ensure that your drawing looks accurate and realistic. Once you have the basic outline, start adding shading and texture to give your drawing depth and dimension. Use a variety of shading techniques such as crosshatching, stippling, or blending to create a realistic and detailed drawing. Finally, take your time and be patient!
How to Create Depth and Dimension in a Camera Drawing?
To make your camera drawing look three-dimensional, you can use shading and highlights to create the illusion of depth. Start by identifying the light source in your drawing, and then shade the areas that would have a casted shadow. Then, use white or light-colored paint to add highlights to the areas that would be catching the light. This will create the illusion of a three-dimensional form and make your drawing look more realistic. Be sure to pay attention to the angles and curves of the camera to ensure that your shading and highlights are consistent with the overall shape of the object. With practice, you can create a camera drawing that looks like it could jump off the page!
Matthew Matthysen is an educated multidisciplinary artist and illustrator. He successfully completed his art degree at the University of Witwatersrand in South Africa, majoring in art history and contemporary drawing. The focus of his thesis was to explore the philosophical implications of the macro and micro-universe on the human experience. Matthew uses diverse media, such as written and hands-on components, to explore various approaches that are on the border between philosophy and science.
Matthew organized various exhibitions before and during his years as a student and is still passionate about doing so today. He currently works as a freelance artist and writer in various fields. He also has a permanent position at a renowned online gallery (ArtGazette) where he produces various works on commission. As a freelance artist, he creates several series and successfully sells them to galleries and collectors. He loves to use his work and skills in various fields of interest.
Matthew has been creating drawing and painting tutorials since the relaunch in 2020. Through his involvement with artincontext.org, he has been able to deepen his knowledge of various painting mediums. For example, watercolor techniques, calligraphy and lately digital drawing, which is becoming more and more popular.
Learn more about Matthew Matthysen and the Art in Context Team.


