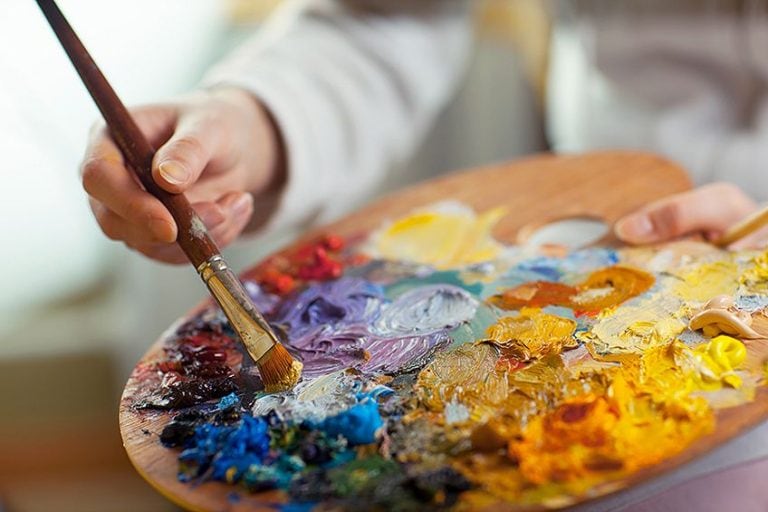
How to Clean an Oil Painting – The Best Oil Painting Cleaners
As an avid painter, your works of art are likely your most prized possessions, and you’d want to look after them accordingly. Although you may think storing your pieces away in darkened, cool, and dry place will increase longevity (and you’re right!), it’s not all that’s needed to ensure your works are well preserved for the long run. For the best aftercare, you need to adequately clean your oil paintings along with storing them appropriately to make sure your paintings stay immaculate throughout the years.
Why You Should Be Cleaning Oil Paintings
Before we get into how to clean an oil painting, let’s first discuss why it’s important to keep on top of artwork maintenance in the first place. It may seem like a mundane task to clean oil paintings, especially if you store your works accordingly. However, it takes immense time and effort to keep a work of art pristine.
Firstly, you want your oil artworks to look like freshly done paintings for years to come, which can only be achieved through maintenance of the work. An oil painting with colors that are still as vibrant as the first day it’s been painted is not only easy on the eyes but can make for a pretty penny too if you’re looking at potentially selling it in the future.

Artworks that have all their rich hues preserved without fading or other damages are well sought-after by art enthusiasts and seasoned collectors. By ensuring your works don’t look like they’ve aged a day, both friends and potential buyers alike will be in awe of your collection.
Oil paintings on canvas also require maintenance so that the work doesn’t deteriorate at a rapid pace. If your work isn’t adequately stored, factors including temperature and sunlight can have devastating effects on the paintings. Through both proper storage and restoration, the artworks won’t become fickle to the touch or fade dramatically.
You can admire these artworks for years to come if restored and preserved correctly.
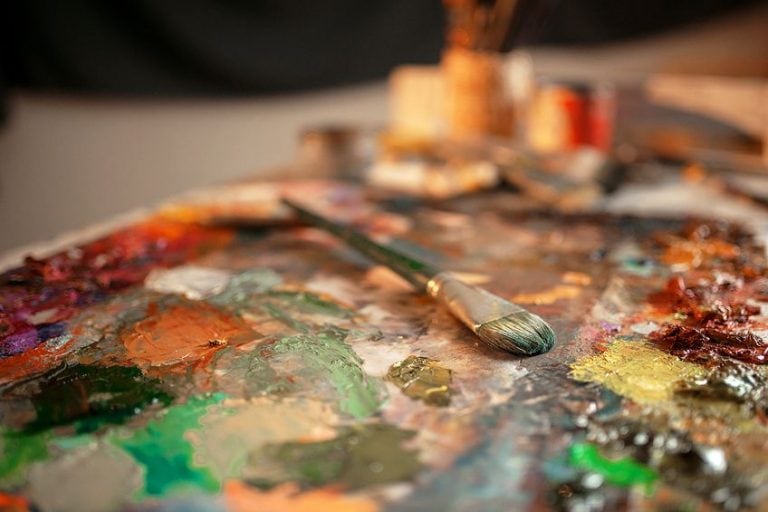
How to Clean Oil Artworks
Now that we know why you need to ensure you do constant maintenance on your precious works of art, let’s dive into which methods are considered to be the best for oil painting cleaning:

Method One: The Best Restoration Process to Remove Dust
You don’t need any fancy oil painting cleaners to effectively clean any pesky dust that may have gathered on your artwork. Here is a useful home method that includes the use of everyday household items:
- Freshly baked bread
- A gentle toothbrush/paintbrush
Have a spare soft toothbrush or paintbrush laying around? These are considered the perfect brushes to gently brush down your artwork; use gentle strokes while doing so with a soft touch to avoid damage. The next step involves using a loaf of bread that is unsliced (yes, you read that correctly; bread has more uses than one!).

Grab the inside of the bread and gently dab it over the painting. Bread is especially useful in the absorption of unwanted reside. Next, use the same brush used earlier to softly remove any leftover pieces of bread on the artwork, especially around those hard-to-reach spots/grooves of your artwork.
Your painting should be as good as new thanks to this quick and easy method that only requires daily utensils that you likely already have laying around your home. Talk about efficiency!
Method Two: The Best Restoration Process to Remove Smoke
You may live in a house or have your artwork stored where smokers live, which can prove damaging to your oil paintings. Here’s an easy way to remove that smog look left from nicotine without costly oil painting cleaners:
- Freshly baked bread
- A bowl
- Vinegar
- Cotton balls
- Water
Your trusted bread dab method is the most suggested when it comes to removing smoke from the painting thanks to how effective it is. However, some smoke damage may require stronger means. In that case, other household items like vinegar will do the trick.

Mix vinegar with water in a bowl with a ratio of 1:3, and mix the concoction. Grab a cotton ball and dunk it into the bowl. Squeeze any excess juice out and proceed to gently rub the painting down, ensuring you only flow one way (either constant strokes down or up). Try to go with the brush strokes to avoid damaging the artwork.
Finish off the job by going over the painting one last time with a damp cotton ball, but using water instead this time. This final step cleans up any unwanted residue of leftover vinegar.
Method Three: The Best Restoration Process to Fix Water Damage
Although you may already be careful with your artwork, accidents still happen, with water damage being no exception. Here’s how you can try to fix that at home before turning to the professionals:
- A soft paintbrush
- A clean cloth
- A bowl
- Lemon juice
First things first, remove the oil painting itself from the frame, while still keeping the stretcher at the back attached to it. Leave the oil painting in a warm, breezy spot to dry out well, for a few hours at the least. Once done, grab your soft brush and gently brush off any potential debris or mold left from the water damage, this ensures an easier restoration process.

Finally, mix some lemon juice into a bowl and dip that clean cloth you’ve put aside into it. Use the cloth to gently blot water stains and remember NOT to rub it, as this can cause the paint to mix and run; proving disastrous for your painting. Wait for a few hours after this process (at least two) for the oil painting to fully dry before placing it back into its frame.
This should drastically improve a painting damaged by water, however, complete restoration by professionals is also advised.
Method Four: The Best Restoration Process for Old Oil Paintings
It’s important to always take care when restoring oil paintings, but older artworks require incredible attention to care when resorting. Generally speaking, it’s advised that more fragile oil paintings be maintained by a professional, but here’s what you can do at home in the meantime:
- A cotton cloth
- Q-tips
- Olive oil-based soap
- Water
- A bowl
The cleaning process for older paintings is similar to the above methods, except with a few key differences. First, you need to buy an olive oil-based soap as its base works best with the oil painting. Make a concoction of warm, soapy water. Place the cotton cloth into the water and remove some excess water. Remember to wear gloves to protect your painting from becoming grimy.

Gently dab the soapy water onto the painting, ensuring no rubbing is done, as that can cause damage to the artwork. You can use a Q-tip for any nooks and crannies that may need extra care, as this can get to the difficult spots with minimal risk of damage to the aged oil painting.
Otherwise, a trip to a trusted art restorer is a good idea if you’re concerned that you may damage a valuable, classic art piece.
DIY vs. Professional Assistance: When Should You Turn to the Pros?
There’s a reason why cleaning oil paintings is one of the most asked about and utilized services that restoration institutions such as The Smithsonian partake in. If you’re not confident about how to clean old oil painting with minimal risk of damage, or simply don’t have the time to carefully restore a painting, turning to professionals is always an option. Here are some instances when it may be best to turn to a reliable art restorer instead of going full DIY.

When You’re Not a Particularly Patient Person
Knowing how to clean oil painting and efficiently pulling it off are two different beasts altogether. Sure, you may have all the steps, but an important aspect to keep in mind is how heavy-handed you may be.
If you’re not impeccably gentle on the paintings at hand, you may cause more damage than what was initially there; making the restoration process that much more difficult.
If You Have Little Knowledge on Which Products to Specifically Avoid
The majority of the time, oil paintings are finished off with a varnish to specifically protect them from dust or any other damage. This varnish tends to turn a yellow hue over time though, and restoration through means of removing the varnish is effective in brightening your artwork.

However, if you don’t use the correct products to remove it, you can cause damage to the painting. There are a variety of solvents that can be used, and choosing the wrong one may prove disastrous for the oil painting. If you want to use something stronger than your everyday household items, such as a solvent, it’s advised you give your painting in for professional restoration.
If You’re Running Short on Time
Another factor? Time. It takes a significant amount of time and patience when restoring an oil painting, and we may not all have the gift of time on our side. If you’re always on the go and hoping the process is a quick and easy one, then we don’t suggest you try this at home. A rushed restoration job can prove to be not only a time-waster on your end, but it may even cost you more money than anticipated due to more thorough restoration being required.
Therefore, although you have effective tips on how to clean old oil painting efficiently, there are moments when using a more experienced individual is the safer choice.
What to Avoid When Restoring Oil Paintings on Canvas
As mentioned earlier, restoring your oil paintings can be risky business and you may cause more harm than good if you’re working on an especially older, more expensive work of art. Here’s what you should avoid at all costs when restoring artwork on your own:
- Not all solvents are created equal. Although you may think your standard oil painting cleaners work the same, there are various ones for different types of paint. Be extra sure that the one you’ve chosen is both safe and efficient to avoid damage or complications.
- You need to take careful consideration when it comes to which items you use to wipe down your paintings too. Don’t stray away from the suggested items, and especially avoid paper towels. Paper towels may break the pieces of paint off as you wipe them down, so steer clear!
- There are various art forms including murals that won’t display any negative side effects if they get wet, but oil paintings are an exception. You must keep your oil painting away from water at all times as any water damage may have disastrous effects. The painting can develop mold or warp on the canvas, which is difficult to fix.

- Sunlight is another factor that plays a major role in the demise of a painting. You may want to hang up your show-stopping art in a brightly lit room for all to see, but harsh sun rays are the worst thing for many types of paintings. The sunlight causes chemical reactions in the paint, which in turn, changes the colors and indues fading.
- There is no worse pet hate than somebody trying to touch your beloved art, we know. But the classic glass framing of art simply doesn’t work for oil paintings, as it does more harm than good. Oil paintings need to breathe, otherwise contracted air may cause damage to the paint.
- Although the commonly used way to store artwork is in a cool, dry place without sunlight, the best way to store the paintings within that area may vary from the type of paint is used. Some paintings can be stored in tissue, some may be best stored in cardboard boxes and some should be left to breathe. Be sure before you simply choose a method.
Storing Your Works of Art
The way you store your artwork is especially important since this determines how well your artwork is protected from the above-mentioned potentially detrimental scenarios. While we’re on the topic of storing art appropriately, now is the perfect time to discuss exactly how you should be storing your valuable works; from oil paintings to watercolor works and more.
These simple yet effective storage methods with help keep your painting quality high while keeping them looking as pristine as the first day they were created.
How to Store Oil Paintings
Oil paintings need to be stored appropriately, otherwise, the artwork will gather unsightly dust and may fade. This storage method will ensure your beloved oil paintings both old and new will be preserved for years to come! These are useful tips to know when you’re about to store your oil painting:
- Place your drying oil painting upon a drying rack to ensure a quick, effective drying process without any potential mess. The oil painting may take 18 to 24 hours to dry so avoid touching it until then.

- Before you place your beloved artworks away for storage, there is an extra step you can take to ensure longevity. Varnishing your oil painting is the first step to ensuring a long shelf life, so grab some from your local art supply store and let it dry the same way as before.
- Store your oil painting in moderate temperatures (ideally, a space with +-50% humidity and a temperature at a maximum of 70 Fahrenheit), away from any sunlight and moisture for maximum shelf life.
How to Store Watercolor Paintings
Keeping your watercolors placed flat with glassine placed in-between each painting is considered to be the safest way to store your works. If you’ve got a soft watercolor painting that you wish to preserve, here are some tips and tricks for longevity:
- Once you’ve finished your watercolor art, keep it facing horizontally, facing upward. Keep the piece flat and avoid rolling it up as it may cause damage. If the paper is rolled for an extended period, it may lose its elasticity and damage the picture as a whole.

- If you wish to wrap your art (which is advised, but not a must), you should choose to wrap it in tissue or glassine as opposed to a plastic sleeve. Plastic sleeves can muster up moisture and the condensation that results from that can damage the painting.
- Ensure that your watercolor painting is stored in a dark, cool, and dry place to avoid any aggressors like sunlight and any potential water damage. These factors are the biggest enemies of all kinds of paintings and should be avoided at all times.
How to Store Acrylic Paintings
Acrylic paintings also require some careful consideration of storage so that the paint doesn’t falter. This is considered the best way to store an acrylic painting:
- Your acrylic painting should ideally be varnished before being stored as it helps with preservation and keeping the art looking pristine. You can place various layers of varnish over if you wish, with the initial varnish coat taking 24 hours, and 3 to 6 hours between other coats.

- After you’ve completed your varnish process, you can wrap your acrylic paints in plastic so that you can easily avoid any dust, water, or other factors that may cause damage to the artwork.
- Ensure you store your acrylic paints away from any direct sunlight, as the harsh rays can turn the painting into an unsightly yellow hue or hinder the solid finish of the painting. The paintings can be stored in a cardboard box, with Styrofoam keeping various paintings in one box.
Through all of this valuable information, you can be confident in your next DIY restoration time and adequately store your prized art in ways that ensure the protection of any mishaps. These methods have been tried, tested, and are well-received by both amateur and more experienced painters, with rave results. Not to mention, these methods are cost-efficient and reliable, saving you money and a potentially unnecessary trip to an art restorer too!
Frequently Asked Questions
What Products Can I Use on My Oil and Acrylic Paintings to Ensure Longevity?
Varnish is the chosen product to use on both acrylic and oil paintings to protect the artworks from factors including harmful UV rays, dust, and the dreaded yellowing effect that comes with aging. The most well-loved type is the Damar finish, as this resin-based varnish seals your paint and adds a dazzling glossy finish to your work. By varnishing your artwork, you can help to keep the pieces looking freshly painted for longer, and varnish helps to protect from the natural aging process of paintings too.
Can I Clean the Back of a Painting?
Yes, it’s encouraged as the back of the painting may gather as much dust, mold, and other potential damage as the front end. Wiping the back of the canvas with a gentle cloth for the dust is a great way to get rid of pesky dust, but there are other effective ways to give it a deeper clean. Using the above methods of soapy water with olive oil-based soap is ideal to get rid of any unwanted build-up.
How Frequently Should I Clean My Oil Paintings?
There is no set amount of time you should wait between maintaining your paintings, as it may vary in different scenarios. Some factors that may determine how often you should clean your oil painting include how exposed your art is to potentially-damaging natural elements, how long you’ve had the painting, and if there has been any recent damage done to the painting. In short, if your painting is looking a bit dull, it’s probably the perfect time for a good clean.
Is It Expensive to Professionally Restore a Painting?
This is a difficult question to give a clear-cut answer to, as what one considers to be expensive may change depending on the individual. However, it can become costly if the painting is a sizeable piece. There is a minimum charge that restoration organizations charge, and the price increases by each square inch. So, if you have a bigger painting you want to be cleaned that doesn’t need professional restoration, it’s advised you first attempt the DIY route if you have the necessary tools and a gentle, steady hand.

In 2005, Charlene completed her Wellness Diplomas in Therapeutic Aromatherapy and Reflexology from the International School of Reflexology and Meridian Therapy. She worked for a company offering corporate wellness programs for a couple of years, before opening up her own therapy practice. It was in 2015 that a friend, who was a digital marketer, asked her to join her company as a content creator, and this is where she found her excitement for writing.
Since joining the content writing world, she has gained a lot of experience over the years writing on a diverse selection of topics, from beauty, health, wellness, travel, and more. Due to various circumstances, she had to close her therapy practice and is now a full-time freelance writer. Being a creative person, she could not pass up the opportunity to contribute to the Art in Context team, where is was in her element, writing about a variety of art and craft topics. Contributing articles for over three years now, her knowledge in this area has grown, and she has gotten to explore her creativity and improve her research and writing skills.
Charlene Lewis has been working for artincontext.org since the relaunch in 2020. She is an experienced writer and mainly focuses on the topics of color theory, painting and drawing.
Learn more about Charlene Lewis and the Art in Context Team.