


Pyrography – A Deep Dive Exploration of the Art of Wood Burning
Perhaps the word pyrography piqued your interest, and you would like to know what it is all about? A word that is described as “writing with fire” seems different, yet intriguing. As with all creative styles, pyrography is the ability to transform something plain into a beautiful piece of art. The whole process can be lots of fun, and you can also put a lot of meaning into it. So, what is pyrography? Let us now delve further into this question and find out everything you need to know about wood-burning art.
What Is Pyrography?
Pyrography is essentially burning designs into certain materials like wood, using some kind of heated instrument. In other words, you are creating decorative burn marks. Today, this is done mostly by using specialized burning or pyrography tools. However, there are other methods some people still use.

The simplest method is a metal implement that is heated in the fire or concentrating the sun using a magnifying glass. Some other methods of creating the same effect can also include the following.
- Chemicals to burn the wood
- Gunpowder
- High voltage electricity
- Torches
Some like to explore the various avenues available, but for beginners, we think a simple pyrography set would be best. Pyrography is more of a general term and there are some differences between pyrography art and wood burning art. The art of wood-burning is merely one form of pyrography and is only done on specific types of wood, however, there are a few other surfaces you can use.
- Leather
- Cork
- Gourds
- Paper
- Bone
- Cotton fabric
- Ivory
- Clay
If you are wondering, a gourd is a type of plant, usually from the family Cucurbitaceae, which can include pumpkins. Once dry, the hard skin of the gourd can become an artist’s canvas when using pyrography. Besides wood, leather is the second most common surface to burn. Lower heat settings can be used for leather as it is much softer than wood. You should make sure you get vegetable tanned leather, as other leather products can contain chemicals that become toxic if burned.
Lighter color leathers are also better options as the contrast created from burning into the leather is better.
Types of Pyrography Equipment
Besides using a simple heated implement, today there are specialized pyrography tools you can use to work with. You can either get a simple pyrography pen or an entire wood burning set that is all you need to begin pyrography art. Some of the basic options include the following.

Solid Wood Burning Tips
These can also be known as solid tips and are almost the same as your soldering iron and are made from a solid brass nib. This can then be heated; however, you can only get one heat setting. These heat up slower but tend to hold their heat well and are not as finicky as some other options. They also take longer to cool down, which might be a problem for those who want to work faster.
They are perfect for beginners who want to learn a few basic techniques but are not the best option for applying finer details.
Wire-Nib Pyrography Tools
Wire nibs are quite popular, as they do have a variable heat setting so you can change the temperature. The wire-nib is heated by an electric current, which you can then use as a wood burner tool. Many of the options available also provide different types of nibs, which create various effects. This option is more for the advanced user who wished to apply finer details. These types of pyrography tools also heat up and cool down faster and are also lighter in weight.

Laser Cutter Machines
This is a more expensive method and uses lasers to burn the material and will not go all the way through. This is a more modern way of doing things as you can import pictures and set the machine to do the work for you. So, there is no real skill needed when using a laser cutter.
However, if you are running a business and want to produce lots of products, this is the way to go.
The History of Pyrography
Where did pyrography begin? Well, it can be traced back to ancient times in places like Egypt and certain places in Africa, where designs were created by using the charred remains of fires or burning sticks. Even in China as far back as the Han Dynasty, the process was used and known as “Fire Needle Embroidery.” Later, in the Victorian era it became known as “pokerwork”, which was then later renamed as pyrography.
During this time, various sizes, or shapes of metal “poker sticks” were placed in charcoal stoves. The metal was then heated and used for wood-burning. This method was difficult to control as you needed to let it cool a little before using it. In many European countries like Poland and Romania as well as countries like Argentina, pyrography has been a traditional folk art.

During the early 20th century, an Architect from Melbourne created the first “pyrography pen” that used benzoline flames, which then applied hot paint to the wood surface. This meant that various tints and shades could be used on an art piece. A little later, the creation of burners similar to soldering irons was developed.
Then, electricity was introduced, and the wood burner tools being produced started to have built-in heat controls.
Today, the wire nib wood burning tool is the most common burner used, which can control the heat produced and often comes with different types of nibs for various effects. The modern wood-burning pen has made it so much easier and more fun to create some incredible forms of detailed art. Some well-known pyrography artworks and artists include:
- Brunhilde Asleep (1902) by Margaret Fernie Eaton
- Turkish Bath (1997) by Selahattin Ölçeroğlu
- Madonnas of the Rose (1998) by Robert McGehee
- Last Supper, central detail (1999) by Dumitru “Dino” Muradian
What Must You Have to Start Pyrography?
You do not need many tools or materials to do pyrography. You first have to decode on what surface you want to create your art. Both burning onto leather and art of wood-burning are popular choices. Then you need your wood burner tool or pen, which you can get separately. It might be a good idea to get yourself a pyrography kit, which has everything you need to start. Before you begin, it is necessary to understand what to look for. We already mentioned that leather and wood are great surfaces, but what types of wood are best and what other factors should you consider?

What Is the Best Wood for Pyrography?
The type of wood is important, as you cannot just use any wood. Some woods are easier to source than others, while costs also play a role in your choice. The wood you choose should have the correct texture as well as grain. You are looking for a wood surface that has tight pores and a smooth surface area.
Any uneven surface will make it difficult to draw or burn straight lines.
All these types of wood differ in grain, texture, color, and other characteristics. You either have your softwood or hardwood options. Softwoods can be used and do not require much heat to burn, for example, pine. Woods like oak or walnut can be a bit hard and grainy, which will affect the quality of the artwork. You can read more in our separate article about the best wood for woodburning.

If you do choose these types of wood, a wire-nib burner would work best as you can control the temperature better. Lighter-colored hardwoods are also good to use for wood-burning, for example, poplar, beech, or sycamore. When creating wood-burning art, the idea is to enrich the look of the wood. So, try to work in and not hide any color, or marks on the wood. Some more wood examples you may want to try put include:
- Willow
- Aspen
- Basswood
- Maple
- Bamboo
Temperature Control and Power
The wattage or power of a wood-burning tool is connected to how hot the tool can get. The best power rating is around 60 watts for a wood-burning pen. However, for beginners, a 30-watt tool can also do the job. The more wattage you have, the higher the temperature can go. Some wood-burning tools can reach up to 900 degrees Fahrenheit (482 degrees Celsius).
However, you do not need to reach this temperature for all items to produce a quality burn.
A wood burner tool that has adjustable temperature controls can produce just the right temperature for your project. Hardwoods, in particular, require higher temperatures for a quality burn. Softer woods, as well as materials like leather, need lower settings. As mentioned, the solid tip wood-burning tools take longer to heat up and cool down. The wire-nib options are better for speed as well as convenience.
Wood Burning Tips or Nibs
Each type of wood-burning tool can have various nibs that produce different types of results. Having an assortment of these different nibs can come in handy and you can swap them out on both types of tools. You have your general-purpose nibs that can be used for shading, outlining, lettering, and maybe a little detailing.

Other nibs provide smoother outlines and move across the surface easier. Other nibs are for calligraphy purposes. There is a variety of nibs available, so you will need to check the pyrography kit to see what is available and best suits your needs.
Comfort and Accessories
You want a wood-burning tool that is comfortable to hold and easy to handle. Larger tools with rubber padding may provide a better grip. On the other hand, a thinner and lighter tool can help you work for longer and is best for applying those finer details. Pyrography kits are great for beginners, as they contain most of what you need.
For example, your general tips and nibs, a tool stand, pliers, stencils, and even book guides.
The Best Pyrography Kit
Now that you have learned a little about pyrography and wood-burning, we can get to a few product recommendations. Below is a book you might want to consider reading to help you with starting your new hobby and a pen set that is great for beginners.

Recommended Pyrography Book: LEARN TO BURN by Simon Easton
This is a new skill, and it will take time to learn all the techniques, so going to a workshop or purchasing a book can help. Our book recommendation is Learn to Burn by Simon Easton, which gives you a step-by-step to getting started with pyrography. The book also contains clear how-to photos as well as over 40 patterns you can use. We also recommend one of the best pyrography kits below.
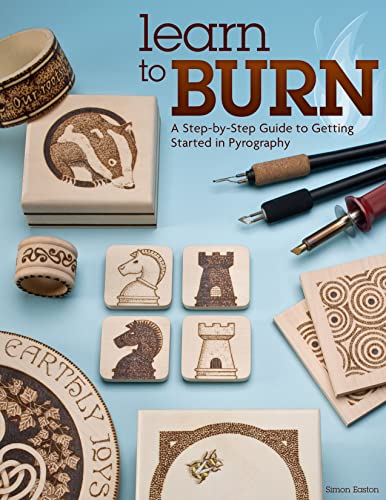
- Includes 14 unique step-by-step projects for all skill levels
- Introduces basic concepts for beginners with illustrated exercises
- Learn expert techniques for texture, letters, shading, and finishing
Best Overall Pyrography Kit: TRUART Pyrography Pen Set
The TRUArt Pyrography Pen Set comes with a 30-watt pyrography pen with a solid tip. The set also comes with a steel number and letter stencil, a tool stand, 21 interchangeable nibs, and a complete user manual. The tool has a 15 watt and 30-watt temperature setting and is lightweight for easy use.
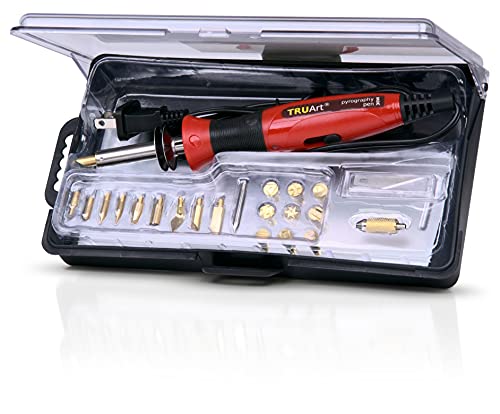
- The superior-quality pen has a stainless steel barrel to resist heat
- Comes with 21 interchangeable tips for versatile mark-making
- Includes a user manual to provide instructions for the pen
The 15-watt setting is perfect for leather burning. The pen also has a rubber handle for better grip, and you should be able to work for extended hours without getting tired. There is also a pen replacement guarantee on the product if the tip happens to break. Everything is kept in a plastic case, to keep all the tools and accessories safe.
- Comes with 35 different nibs
- Comfortable grip
- Easy to operate with two heat settings
- Can be used on both wood and leather
- Heats up quickly
- Great for beginners
- The cord might be too short
- The tips or nibs do not fasten on securely enough
- Only two heat settings
How to Start Pyrography Art
Once you have chosen your pyrography set, it is time to practice your skills on a scrap piece of wood. Wood-burning art can be relaxing, but it also requires practice and some patience to get all the techniques right.

Let us start with a few key items you will need to begin.
- Pyrography set
- Wood or leather
- Sandpaper
- Painter’s tape
- Graphite paper and eraser
- Ruler
- Olive or mineral oil
Transferring Your Design
Many of the wood burner sets come with stencils you can use to apply various designs. You can also simply go freehand and design your own image. The third option is to transfer your own image onto the wood surface. Print your chosen image out, you can use simple white printing paper for this. You will be using graphite paper next. Position the graphite paper onto your wood surface and cover it with the printed paper that has your design. Take a pencil and firmly press down and trace the design. This transfers an outline onto your wood surface.
You can then use your wood-burning tool to create your picture. Any left-over graphite can be erased from the wood.
How to Use a Wood Burning Pen
As mentioned, it will take time and practice to get good at this. However, you can follow some simple steps to start with. First, read the directions that are with the pyrography set. You can then choose and screw on your chosen tip or nib as instructed. Plugin the pyrography pen and let it heat up.
Once the burning pen is hot enough, you can then start burning your image into the wood. When attempting even lines, try to keep even pressure as you go. Applying too much pressure can damage the nib, instead hold the nib in place for a short time, to create darker shading. Once done, lift the pen off to avoid any excessive scorch marks.

When you want to change a nib, you should make sure your tool is unplugged and has cooled down. Fingers can easily be burnt if you do not pay attention. Store the nibs in a carry case to help prevent any damage. If you want to try and take the nibs off while they are still warm, you can try using pliers but be gentle. You can gently lean the nib with some fine sandpaper, making sure to wear gloves. Any wood deposits remaining on the nib can begin to make it dull, so wipe with a clean rag.
You can also apply a little color by using various options like crayons, gel paints, wood stains, wood paints, chalk, food dyes, pastels, or wax oil pencils. If you need to, once done, you can sand any rough parts. Then wipe off with your clean cloth.
You can then apply some of your mineral oil, or you can use another sealant like lacquer or shellac.
Some Easy Beginner Strokes and Designs
Facing a black wood surface, even if it has a design on it, can seem a bit daunting. How do you burn in the design? Going on a workshop, looking at some YouTube tutorials, or purchasing a good book can help. Here are a few very basic ideas.
- You can use the tip of the pen to create a mass of dots, which can also be used as a shading effect or to add texture. The amount of time you hold the pen on the surface will be what affects the size and color of your dot.
- Use the tip and apply light and even pressure to create thin outlines on your design.
- Try using simple swirls or zig-zag lines in various designs.
- As with drawing, you can use cross-hatching, which is great for shading. You can do this by applying different length parallel lines.
- To cover a larger space, there should be a larger nib for this purpose.

- Within a kit, there can be a calligraphy tip that should be able to provide narrow and wide lines. These are great for text and word designs.
- To create finer lines, a fine nib is necessary to get results. Applying short and fine lines can produce effects that resemble hair, which is great for a portrait or animal design.
- When using the pyrography tool, work with the grain. When using the tool against the grain, it can create some resistance, which makes the whole process a little more difficult.
- Instead of jumping into a picture, even if it is freehand, rather draw in an outline and then add in the details.
Safety Guidelines When Using a Pyrography Tool
Since you are going to be dealing with something that gets quite hot, there are some safety guidelines you need to follow to avoid any mishaps. If you are using wood as your canvas, then you might need to sand it, which means you need to wear a mask or sand outside. Some woods can also exude a sap, which can turn into toxic fumes if burned. So, wearing a dust mask or respirator is needed.
Also, pressure-treated wood should not be burned, as it has been in contact with chemicals and might be safe for construction, but if you are going to be burning into the surface, it will become hazardous.
This also goes for all kinds of treated or prepared wood, whether it is chemically treated sealed, or finished in any way. This includes medium-density board or plywood. You will need to sand the treated wood thoroughly to remove the finish if you want to use it. You should be burning into bare, natural wood only or things like gourds and leather. Some woods may also contain mold, that when burned, can also become toxic. So, always be careful of the material you burn, whether it is wood or another material.

Since there is going to be heat and smoke generated, you should work in a room that has enough ventilation or a fan going to get in some fresh air. You need to be careful with handling your wood-burning pen, as you can burn yourself.
A Few Wood Burning Ideas
There are many wood-burning ideas that you can use to make gifts with or begin your own business. The most common, obviously being your wood items and these can include things like jewelry and kitchen supplies. Many of the craft stores also provide wooden bases, boxes, frames, and more. Below are a few more ideas:
- Wooden spoons
- Shaped wooden earrings or pendants
- Wooden clocks
- Jewelry or keepsake boxes
- Wooden guitar
- Kitchen cutting boards or serving trays
- Wooden clothing hangers
- Coasters
- Christmas decorations

- Rolling pins
- Customize a wooden handle for a hammer
- Create a funky skateboard
- Wooden bowls
- Panels for your light switch
- Garden stick labels
- Wooden containers
- Nameplates
- Wall art
Wood Burning Tips and Tricks
Woodburning art can be so much fun, but it does take some practice, which is one of the first tips. Take some scrap pieces of wood and practice the various techniques, test out the correct pressure needed to make quality burns, and get comfortable with how the pyrography pen feels. Here are some more recommendations.
- Use softwoods, to begin with. For example, pine, cedar, and aspen are easy to burn on.
- Burning into wood is slower than when writing normally with a pen on paper, so try not to work too quickly as this could produce light and uneven lines.
- To achieve the outcome you want, you must have patience.
- The right tools will always help to make learning easier, so make sure to get a good quality pyrography kit.
- You can also get accessories like wood-burning letter nibs, so you do not have to write letters freehand. Also, try using stencil designs to make things a little easier.
- Do not try the most difficult design first, start simple and get comfortable with the whole process. Take a single nib and work with it until you feel you have made progress and then move on to the next one.

- You are working with very hot equipment, so follow all safety guidelines. Make sure to keep the tools away from children and pets and be careful around the hot tips. Keep everything away from the heated tips, including anything that may hang, like a necklace or your hair! Do not leave the tool on and walk away to do something else, always switch it off if you are not using it.
- A tool stand is a necessary item in your wood-burning kit. The stand is a safe place to put your pyrography pen, otherwise, it could burn the surface you lay it down on.
- Use flat-nose pliers to add on and take off a wood-burning nib or tip.
- Keep a bowl of cool water nearby. Once you have finished using the nib, place it in the water to cool off. Wipe dry before using it again.
- The surface you choose to work on must be even and stable, you do not want the hot tool falling onto your new carpet.
- Always check the wood you are working on; you do not want any toxic fumes from treated wood.
You will be creating amazing wood burnt images with a little patience, practice, and determination. This is a wonderful and unique hobby for those who love to create things and another way for artists to express themselves.
Read also our wood burning art web story.
Frequently Asked Questions
Is There a Difference Between Wood Burning and Pyrography?
There is a slight difference, pyrography is the art form of burning designs into various materials like wood, leather, cork, paper, or gourds. So, it can be used as more of a general term, while wood-burning is more specific and is only done on wood.
Is Plywood Good For Wood Burning Art?
We would say no. You can use plywood for pyrography art, but the design will fade, and it will release toxic fumes when you burn the surface. There are many other better and safer choices for you to choose from.
What Wood Is Best For Pyrography?
The best wood to use for pyrography is smooth and preferably light in color. Softwoods tend to burn easier, but you can also use certain hardwoods. Some examples of wood include pine, aspen, beech, maple, amongst others.
Must You Wear a Mask When Wood-Burning?
Yes, it is always recommended you wear a mask when doing pyrography. This is needed if you suffer from problems with your lungs. There is an amount of smoke that is emitted, and if you are using certain treated woods, they will give off toxic fumes. You should also work where there is enough air circulating.

In 2005, Charlene completed her Wellness Diplomas in Therapeutic Aromatherapy and Reflexology from the International School of Reflexology and Meridian Therapy. She worked for a company offering corporate wellness programs for a couple of years, before opening up her own therapy practice. It was in 2015 that a friend, who was a digital marketer, asked her to join her company as a content creator, and this is where she found her excitement for writing.
Since joining the content writing world, she has gained a lot of experience over the years writing on a diverse selection of topics, from beauty, health, wellness, travel, and more. Due to various circumstances, she had to close her therapy practice and is now a full-time freelance writer. Being a creative person, she could not pass up the opportunity to contribute to the Art in Context team, where is was in her element, writing about a variety of art and craft topics. Contributing articles for over three years now, her knowledge in this area has grown, and she has gotten to explore her creativity and improve her research and writing skills.
Charlene Lewis has been working for artincontext.org since the relaunch in 2020. She is an experienced writer and mainly focuses on the topics of color theory, painting and drawing.
Learn more about Charlene Lewis and the Art in Context Team.
Cite this Article
Charlene, Lewis, “Pyrography – A Deep Dive Exploration of the Art of Wood Burning.” Art in Context. February 4, 2022. URL: https://artincontext.org/pyrography/
Lewis, C. (2022, 4 February). Pyrography – A Deep Dive Exploration of the Art of Wood Burning. Art in Context. https://artincontext.org/pyrography/
Lewis, Charlene. “Pyrography – A Deep Dive Exploration of the Art of Wood Burning.” Art in Context, February 4, 2022. https://artincontext.org/pyrography/.


