How to Paint Watercolor Sunflowers – Easy Tutorial
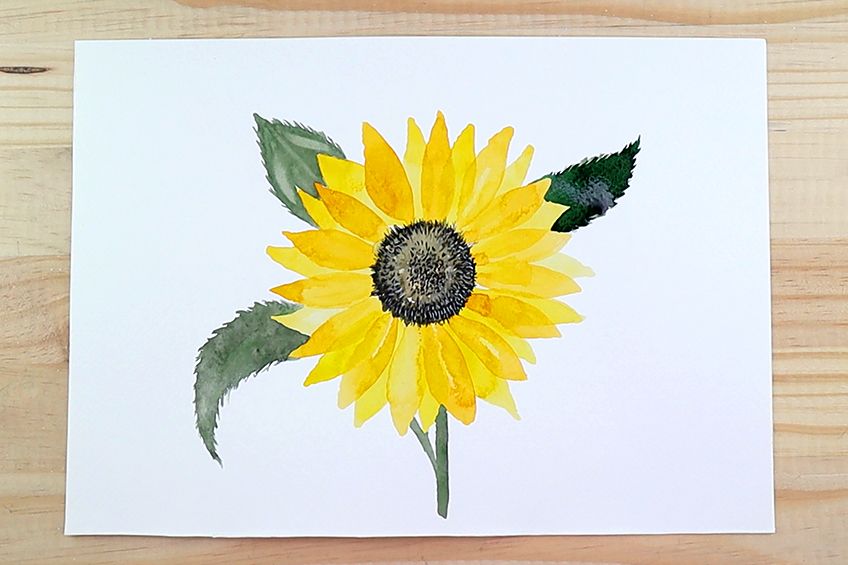
Learning how to paint a sunflower in watercolor is a very fun and easy task. Watercolor sunflowers are a great painting exercise because of their simple structure. Sunflowers are a beautiful vibrant feature that can be added to various types of landscapes or they can be painted as a single subject on a page. Either way, this flower is a great exercise for practicing your watercolor skills whilst simultaneously learning how to paint a beautiful flower that can be used in a variety of ways for future paintings.
Table of Contents
- 1 Step-by-Step Instructions on How to Paint a Sunflower with Watercolor
- 1.1 Step 1: Making the Pistil of the Flower
- 1.2 Step 2: Painting the First Layer of Petals
- 1.3 Step 3: Painting the Second Layer of Petals
- 1.4 Step 4: Painting the First Layer of the Pistil
- 1.5 Step 5: Painting the Second Layer of the Pistil
- 1.6 Step 6: Painting the Last Layer of the Pistil
- 1.7 Step 7: Painting the Leaves of the Sunflower
- 1.8 Step 8: Painting the Stem of the Sunflower
- 2 Tips to Remember
- 3 Frequently Asked Questions
Video for this Sunflower Painting Tutorial
Preparation
We want to make sure that we have all our materials ready and in place. We want to make sure that we place ourselves in an environment where we feel relaxed and can focus on the tutorial. It is always a great idea to listen to some music whilst painting so maybe plug in your earphones whilst you go through this tutorial.
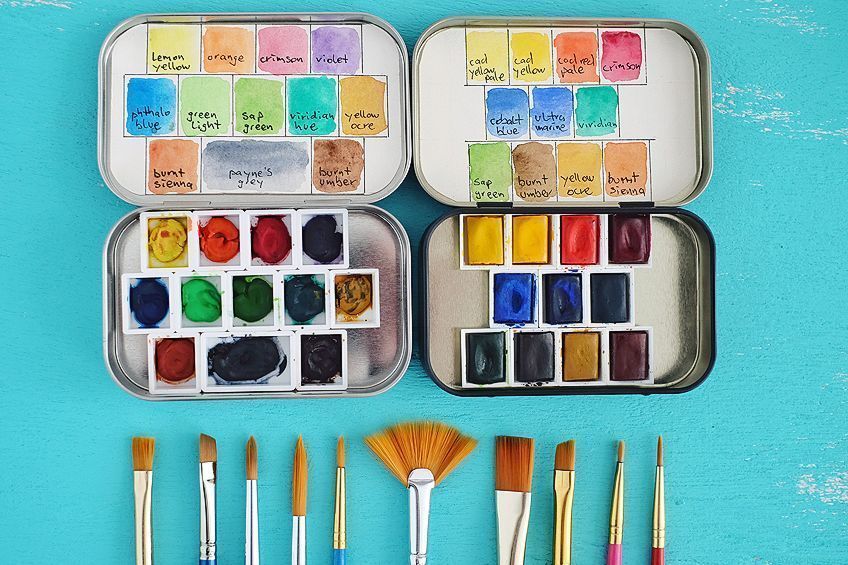
Lastly, make sure you have your paper placed on a flat surface with some water in one or two jars for rinsing your brushes.
Step-by-Step Instructions on How to Paint a Sunflower with Watercolor
The process of learning how to paint watercolor sunflowers is quite simple. We start by creating a bud for the center of the flower which we will use to guide our painting process for the petals. We will then paint the petals in their lightest colors which we will then allow to dry completely. We then follow that by painting new petals in the gaps of our first petals which will create a multilayered quality for our petals. We then will paint the darkest part of the flower, which is the bud of the flower and lastly, we then will paint the leaves and stem of the flower. That’s it! With that said, let us begin.
Step 1: Making the Pistil of the Flower
Making the center part of the flower, otherwise known as a pistol, is a simple task. We want to get something round like glass or anything circular to use as a stencil. We will then proceed to use it as a stencil whereby we will draw a circle around with a pencil.
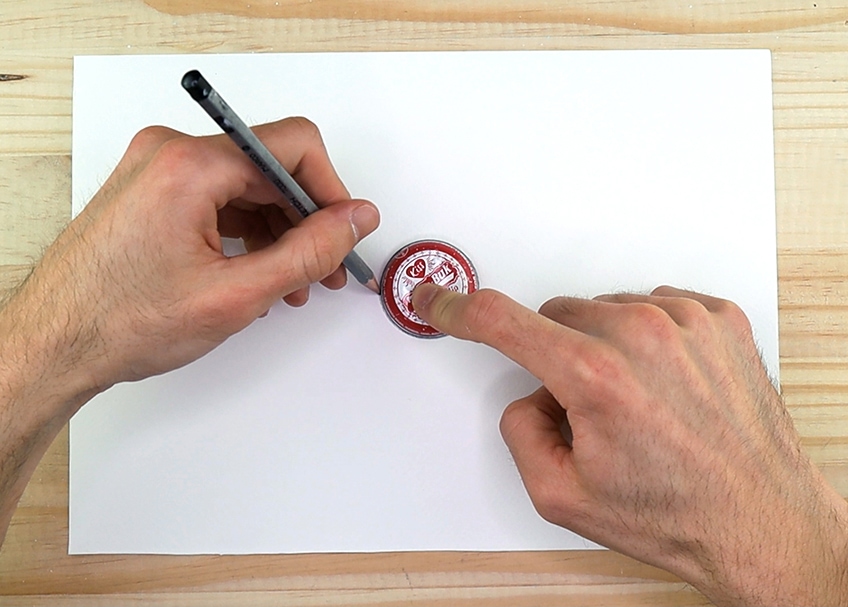
We want to make sure we have a perfect circle because flower pistils are generally perfectly circular. This helps to keep the quality of the flower as realistically proportioned as possible.
Step 2: Painting the First Layer of Petals
As we proceed to paint the first layer of petals we want to make sure we have a light wash of yellow paint prepared. Painting the petals of a sunflower generally looks like a surfboard shape. This means the petals are thinner near their tips and slightly wider in their center.

As you paint each of these petals, a good suggestion is to start from the pistil. Start with a light-handed stroke which you then press down harder as you paint the center part of the petal and then lighten your hand again as you come to the tip of the stroke. The motion is light-handed. Then, add some pressure to the brush followed by a light-handed stroke toward the tip of the petal.

Another good suggestion is to use a round brush, which is a brush with a thick body and a pointed tip. This brush works well for making petal-like strokes due to the shape of the brush.
As you paint these petals, try to keep them similar in length for an equal proportion between the petals and the pistils.
Step 3: Painting the Second Layer of Petals
Once you have allowed the first layer of petals to completely dry, you can then proceed to paint the second layer of petals. What we want to do is slightly darken our paint mix with a hint of orange. As these petals dry they will also lighten in color. As we paint the next layer of petals try to paint them in between the first layer of petals.
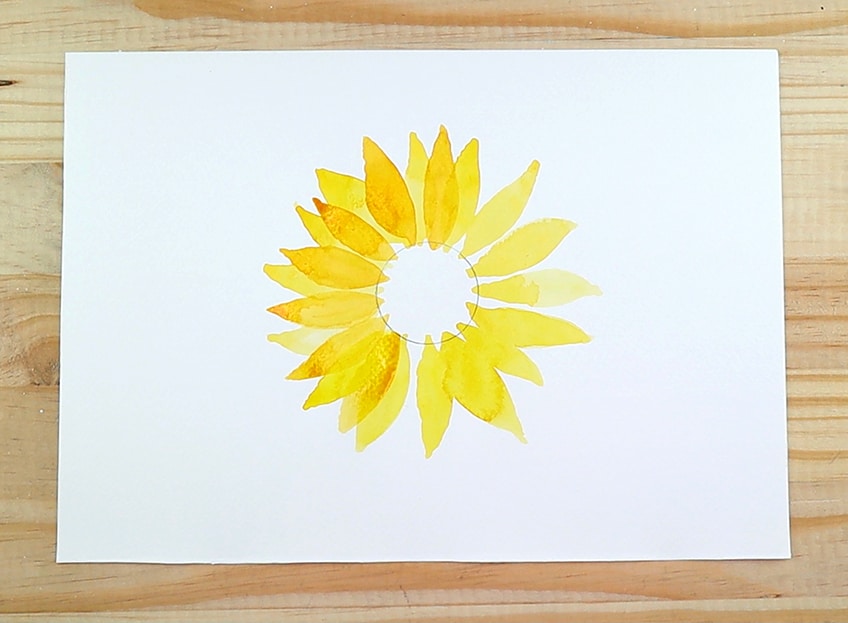
As you paint the petals around your flower be conscious of your hand smudging your marks. Do not worry about your petals merging as this is a normal part of the medium whereby the water can merge painted marks in some cases. This quality is unique to watercolor and makes interesting and beautiful qualities in the painting.
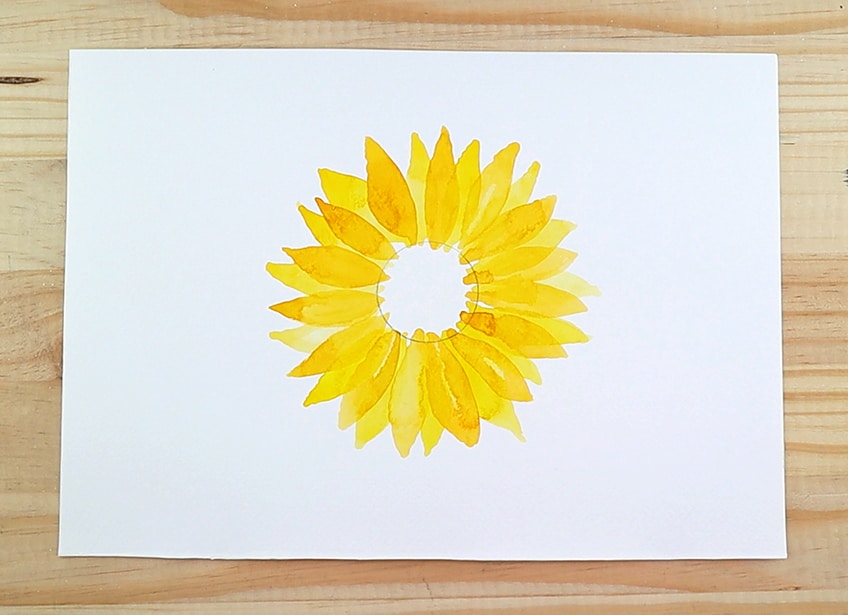
Make sure that you keep the tips of either end of the petals pointed and the body of the petals thick, similar to a surfboard shape. Another good tip is to paint the second layer of petals in between your first layer of petals.
Again, we want to make sure that the length of our petals is evenly sized so that there is a well-proportioned array of petals around the pistil. However, do not worry too much about making them perfect as some petals can often be slightly longer than others.
Step 4: Painting the First Layer of the Pistil
Once our petals are completely dry we can proceed to paint the pistil. We begin by giving the pistil a thin coating of water with our brush. The aim here is to paint water onto the pistil, following the circular shape of the pistil to guide the application of water.
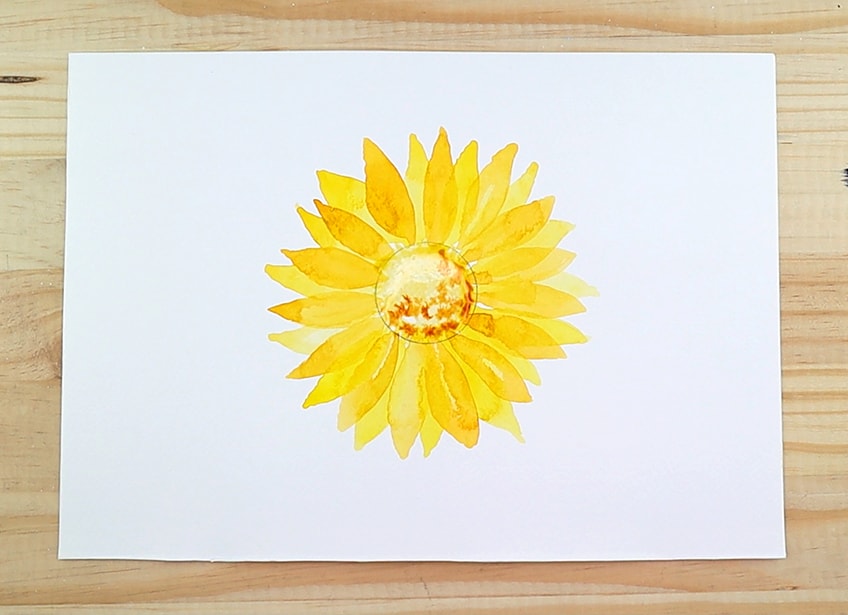
Whilst your pistil is still wet, begin to apply a few dabs of brown paint with your brush. We want to have a light brown mix of brown, which we will use to add some dots on the wet pistil. While the pistil is still wet we will proceed to add some black paint into the wet pistil as well. We want the brown and the black paint to merge, which will create a nice quality in the pistil once it has dried. This will give the pistil some depth and definition, as opposed to being a singular flat color.
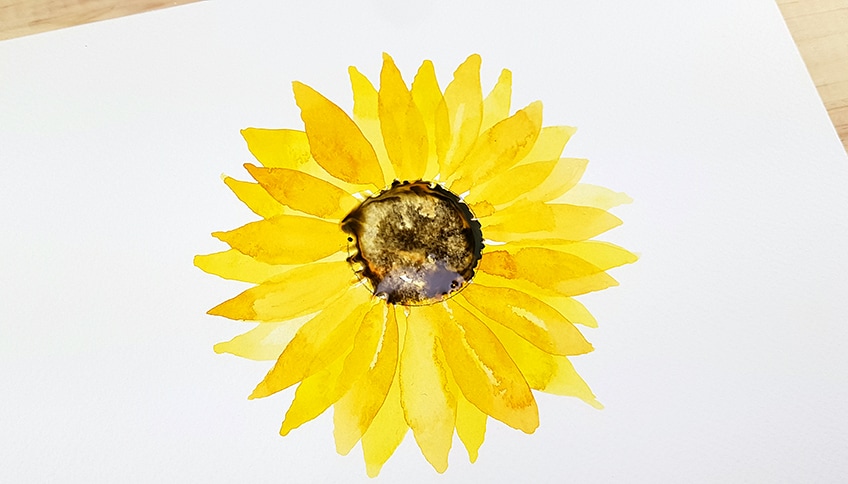
While the paint on the pistil is still wet, we now want to take some toilet paper or paper towels and twist it into a pointed tip. With that pointed tip, we will proceed to make little dabbing actions onto the wet paint in the pistil to create some negative dots. Again, this is to just add some texture to the pistil so that it does not seem flat.
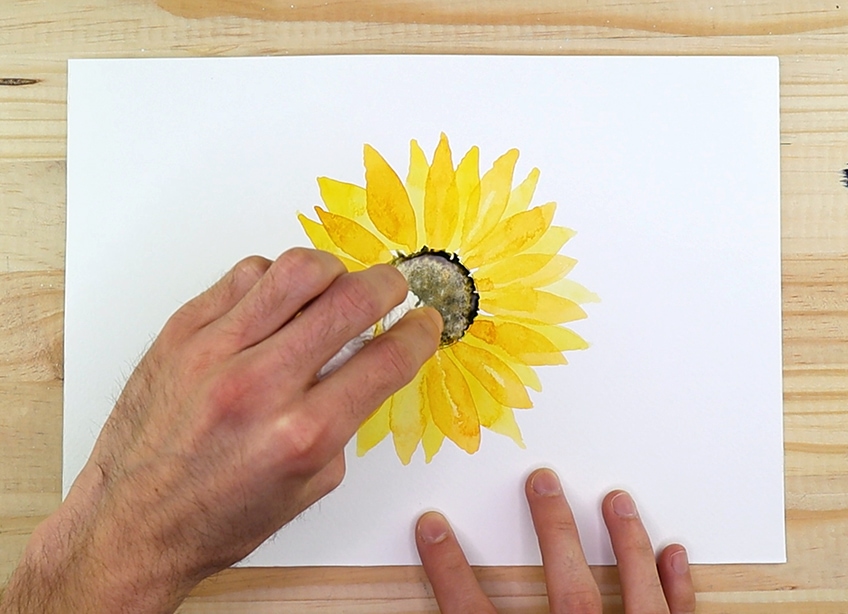
Step 5: Painting the Second Layer of the Pistil
We can now begin to add some more details to the pistil, we do this by creating little lines around the edges of the pistil. Take a small-tipped watercolor brush and begin to paint black strokes around the edges of the pistil. These strokes should look like little black lines that move outwardly from the pistil into the gaps near the base of the petals.
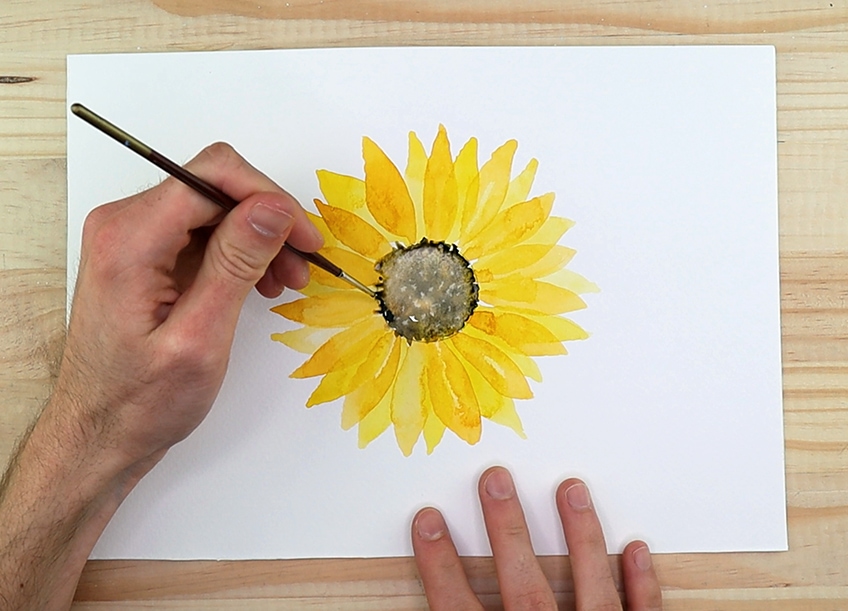
Make these little strokes around the pistil until you have completely gone around the whole pistil. These little strokes allow the pistil to seem as if it is connected to the petals. Once the black paint around the pistil has completely dried we can add on some more details. The center of a sunflower has a combination of tiny blossoms that often provide nutrition for various insects, most specifically bees. This center part, or pistil, can be represented by painting a variety of little lines around the rim of the pistil and dots on the center.
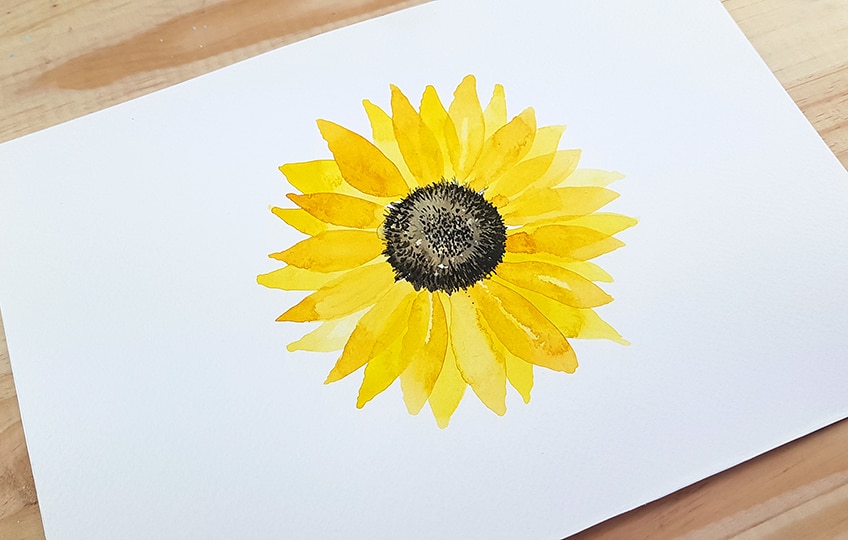
What you want to do is use a smaller and thinner brush, and then use some black paint to make strokes of lines around the rim of the pistil. These lines should be following the shape of the pistil as they circulate around the center.
Keep some space between a grouping of dots in the center of the pistil and these lines around the rim.
Step 6: Painting the Last Layer of the Pistil
Once the little lines and dots have completely dried we can add the last little details onto the pistil. The pistil of a sunflower can have a variety of looks depending on what kind of sunflower you want to paint. However, they often can be depicted by a series of little lines and dots. Here we will add the last details on the pistil with some white paint.
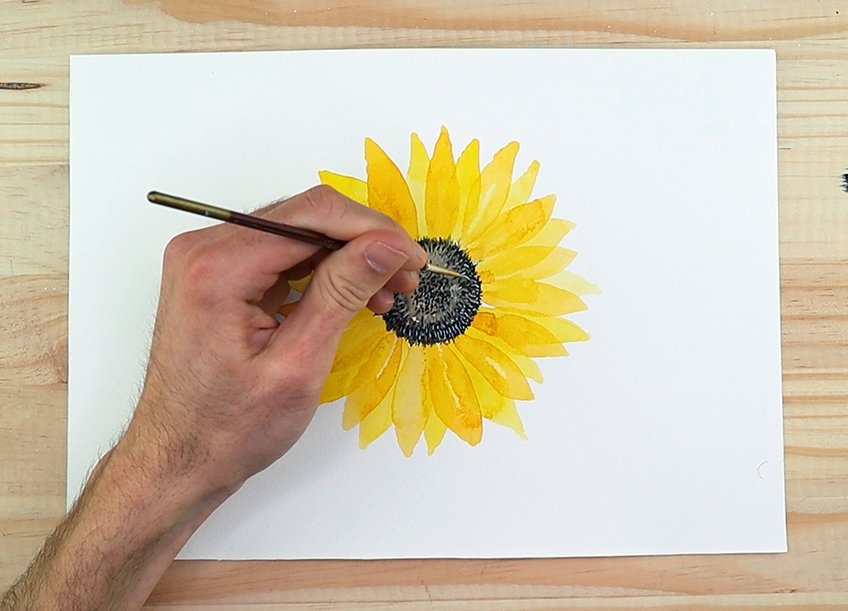
We do this by using a thin brush that allows us to paint fine lines. What we want to do is, again, with our white paint this time begin to add a variety of lines in the pistil that follows the circular shape of the pistil. A good suggestion is to make these marks more prominent or larger in the amount on one side of the pistil. This can help to create a sense of depth, giving the pistil more dimension.
Another good tip is to not do too many marks, we do not want to overwhelm the pistil with these marks so that all the layers painted can be present.
Step 7: Painting the Leaves of the Sunflower
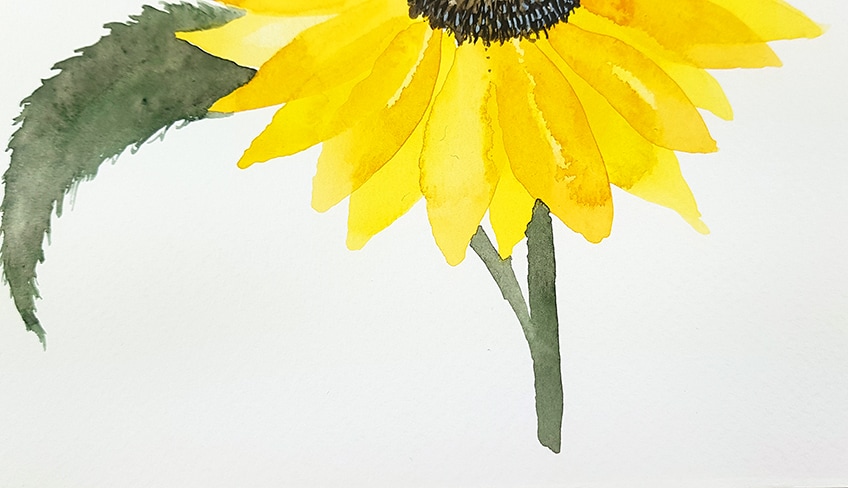
Painting the stem and leaves of a sunflower is quite simple. We begin by making a mix of green and brown paint. We want our green leaves to have an earthy quality that the brow paint enables. Once we have our mix of paint, let us begin to paint outwardly from the tips of our petals. The shape of the leaves can vary as this is the case most often with sunflower leaves. Let us create a lease that seems to be folding over by painting a triangular shape that is curved downward. This gives the quality of movement in the leaves.
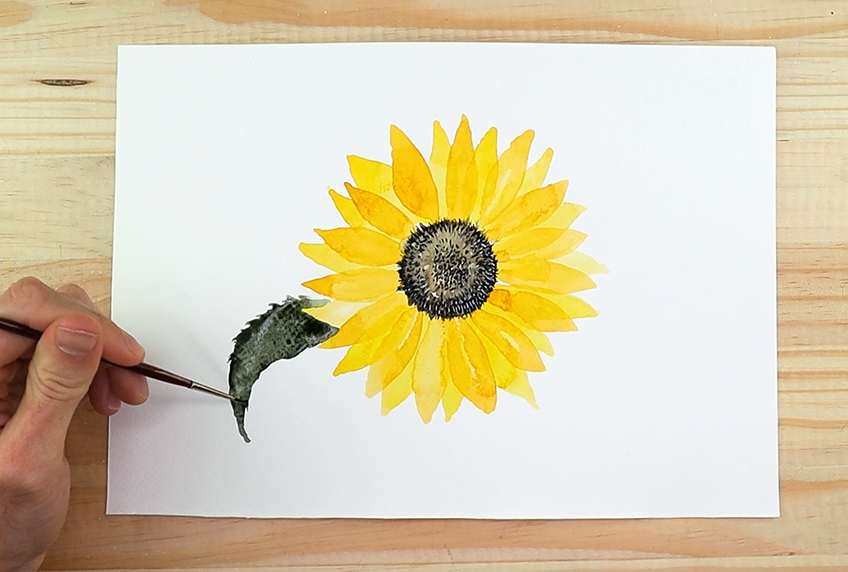
Once we have the shape of the leaf we can act fast whilst the leaf is still wet, by making little strokes with a thin brush along the edges of the leaf. What we want to do is pull the wet green paint with the brush, creating little sharp points around the edges of the leaf. This gives the leaf a more realistic quality.
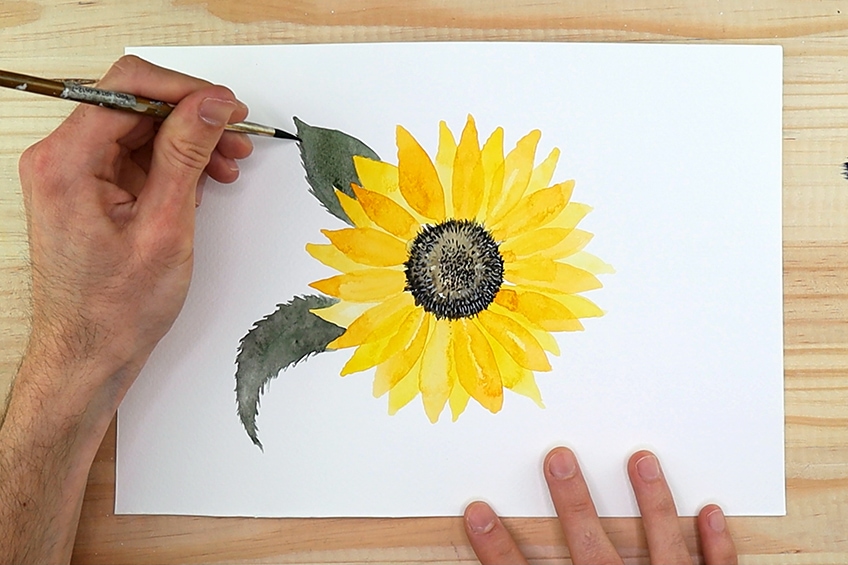
Not all leaves are seen from the same angle which is why for the next leaf we can change the shape a bit. All of these leaves should be painted as sitting behind the flower. We can begin to paint a more spearheaded shape leaf behind the flower. Be careful when painting near the petals so that you don’t mess up the yellow paint. As you paint this flower with your green paint, you can also give it some definition and texture by making a stroke onto the leaf with a dry brush. This will lift the paint and give the leaf a unique texture.
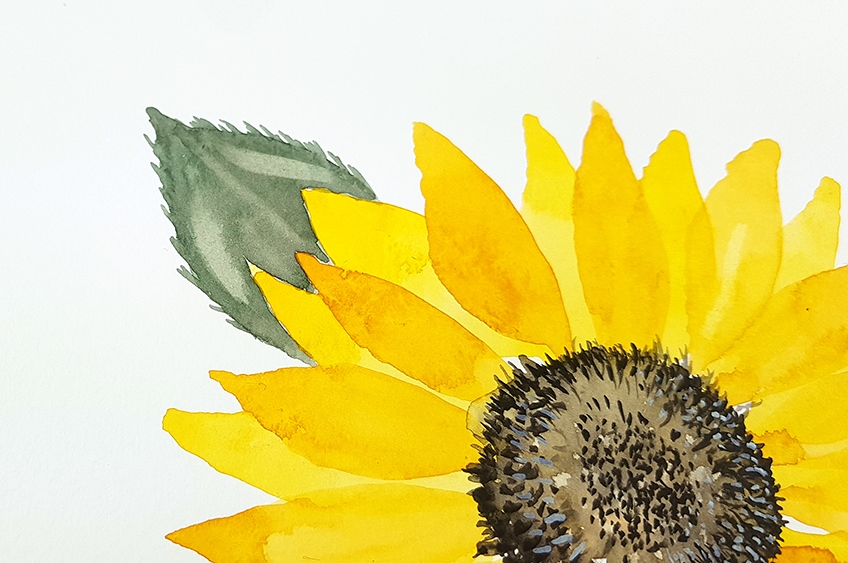
We can proceed to paint another leaf; having three leaves just gives the flower a more complete feel. Try to spread your leaves around the flower so that they are not too close together. Perhaps, let us make this one a more curved spearheaded shape.
Remember to add some sharp tips along the edges of the leaf with a thin small brush.
Step 8: Painting the Stem of the Sunflower
This is the last step whereby we will begin to paint a stem. This process is very simple, we start by making a single stroke vertically down the page directly under the flower. The stem can be painted in the same green color as the leaves, often the stem of a sunflower is green. Perhaps, add a little deviating branch to indicate a stem being connected to the leaves.
Tips to Remember
This is a very easy sunflower painting method, as it requires no source image. This easy sunflower painting is an exercise of mark-making styles that help you build your skills. When learning how to paint a sunflower with watercolor as a beginner, it is always best to use a doable method. Easy sunflower paintings are very fun when painted loosely. It is really fun and creates a painterly effect in the image that looks more organic for a sunflower watercolor painting. Either way, this tutorial provides some unique tips and tricks that can help you refine your sunflower watercolor painting skills overall.
- A sunflower painting tutorial is a layering process. You always want to begin with the lightest parts of the painting and then work in the darkest parts of the painting.
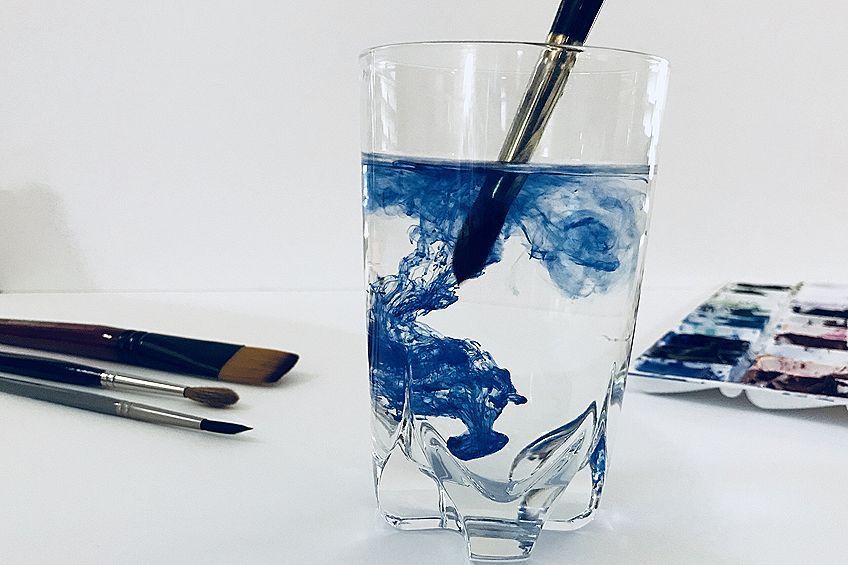
- Doing a sunflower watercolor painting requires cleaning your brushes. Always have two jars of water nearby, one for an initial rinse and then the other for a second rinse to make sure there is no leftover color on your brush
- When learning how to paint a sunflower with watercolor you don’t need a source image. However, you can use one for guidance if you feel that it might help.
- When doing this sunflower painting tutorial, make sure you rinse your brushes thoroughly before new applications of paint.
- For this sunflower watercolor painting, You don’t need to tape your page down when painting a flower as it helps to move your page around for more accurate mark-making.
There you have it! An easy sunflower painting. Learning how to paint a sunflower in watercolor is easy when made possible through a series of eight simple steps. This sunflower painting tutorial is one of many ways to paint a sunflower, however, it is an easy and fun way to do so. Sunflower watercolor painting does take a little bit of practice, so do not worry if you do not get it right the first time. Painting sunflowers is not difficult, they just require the correct steps to help break it down.
Frequently Asked Questions
How to Paint Loose Sunflowers in Watercolor?
Painting loose sunflowers in watercolor is easy. We begin with creating a circle on the page that will become the bud of the flower. We then create brush strokes starting from the bud moving outwardly in a surfboard-type shape. We make a series of these strokes around the bud which will define the petals of the flower. We will allow that to dry completely, and we will then apply new marks in the gaps of those petals, making the second layer of petals. You can add as many as you like as no single flower is ever the same as the next. We then paint the bud with darker colors which we then can add finer details onto once it has completely dried. Then lastly, we paint the stem and leaves. There you have it, a loosely painted sunflower.
How Do You Paint Sunflower Petals?
When painting petals we want to make sure we have the right brush. The brush that works best with this is round. A round brush is a brush that has a slightly pointed tip with a thicker body. This allows you to make the surfboard shape that describes the quality of a petal. You begin near the bud with a thin stroke from the tip of the brush which you will press down as you paint the petal moving outwardly from the bud of the flower. As you press down you will slowly soften your touch again as you move toward the tip of the petal by painting with the thin tip of the brush. SO basically you lightly press your brush, followed by pressing down for a thicker stroke and then slowly lifting your brush to make the tip of the petal thin. This is the general idea of painting a petal.
How Do You Paint Leaves?
Very much like flowers, leaves are very abstract and can be painted in a variety of ways. Some more common ways of painting leaves that are generally found on flowers is by painting the spear-headed shape with your color choice which we then add on little details through several ways. One of these ways is by lifting the paint which creates these light moments in the leaves. Another way is by painting on the leaf directly whilst it is wet so there can be a seamless mix of colors in the leaves. However, the way we achieve the spear-head shape is by painting a circle which we then add a pointed tip to indicate the top of the leaf. We can add little strokes moving outwardly on the edges of the leaf to give it texture.
Matthew Matthysen is an educated multidisciplinary artist and illustrator. He successfully completed his art degree at the University of Witwatersrand in South Africa, majoring in art history and contemporary drawing. The focus of his thesis was to explore the philosophical implications of the macro and micro-universe on the human experience. Matthew uses diverse media, such as written and hands-on components, to explore various approaches that are on the border between philosophy and science.
Matthew organized various exhibitions before and during his years as a student and is still passionate about doing so today. He currently works as a freelance artist and writer in various fields. He also has a permanent position at a renowned online gallery (ArtGazette) where he produces various works on commission. As a freelance artist, he creates several series and successfully sells them to galleries and collectors. He loves to use his work and skills in various fields of interest.
Matthew has been creating drawing and painting tutorials since the relaunch in 2020. Through his involvement with artincontext.org, he has been able to deepen his knowledge of various painting mediums. For example, watercolor techniques, calligraphy and lately digital drawing, which is becoming more and more popular.
Learn more about Matthew Matthysen and the Art in Context Team.
Cite this Article
Matthew, Matthysen, “How to Paint Watercolor Sunflowers – Easy Tutorial.” Art in Context. February 11, 2022. URL: https://artincontext.org/how-to-paint-watercolor-sunflowers/
Matthysen, M. (2022, 11 February). How to Paint Watercolor Sunflowers – Easy Tutorial. Art in Context. https://artincontext.org/how-to-paint-watercolor-sunflowers/
Matthysen, Matthew. “How to Paint Watercolor Sunflowers – Easy Tutorial.” Art in Context, February 11, 2022. https://artincontext.org/how-to-paint-watercolor-sunflowers/.


