How to Draw the Earth – Learn How to Create a Drawing of the Earth
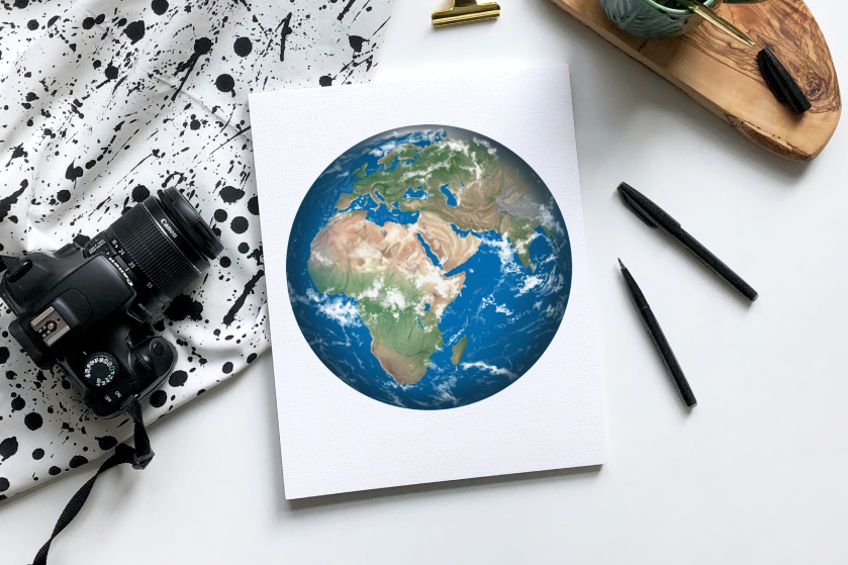
Our planet is strong but also fragile. As we celebrate her versatility and strength, we honor our home with this earth day drawing tutorial. In only 10 easy steps, we guide you through the process of drawing earth in a realistic way. Beginning with a basic sketch earth drawing, we then enhance our earth drawing with color and texture.
Easy Earth Day Drawing Tutorial in 10 Steps!
This one is out of this world, or rather of this world! In this tutorial, we are going to show you how to create a realistic drawing of earth from space. We begin the earth drawing with a simple circle, and then we draw the continents in detail. Finally, we enhance our earth drawing with color to capture the sea, land, and clouds. You can see an outline of our whole earth sketch tutorial below.
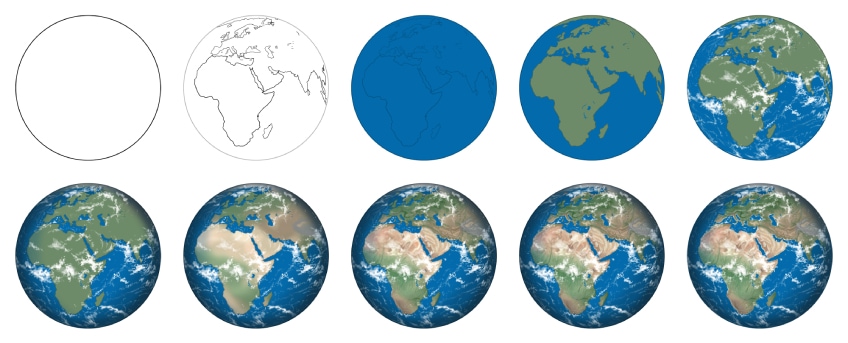
Our earth drawing with color is written for a painting medium, but we encourage you to use the medium that you feel most confident with. As we explore the complexities of color blending, shading, and highlighting, it is important that you are comfortable with your chosen medium.
Whether you are a digital artist, or you prefer to work with coloring pencils, you can easily adapt the coloring steps to suit your own unique artistic needs.
Step 1: Draw the Shape of Your Earth Sketch
We begin drawing earth by constructing the overall shape. Find the center of your canvas and draw a large circle to represent the base of your sketch earth drawing. If you do not feel confident drawing a perfect circle freehand, then you can find a circular object to trace.

Step 2: Start the Drawing of Earth Continents
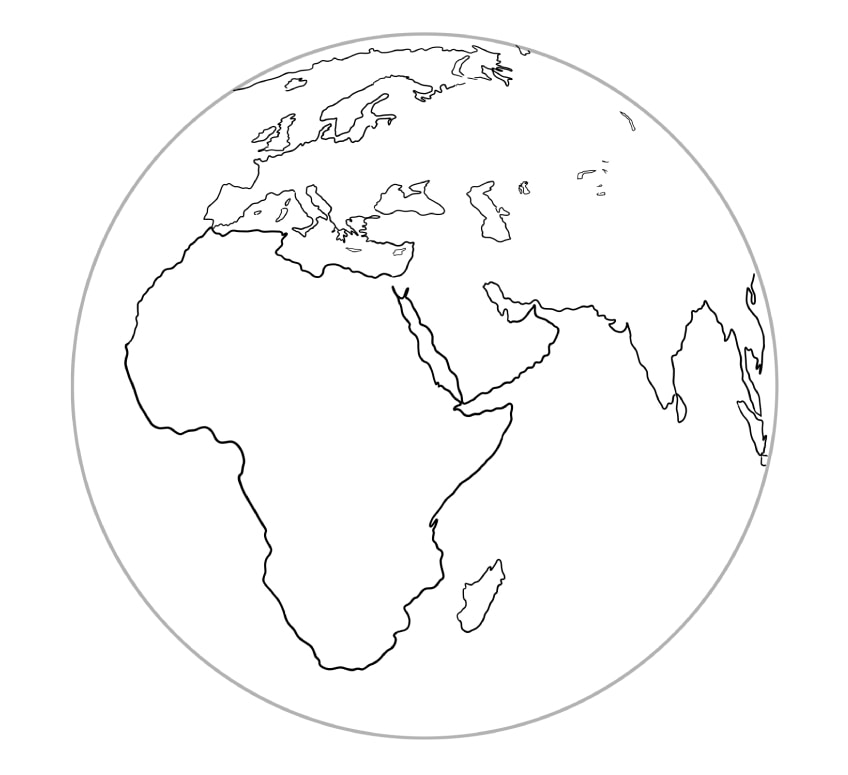
This step is probably the most time-consuming part of drawing earth. We suggest using a photograph of the earth or a map as a reference point for the shapes of the continents and islands. Start with the largest continents, like Africa and Europe, and then fill in the smaller islands.
Remember that you are drawing a globe, so add a gentle curve to the lines so they look like they are wrapping around the edge of the earth.
Step 3: Begin Coloring Your Earth Sketch
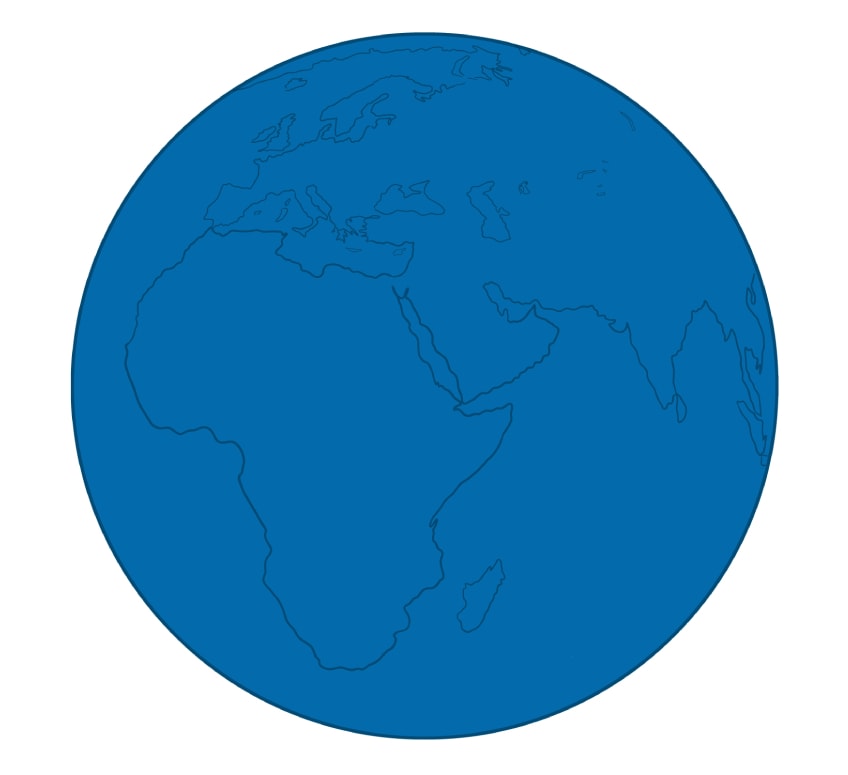
Now that your continents are in place, you can move on to adding color to your earth drawing. We start with a simple base coat of blue. Use a regular paintbrush and a shade of ocean blue, and fill the entire globe with an even coat of color. It may seem strange to color the continents blue, but in the next few steps we will build up the color of the land on top of the base coat.
Step 4: Apply a Base Coat to the Continents
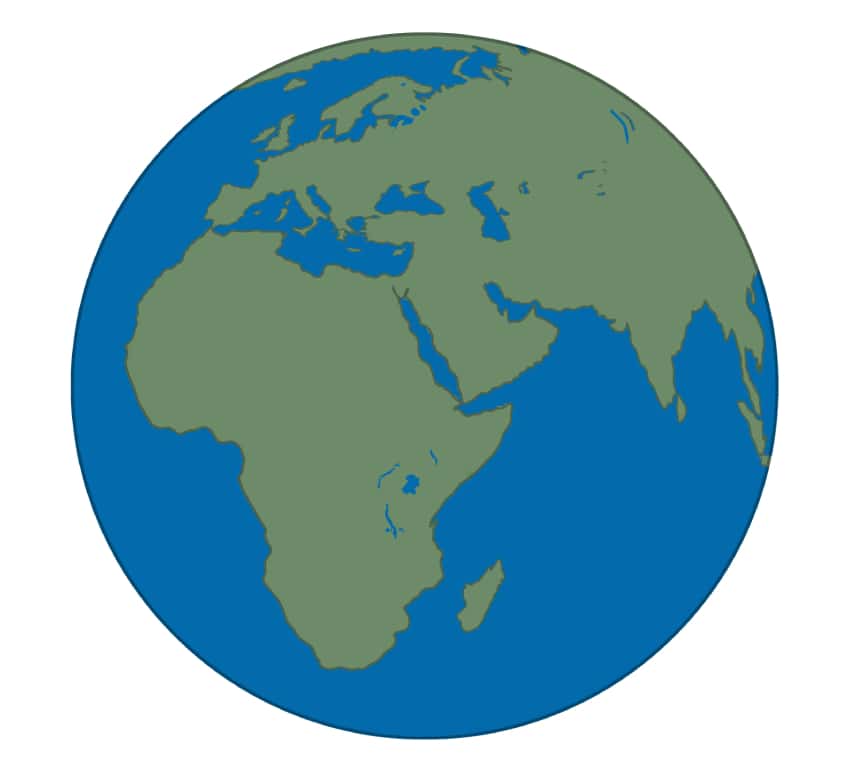
In this step, you are going to apply a single base color to all of the land areas of your drawing of earth. Find a shade of olive green paint and use a regular paintbrush to fill all of the continents and islands with an even coat of color.
Step 5: Begin Painting the Atmosphere
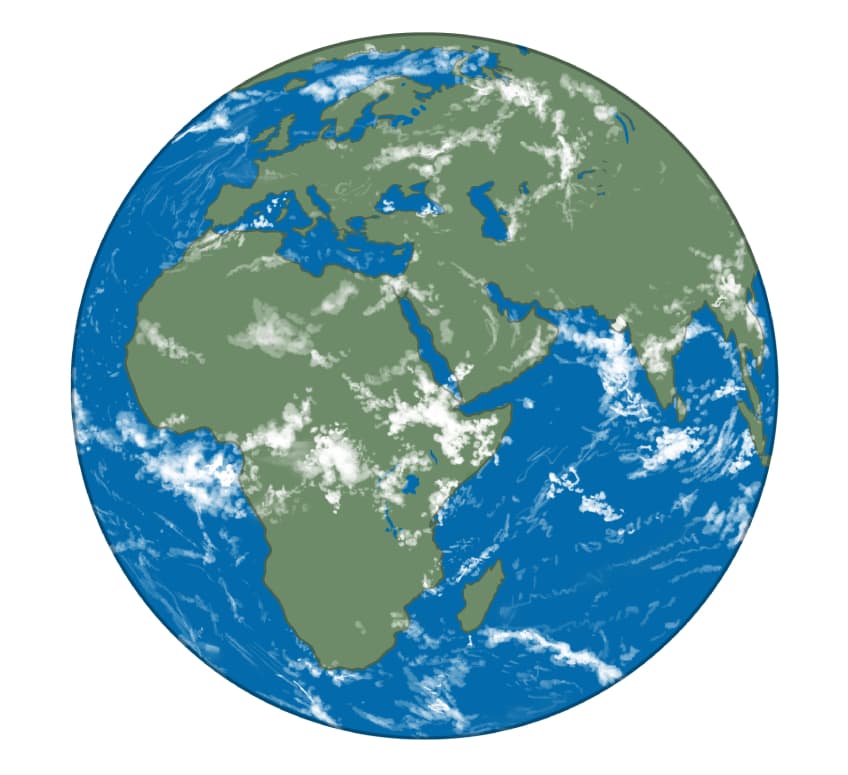
Because we are drawing the earth from space, we are going to add to the realism by including a layer of the atmosphere. Commonly known as the troposphere, this layer of the atmosphere consists of the earth’s clouds. Use a combination of a small blending brush and a small sharp brush, and add soft streaks of white throughout the globe. These patterns of clouds should cover areas of the land and sea.
Remember that your clouds should not be too sharp. You can use a clean blending brush to soften them and blend them out once you have applied the paint.
Step 6: Define the Edge of Your Earth Drawing
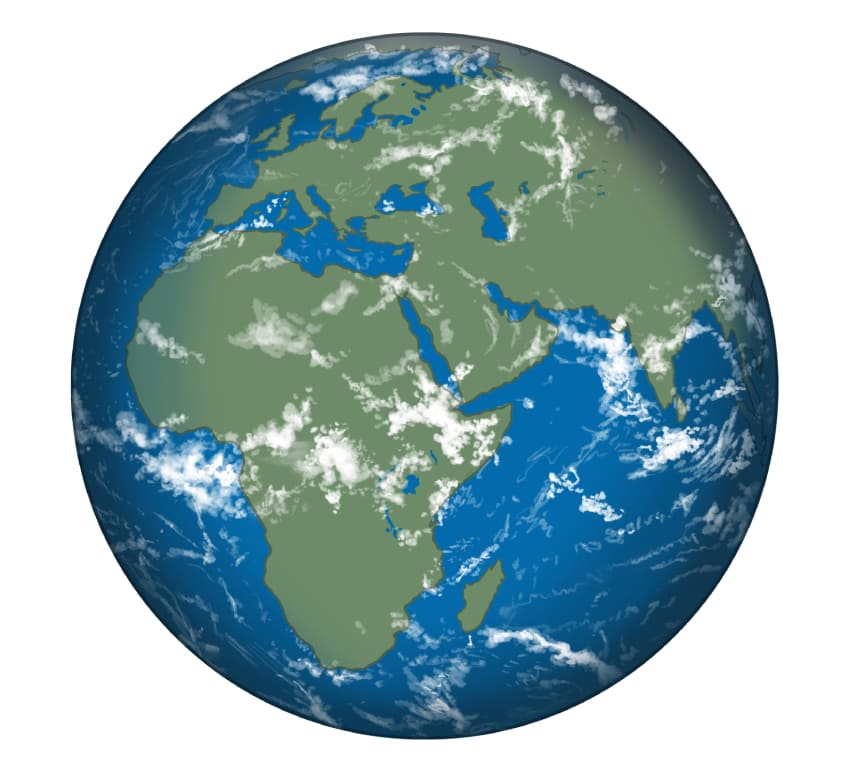
In this step, you are going to further define the edge of your drawing of earth by creating some shadows. With a medium-sized blending brush and a touch of black paint, apply some gentle shading to the outline of your earth sketch.
Step 7: Enhance the Continents with Color
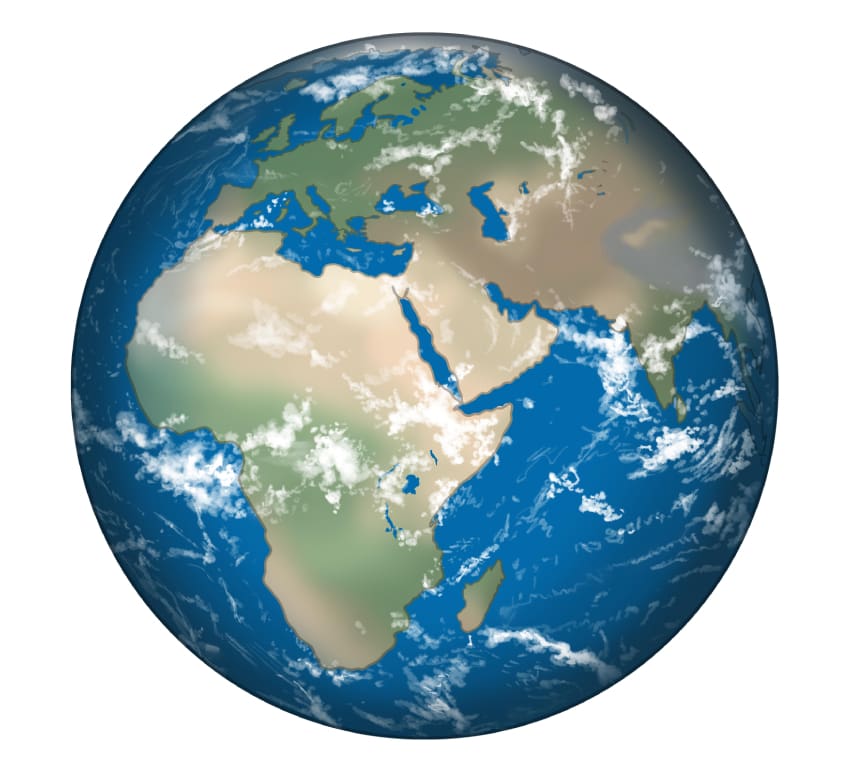
Different parts of the world usually have different types of terrain, some tropical and green, others more dry and sandy or wet and frozen. In this step, we are going to add these details to the continents of the earth drawing with color.
Begin with a small blending brush and a tan shade of paint and lightly blend this color into the green base coat on the top and bottom of Africa. You can then do the same with Madagascar, just to the right of the African continent, and the large area to the right of the top of Africa. As you move towards Eastern Europe and Asia, begin to use a darker shade of tan and then brown. Next, use a small blending brush and some white paint to carefully soften the top edges of the visible continents. You can then repeat this with some light grey paint.
To complete the step, use a small blending brush to gently blend these different colors together, creating a smooth transition.
Step 8: Create Texture in Your Earth Sketch
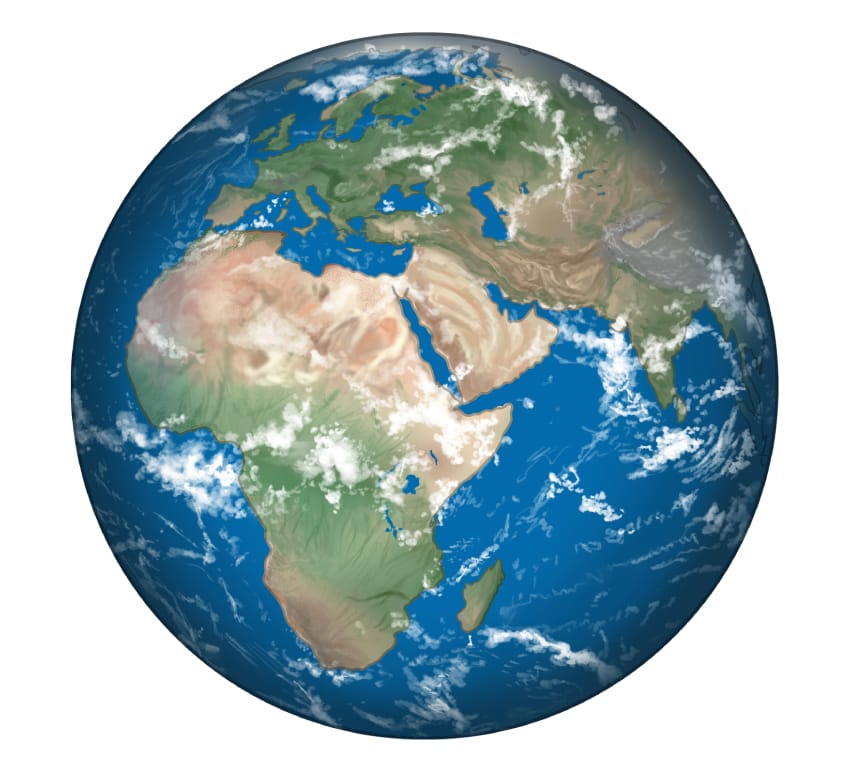
In this step, you can begin to bring your earth drawing to life by adding additional details. Begin with a small rough brush and a combination of darker brown and white paints. Start to create a rough texture within the brown areas of the continents. Repeat this process throughout the continents of your earth sketch using the relevant color for each part.
Continue by using a fine brush and brown paint to add fine lines which will represent the earth’s structure such as mountains and rivers. Repeat this step onto the greener areas using a small soft brush and a darker shade of green to add terrain texture and using a fine sharp brush to add finer texture details. For the lighter tan areas make use of a small soft brush and a combination of white paint and a light orange or peach color to create a sandy desert shade between the texture lines.
Repeat as necessary on to the rest of the continents.
Step 9: Add Final Details
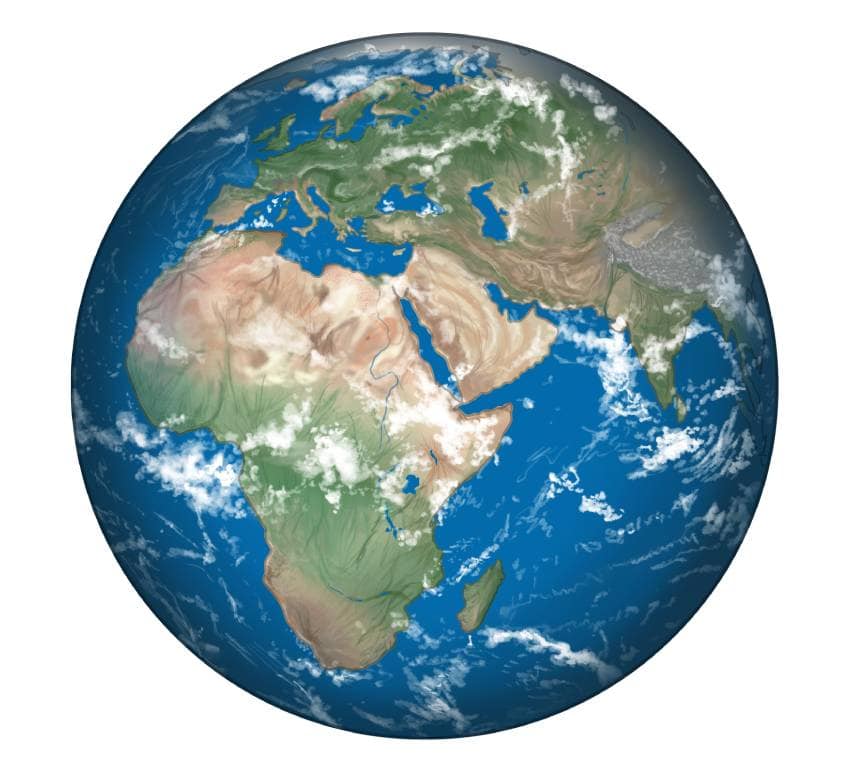
Using a fine sharp brush and the same blue that we used for the initial base coat, paint a fine river within the top area of the African continent. Continue with a fine brush and the corresponding color to the area being painted and apply hairline brush strokes along the roughened areas to create a protruding look to the terrain representing mountains or higher grounds within the continents.
Step 10: Finish Your Earth Day Drawing
Now that we have come to the end of the tutorial on creating a drawing of earth, we are going to remove the outlines. This will create a more seamless and realistic earth sketch. Use a fine brush and the corresponding colors at each point of the outline to trace over the black lines.
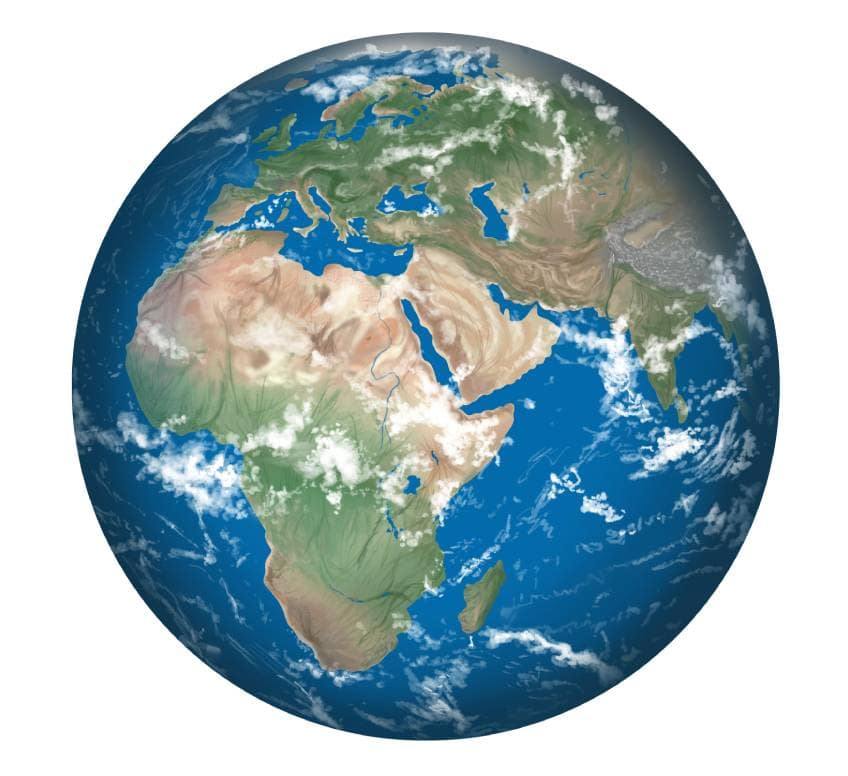
In this tutorial, you have learnt how to draw the earth from space in a realistic way. You have honored our planet with this realistic earth day drawing, and we hope that you have not only enjoyed the process, but have developed a greater appreciation for our beautiful home!
Frequently Asked Questions
How do You Begin an Earth Day Drawing?
In this tutorial, we honor our world with this earth day drawing. We begin the drawing of the earth by constructing the general shape and sketching the different continents. We then start to flesh out our earth drawing with color, making the deep oceans blue and the continents lush and green.
What Is the Hardest Part of Drawing Earth?
Our tutorial makes learning how to create drawings of the earth very easy, but the hardest part is creating realistic-looking continents. As the land masses of the earth are so recognizable, this step of our earth sketch tutorial is definitely going to take the most time.
Matthew Matthysen is an educated multidisciplinary artist and illustrator. He successfully completed his art degree at the University of Witwatersrand in South Africa, majoring in art history and contemporary drawing. The focus of his thesis was to explore the philosophical implications of the macro and micro-universe on the human experience. Matthew uses diverse media, such as written and hands-on components, to explore various approaches that are on the border between philosophy and science.
Matthew organized various exhibitions before and during his years as a student and is still passionate about doing so today. He currently works as a freelance artist and writer in various fields. He also has a permanent position at a renowned online gallery (ArtGazette) where he produces various works on commission. As a freelance artist, he creates several series and successfully sells them to galleries and collectors. He loves to use his work and skills in various fields of interest.
Matthew has been creating drawing and painting tutorials since the relaunch in 2020. Through his involvement with artincontext.org, he has been able to deepen his knowledge of various painting mediums. For example, watercolor techniques, calligraphy and lately digital drawing, which is becoming more and more popular.
Learn more about Matthew Matthysen and the Art in Context Team.
Cite this Article
Matthew, Matthysen, “How to Draw the Earth – Learn How to Create a Drawing of the Earth.” Art in Context. June 13, 2022. URL: https://artincontext.org/how-to-draw-the-earth/
Matthysen, M. (2022, 13 June). How to Draw the Earth – Learn How to Create a Drawing of the Earth. Art in Context. https://artincontext.org/how-to-draw-the-earth/
Matthysen, Matthew. “How to Draw the Earth – Learn How to Create a Drawing of the Earth.” Art in Context, June 13, 2022. https://artincontext.org/how-to-draw-the-earth/.


