


How to Draw Godzilla – Create a Monstrous Godzilla Drawing
From Tokyo to New York, Godzilla has been stomping his way into our hearts for over 60 years! Towering over skyscrapers and breathing fire, this iconic monster has captivated audiences with his sheer size and ferocity. But behind the terrifying roar lies a symbol of resilience and strength, reminding us that even in the face of disaster, we can rise up and fight back. So, grab your drawing kit and get ready for a monster-sized adventure with the king of the monsters – Godzilla!
How to Draw Godzilla With Our Easy Step-by-Step Guide
Congratulations on embarking on the journey to learn how to draw Godzilla! Get ready to unleash your inner artist and gain some new drawing skills. Not only will you be able to draw one of the most iconic movie monsters, but you’ll also develop your ability to capture proportions, shading, and perspective. By breaking down the complex features of Godzilla, you’ll learn to observe details and textures that will be useful in any future artwork you create. So, grab your pencils and sketchbook, and get ready to discover the artistry behind the king of the monsters. You’re in for a wild ride!
By following the steps depicted in the below collage, you can achieve the final result of drawing a realistic Godzilla!
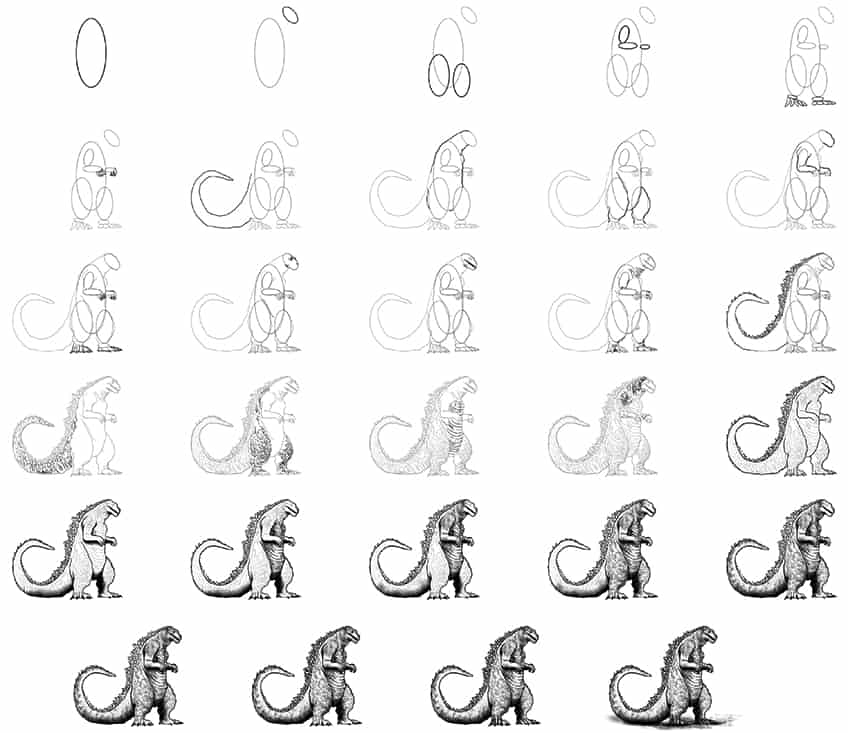
Step 1: Draw the Main Body of Your Godzilla Drawing
Begin your drawing tutorial by drawing a vertical oval shape that will represent the main body of Godzilla.

Step 2: Draw the Head
Above the main body, draw a small tilted oval shape to represent the head of Godzilla.

Step 3: Add the Legs to Your Godzilla Sketch
Overlapping the main body, draw a large vertical oval shape to represent the first leg. Draw a smaller oval shape to the right side to represent the second partially visible leg.

Step 4: Draw the Arms
Within the main body, draw an attached vertical and a horizontal oval shape to represent the fully visible arm. Continue to draw a small horizontal oval shape to represent the second partially visible arm to the right of the body.

Step 5: Draw the Feet of Your Godzilla Drawing
Attached to the lower ends of each leg, draw a horizontal laying oval shape, and attached to this draw five additional ovals to represent the foot and claw-like toes.

Step 6: Add the Hand Construction Lines
Attached to each arm previously drawn in step four, draw four additional ovals to represent the hands.

Step 7: Draw Godzilla’s Tail
Draw the wide curving tail from the lower and top ends of the main body, and curve the tail into a ‘C’ shape.

Step 8: Draw the Neckline
Begin by drawing the top neckline reaching from the head and leading onto the back of the main body, attaching to the tail. Complete the step by drawing the lower neckline and leading onto the chest and belly main body lines, attaching to the legs and thighs.

Step 9: Outline the Legs
Make use of the previously drawn oval shapes from step three to aid you in outlining the more realistic-looking legs of your Godzilla drawing.

Step 10: Outline the Head and Arms
In this step, you will outline the edgy-looking head and arms, using the previously drawn oval shapes. Apply additional structure lines alongside the fully visible arm.

Step 11: Continue to Outline Godzilla Sketch
Begin to outline a realistic set of feet and fingers to your Godzilla sketch.
Note! The feet should lead onto a sharp triangular-shaped toe while the fingers of the hands should be entirely sharp.

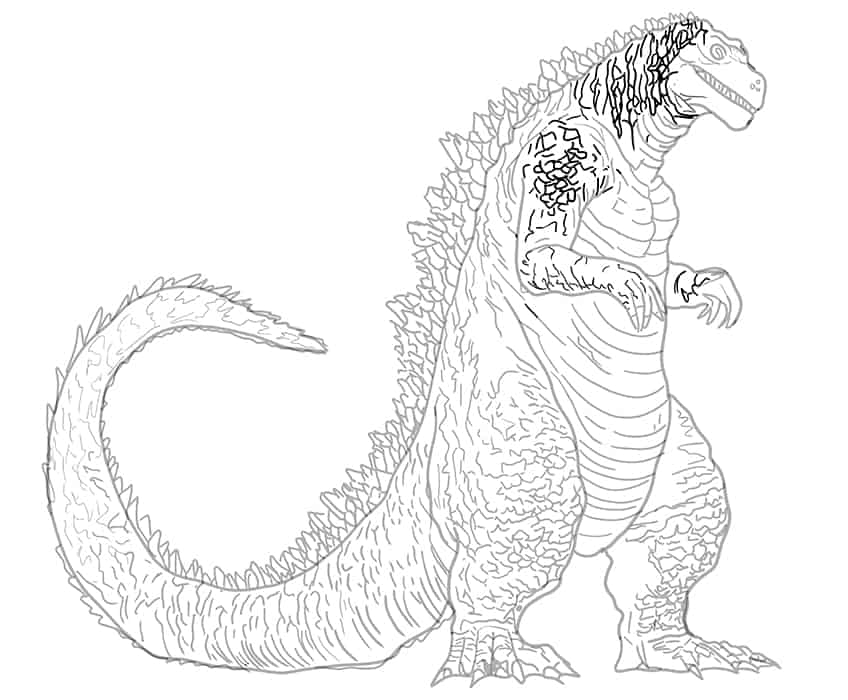
Step 12: Draw the Facial Features
Within the face, draw the nostrils at the right end of the curving facial structure. Continue by drawing the eye and structural lines to curve around the eyes. Complete the step by drawing a fine structure line where the neck would be attached to the head and a body separation line between the thigh and the body.

Step 13: Draw the Mouth
Draw two lines through the center of the mouth area and within the gap of the mouth. Continue to draw the individual sharp teeth.

Step 14: Add Texture Lines to the Neck and Feet
On the neck area draw fine curving lines to add to the texture and stretch skin look. Continue by adding fine texture lines along the arms and feet.

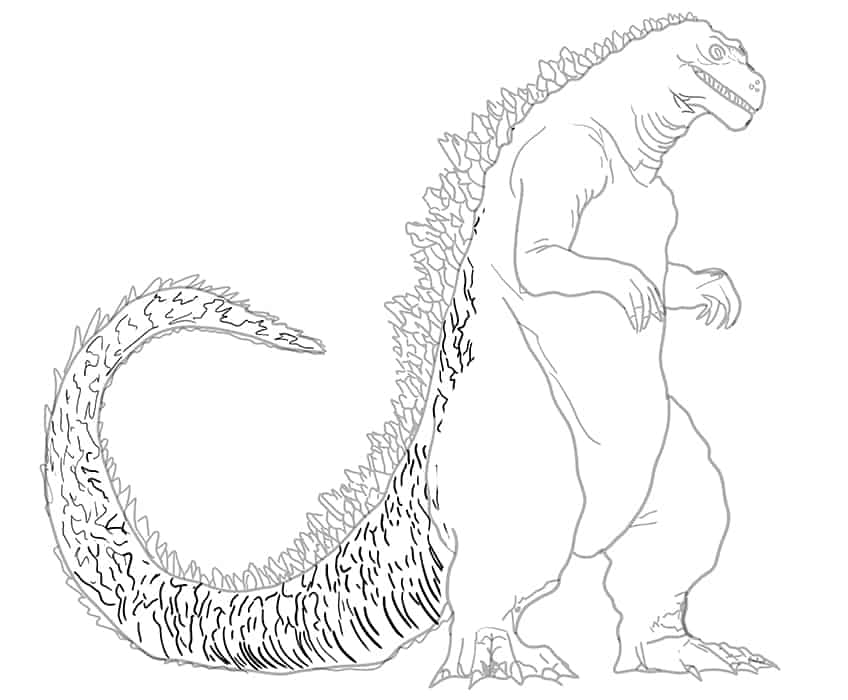
Step 15: Texture the Outer Area of the Tail
Begin at the top of Godzilla’s head, and draw small sharp crystal-like edges leading onto the back and curvature of the tail. The edges should be larger and layered along the center back area.
Once you have completed adding texture to the tail, you may now erase any visible construction lines.

Step 16: Add Texture Within the Tail
Draw fine wave-like lines beginning at the tip of the tail and leading through the tail onto the main body.
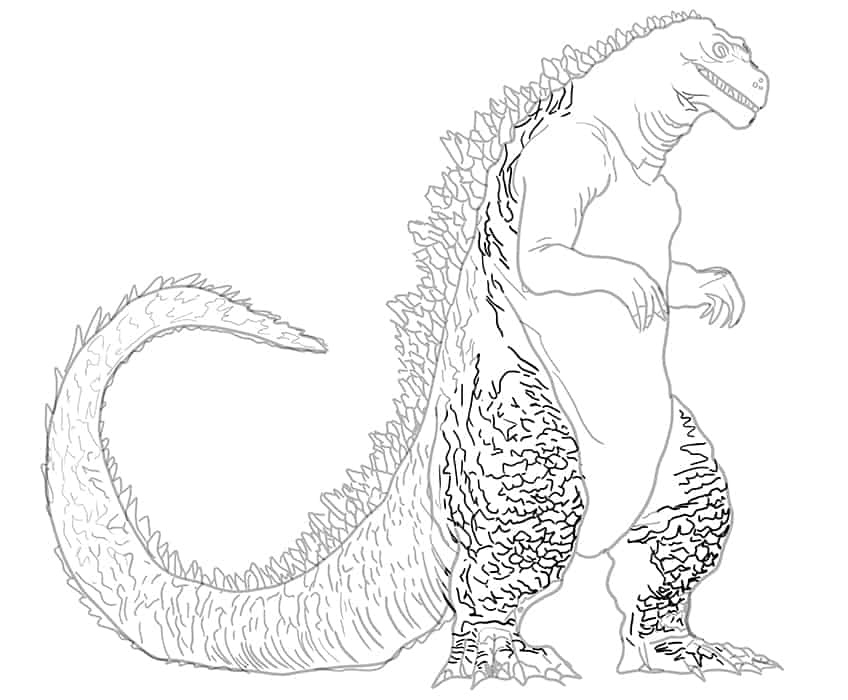
Step 17: Texture the Legs of Your Godzilla Sketch
Continue by drawing wave-like lines within each leg. Continue to draw small wave-like lines within the feet and lead upwards within each leg and complete with larger wave-like lines in the thigh of your Godzilla sketch.
Step 18: Add Structure Lines to the Belly
Draw a centerline in the upper chest area and horizontal lines on each side of the centerline. Continue by drawing curved lines throughout the belly and lower body area.
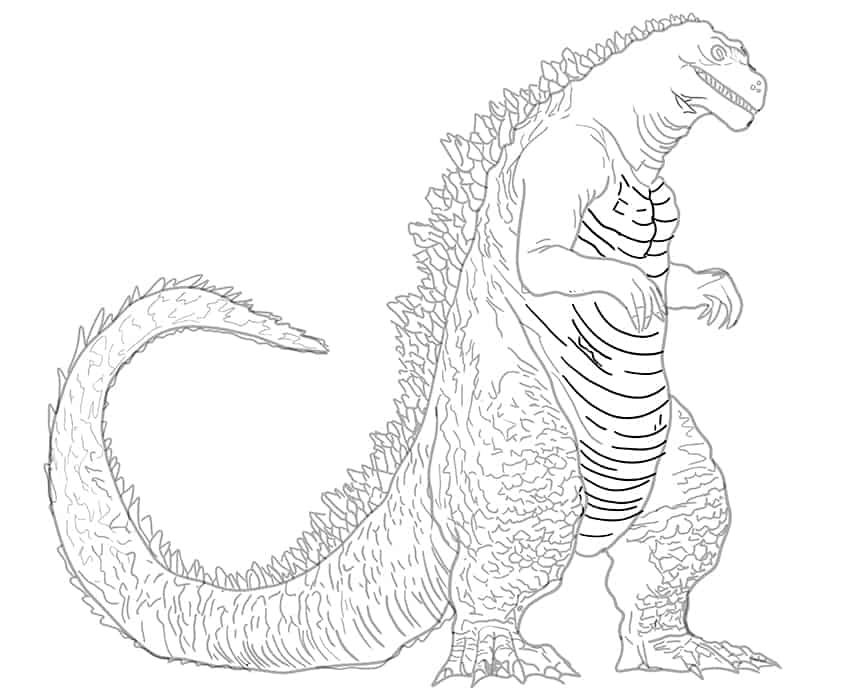
Step 19: Structure the Neck
Draw fine, rough pattern lines from the head leading toward the neck and shoulder areas.
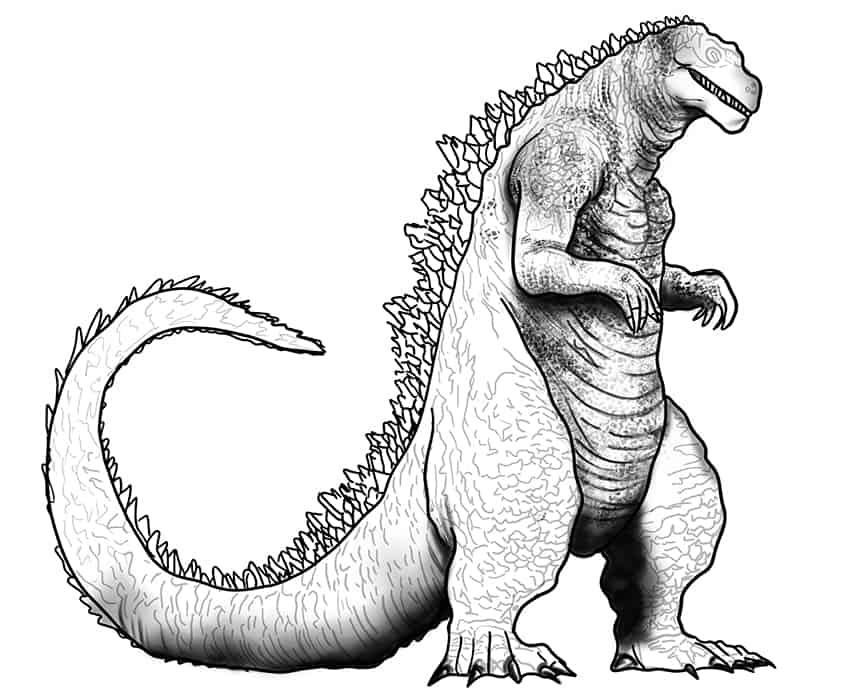
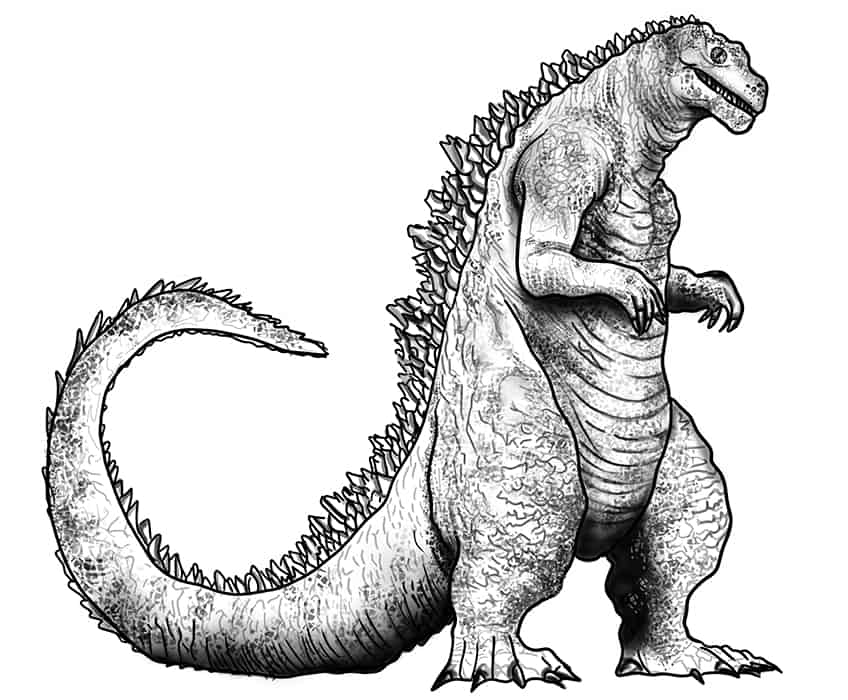
Step 20: Trace the Main Outline of Your Godzilla Drawing
In this step simply trace the main outlines of Godzilla to enhance and darken your drawing.
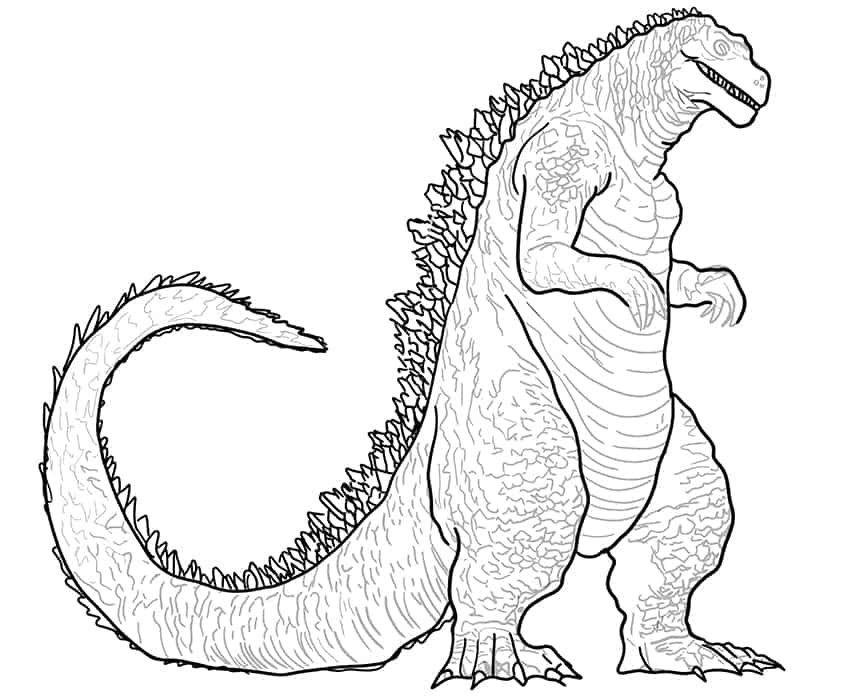
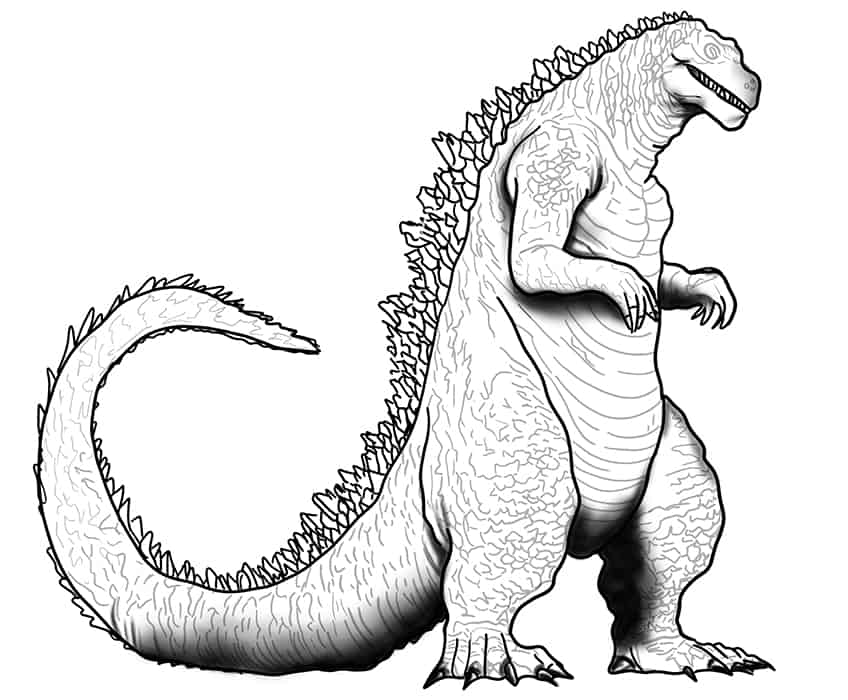
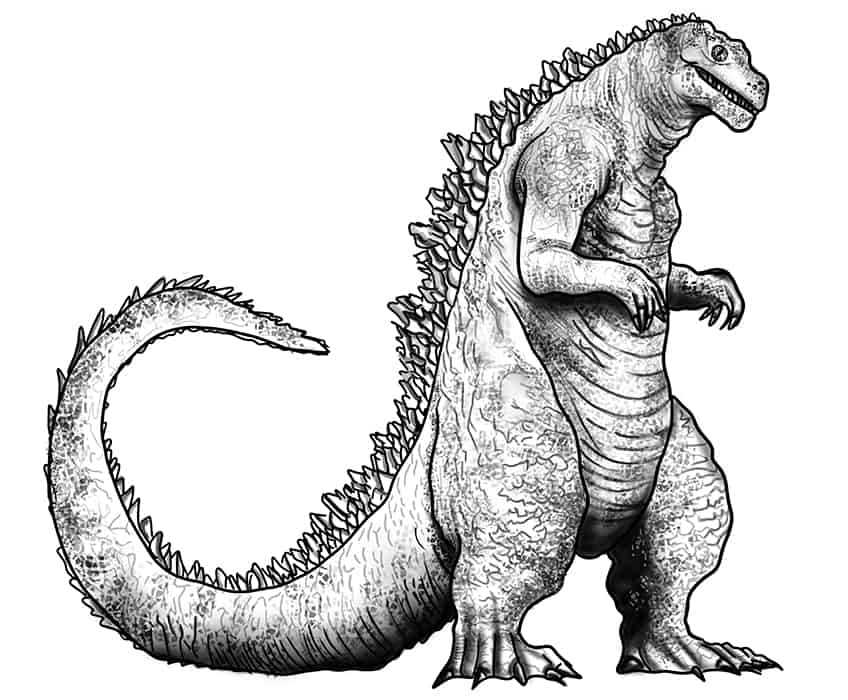
Step 21: Shade Your Drawing of Godzilla
Select a small, soft brush and black paint, and add shading beneath the tail, legs, belly, arms, and chin area.
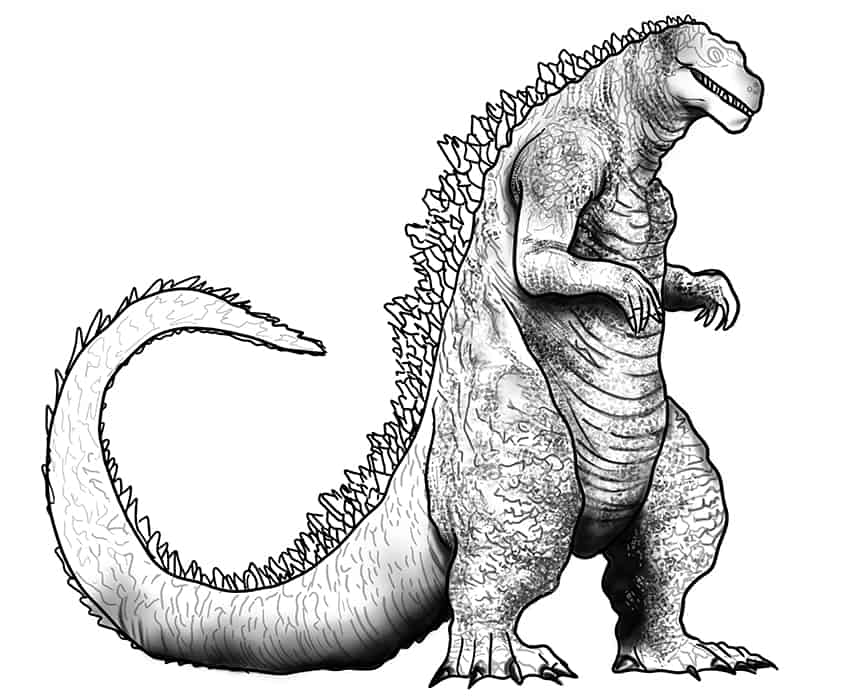
Step 22: Texture the Belly
With a rough, texture brush and the use of black paint, begin to paint individual dots, blocks, and shapes scattered along the structure lines of the belly and chest areas.
Repeat this step with harder or softer intensity so that you have more than one shade of black.
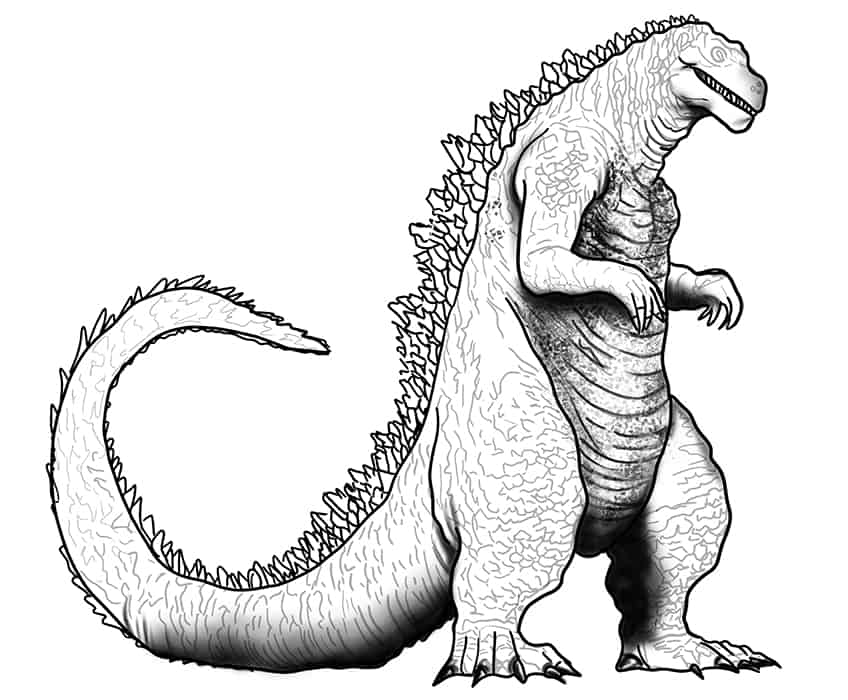
Step 23: Continue to Add Texture
With the same brush as previously and black paint, paint individual dots, blocks, and shapes and scatter them along the entire neckline leading onto the shoulders and arms.
Step 24: Add Texture to the Legs
Repeat the previous step on each of the legs and feet areas using a fine, sharp brush and black paint to apply fine-textured spots and dots on your Godzilla drawing.
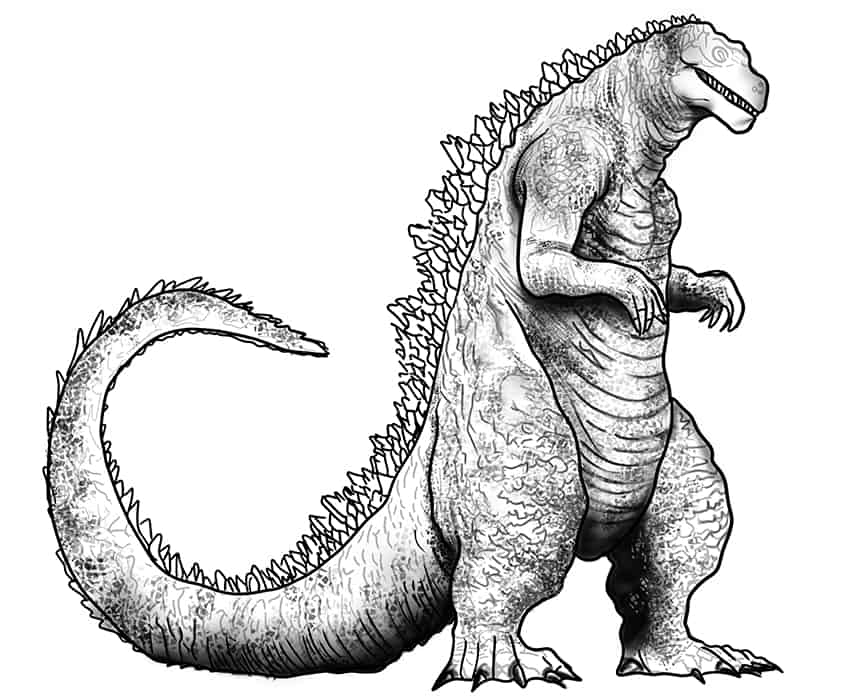
Step 25: Texture the Inner Tail Area
Use the same brush and paint color as previously, and trace the structure lines within the tail to enhance and darken them. Continue using a rough, texture brush, and add spots and dots along the inner area of the tail.
Step 26: Add Texture to the Face
Use a thin brush and black paint, and continue the add a textured pattern onto the face and surrounding area. Continue using a soft brush to shade the fingers.
Complete this step with black paint, and fill the nostrils, the iris in the eye, and outline the eye of your Godzilla drawing. Continue using gray paint to add a secondary sclera color. With white paint, begin to add fine highlighted lines with Godzilla’s face.
Step 27: Shade the Outer Edges of the Tail
Begin to shade one-half of each outer spike along the head, leading to the tip of the tail, using a thin brush and dark gray paint.
Step 28: Shade the Feet
With a small, soft brush and black paint, add soft shading between each claw on each foot. Continue using a blending brush to spread the shading upwards.
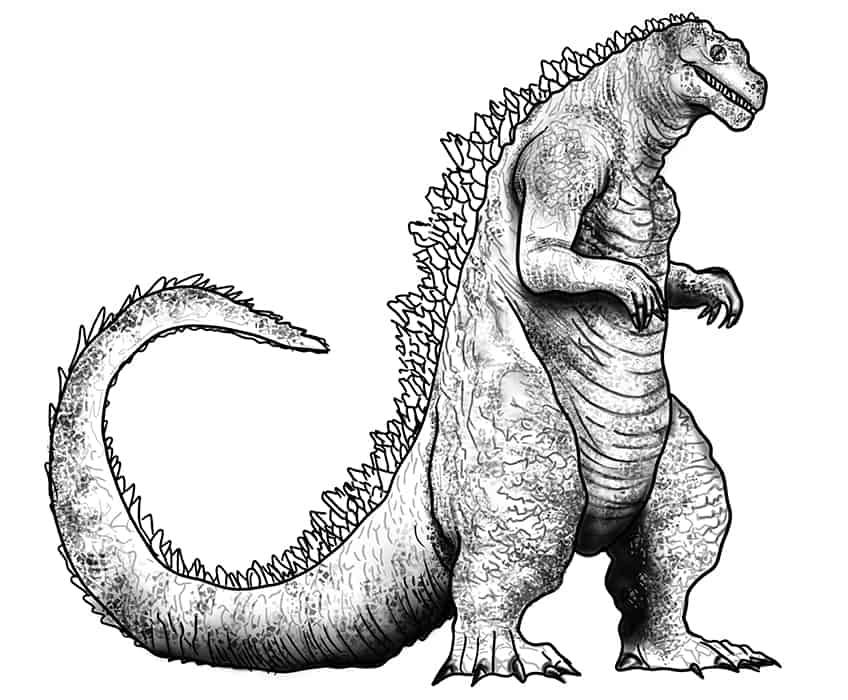
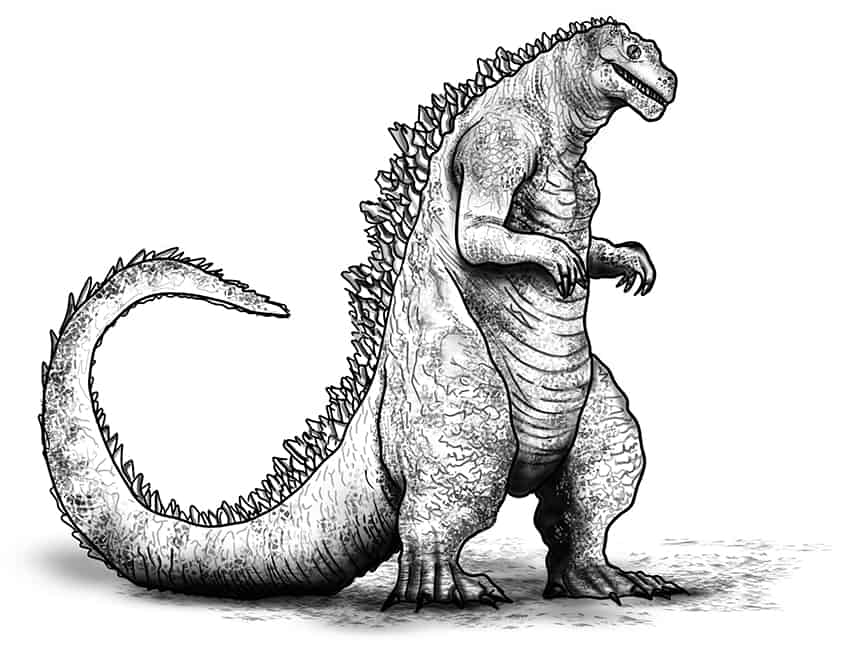
Step 29: Add a Ground Shadow to Your Godzilla Drawing
Select a thin brush and dark gray paint, and add fine bumps and heaps on the ground to create a suitable terrain for Godzilla. Complete the step using a small, soft brush and black paint, and add soft shading below each foot and the tail.
Continue by using a blending brush to spread and soften the shading.
Wow! Well done on completing our tutorial on how to draw Godzilla! By learning how to create this iconic movie monster, you have not only gained new drawing skills but also honed your creativity and attention to detail. The ability to draw complex characters like Godzilla is a testament to your artistic abilities, and you should be proud of yourself for completing this challenging task. Remember, every artist was once a beginner, and you have taken the first step towards becoming a skilled illustrator. Keep practicing, exploring new techniques, and most importantly, have fun with your art. The world is waiting for your creative genius to shine!
Frequently Asked Questions
How to Draw the Intricate Scales on Godzilla’s Skin?
Drawing the scales on Godzilla’s skin requires a lot of patience and attention to detail. Start by lightly sketching the outline of Godzilla’s body and then create rough scale patterns using small, curved lines. Once you are happy with the placement of the scales, go over them with darker lines and add shading to give the impression of depth and texture. Experiment with different shading techniques, such as cross-hatching or stippling, to create a more realistic effect. Remember to vary the size and shape of the scales to add visual interest and avoid creating a monotonous pattern.
What Are Some Tips for Capturing Godzilla’s Iconic Posture and Expression?
Godzilla is known for his powerful and intimidating posture, so it’s important to get this right when drawing him. To achieve his iconic posture, focus on drawing his thick neck and muscular body, as well as his broad shoulders and arms. Make sure his feet are firmly planted on the ground, conveying his immense weight and power. For his expression, pay attention to his large, almond-shaped eyes and his distinctive snout with flared nostrils. Don’t be afraid to exaggerate his features slightly to add more drama and intensity to your drawing. Finally, remember that Godzilla’s posture and expression can change depending on the situation, so take inspiration from different iterations of the character to create a drawing that truly captures his personality and mood!

Matthew Matthysen is an educated multidisciplinary artist and illustrator. He successfully completed his art degree at the University of Witwatersrand in South Africa, majoring in art history and contemporary drawing. The focus of his thesis was to explore the philosophical implications of the macro and micro-universe on the human experience. Matthew uses diverse media, such as written and hands-on components, to explore various approaches that are on the border between philosophy and science.
Matthew organized various exhibitions before and during his years as a student and is still passionate about doing so today. He currently works as a freelance artist and writer in various fields. He also has a permanent position at a renowned online gallery (ArtGazette) where he produces various works on commission. As a freelance artist, he creates several series and successfully sells them to galleries and collectors. He loves to use his work and skills in various fields of interest.
Matthew has been creating drawing and painting tutorials since the relaunch in 2020. Through his involvement with artincontext.org, he has been able to deepen his knowledge of various painting mediums. For example, watercolor techniques, calligraphy and lately digital drawing, which is becoming more and more popular.
Learn more about Matthew Matthysen and the Art in Context Team.


