How to Draw Chains – A Detailed and Realistic Drawing Tutorial
Chains are versatile objects as they can be used in various contexts for artworks. Creating a chain drawing is a great activity to have in your repertoire of drawing skills as it can be used in horror genres, it can be used as a feature in Medieval pieces and many other interesting art ideas. As you learn how to draw chains, you will find that there are little nuances that give the chain dimension and their circular form. A chain drawing is also a good shading challenge, as you try to give the chain form and dimension through the process of shading. However, chains are quite simple to draw and in this easy chain drawing tutorial, we will be breaking down the basic process of creating a chain line drawing.
An Easy Guide to Drawing Chains
Chain link drawings can be really symbolic of various ideas associated with captivity, struggle, or even liberation, so learning how to draw chains can be really helpful as an addition to other artworks. The process of drawing chains is really easy and simple, and in this easy chain drawing tutorial we will break down the process in a few simple steps. Drawing chains is also fun as a skill-building exercise as it is a great opportunity to refine your shading and perspective. As we go through this tutorial on how to draw chains, we will only need a few simple items. Let us take a look at what we will need for our chain drawing exercise.
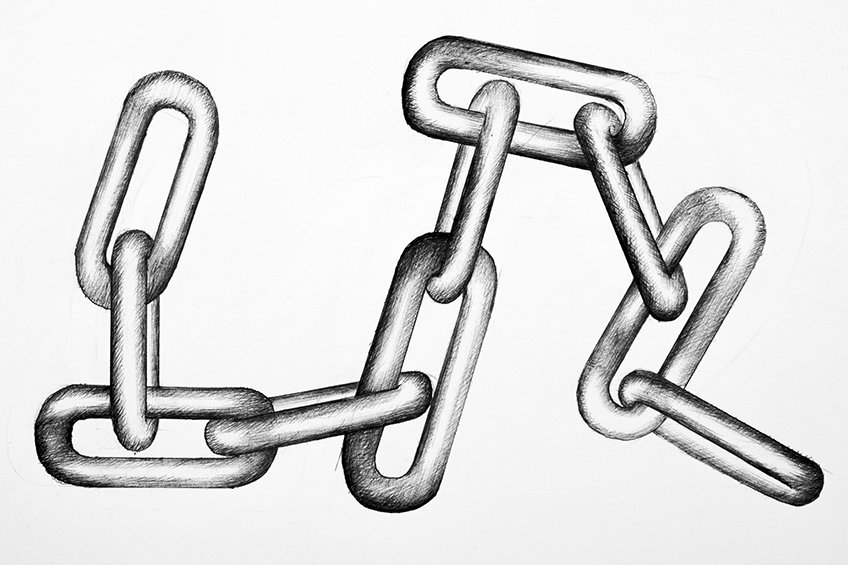
Once all our materials are ready, we can begin to prepare ourselves in a space where we can focus and engage with each step of this tutorial. This is quite an easy chain drawing tutorial, however, concentrating on each step is only going to provide you with the best outcome for your chain drawing. That being said, let us see what we should expect in this tutorial on how to draw chains.
Instructions on How to Draw Chains
In this tutorial, we will start by creating a line to indicate how long and what form our chain will have. From there we will proceed to draw a light sketch of the chains, working out the form and shape of our chain drawing. Once that is complete, we can then move on to shading the chains using our pencils. We want to give some light shading to the chain drawing before moving on to using a pen for further shading and details. Once our drawing is complete, we can proceed to shade in the drawing using our pens, we want to take time with the pen process as it can be easy to make silly mistakes when using a pen.
Now that we know what to expect, let us get into this tutorial on how to draw chains.
Step 1: Drawing a Line to Indicate the Length of the Chain
We begin by drawing a simple line with our HB pencils to indicate what kind of flow and length we would like our chain to have. You can keep your chain straight, however, it’s a little more interesting to give your chain different movement.

Step 2: Sketching the Chain
We now will carry on by drawing each link in the chain. Chains are made up of all sorts of different links, in this tutorial on how to draw chains, we will draw simple chain links. We can begin by drawing an oval-like shape at one of the ends of the line. Think of it as drawing the number 0, however, you want to keep the sides straight and you can use a ruler to do so.

As we draw links connected to one another some will be viewed from the side. This means we won’t see their loop, but simply just the steel bar of the link from a side-view. As you draw the link connecting to the loop, you want to make sure that you draw the link going through the loop. This means we will have links where we see the full loop and somewhere we will only see part of the link from the side.
We want to keep our chain link drawing quite light for now while we work out how the links connect to one another.
Especially for the links that we only get a side view of. We want to make sure that they are placed within the full loop links in a way that makes sense. They should seem as if they are moving through the loop. We also want to take our time making sure each link is the same in length.

Take your time on drawing and erasing as you work out how the links should fit together in a way that makes sense. We want them to be the same in height, width, and thickness. Remember, each loop should look like the number “0” with straight sides and arches on the bottom and top of the loop. Use the line that you drew in the first step to help guide you in the formation of how you draw your chain.

Take your time getting the shape of each link right, as well as how they link into each other. Remember, when the links are viewed from the side, we won’t see the cross-over of that link into another, except we will see only the side of that link moving into the loop of another. Use your ruler for the straight sides of the chain to make them more realistic in their structure. Allow yourself to use your eraser as a tool to help you form your chain links by drawing and erasing as you go. You will find that sometimes you will need to draw the link, then it may not be right the first time. Work on each link and its connections with attention to detail, always take your time for each link.

Step 3: Shading the Chain
Once we have configured the chain’s form and we are satisfied with each link, we can now proceed to add in some light shading with our pencils. The way in which you shade the links is quite simple and can be quite sporadic. This is because metallic surfaces reflect light in various directions if they are curved. We can begin by shading around the outer and inner edges of the links.

We want to leave negative or untouched space in the center of the links as if there were a white stripe in the link’s steel bar. By adding shading along the outer and inner edges of the link, we create a contrast between the reflection of light and shadows on the surface of the metallic object. We can, however, add shading at the curved sections of each link, where they connect to one another.
By doing this we create the effect of shadows warping and being cast by the chain-link connections. This makes the chains seem as if they are casting shadows onto one another.
We can also play around with the shading in each link. As long as we leave strips of negative space in each link then we will have the effect of light refraction in each link. This means you can leave some negative space in the loops every now and then, however, make sure to leave negative space in the straight sections of each link.

Step 4: Shading the Chain With a Pen
Once we have given our chain drawing some light shading, we now have a base to shade over using a pen. Using your ballpoint pen, start to shade in your chains, using your pencil shading as a way of indicating where to shade. Using a ballpoint pen allows us to control the amount of ink that comes out of the pen by paying attention to the pressure that we apply to the pen. As we shade, we want to make sure we take our time with each link, as using a pen to shade can be very susceptible to mistakes. Take your time with each link, adding in the darker shading along the outer and inner edges of the links, whilst leaving out negative spaces in the center of the link’s steel bar.
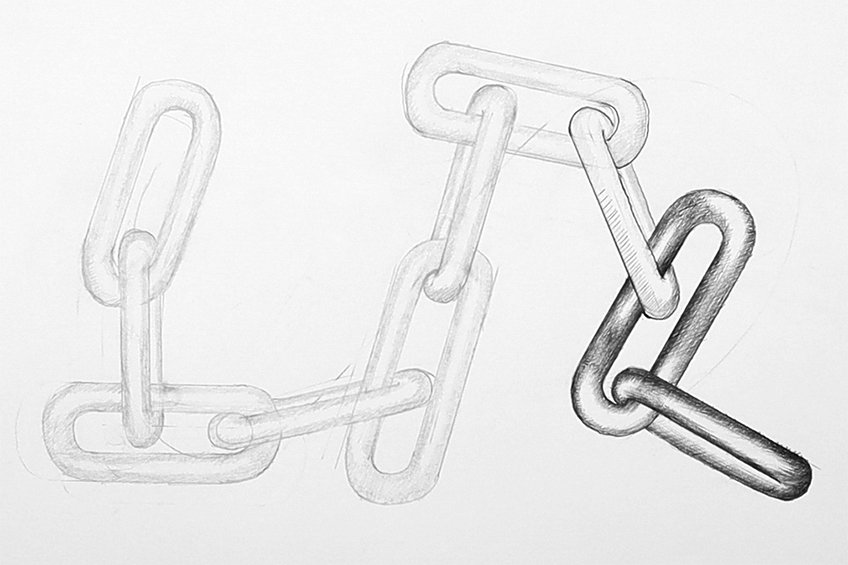
As you shade in the links viewed from the side-angle, you want to maximize the contrast of the line that moves through the loop. You also want to add shading to the part of the link that runs through the loop that can be seen on the other side of the link. This will give the link dimension and make it seem more realistic. You want to make sure that you go through each link one at a time, one after the other. This way you can work on one single link at a time whilst concentrating on the connection point to the next link in the chain.
Remember, we want to have darker sections in the chain as well as white or negative spaces to represent light reflections of the surface of the metal.
Taking your time with a shading process done in pen is essential. You want to make sure to use a cross-hatch method and a light hand, this is the best way to create seamless gradients in your shading. If you feel yourself getting tired, take a break. Creating a realistic chain drawing requires a lot of attention to shading, so you want to make sure to take your time.

You can play around with your shading to create shadows and dimensions in the chain links. However, a good rule of thumb is to remember to keep moments of negative space to represent light reflecting off the surface of the metal. You can also add some darker shading near the connection points of the links, as this gives the effect of links casting shadows onto one another. We want to carry on with this process, slowly going through each link. Capturing the light and shadow as best we can will result in a realistic chain drawing. We want to make sure that we do not rush and focus our attention on each link as we go through our chain drawing. Slowly but surely, we will start to see our chain drawing come to life and seem more realistic and three-dimensional. Remember, you want to focus on creating seamless gradients in your shading, whereby the shading is emphasized on the inner and outer edges of each link. You can have moments of shading covering whole sanctions on the chain.
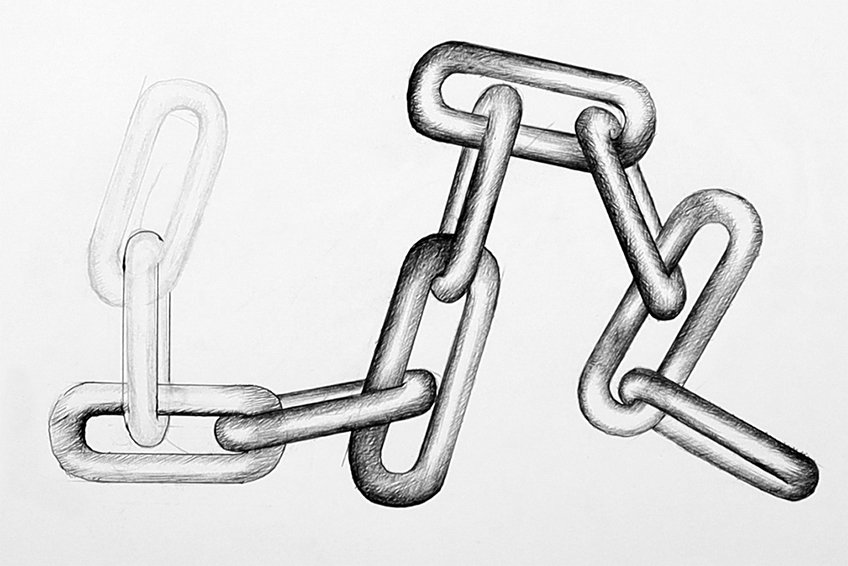
Remember, chains are metallic and quite cylindrical in their steel bars. This means shadow and light wrap around the structure, which creates these seamless transitions between light and shadow on the surface. We want to capture this through our shading, which can be achieved by shading with a light hand using the cross-hatching method. Carry on going through each chain link, making sure you take the shading process slow. Think of it as adding layers on top of one another. By doing this we can build up the contrast in the shadows, making sure that we are less likely to make mistakes by going slowly.
Make sure you also use your pencil shading to help guide you in your shading process.
As you go through each link in the chain you want to keep in mind that there should always be light and shadow in each link of the chain. By keeping this in the back of your mind you are less likely to make a chain too light or too dark. As you come to the completion of each link in the chain you should be left with a realistic chain drawing.

That’s the simple process of how to draw chains. This is a chain drawing guide and can be used as a general idea to be tweaked and changed for your own drawings. Allow yourself to experiment and try different shading combinations. As long as there is both light and shadow in the metallic structure, it will have a realistic look to it.
Tips to Remember
- Drawing takes time. You should always take your time with your drawing.
- Take a break. It’s really easy to get fatigued or tired withdrawing, so remember to take a break and come back to your drawing with fresh eyes.
- Build layers. You want to get the pencil drawing part as good as possible before moving on to drawing with a pen.
- Remember your light source. This will be indicative of where the shading should go in the chain-link drawing.
- Once you understand the basic process of a chain drawing, feel free to elongate your chain link drawing.
- Have fun with it. Learning a new drawing skill can always be fun, and it is always great to have more skills in your drawing repertoire.
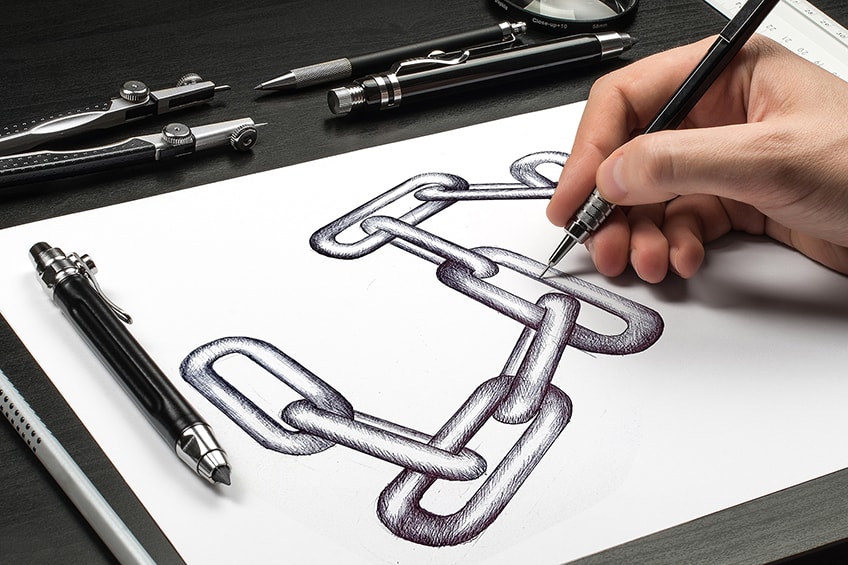
The process of drawing chains is quite simple. you first want to figure out the shape and length of the chains. From there, you will focus on shading the chains, working out how to create a shine on the surface of the chains. This is simply a matter of leaving out negative spaces, which you will shade around to create an effect of shine. when you take time working on your shading in the chain drawing then you will end up with a more realistic image in the end. Remember., drawing is a skill that requires practice, so don’t be dismayed if it doesn’t work out perfectly the first time.
Frequently Asked Questions
How Do You Shade Chains?
When drawing chains, we want to be conscious of the fact that it is a metallic object. This means that there is going to be a shine and reflection of light bouncing off the surface of the chain. However, this is quite simple to achieve as we represent the shine quality of the chain by leaving negative space in various sections of the chain. These little negative sections are normally along with the longer piece of the chain. From there we can create gradients with our shading around these negative sections that we leave white, which will create a contrast between darker and lighter tonal values. This will result in a shine effect which will give the chain drawing, a realistic quality. So, as you learn how to draw chains, try to imagine a light source interacting with the chains, which will result in a shining quality in the chain which can be achieved by leaving negative spaces in the chain draw.
How Do You Draw a Chain Link?
When learning how to draw chains, you want to build up the drawing with layers. This means that we want to develop the drawing with a light sketch of the pencil. We can start by simply creating linework where we figure out the shape and length of the chain. From there, we will give the chain body and shape, where we actually form each link in the link chain draw. We then will move on to some shading where we start to work with representing shadow and light in the object. This will refine the dimensionality of the object and give the drawing more perspective. From there you can add more contrast and detail with a darker tool, in this tutorial on how to draw chains, we do this with a pen. You don’t have to draw the last stages with a pen, although adding darker qualities in the chain drawing to maximize contrast is going to make it more realistic.
Matthew Matthysen is an educated multidisciplinary artist and illustrator. He successfully completed his art degree at the University of Witwatersrand in South Africa, majoring in art history and contemporary drawing. The focus of his thesis was to explore the philosophical implications of the macro and micro-universe on the human experience. Matthew uses diverse media, such as written and hands-on components, to explore various approaches that are on the border between philosophy and science.
Matthew organized various exhibitions before and during his years as a student and is still passionate about doing so today. He currently works as a freelance artist and writer in various fields. He also has a permanent position at a renowned online gallery (ArtGazette) where he produces various works on commission. As a freelance artist, he creates several series and successfully sells them to galleries and collectors. He loves to use his work and skills in various fields of interest.
Matthew has been creating drawing and painting tutorials since the relaunch in 2020. Through his involvement with artincontext.org, he has been able to deepen his knowledge of various painting mediums. For example, watercolor techniques, calligraphy and lately digital drawing, which is becoming more and more popular.
Learn more about Matthew Matthysen and the Art in Context Team.


