How to Draw an Umbrella – A Bright and Easy Umbrella Drawing
A bright and cheerful umbrella can really liven up a grey and rainy day. In today’s tutorial, we are going to show you how to create a fun umbrella illustration in 19 easy-to-follow steps. We begin our umbrella sketch by using simple construction lines, before creating more detail with color and shading. If you want to brighten up a rainy day, gather your drawing supplies and let us learn how to draw an umbrella!
Step-by-Step Easy Umbrella Drawing Tutorial
In this tutorial, we are going to draw a three-dimensional umbrella illustration from scratch. We start the drawing with some very basic construction steps before we move on to create detail, color, and shadows. You can see an outline of the different steps in the collage below.
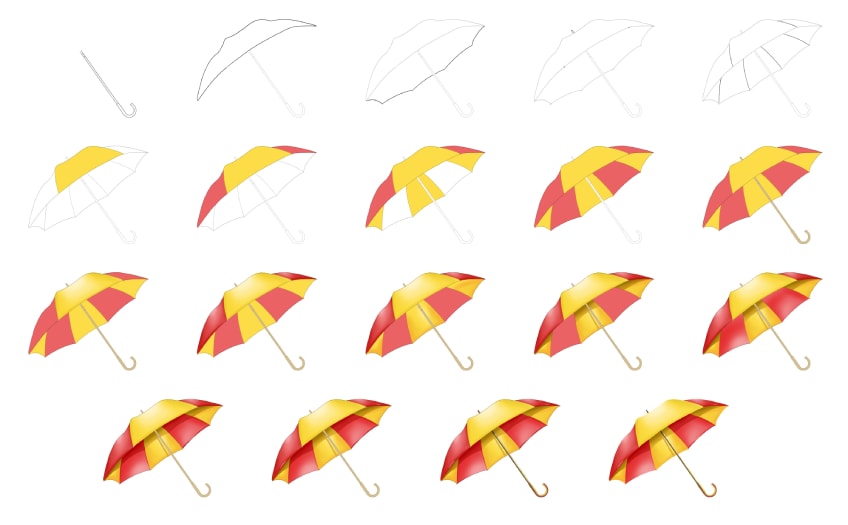
You can see that the majority of our umbrella drawing steps focus on coloring. This umbrella illustration tutorial is suitable for any kind of medium, including digital and painting mediums. If you are using a digital drawing tablet, we recommend drawing the outline on a separate layer. This will help you to erase the outline later. For physical mediums, use light and easily erasable pencils.
Gather your drawing supplies, and let us begin our umbrella sketch.
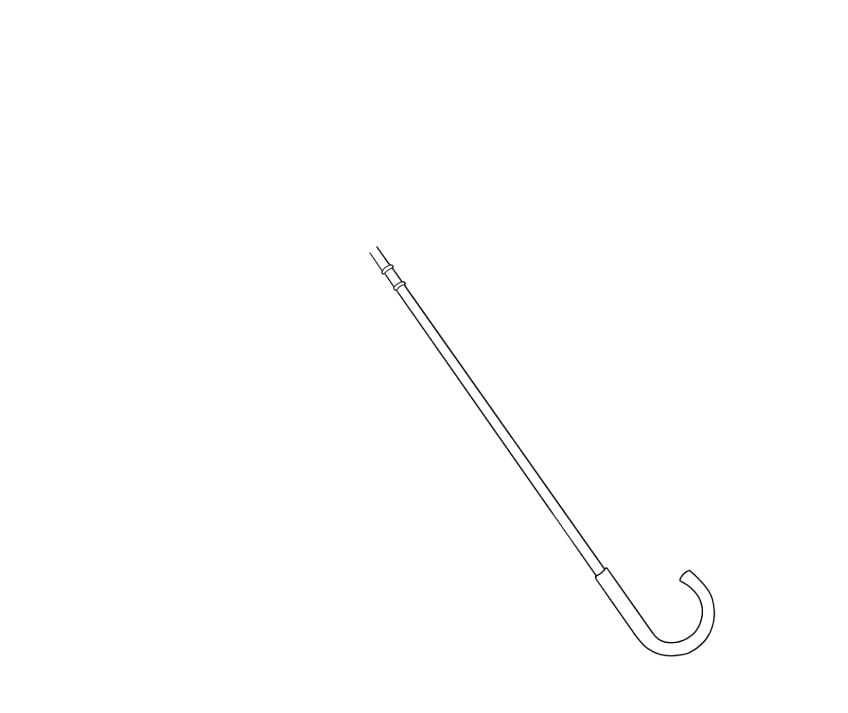
Step 1: Begin by Drawing the Main Handle
To begin your umbrella drawing, find the central point of your drawing area. Here, you are going to draw the main crook handle in the lower right corner. From this crook, draw the main pole that extends up and to the left of your canvas. At the top of the umbrella handle, draw two little rings.
Step 2: Shape the Top of the Canopy
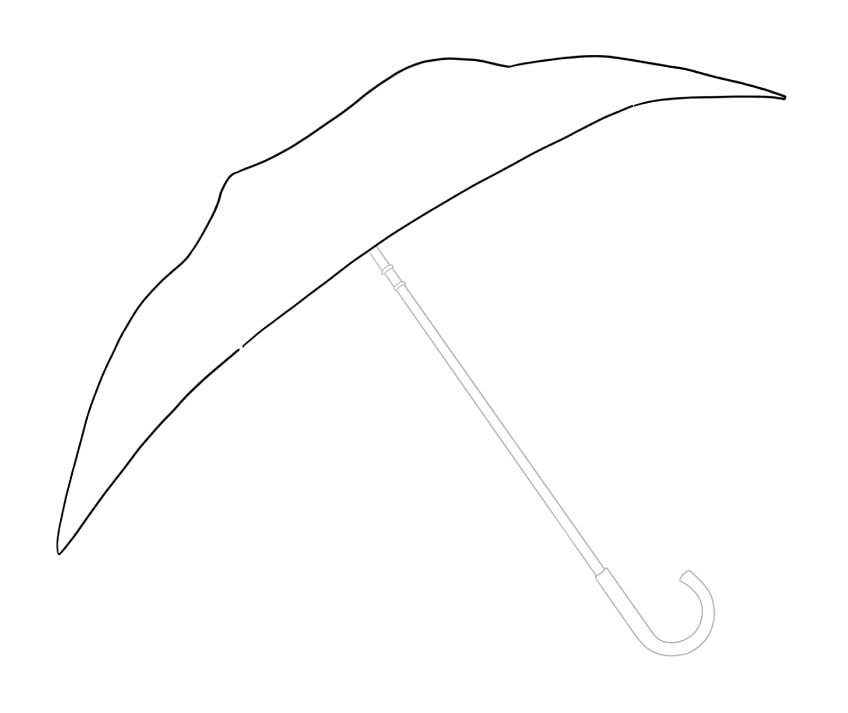
We now move on to the canopy of our umbrella sketch. Begin by drawing a curved arch that is equally wide on both sides of the handle. Above this, create a larger arch with four soft peaks.
Step 3: Create the Bottom Part of the Umbrella Canopy
In this step, we begin to create the three-dimensionality that we are looking for. To do this, we are going to draw the bottom part of the umbrella canopy. From the bottom of each side of the canopy, begin drawing small swooping lines that form four small points.
These points are where the struts of the umbrella canopy could come to an end.

Step 4: Add the Canopy Details
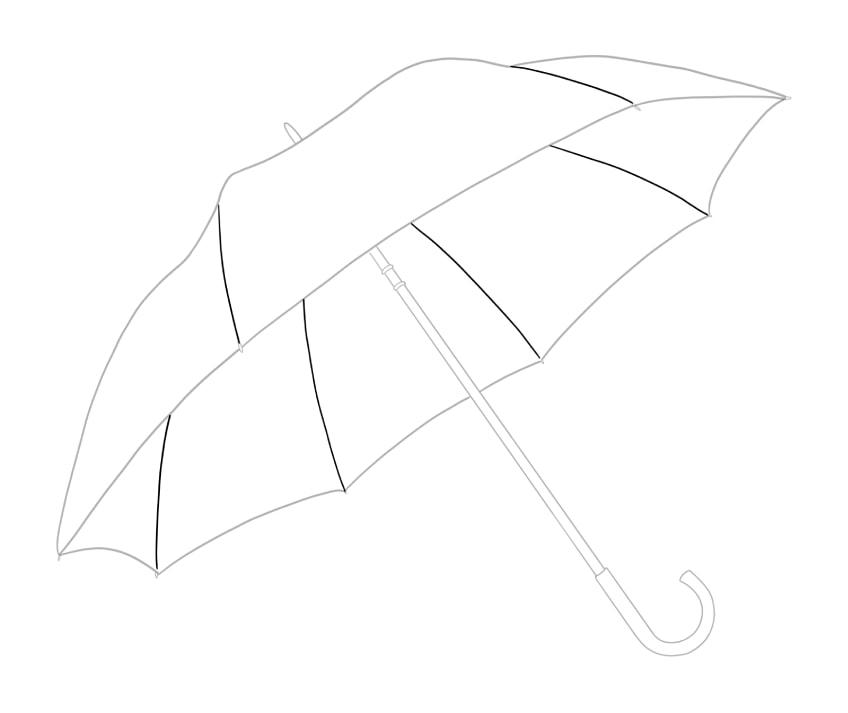
We are now going to add some details to our umbrella illustration. Begin at the top of your canopy, drawing the final curved point of the handle pole. You can then draw the tip caps for the poles along the edges of the canopy. These should be slightly sharp-edged.

Step 5: Add the Ribs to Your Umbrella Illustration
Before we begin adding color to our umbrella drawing, we are going to add the curving rib lines to the canopy. Begin on the upper part of the canopy, drawing two curving lines from the top to the bottom outline. Finish the step by drawing the inner ribs on the bottom part of the canopy, ending at each of the tip caps.
Step 6: Apply Some Color to the Umbrella Sketch
We are now going to start applying some color to our umbrella canopy. We are using red and yellow, but you are welcome to use any colors that you like. Start with some bright yellow paint and use a regular paintbrush to fill in the center portion of the upper part of the canopy.
This coat of yellow should be very even and smooth.

Step 7: Add Your Second Color
We are now going to add a second color to the two panes on either side of your yellow one. We are using a dark shade of pink. Use a regular brush to fill the two side portions of the top canopy.

Step 8: Begin Coloring the Inner Canopy
Let us go back to our yellow color now, using a regular brush to fill the outer and middle portions of the inner canopy. Remember not to color the handle of your umbrella illustration yet.
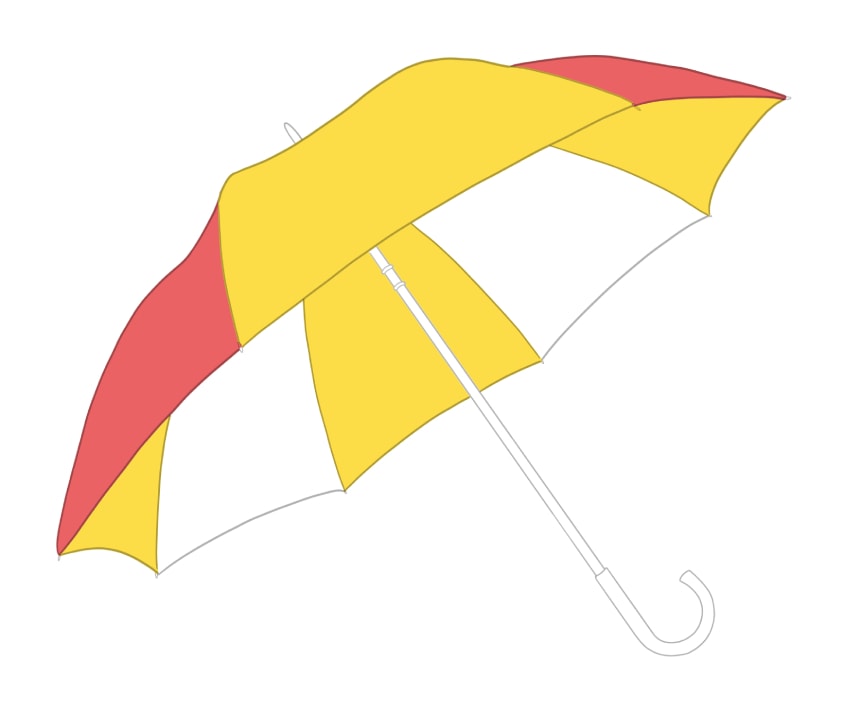
Step 9: Finish Coloring Your Umbrella Sketch Canopy
Using your dark pink color again, fill in the remaining two portions of the inner canopy.

Step 10: Color Your Umbrella Handle
We are now going to color the handle and pole of our umbrella illustration. For this, you will need a fine detail brush and a shade of light brown or caramel paint. Begin by filling the main pole and the handle with an even coat of color.
You can then finish this step by coloring the details, including the tip caps and the top of the pole.

Step 11: Highlight the Top of Your Umbrella
Now that our base colors are down, we can begin using shadows and highlights to create dimension and realism. Let us begin by creating a highlight on the top part of the umbrella canopy. Use a soft blending brush and some white paint to add a gentle highlight to the top of the middle segment in the upper canopy.
You can then complete the step by using some gray paint to add some gentle structure lines along the edges of this middle portion.

Step 12: Blend the Side Portions
Now, use a small blending brush and a shade of red to apply a second color coat along the edges of the side portions of the top canopy. Then, highlight the top parts of these portions with a little white paint. You can finish this step using a clean blending brush to create a smooth blend between the different layers of color.

Step 13: Shade the Inner Part of the Umbrella Canopy
With a small blending brush and a darker shade of yellow, carefully apply some structure and shading to the edges and surrounding area of the yellow-colored inner portions.
You can then complete this step by using a small blending brush and some white paint to carefully highlight the center of this portion.

Step 14: Continue Shading
With a small blending brush and some black paint, carefully apply some very light shading to the yellow parts of the inner canopy. This shading should include the casted shadow of the pole and a shadow cast by the upper side of the umbrella canopy.

Step 15: Blend the Red Inner Portions
Use a small blending brush and a shade of red to apply some soft shading around the edges of the red portions on the inside of the canopy. You can then repeat this process using some white paint, creating a light highlight in the center. Finish the step with a clean blending brush to smooth the colors together.

Step 16: Apply Some Final Shading to the Inner Canopy
With a small blending brush and some black paint, complete the shading within the red portions of the inner canopy.

Step 17: Highlight the Rim of the Umbrella Sketch
For this step, you will need a fine detail brush and some white paint. Simply add two curving brush strokes along the bottom rim of the upper canopy red segments.

Step 18. Complete the pole and main handle
Begin by using a small blending brush and black paint to add shading to the left side of the pole. This should also be on the top edge on top of the canopy. You can then add a smooth casted shadow along the left side of the pole and handle. You can deepen this shadow with some red paint. Finish your step using a small blending brush and yellow paint to add color to the pole and handle.
Blend all of these colors together smoothly with a clean blending brush.

Step 19: Finish Your Easy Umbrella Drawing
In this step, we are going to remove the dark outline of our umbrella illustration to create a seamless final drawing. Use the same color at every point of the outline to carefully trace over it with a fine brush.

Well done on completing your easy umbrella drawing. We hope that you have enjoyed the process and your day is a little brighter. Now that you are inspired, check out our website for our other fun and exciting drawing tutorials.
Frequently Asked Questions
How to Create an Umbrella Sketch Outline?
We make creating a realistic umbrella illustration easy by using a series of construction steps to build up a realistic three-dimensional umbrella sketch. We use simple shapes and lines to gradually build up the final shape before adding detail and color.
What Colors Should I Use for My Umbrella Illustration?
As with all artistic endeavors, the colors that you use are completely up to you. We use red and yellow, but you can use any colors that take your fancy. Whether you want your umbrella to be one color only, or you want to create an intricate pattern, you have absolute artistic freedom!
Matthew Matthysen is an educated multidisciplinary artist and illustrator. He successfully completed his art degree at the University of Witwatersrand in South Africa, majoring in art history and contemporary drawing. The focus of his thesis was to explore the philosophical implications of the macro and micro-universe on the human experience. Matthew uses diverse media, such as written and hands-on components, to explore various approaches that are on the border between philosophy and science.
Matthew organized various exhibitions before and during his years as a student and is still passionate about doing so today. He currently works as a freelance artist and writer in various fields. He also has a permanent position at a renowned online gallery (ArtGazette) where he produces various works on commission. As a freelance artist, he creates several series and successfully sells them to galleries and collectors. He loves to use his work and skills in various fields of interest.
Matthew has been creating drawing and painting tutorials since the relaunch in 2020. Through his involvement with artincontext.org, he has been able to deepen his knowledge of various painting mediums. For example, watercolor techniques, calligraphy and lately digital drawing, which is becoming more and more popular.
Learn more about Matthew Matthysen and the Art in Context Team.


