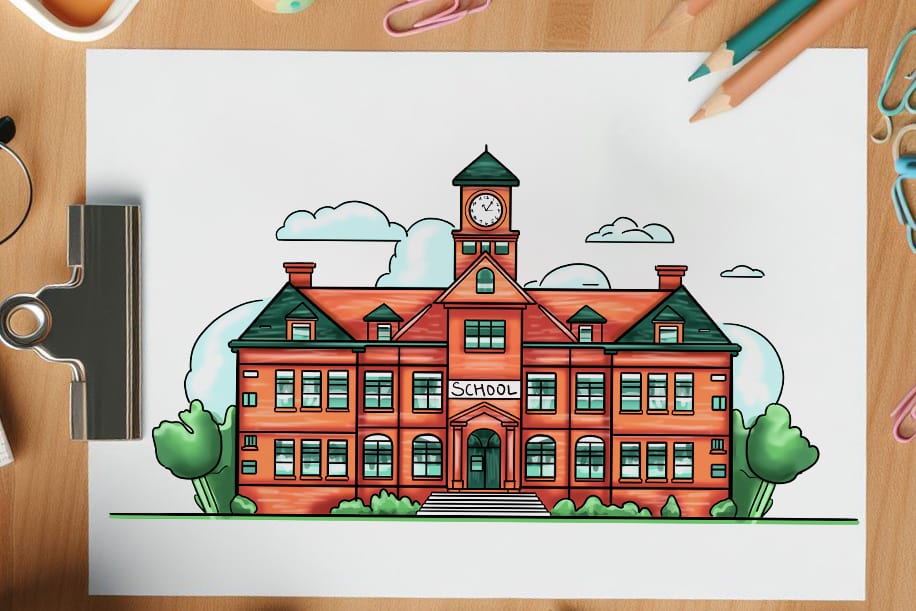
How to Draw a School – A Step-by-Step Drawing Guide
Join us for a simple 17-step tutorial on how to draw a school, a magnificent and powerful force in our universe! Learn to capture its dynamic energy and radiant beams, bringing this grand titan to life on your canvas. Our guide is clear and straightforward, making it accessible for artists at all levels of experience, and ensuring that the journey of drawing the school is both achievable and enjoyable.
Drawing the Academic Landscape: How to Draw a School
This collage serves as a visual guide for each step taken towards the final creation. By adhering to it, you’ll also become proficient in the technique of learning how to draw a school!

Step 1: Start Drawing the Basic Outline
Start by finding the middle of your drawing space and there, sketch a rectangle lying horizontally.

Step 2: Begin to Add Guidelines
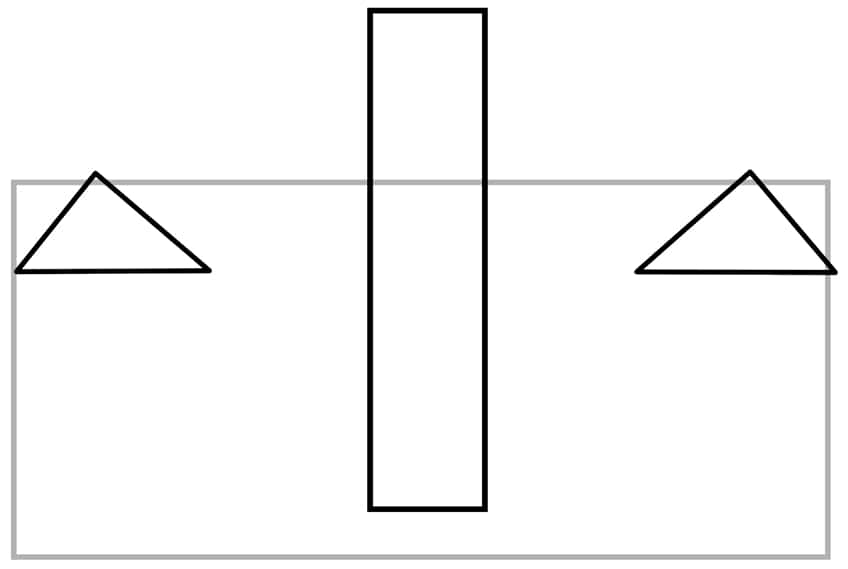
Inside the rectangle you’ve already drawn, sketch a sloped cone roof at both the left and right ends of the structure. Then, in the middle, add a tall vertical rectangle that overlaps the horizontal one.
Step 3: Draw the Roof on Your School Drawing
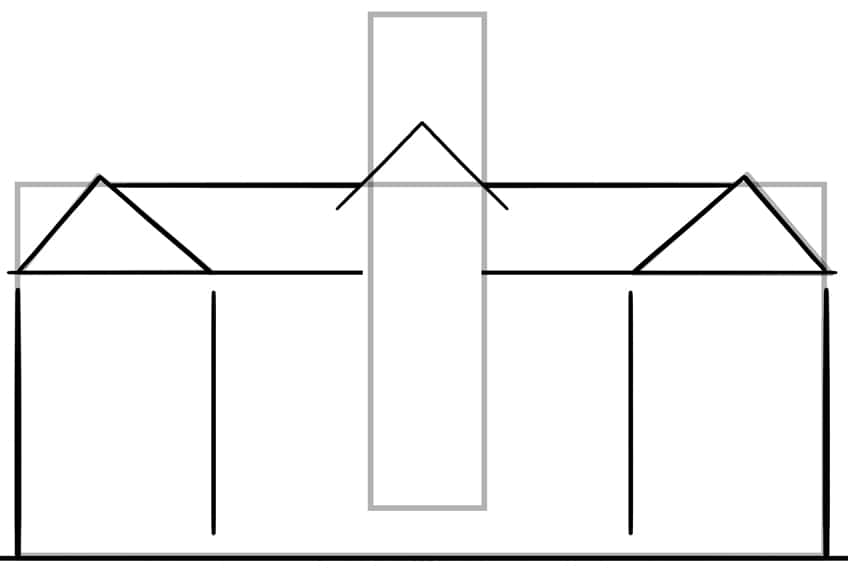
Connect the roof cones by sketching two horizontal lines that link both roofs to the central rectangle, and then draw the slope of the center roof here.
Step 4: Begin to Add the Separation Lines
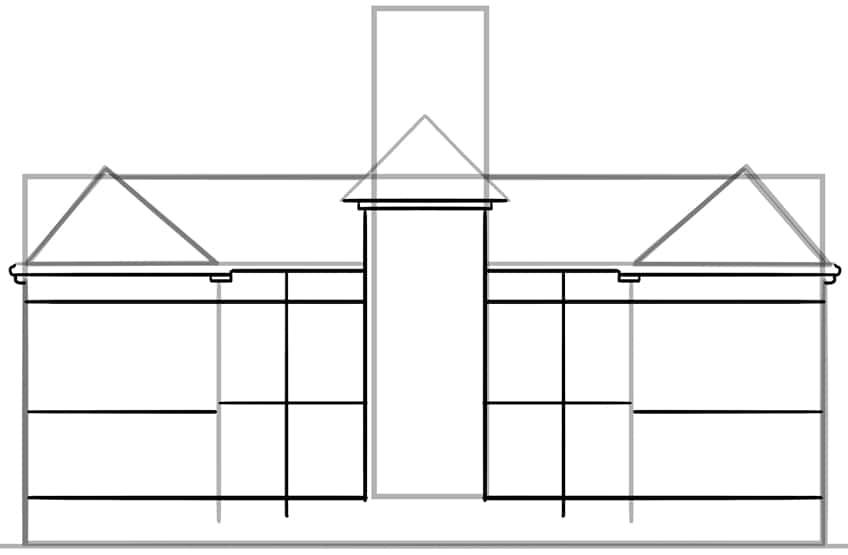
Sketch four horizontal dividing lines and two vertical dividing lines. Finish the central tower of the school building by adding two vertical wall lines to integrate the tower seamlessly with the rest of the structure.
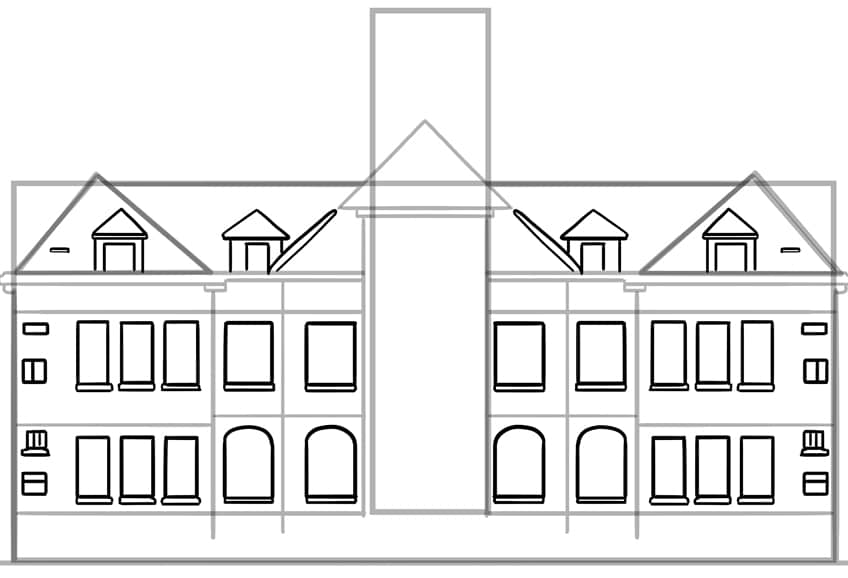
Step 5: Draw the Windows on Your School Building Sketch
Using the separation lines previously drawn, begin to draw the windows symmetrically. The windows on the left and right sections of the building should be the smallest, each featuring a bottom railing. The windows in the central section should be the largest, including top rectangular windows with bottom railings and lower windows with a curved arch and bottom railing.
Finalize this step by sketching the additional attic roof cones and attic windows.
Step 6: Add the Entry and Detail to the Tower
Begin by drawing the staircase leading from the first horizontal line to the second base level of the school, the staircase should begin wide and end narrow. Above the staircase, draw the two pillars holding up a secondary roof. Continue by drawing the arched doorway.
Utilize the construction lines drawn earlier to guide you in detailing the central tower and adding the extra triangular cone roof. Complete the step by drawing the final small windows on the tower and the two chimneys on each end of the school building.

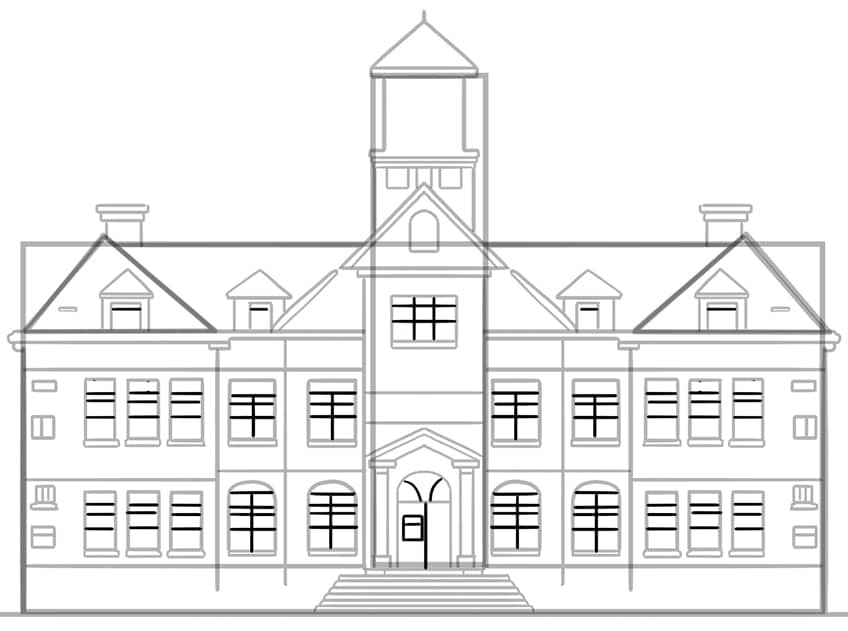
Step 7: Begin to Detail the Windows on Your School Drawing
Within each of the windows, draw at least three horizontal lines. For the larger windows, draw at least one vertical center line. Continue this step by detailing the arch entry door. After finishing, remove any construction lines.
Step 8: Add a Background Scenery
Start by sketching small bushes along the front of the school and larger trees to the sides of the building. Then, add several clouds of varying sizes in the sky. Finish off by drawing the circular clock within the tower.

Step 9: Start to Color Your School Building Sketch
With a fine, sharp brush and orange paint, apply an even coat to the school.

Step 10: Apply the Second Color Coat
Utilize a fine, sharp brush with dark green paint to evenly cover the rooftops. Then, switch to bright green paint to color the smaller bushes in front of the school. For the air vents, clock, wall banner, and steps, use a fine, sharp brush with white paint to apply color.

Step 11: Color the Windows in Your School Drawing
Using the same brush as previously, switch to teal paint and evenly coat each of the windows.

Step 12: Continue to Color the Trees and Clouds
Apply an even coat to the larger trees using a fine, sharp brush and green paint. Then, with the same type of brush, use a lighter shade of teal paint to evenly color each of the clouds.

Step 13: Begin to Shade and Highlight Your School Building Sketch
Start by applying shading to the edges, floors, and dividing lines of the school building’s walls with a small, soft brush and a dark shade of red paint, applying it gently. Then, use a blending brush to diffuse and soften the shading. Proceed by adding soft, horizontal highlight strokes along the walls using a small, soft brush dipped in white paint.
Again, employ a blending brush to distribute and mellow the highlights.

Step 14: Continue Shading the Roof Tops
Use a small, soft brush with black paint to create horizontal shading on the cone rooftops and the green beam across the school. Add highlights with white paint and blend to soften. Shade the bushes with dark green and highlight with white. With a fine brush, write ‘school’ on the banner and detail the clock. Finally, shade the arched entryway with black and add white highlights for contrast.

Step 15: Add Shading and Highlight to the Windows
Utilize a small, soft brush and black paint to gently add shading inside each window. Then, repeat the process with white paint to introduce highlights and use it to delineate the window frames by painting them white.

Step 16: Finish Off the Shading and Highlighting
Start with a small, soft brush and black paint to apply gentle shading to the tree edges. Follow up by adding soft highlights with white paint, using a blending brush to diffuse and spread these highlights smoothly. Then, switch back to a soft brush and white paint, and enhance each cloud with highlights.

Step 17: Complete Your School Drawing
Start by tracing the outlines and adding any inner texture or detail lines of the school with a fine, sharp brush and black paint to achieve the final look. This step brings definition and depth, concluding the drawing tutorial with a polished and detailed representation of the school!

Through this article, readers have been equipped with a step-by-step guide that demystifies the process of drawing a school, making what may have seemed daunting now feel achievable. By breaking down the drawing into manageable stages, we’ve provided a pathway for both beginners and seasoned artists to enhance their skills and express their creativity. It’s our hope that this guide has not only taught you how to illustrate a school but also inspired a deeper passion for drawing and a confidence to tackle even more complex subjects in the future.
Frequently Asked Questions
Are There Specific Tools I Should Use for a School Building Sketch?
In my experience with architectural drawings, using a range of drawing tools can greatly enhance the quality of your school building illustrations. I recommend starting with good-quality sketching paper or a drawing tablet if you prefer digital art. For traditional media, a variety of pencils, including H and B grades, can help achieve different line weights and shading effects. Additionally, fine-tipped pens are excellent for adding precise details to your school drawings. Don’t forget a good eraser and a ruler for straight lines and accurate proportions. Whether you choose traditional or digital tools, the key is to practice and experiment to find what works best for your unique style and vision.
What Are Some Common Mistakes to Avoid When Drawing School Buildings?
Drawing school buildings, like any architectural subject, can present challenges. One common mistake to avoid is neglecting proper perspective. Pay attention to vanishing points and ensure that your lines and angles align correctly to create a realistic sense of depth. Another common error is neglecting details such as windows and doors, which are essential for conveying the character of a school building. Finally, remember to maintain consistency in scale and proportions, as irregularities can detract from the overall believability of your illustration. With practice and attention to detail, you can avoid these pitfalls and create stunning school-building drawings.
How Can I Create a Sense of Scale and Perspective in My School Drawing?
Creating a sense of scale and perspective is crucial for realistic school-building illustrations. To achieve this, I often start by establishing a horizon line and vanishing points. Using these as reference points, I draw architectural elements with attention to proper foreshortening and convergence. Paying close attention to details that become smaller as they recede into the background helps create the illusion of depth and distance. Adding surrounding elements like trees, people, or other buildings can further enhance the sense of scale. Practice is key, and with time, you’ll develop a keen eye for achieving realistic perspective in your school drawings.
Matthew Matthysen is an educated multidisciplinary artist and illustrator. He successfully completed his art degree at the University of Witwatersrand in South Africa, majoring in art history and contemporary drawing. The focus of his thesis was to explore the philosophical implications of the macro and micro-universe on the human experience. Matthew uses diverse media, such as written and hands-on components, to explore various approaches that are on the border between philosophy and science.
Matthew organized various exhibitions before and during his years as a student and is still passionate about doing so today. He currently works as a freelance artist and writer in various fields. He also has a permanent position at a renowned online gallery (ArtGazette) where he produces various works on commission. As a freelance artist, he creates several series and successfully sells them to galleries and collectors. He loves to use his work and skills in various fields of interest.
Matthew has been creating drawing and painting tutorials since the relaunch in 2020. Through his involvement with artincontext.org, he has been able to deepen his knowledge of various painting mediums. For example, watercolor techniques, calligraphy and lately digital drawing, which is becoming more and more popular.
Learn more about Matthew Matthysen and the Art in Context Team.


