How to Draw a Monster – Create a Spooky and Ghastly Monster
Monsters have captured the human imagination for centuries, from ancient myths and folklore to modern-day movies and video games. These creatures of the dark and unknown often represent our deepest fears and anxieties, taking on various forms and shapes such as dragons, vampires, zombies, and werewolves. Yet, monsters also have a unique appeal, offering us a glimpse into a world beyond our own, where danger and adventure await. Whether we see them as horrifying abominations or fascinating beings, monsters continue to fascinate us and fuel our imaginations. Prepare yourself for today’s tutorial, as we guide you through the step-by-step process of drawing a monster!
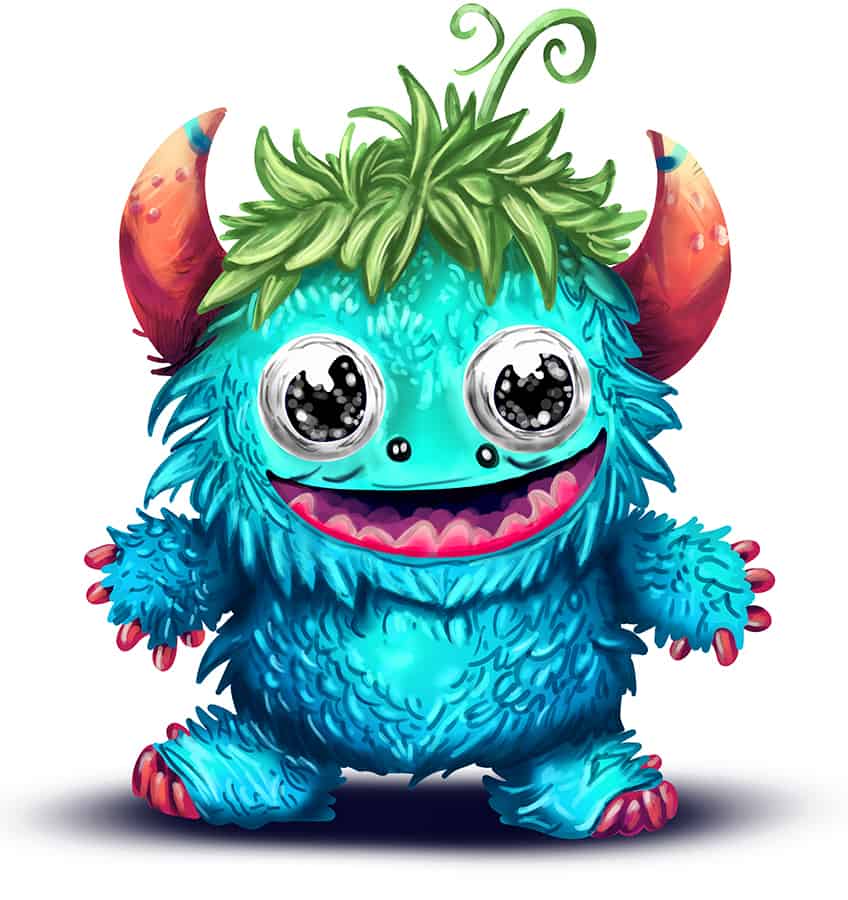
A Guide to Creating a Drawing of a Monster
Congratulations on your decision to learn how to draw a monster! The art of creating monstrous creatures can be a thrilling and rewarding experience, as you get to unleash your creativity and imagination. To begin, think about what type of monster you would like to create. Will it be a fearsome dragon or a slimy, tentacled beast? Once you have a clear idea, gather your drawing supplies, and start sketching out the basic shape of your monster. Add in details such as sharp claws, glowing eyes, or multiple heads to bring your creation to life. Remember, the beauty of drawing monsters is that there are no limits to your imagination, so let your creativity run wild!
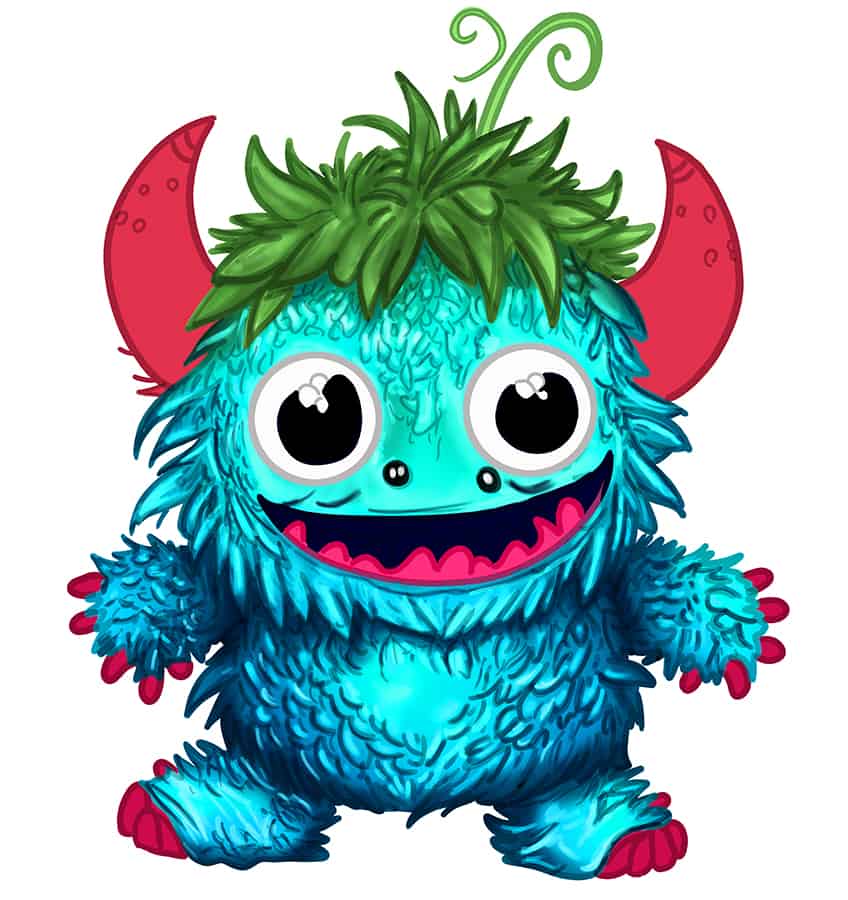
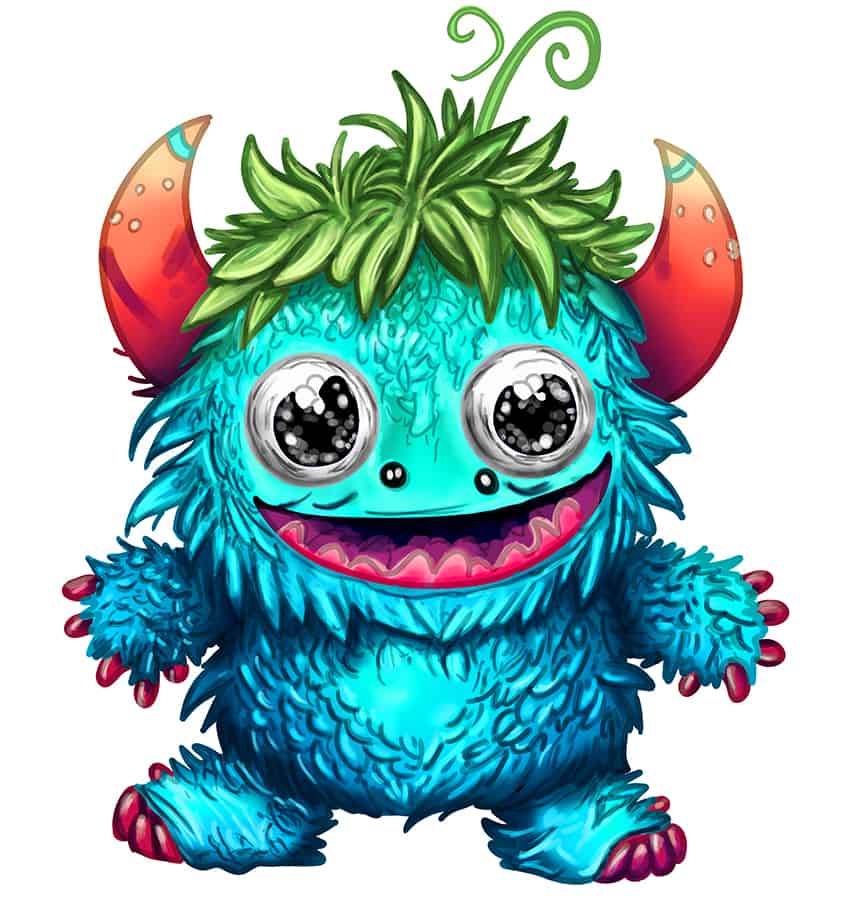
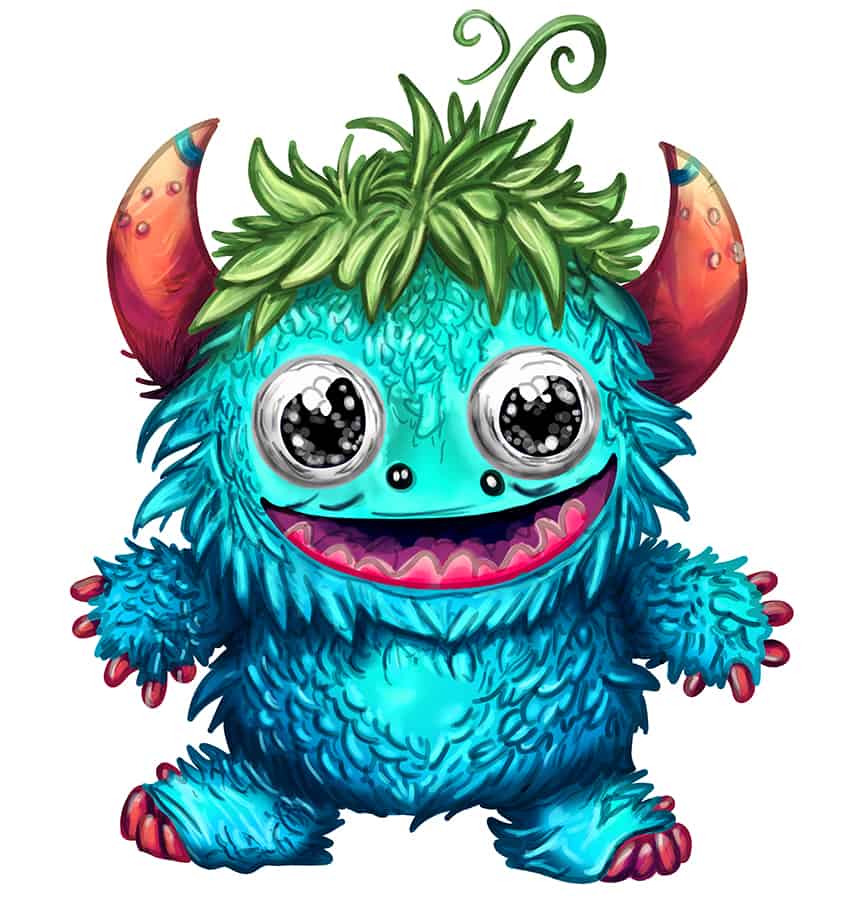
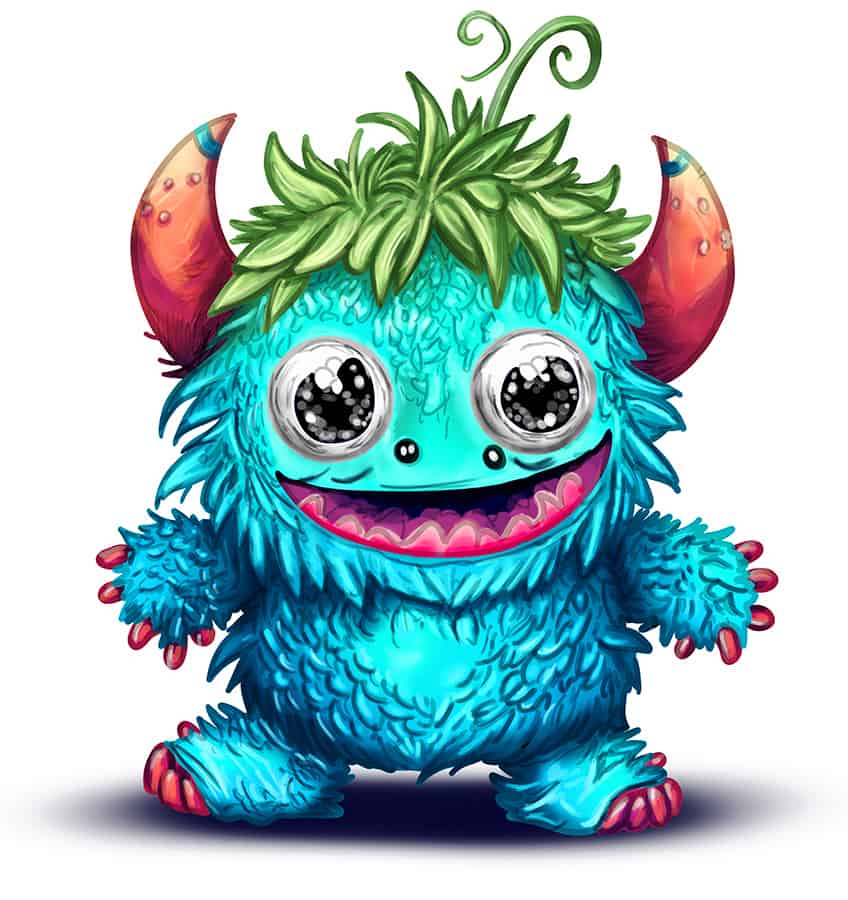
You too can learn how to draw a monster by following the step-by-step process illustrated in the below collage. So grab your drawing kit and let’s get started!
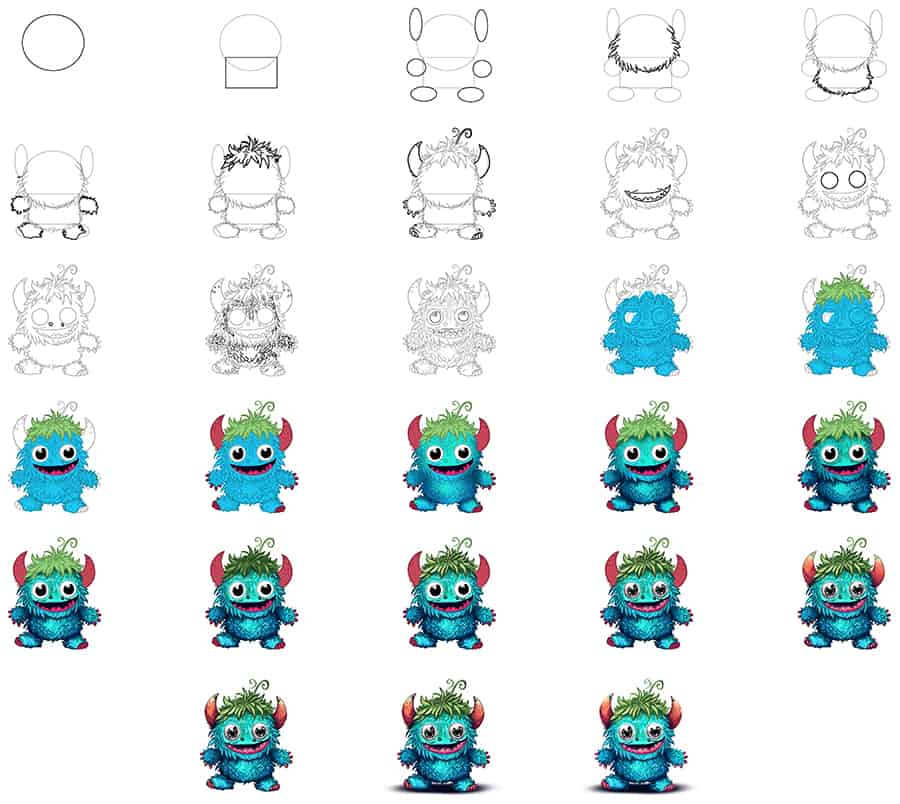
Step 1: Draw the Head of Your Monster Drawing
Begin your monster drawing by drawing a circle to represent the head of the monster.

Step 2: Draw the Main Body
Overlapping the head, draw a rectangle shape to represent the main body of your monster sketch.

Step 3: Add the Horns, Hands, and Feet Guidelines
On each end of the head, draw a narrow oval to represent each horn of the monster. Follow this by drawing a circle to represent the hands. Continue this process and below the hands, draw a wide oval to represent the feet of your monster sketch.

Step 4: Outline the Face
Use the previously drawn construction shape in step one, and draw the rough, furry outline surrounding the face of the monster.

Step 5: Continue to Outline the Body
Similar to the previous step, use the previously drawn rectangular shape to aid you in outlining a rough, hairy fur-like outline surrounding the main body.

Step 6: Outline the Hands and Feet
Using the construction lines drawn in step three, create a furry outline surrounding the hands and feet of your monster drawing.

Step 7: Continue to Outline Your Drawing of a Monster
Draw a furry head patch, at the top of the head, and let it cover the majority of the head.

Step 8: Outline the Horns and Fingers
In this step, outline sharp horns, on each side of the side, using the oval shapes drawn in step three. Within the tip of each horn, draw two fine curving lines. Above the head patch, draw a fine curving line.
Continue onto the hands, and draw five small oval shapes attached to the hands. This will represent the fingers of your monster sketch. Follow this by drawing the toes on each foot. Once completed, you may erase any construction lines that are still visible.

Step 9: Draw the Mouth of Your Monster Drawing
Within the lower part of the face, draw a sharp and curving shape to represent the mouth. Once the mouth is complete, you can now draw several teeth shapes within the mouth shape. Complete the step by drawing a stretch line on each end of the mouth.

Step 10: Continue to Draw the Eyes
Above each stretch line previously drawn, draw two large circles to represent the eyes of your monster drawing.

Step 11: Draw the Nostrils on Your Monster Sketch
Draw the nostrils represented by two small ovals between the eyes and mouth on your monster’s face.

Step 12: Texture the Body
Within the body and head of the monster, draw fine curving lines attaching to create layers of fur-like texture. Finish this step by drawing the fine circles within the horns, and the final structure lines on the hair and feet.
Step 13: Add the Final Detail to Your Monster Sketch
Draw a large circle with several smaller circles attached to it, within each eye. Complete the step by outlining the mouth area.

Step 14: Apply the First Color Coat
With a regular brush and blue paint, evenly coat the main body and face of the monster. Continue using a bright shade of green paint and a thin brush, and evenly coat the hair on your monster drawing.

Step 15: Continue to Color Your Drawing of a Monster
Select a fine, sharp brush and a shade of dark blue or black paint, and paint the background of the mouth. Switch to pink paint, and color the teeth. Continue by using black paint, and paint the center circle in each eye.
Finalize this step, by coloring the horns, fingers, and toes of the monster using a thin brush and a bright shade of pink paint.

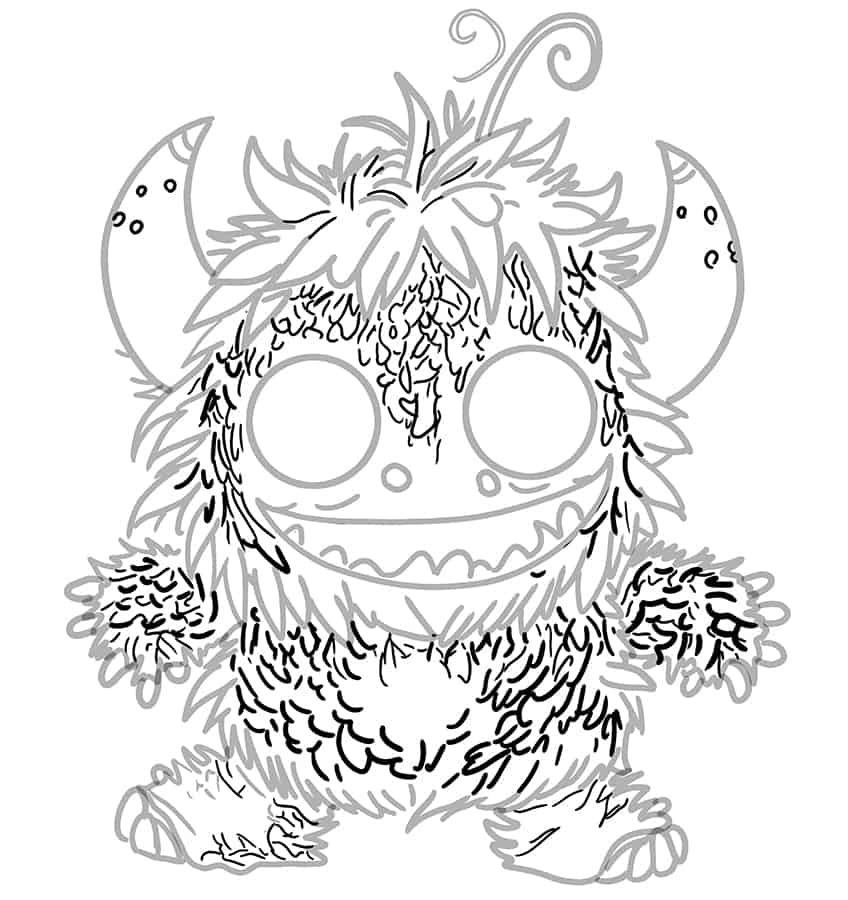
Step 16: Begin to Contour Your Drawing of a Monster
In this step, start by applying a soft contour around the edges of the body and head, using a small, soft brush and a dark shade of blue paint. Repeat this step using turquoise blue paint to apply soft highlights in the center of the monster’s body and head.
With a small, soft brush and black paint, add shading between the edges and layers of the furry coats. Finish this step with a blending brush to soften and spread the shading.

Step 17: Shade Your Monster Drawing
Apply shading around the eyes using a soft brush and black paint. This will create a realistic look for your monster drawing. Switch to a thin brush and gray paint, and add fine lines between the texture lines surrounding the face and body of the monster.

Step 18: Add Highlights to the Monster
Select a fine, sharp brush and a bright cyan or turquoise paint, and trace the fur lines, enhancing the highlight spots. Switch to a small, soft brush and apply a bright highlight color coat along the face and top area of the body. Use a blending brush to smoothen and spread the color coats. Complete the step using a fine, sharp brush and black paint, and fill the nostrils. Repeat using white paint to add fine highlights.
Step 19: Shade the Hair
In this step, apply soft shading within the hair patch using a soft brush and black paint. Make sure the first coat of color is still somewhat visible.
Step 20: Highlight the Hair Patch
Begin to apply highlights within each hair strand using a small, soft brush and white paint. Repeat using a thin brush and add fine highlighted brushstrokes within the hair patch.

Step 21: Detail Your Monster Drawing
Apply several brushstrokes circling the eyes using a soft brush and gray paint. Repeat using a thin brush and black paint. Combine gray and white paint and add fine dots within the black circle of each eye. Coat the back of the mouth using purple paint and apply soft highlights to each tooth using white paint.
Continue onto each finger and toe and apply soft brushstroke using dark purple paint. Add soft highlights using white paint. Switch to a combination of orange and yellow paint, and apply a soft highlight to the tip of each horn.
With a blending brush, smooth out the color coats. Fill in the stripe on each horn using a thin brush and cyan paint. Continue to fill in the circles within each horn using cream paint. Complete the step using dark purple paint and a small, soft brush to add fine texture lines and shading from the bottom of each horn leading upwards.
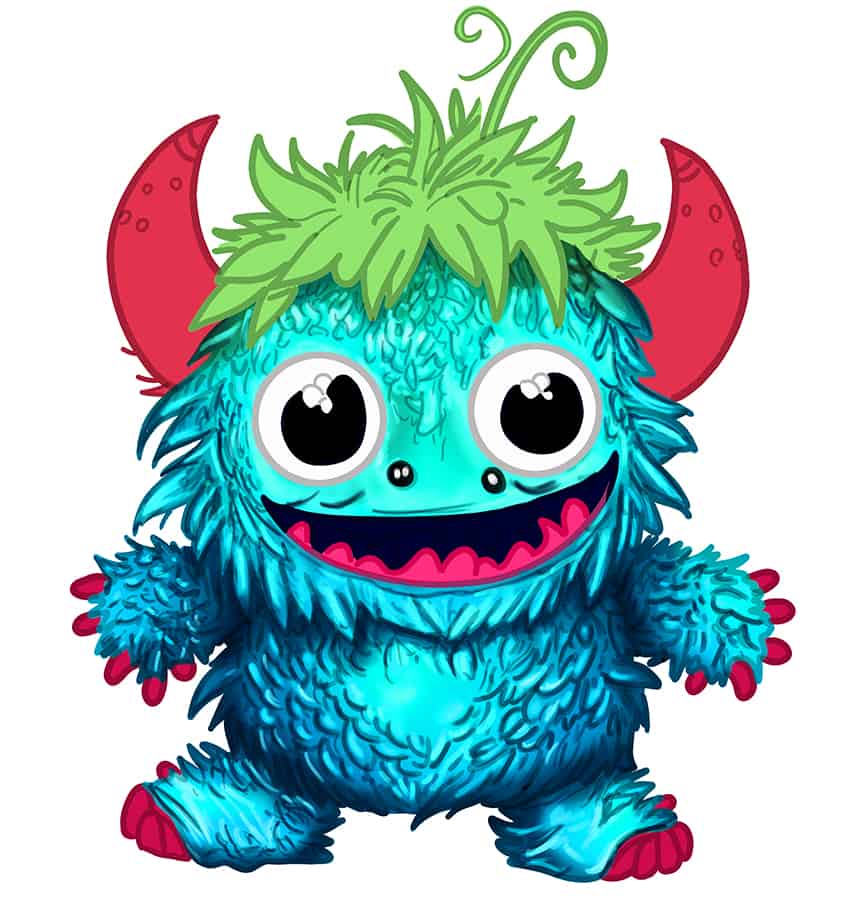
Step 22: Shade the Horns
With a soft brush and a dark shade of purple paint, add sharp shaded strokes within each horn. Repeat using a fine, sharp brush and black paint to add fine hairline brushstrokes. Complete the horns by adding a second coat of white highlights. Finish off using a thin brush and black paint, and add shading within each hair strand.
Step 23: Add a Ground Shadow
In this step, apply shading between both legs with a soft brush and black paint. Spread the shading using a blending brush to create a realistic ground shadow effect.
Step 24: Finalize Your Drawing of a Monster
You have reached the last step on how to draw a monster! To finish off your drawing, select a fine, sharp brush and the corresponding colors, and trace any harsh outlines that are still visible.
Congratulations on completing our tutorial on how to draw a monster! You have unlocked a world of creativity and imagination, where anything is possible. Take a moment to appreciate your accomplishment, as drawing a monster can be a challenging task that requires both skill and vision. Now that you have learned how to create a monstrous creature, consider experimenting with different types of monsters or creating your own unique beast. With every new drawing, you’ll continue to refine your skills and unlock your full artistic potential. Keep up the great work!
Frequently Asked Questions
How to Create a Scary Monster Drawing?
To make your monster look scarier and more intimidating, there are a few things you can do. First, focus on the creature’s facial features. Give it sharp teeth, glowing eyes, or a menacing expression to make it look more aggressive. Next, add texture and detail to the monster’s skin or fur to make it look more realistic and primal. You can also play around with the creature’s proportions and size to make it appear more menacing. Additionally, consider the creature’s posture and body language. Giving it a hunched-over stance, or positioning it to look like it’s in mid-attack can also add to the overall fear factor. Lastly, experiment with different lighting and shading techniques to create a dark and moody atmosphere around your monster, further adding to its ominous appearance.
What Color Can My Monster Drawing Be?
Your monster drawing can be anything you want it to be! The beauty of drawing monsters is that they can come in all shapes, sizes, and forms. You can draw a classic monster like a dragon, werewolf, or vampire, or create a unique creature using your imagination. You can also give your monster different personalities, expressions, and poses to add depth and character to your artwork. The possibilities are endless when it comes to drawing monsters, so don’t be afraid to get creative and let your imagination run wild!

Matthew Matthysen is an educated multidisciplinary artist and illustrator. He successfully completed his art degree at the University of Witwatersrand in South Africa, majoring in art history and contemporary drawing. The focus of his thesis was to explore the philosophical implications of the macro and micro-universe on the human experience. Matthew uses diverse media, such as written and hands-on components, to explore various approaches that are on the border between philosophy and science.
Matthew organized various exhibitions before and during his years as a student and is still passionate about doing so today. He currently works as a freelance artist and writer in various fields. He also has a permanent position at a renowned online gallery (ArtGazette) where he produces various works on commission. As a freelance artist, he creates several series and successfully sells them to galleries and collectors. He loves to use his work and skills in various fields of interest.
Matthew has been creating drawing and painting tutorials since the relaunch in 2020. Through his involvement with artincontext.org, he has been able to deepen his knowledge of various painting mediums. For example, watercolor techniques, calligraphy and lately digital drawing, which is becoming more and more popular.
Learn more about Matthew Matthysen and the Art in Context Team.