How to Draw a Guitar – Create a Realistic Drawing of a Guitar
Whether you are musical yourself, or you know someone who is, you can certainly appreciate the beauty of musical instruments. Today, we are going to bring one of these instruments to life in paint. If you follow along, you will learn how to draw a guitar that jumps off the page! With so many intricate elements, creating a drawing of a guitar may seem like an impossible task. Fortunately, we have a very easy-to-follow tutorial for you, so that you can make a realistic guitar sketch with no hassle!
A Step-by-Step Guitar Illustration Tutorial for All Artists
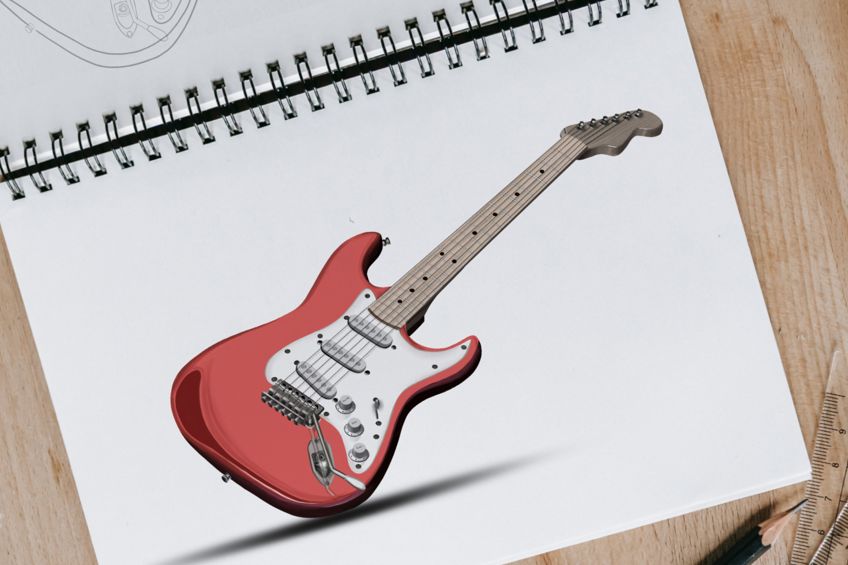
To get that music ringing in your ears, we are going to break the guitar drawing process down into 20 simple steps. In the first few steps, we will use some basic shapes to build up the guitar. This process helps you to gradually build up the final shape and redo small portions if you do not manage to get them perfectly the first time. We then begin to add color, starting with a simple base coat, and moving on to add contours and highlights. You can see an outline of the guitar illustration in the collage below.
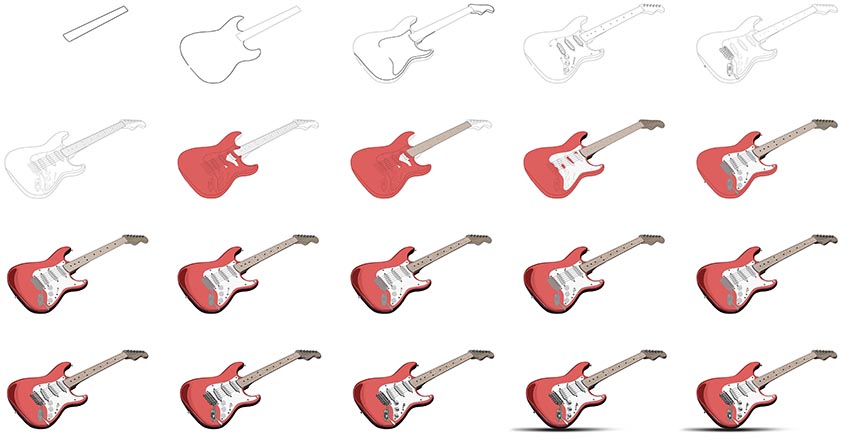
We now come to the question of medium. We are happy that our tutorials are suitable for all possible mediums, be they digital or physical. If you are using a drawing tablet, then we recommend creating the outline on a separate layer to the colors. For physical mediums, like paint or coloring pencils, create the outline with a light pencil that you can easily erase later.
Gather your supplies and a cup of tea, and let us begin to hear the music!
Step 1: Begin by Drawing the Guitar Neck
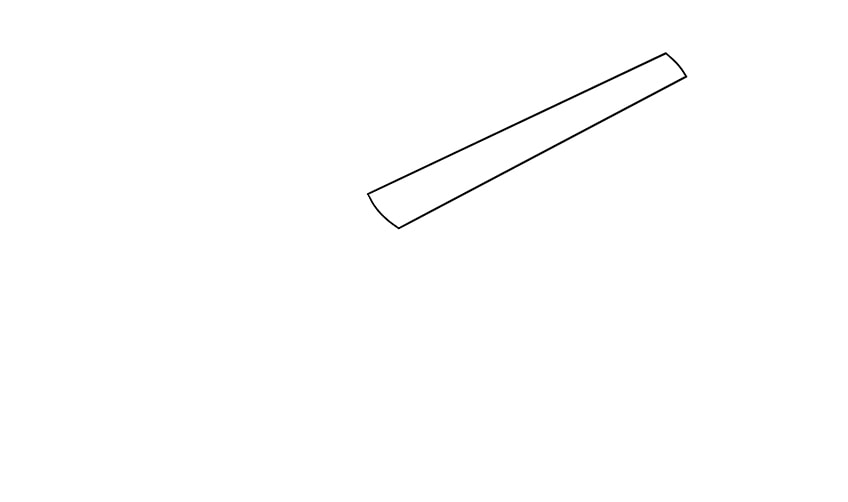
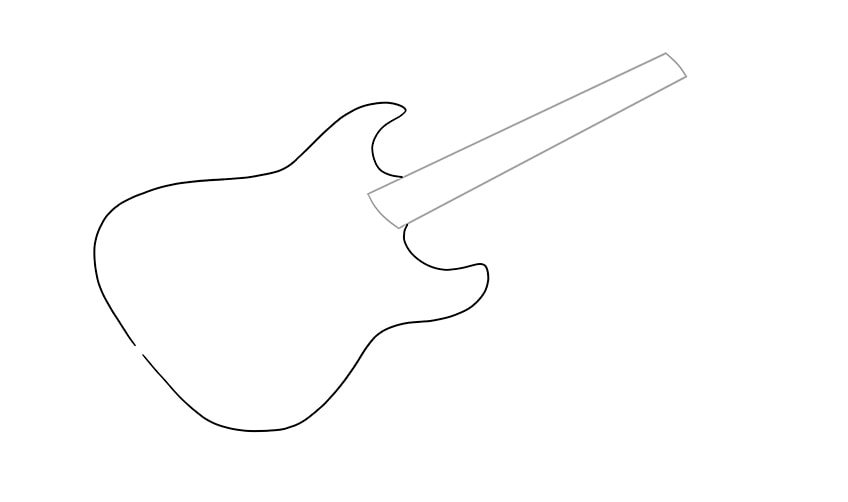
The first part of our guitar sketch is going to be the neck. The neck is where the strings run down, and where we will add the frets in a later step. Begin by finding the central point of your drawing area. Just to the right of this spot, draw two lines that angle down to the bottom left corner. Join these lines with a slightly rounded line at each end. To create the necessary realism, the top (right) part of the neck should be slightly narrower than the bottom (left) side.
Step 2: Create the Guitar Sketch
In this step, you are going to draw the body of your guitar illustration. This may take several attempts as the shape is very specific, so take your time. The shape should be slightly oval with a flat base. It should then curve inwards, before ending with two horns above the end of the neck.
Step 3: Draw the Guitar Head and Other Details
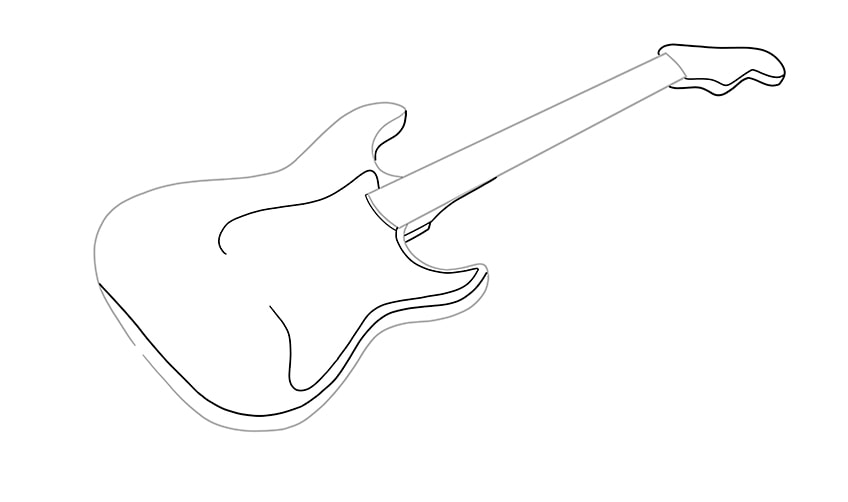
We are now going to flesh out the shape of our guitar sketch in a little more detail. Begin at the top of the neck, drawing the tuning head of the guitar. This shape should be curved and slightly angled towards the right side. You can also create a separate outline here to create more three-dimensionality.
Next, draw the pickguard within the main body of the guitar, and outline the bottom of the body and rear neck to create three dimensions.
Step 4: Add Finer Details to Your Guitar Sketch
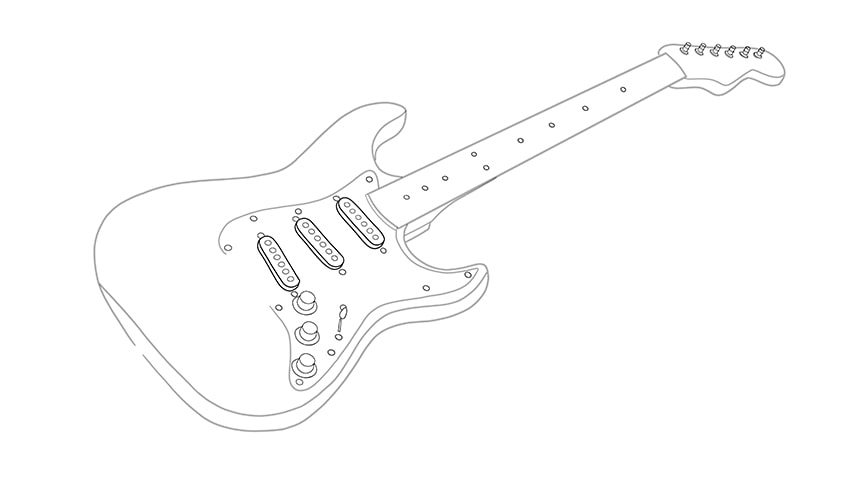
In this step, you are going to add some much finer details to your guitar illustration. Begin with the pickguard, creating several small circles around the edge of the shape to represent the nuts. Next, create three long and three-dimensional oval shapes that lie horizontally just below the neck. Fill each of these with a row of smaller circles. You can then create the volume and tone dials along the bottom of the pickguard area. On the neck, you can draw position markers represented by small circles.
You can then complete this step by drawing the string holders (or machine heads) along the top edge of the head of the guitar.
Step 5: Outline the Bridge of the Guitar Sketch
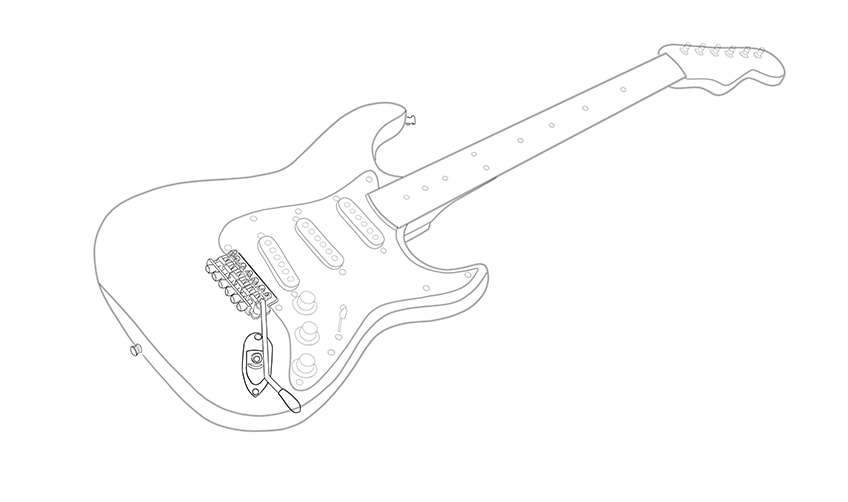
We are now going to draw the bridge on the body of the guitar drawing. The bridge supports the strings and transmits the vibrations and tones of the guitar, literally creating the music. At the bottom of the pickguard, you can draw the bridge. It is quite complex and will take some time, but with patience, you can create a lot of realism.
To finish this step, you are going to draw the bottom strap button on the bottom portion of the main body. The second strap button can be placed on the left horn of your guitar illustration.
Step 6: Draw the Strings
Compared to the previous few steps, this one is nice and easy. It is also the final detail step before we start coloring our drawing of a guitar. Using a ruler, draw six straight lines that extend from each of the tuners on the head to the bridge.
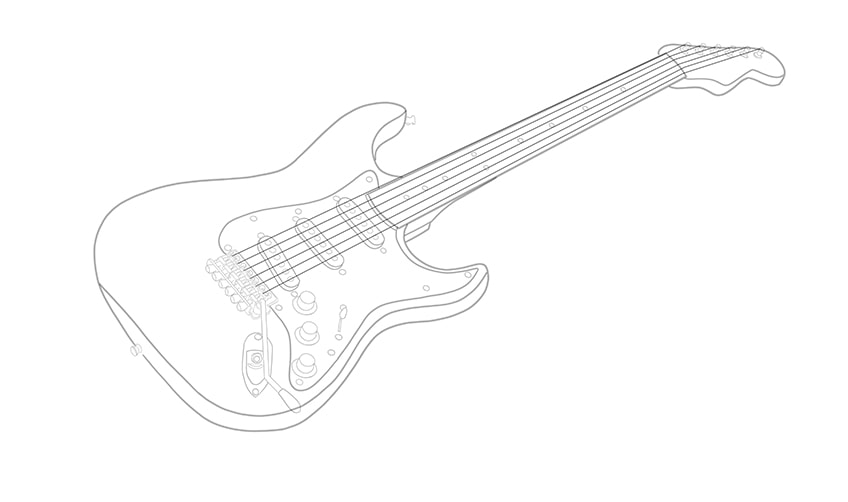
Step 7: Apply a Base Color Coat to the Body of the Guitar
We begin coloring our guitar illustration in this step. Let us start with a base coat for the body of the guitar. Use a regular paintbrush and some light pinkish-red paint to evenly color the main body.
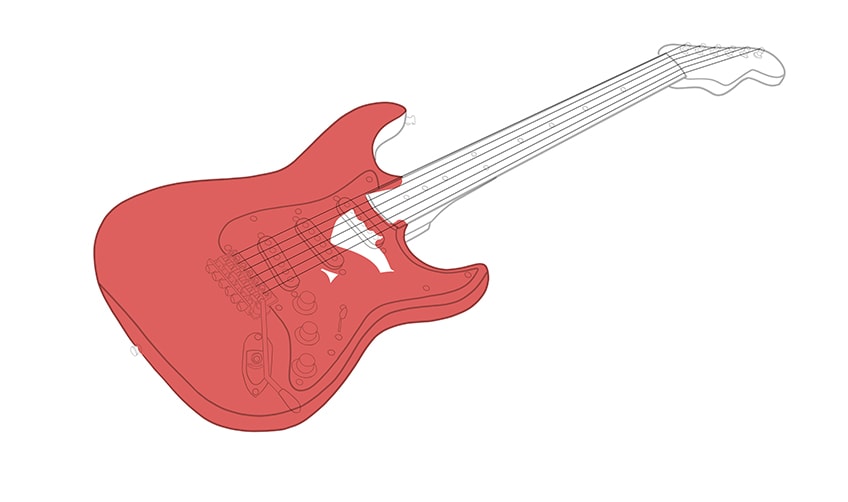
Step 8: Color the Guitar’s Neck
You can now apply a base coat of color to the neck of the guitar. You can use a shade of light brown or light tan for this base coat.
Apply it evenly to the neck with a regular paintbrush.
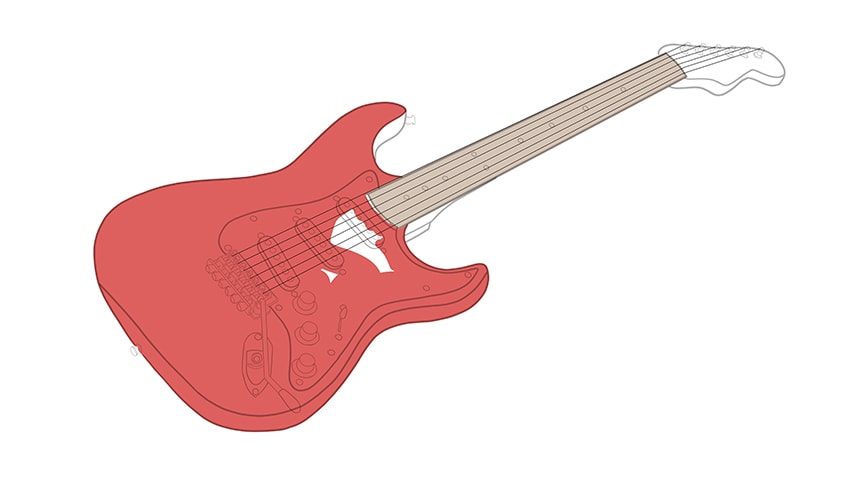
Step 9: Color the Guitar Head and the Pickguard
For this step, you are going to need three different colors; white, black, and dark gray. Begin with the white, using a small paintbrush to fill the shape of the pickguard with an even coat of white. You can then use the same brush and some black paint to color the side wall of the main body horn and neck.
Finally, with the same brush and a dark shade of gray, fill the head of the guitar and the side wall of the neck.
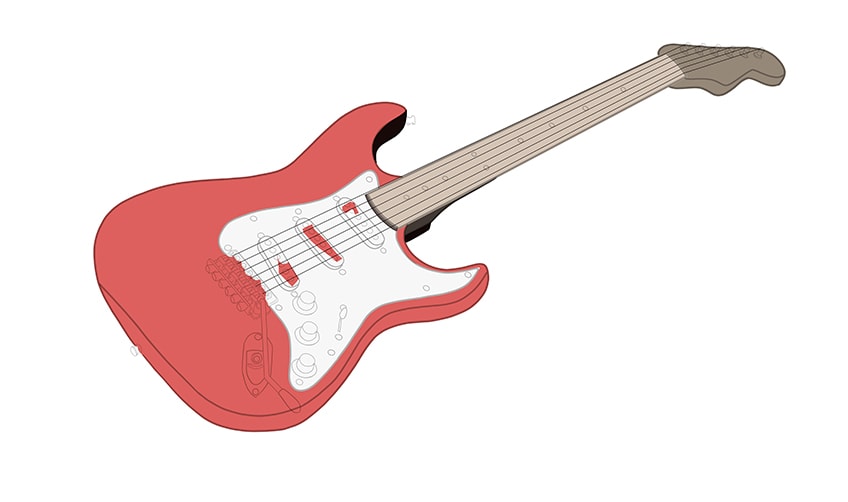
Step 10: Coloring the Details
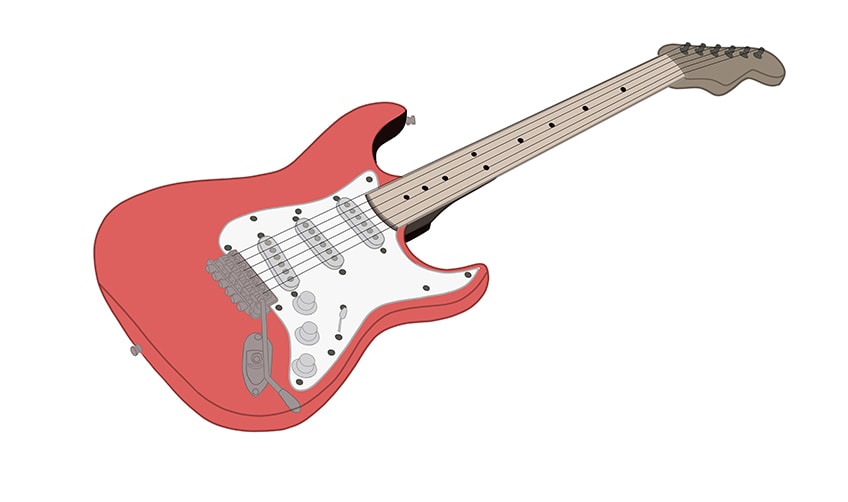
We are now going to color the details of the guitar, including the marker dots, the bridge, the tone dials, and the tuners on the head. Begin with a fine detailing brush and some black paint, and carefully color the position marking dots on the neck. You can then use some dark gray paint to fill in the screws on the edges of the pickguard.
Next, with a regular paintbrush and some light gray paint, color the three ovals below the neck. You can then use a very fine brush and some olive green paint to fill the dots within these ovals. Using a small brush and some dark gray, paint the bridge, the whammy bar, and the output jack. The second final part of this step is to paint the tone dials with a light gray color.
Finally, use some black paint and a fine brush to paint the tuners on the head of the guitar.
Step 11. Shade and highlight the body
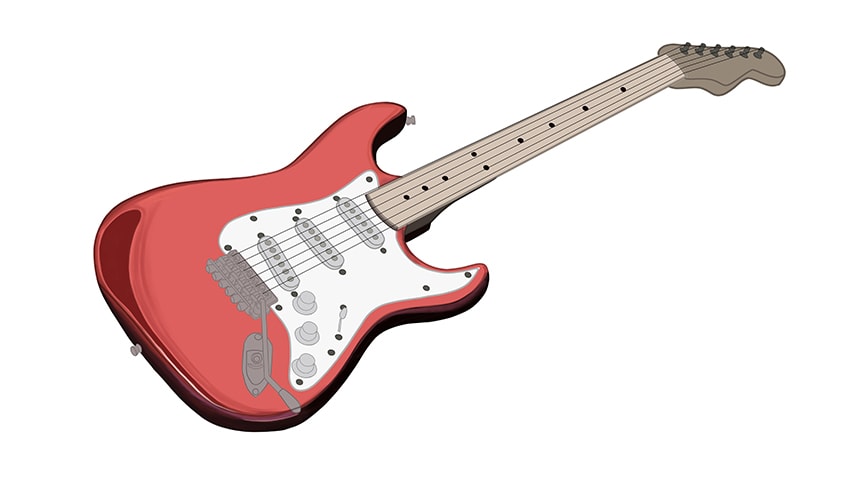
Let us now start adding some more definitions to our guitar illustration. Use a small blending brush and some dark red paint to carefully apply some brush strokes along the side wall of the guitar. This color should fade into the curving edge of the main body. Repeat this process to gradually darken the reflection spot and curve it gently to a fine line along the bottom outline. Next, use some black paint with the same brush to add shading along the sidewall of the main body. To complete this step, use a fine detailing brush and some white paint to create a hairline highlight along the bottom of the guitar body.
You can also use a clean blending brush to smooth the layers of color together.
Step 12: Paint the Frets
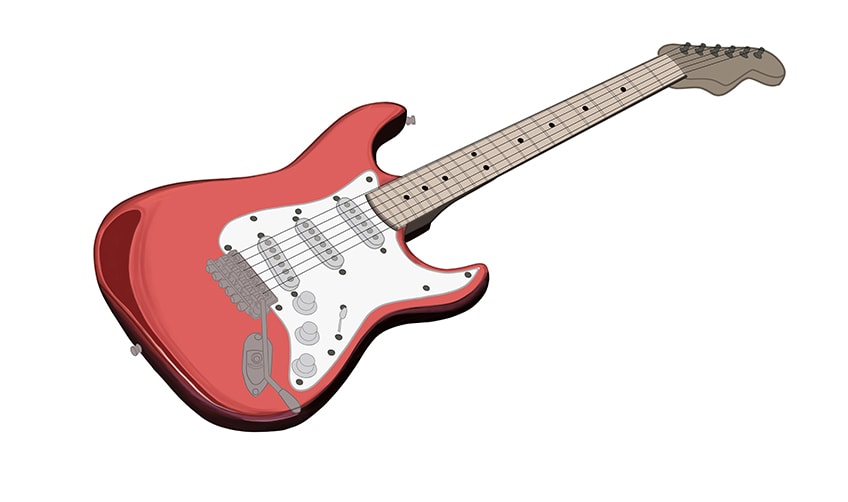
We are now going to paint the fret lines on the neck of the guitar. These lines are the grids that separate the different notes that can be played. Use a fine detailing brush and some black or dark gray paint and create 21 thin lines. Complete this step using a fine brush and dark gray paint to trace along the bottom edge of the neck.
Step 13. Shade the neck
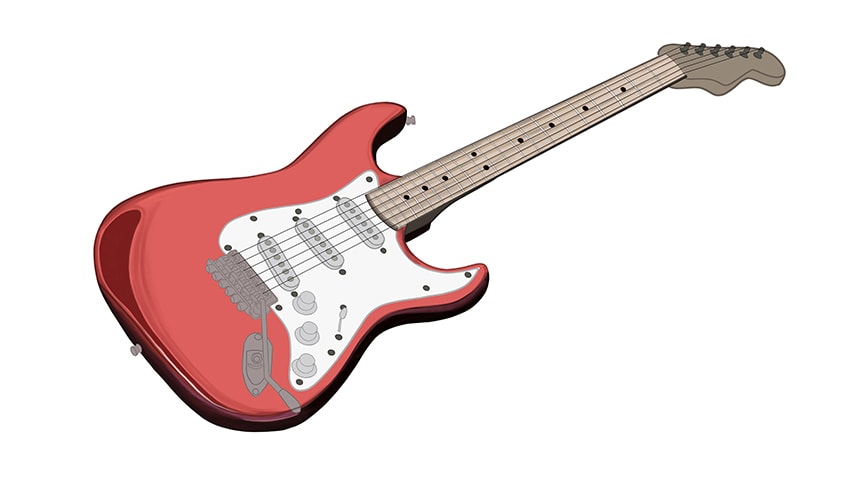
Let us now create some shading between the fret lines and the strings. Begin with a detailing brush and some white paint and carefully fill the gap between each double fret line. Then, use a small blending brush and some black paint to carefully apply a shadow to each string. You can repeat this using some light tan paint and then some white paint to create a little highlight.
Step 14: Shade Around the Pickguard
In this step, we are going to use a small blending brush and some light gray paint to apply a soft shadow around the outline of the pickguard. You can also shade around the three oval shapes, the pickup selector, and the three tone dials. Soften this shadow further with a clean blending brush.
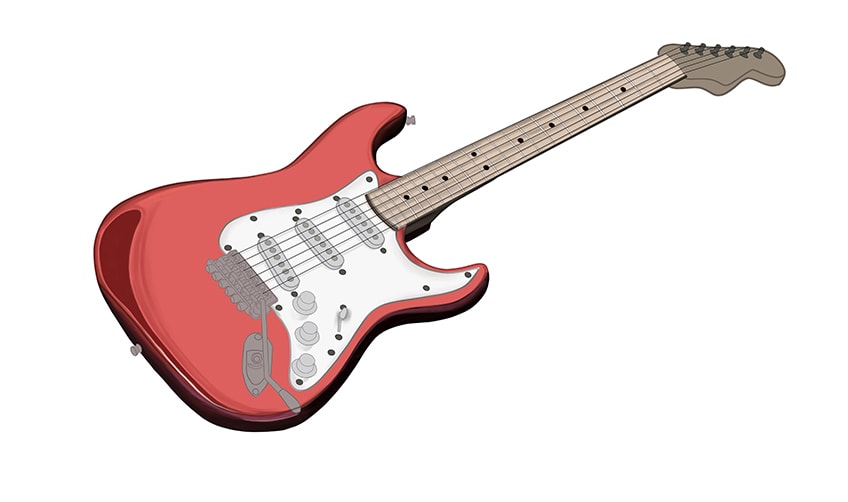
Step 15: Create Texture in the Guitar Head
With a small blending brush and some wood brown paint, you can now darken the first coat of the head. This should not be a smooth, even coat of color. In order to create texture, this color should be applied in clear brush strokes. Repeat this step with white paint to add more depth of texture. For the sidewall of the head, repeat this process with black paint, adding some contouring definition. You can now add a soft shadow around each of the tuners on the head.
To complete this step, use a detailing brush and white paint to add a highlight along the right edge of the guitar head.
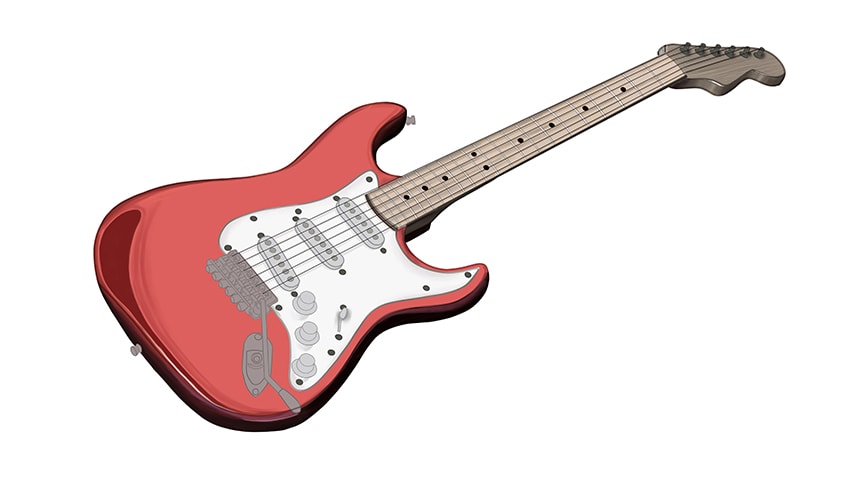
Step 16: Add Color Detail to the Bridge
For this step, you are going to need a small blending brush, a fine detail brush, and several shades of color. You will need black, white, light gray, and a dark olive shade. Begin with a blending brush and some black paint, using these to shade around the edges of the ovals on the pickguard. Repeat this using a fine brush and black paint to partially fill in the screws, creating a small indent. Next, use the blending brush and black paint to softly shade each of the holes in the front of the bridge. You can also gently shade each of the springs and the backbone of the bridge.
You can now add some highlights to the back bone with a small blending brush and some white paint.
Now, with a small blending brush and some white paint, evenly coat the bridge saddles. You can repeat this with some dark gray paint, filling the vertical edge of each saddle. Fill the flat surface of each saddle with some light gray paint. Moving on to the whammy bar, begin with a small blending brush and paint the inner part with some white color. To complete this coloring detail, use a small blending brush and black paint to carefully shade around the edges, and repeat this process once more with dark olive color.
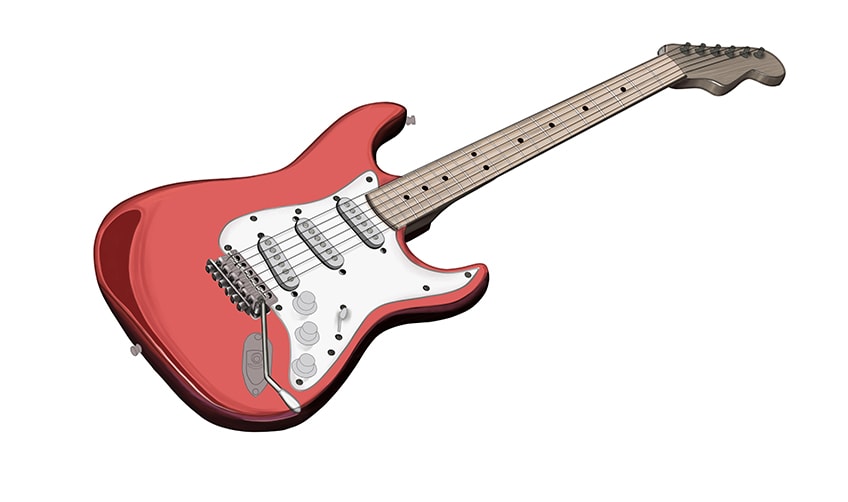
Step 17: Finish the Bridge Details
Begin by using a small blending brush and some dark gray paint and softly shade the bridge areas where the first color coat is still slightly visible. Repeat this with some white paint, highlighting the edges. Then, with a small blending brush and some gray paint, fill the output jack. You can repeat this with some black paint, structuring the area. Once again, you can highlight the edges with white. Finally, use a small blending brush and a combination of light gray and white paint to create a soft reflection of the whammy bar on the main body.
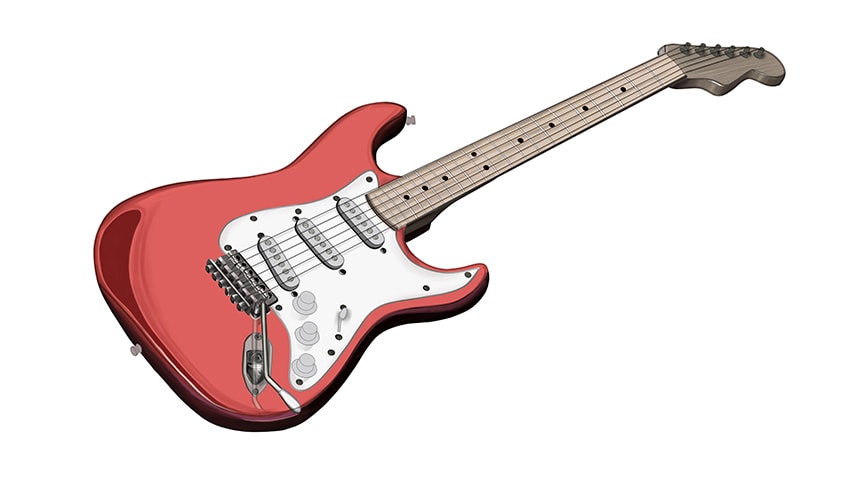
Step 18: Detail the Dials
We are now going to add details to the tuner dials. With a small blending brush and some dark gray paint, carefully shade the side walls of each dial tone. With a fine brush, you can paint the markers within each dial and the labels. With a small blending brush and some white paint, apply some soft highlights onto the bottom area of each dial. You can then shade the pickup selector with dark gray, and apply a soft spot of highlight with white paint. Use a fine detailing brush and some black paint to softly fill the strap buttons, and add a little highlight with some white.
Finish this step with a small blending brush and black paint, filling the tuners on the head and adding rings of highlights.
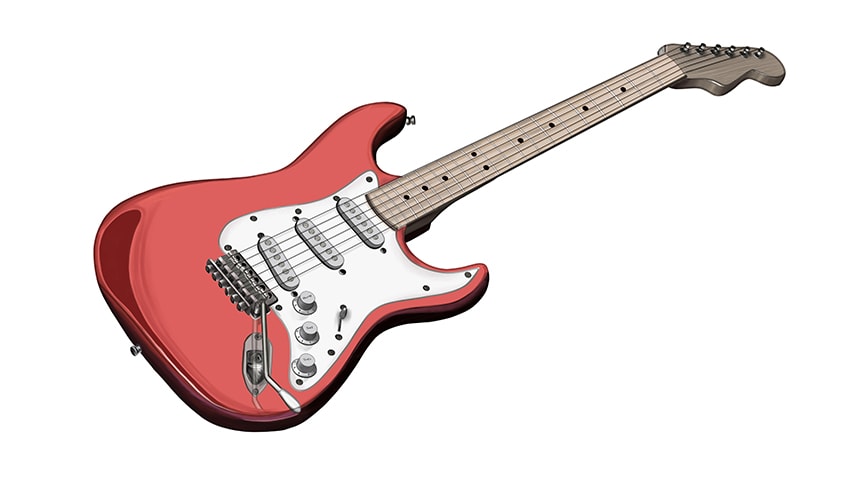
Step 19: Add A Ground Shadow
To enhance the three-dimensionality of our guitar illustration, we are going to add a soft shadow to the ground below it. Use a small blending brush and some black paint to create a dark spot right below the lowest point of the guitar.
You can then blend this out with a clean blending brush, fading the shadow to either side.
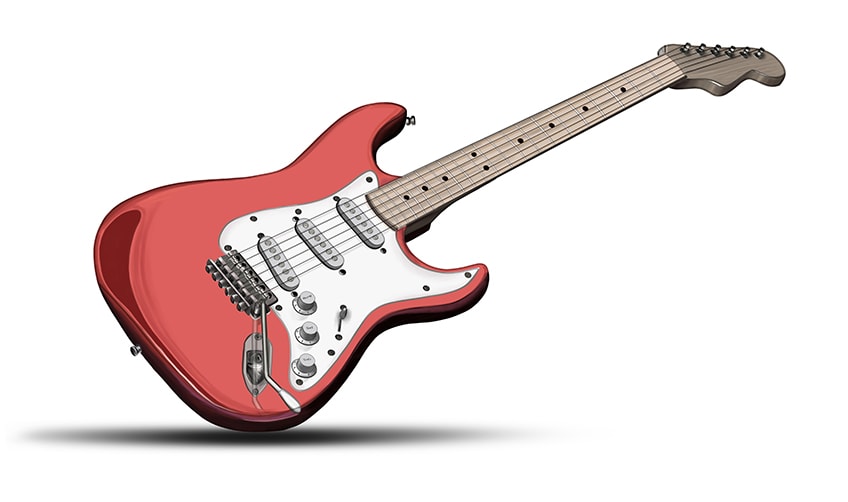
Step 20: Finishing Your Guitar Illustration
In order to finish our guitar drawing, we are going to simply remove the outline. For digital artists, you can delete the outline layer. For physical artists, you can use the corresponding color at each point of the outline to carefully trace over it. You will be left with a seamless and realistic drawing of a guitar.
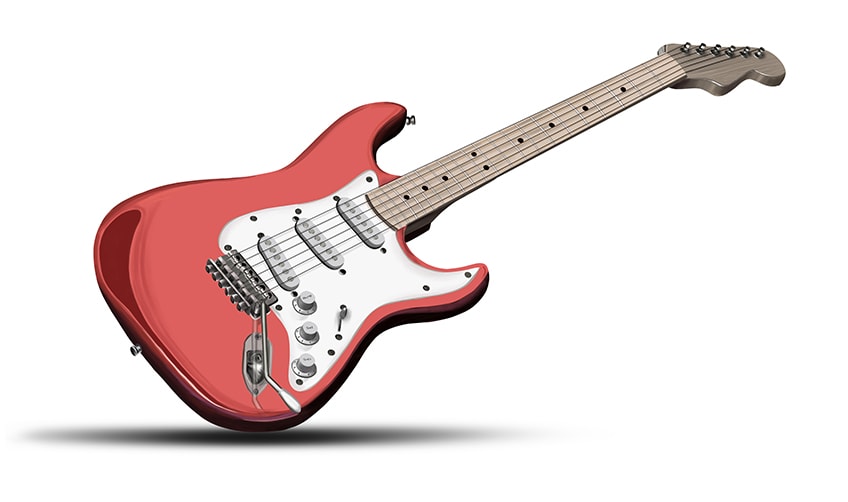
Although this tutorial has been quite long, we hope that you know feel confident in your ability to create a realistic electric guitar sketch. You will also have a more in-depth knowledge about constructing and shading in order to create three-dimensional realism. Hopefully, you have enjoyed the tutorial and we will see you again soon for more artistic adventures!
Frequently Asked Questions
How to Draw a Guitar That Is Realistic?
The key to creating a realistic guitar illustration lies in your ability to have the patience for small details. All the little dials and knobs on an electric guitar do take some time, but the outcome is well worth it!
What Colors Do You Need for a Drawing of a Guitar?
The colors that you choose to use for your guitar sketch are completely up to you. Our tutorial is for a red guitar sketch, but you can make your own guitar illustration in any color you choose. Some basics that you will need regardless are black, white, gray, and light brown.
Matthew Matthysen is an educated multidisciplinary artist and illustrator. He successfully completed his art degree at the University of Witwatersrand in South Africa, majoring in art history and contemporary drawing. The focus of his thesis was to explore the philosophical implications of the macro and micro-universe on the human experience. Matthew uses diverse media, such as written and hands-on components, to explore various approaches that are on the border between philosophy and science.
Matthew organized various exhibitions before and during his years as a student and is still passionate about doing so today. He currently works as a freelance artist and writer in various fields. He also has a permanent position at a renowned online gallery (ArtGazette) where he produces various works on commission. As a freelance artist, he creates several series and successfully sells them to galleries and collectors. He loves to use his work and skills in various fields of interest.
Matthew has been creating drawing and painting tutorials since the relaunch in 2020. Through his involvement with artincontext.org, he has been able to deepen his knowledge of various painting mediums. For example, watercolor techniques, calligraphy and lately digital drawing, which is becoming more and more popular.
Learn more about Matthew Matthysen and the Art in Context Team.


