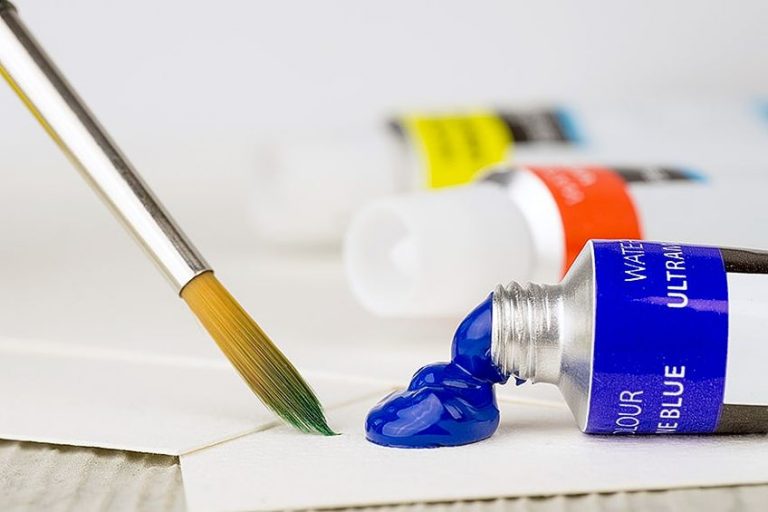
Best Masking Fluid – What Is Masking Fluid and How to Use It?
If you are a watercolor artist, then you are probably very familiar with the painting techniques used to preserve white space in your paintings. These white spaces are often used to create highlights or to define objects and preserve details. The commonly used techniques to preserve or create whites include using the white of the paper, lifting off some of the watercolor paint, or using white gouache in conjunction with your watercolors. While the last two methods can work very well, they will hardly ever provide you with a pure, vibrant white, and preserving the white of the paper can be close to impossible under some circumstances. This article is all about how you can use masking fluid to preserve white spaces in your watercolor paintings.
What Is Masking Fluid?
Liquid masking fluid is a specially formulated artist’s medium made with latex. If you want to protect small or large areas from watercolor when painting, then you should try using some masking fluid. Masking fluid is used to preserve white areas on paint, glass, and even porcelain. In this article, we will focus on discussing masking fluid in relation to its use with watercolor paints on paper.
Art masking fluid helps watercolor artists produce highlights and negative spaces while preserving details and creating textures. Thicker papers with a smooth finish work best with masking fluid. If you have lots of white or even lightly painted shapes with a darker background, you can use masking fluid to protect those shapes.

For example, if you have trees, people, or buildings visible on the horizon with a sky in the background you can use masking fluid to protect them and apply a smooth, seamless wash to create the sky. You could try to paint around the objects, but this will be risky and time-consuming. Painting around objects in this way also tends to create a build-up of color, streaks, and brush marks around the object.
Masking fluid can be used seamlessly with any watercolor technique with the only downside being that masking fluid of even the highest quality will produce hard-edged shapes. If you prefer having a softer look to your watercolor art, then masking fluid may not be the best option for you to use. If everything that we have said about masking fluid has piqued your interest, then read on into the next section to learn about everything you need to look for to pick the best masking fluid available.
How to Choose the Best Masking Fluid
When you are looking for the best masking fluid the easy answer is that you want something with a thin but creamy consistency that can be applied precisely and removed with ease. Ideally, your masking fluid should also dry quickly and have a suitable color for your needs. You will need to consider all these factors and a few more in detail if you want to make sure that you buy a decent quality masking fluid from the start.

Ease of Removal
Try to choose a masking fluid that comes off easily when the time comes. Read reviews before purchasing a product or see if the label says it comes off easily or has a peel-off formula. Some brands may require you to rub off the fluid with your fingers or a separate putty eraser.
Drying Time
You will need to wait for your masking fluid to dry before you can start or continue painting. If your masking fluid takes a long time to dry it can be especially irritating and can even make some artists lose interest or run out of available time to paint.
Pay attention to the stated drying times and be sure to apply it thinly in multiple layers to save yourself this hassle.
Color or Tint
Most masking fluids available are white, but you may want to purchase a different colored masking fluid, so it is easier to see where you have applied fluid. If you choose a colored masking fluid be sure to choose a brand that is non-discoloring so that you don’t stain the area you were trying to preserve.
Versatility
You should make sure that the masking fluid you buy is suitable for the medium you are working with. Some masking fluids work best with watercolors while others may only work with acrylic. If you are hoping to use your masking fluid with all kinds of mediums and on many different surfaces, be sure to choose a product that is versatile enough for the task. Check the product description or manufacturer’s specifications to make sure that the product is suited for your needs before settling on a purchase.

Consistency
Be sure that you decide on a masking fluid that has the correct consistency. You cannot use something that is too thick or too thin. The ideal consistency is a creamy but fluid substance that flows readily without clogging your nozzle or applicator.
Application
You will find that masking fluids can be found in jars, bottles, and even tubes. Some of these containers have affixed nozzles that will help you dispense the masking fluid directly onto your surface while others may not. You will need to decide on an application method that best suits you before you can choose a product. There are many ways to apply masking fluid as well as many advantages and disadvantages.
You could use paintbrushes, sticks (such as toothpicks or skewers), or sponges to apply your masking fluid.
Some masking fluids will come with brushes or sponges affixed via a stick to the inside of the lid or you can purchase a masking fluid pen. Read the product description to find out which application method each product uses.
| Application Method | Pros | Cons |
| Masking Fluid Pens | ✔ Convenient ✔ Precise | ✘ Can clog easily |
| Paint Brushes | ✔ Precise and easy to control ✔ A good use for old paintbrushes | ✘ Brushes can be ruined easily ✘ Requires clean-up |
| Nozzle | ✔ Easy to dispense a large amount of masking fluid ✔ Can be used in conjunction with other tools such as brushes, sticks, or sponges | ✘ Less control over the amount of fluid dispelled ✘ Can clog easily ✘ Less precision |
| Sponges | ✔ Easy to move large quantities of fluid around ✔ Handles similarly to a paintbrush | ✘ It May be difficult to control the flow and spread of fluid |
| Toothpicks/Skewers | ✔ Great for small details ✔ Precise | ✘ Not good for large areas ✘ It may be time consuming |
Choosing the Best Masking Fluid
We have chosen three of the best masking fluids available on the market. Our three picks include the best overall, the best value for money, and the best budget choice. This means that regardless of your needs or budget, there is a masking fluid recommendation for you! Keep in mind everything we have mentioned above while you read our reviews and make your choice, that way you will be sure that you choose a product that is suited to all your needs.

Premium Choice: SCHMINCKE Blue Masking Fluid
The Schmincke blue-tinted masking fluid is a high-quality frisket with a thick liquid consistency that makes it perfect for masking and spreading. Its blue tint helps keep the masking fluid readily visible to help you find and remove it easily once dried. The masking fluid dries to a nice, even film that peels off neatly and leaves no residue or tears, while the bottle itself has a very ergonomic design. Since the bottle is so thin, it allows you to hold it very much like a pen and the applicator tip can be used to create dots or lines with ease.

- The masking fluid has a smooth and easy to use consistency
- The blue tint makes it easy to see but is not staining
- Dries quickly and does not leave any residue or tear the paper
Schmincke is a very reputable brand within the art community and their blue-tinted masking fluid is both fast-drying and one of the few low-odor masking fluids available on the market today. The only downside to this product is that it may seem a bit pricey for a first-time investment and that the bottle can suck up air and form bubbles. Bubbles contribute to clumping in but this is a very minor issue that may not even arise if you are careful with how hard you squeeze the bottle.
- Low-odor
- Good consistency
- Easy to use and handle
- Tinted and easy to see
- Non-staining
- Has an applicator nozzle
- Fast-drying
- No residue or tearing
- May form bubbles
- A bit pricey
Best Value for Money: WINSOR & NEWTON Colorless Art Masking Fluid
This colorless masking fluid from Winsor & Newton is smooth and easy to work with. It can easily be spread around a large area and directed through smaller, more detailed spaces. The masking fluid is convenient to work with because it is fast-drying, mess-free, and non-staining. It washes off of brushes with ease and readily lifts off of paper while leaving no residue, tears, or other traces behind. Once you remove the masking fluid from your artwork, all that you will see is pure white in-tact paper and flawless, sharp edges.

- Art masking fluid is a colorless, non-staining rubber latex liquid
- For masking areas of work needing protection when color is applied
- One of the more affordable but still high-quality options
- Mess-free and easy to clean
- Convenient
- Affordable
- Easy to peel off
- Non-staining
- No residue or tearing
- Transparent masking fluid can be difficult to see
- Doesn’t have an applicator
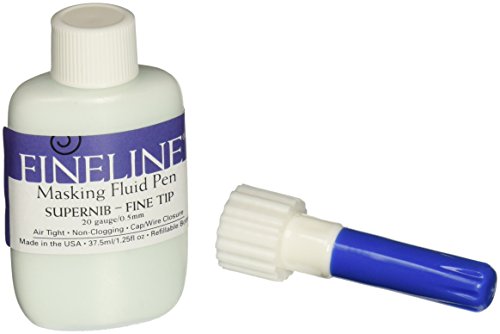
Most Affordable: FINELINE Masking Fluid Pen
These masking fluid pens by Fineline are ideal for targeting small areas with high detail or intricacy. The tip is 0.5mm wide and perfect for drawing and tracing small, fine edges of patterns and designs on your artwork. If you want to cover a wider area, you can use it without a tip. This masking fluid pen is consistent, smooth, easy to apply and is also non-clumping. As an added precaution, the lid has a pin attached to it to prevent the tip from clogging up while out of use. The masking fluid comes off easily using your hands or an eraser without leaving any residue or tearing the paper.
- Comes in an applicator bottle with a non-clogging cap system
- Can be used with acrylic, ink, watercolors, dyes, and glazes
- Provides very precise application and peels off very easily
- Allows for precision application
- Can be used without the tip to cover larger areas
- Suitable for watercolor and other mediums
- Easy to peel off
- Non-staining
- Very affordable
- The needle inside the lid may bend
- Doesn’t dry fast
How to Use Masking Fluid With Watercolor Paints
Now that you have chosen the best masking fluid you can finally try out using watercolor masking fluid! There are many ways you can apply it to your paper and possibly produce a range of different effects. The different ways you may apply art masking fluid to your paper have already been mentioned briefly above but we will go into more detail in the tutorial below.

Supplies Needed When Using Masking Fluid
- A kneadable eraser for removing the mask (optional)
- Masking fluid
- A masking fluid applicator (brush, toothpick/skewer, sponge, pen, etc.)
- A small bowl (to pour some masking fluid into if needed)
- A small bowl full of soapy water (if using paintbrushes)
How to Use Masking Fluid With a Nozzle
The most common way you will encounter masking fluid applicators is with a nozzle attached. Using a nozzle to apply your art masking fluid is as straightforward as you would think. Tilt the applicator bottle towards your artwork and allow the fluid time to start pouring out. Resist the urge to squeeze the bottle right away as you could end up with too much masking fluid on your artwork. If you need to squeeze the bottle to encourage flow then you must be sure to squeeze very carefully and gently.
You can move the applicator around to spread the masking fluid where it is needed and you can even drag the nozzle around to aid this process further. Just make sure that you stay aware of how much fluid is coming out while you do this.
How to Use Masking Fluid With a Brush
Another common way to apply masking fluid to an artwork is to use a paintbrush. Many artists like to use old paintbrushes that would otherwise be discarded for this purpose because while masking fluid runs quite well off a brush, it can also easily clog up a brush and make it unusable.
When using a paintbrush to spread out masking fluid you can use masking fluid that comes in a jar, tube, tub, or applicator bottle. You can apply masking fluid from an applicator bottle straight onto the artwork and move it around with a brush or you could dip your brush into a tub and go from there.
We suggest dispensing some of the masking fluid into a separate bowl as it allows you more control than applying directly and avoids the possible contamination of your masking fluid that can come with dipping your paintbrush directly. Remember that if you are working with negative space, as in the example below, you will apply the masking fluid to the gaps between your different subjects.

Dip your paintbrush into the bowl of soapy water to wet the fibers. The soapy water helps to protect the fibers of the brush and makes it easier to clean. Next, you can dip your paintbrush into the masking fluid and use it to cover the necessary areas. This should be a very familiar exercise as it will be just like applying paint using a paintbrush.
After you have applied masking fluid a few times, make sure that you dip your paintbrush into the soapy water again. This helps to prevent the latex from drying out and gumming up the fibers of the brush. If the brush’s fibers get too gummed up you will lose precision.
How to Use Masking Fluid With a Masking Fluid Pen
Using a masking fluid pen will be similar to using a paintbrush to apply masking fluid, only you do not want to dip your pen/marker into soapy water to prevent it from gumming up. Instead, you can use a rag or paper towel to wipe off the nib or tip whenever it becomes gummed up. You may need to shake the marker or prime the nib before use but this will depend on the brand.
Refer to the manufacturer’s instructions to see what further steps will need to be taken for your specific product.
How to Use Masking Fluid With a Sponge
Using a sponge to apply masking fluid is quite a fun and creative technique to try out. You can use natural or synthetic sponges to get started and all you need to do is make sure that it is damp before you get started. Much like when working with paintbrushes, you will need to wet your sponge and squeeze out excess moisture as you work if you don’t want to gum up your sponge. You can cut your sponges into different shapes and sizes if you want to experiment even further with this technique.

How to Use Masking Fluid With a Toothbrush
If you feel like experimenting with different, exciting techniques when applying masking fluid you can even use an old toothbrush to create speckled, splatters on your artwork. You will clean your toothbrush in the same way that you would clean your paintbrush. All you need to do to start creating splatters is to dampen your toothbrush and dip it in some masking fluid.
Then, use your fingers to bend back the bristles and release them over your artwork.
How to Use Masking Fluid With a Toothpick/Skewer
Another way you can apply masking fluid is by using toothpicks or skewers. You can use the toothpicks to drag and move the masking fluid around or to apply it in small dots and spots. Toothpicks and skewers are a really great way to apply thin, detailed lines of masking fluid to an artwork.
How to Thin Watercolor Masking Fluid
A great benefit of masking fluid is that it is water-soluble. This means that if it has started becoming lumpy and gummy, you can simply thin it out using a few drops of water. You will find that masking fluid has a tendency to dry quickly and will become lumpy quite often while you work with it. Masking fluid with a thinner consistency work better for creating fine details on artworks.
A good idea to stop your whole tub or jar of masking fluid from drying out is to decant some of the fluid into a bowl for use, and then replace the cap on the bottle right away.

How to Remove Masking Fluid From Paper
You can remove dried masking fluid in several different ways once your artwork has dried sufficiently. If you try to remove masking fluid while the paper is still wet it can ruin and smudge the painting or tear the paper. If you wait too long to remove the masking fluid once the artwork has dried it increases the likelihood that the paper will tear.
Dried masking fluid should peel off easily, and you can simply lift it off as slowly and gently as possible.
You can use your fingers to remove the dried masking fluid but you should opt to wear gloves or at the very least make sure that your hands are clean. This is important because your fingers can leave dirt or oils on your clean white paper. A different option to try when removing dried masking paint is to use a putty/kneadable eraser. You can mold the putty into precise shapes to help you remove even the smallest areas of masking fluid. Putty erasers won’t leave behind any residue and can help you to lift the edges off of the paper so that you can use your fingers to peel off the whole dried film with ease.
How to Remove Masking Fluid From a Brush
As we have mentioned above, you can clean your paintbrushes using soapy water. If you have made sure not to clog up your brushes while applying the masking fluid then it will be easy to clean them thoroughly in this way. If the masking fluid has been allowed to dry then you will need to let your brush soak in warm, soapy water until you can attempt to clean the brush. You may still end up with a ruined brush or have to sit and pick pieces of dried masking liquid off if the liquid was allowed to dry.

Make sure that you follow the advice in this article to prevent the masking fluid from clumping up and drying on your brushes. Do not use expensive brushes when applying masking fluid and be sure to keep them wet while they are in use. If you have badly clogged brushes from using masking fluid you may be able to loosen the dried latex using lighter fluid.
Masking Fluid Tips and Tricks
- Stir the art masking fluid thoroughly to ensure it has an even consistency before you begin using it. Do not shake the bubble as this will create air bubbles.
- Plan your painting before you get started. Consider doing a light pencil sketch to properly plan your painting and identify where you want to preserve whites using liquid masking fluid.
- Do not apply masking fluid to wet paper because it will be absorbed into the paper fibers and increase the risk of tearing when you remove the dried fluid.
- Clean your brushes and applicators during and immediately after use to avoid clogging them up with dried liquid masking fluid.
- Try to use high-quality, thick, or hot-pressed watercolor papers when working with liquid masking fluid as it will help you avoid tearing when you need to remove the dried fluid.

- Don’t try to speed up the drying time of your art masking fluid using heat or sunlight. Masking fluid contains latex rubber and can cook easily when exposed to heat. If this happens it will become very difficult to remove at a later stage.
- Make sure that you allow the masking fluid to dry completely before painting over it with watercolor.
- Make sure that you allow the paint to properly dry before you remove the masking fluid. If you don’t do this, you can smear the paint over your white area.
- Remove the masking fluid quickly once the paint has properly dried as it will lessen the risk of tearing the paper.
- If you are using masking fluid to cover a previously painted area you must make sure that you have allowed the paint to properly dry before applying liquid masking fluid.
- Remember that masking fluid applied on top of a previously painted area will very likely lift off some of the paint when removed. You can limit the amount of paint lifting by using at least artist-grade watercolor paints with higher staining power.
- Most masking fluids contain ammonia and will have quite a pungent odor. You should be sure to use liquid masking fluid in a well-ventilated room.
Once you have chosen the best masking fluid and the way you want to apply it, you can start masking all of your watercolor paintings and see the big difference it makes! Masking fluid is very convenient and an important tool for watercolor artists in particular. Keep in mind that masking fluid doesn’t only have to be used with watercolor though. You can use masking fluid with any number of mediums, just make sure that you have purchased a versatile brand of masking fluid if you want to avoid disappointment. All of our tips and tricks in this article will apply to any masking fluid you choose to use, and the techniques used can easily be carried over to other mediums if you are feeling experimental.
Frequently Asked Questions
Can I Make My Own Masking Fluid?
You can easily create masking fluid at home with latex fabric paint and some water. Pour equal amounts of water and latex fabric cement into a container that can be closed and become airtight. Gently mix the fabric cement and water together with a spoon to prevent creating bubbles. If you would like your masking fluid to have a tint or color, you can simply mix small amounts of watercolor paint into the fluid until you are satisfied.
What Is Frisket?
What is masking fluid? This question is pretty much the same as asking what frisket is. Liquid frisket is another name for liquid masking fluid. Frisket is a latex-based medium commonly used by watercolor artists to preserve white spaces on their artwork.
What to Use Instead of Masking Fluid?
If you want to create highlights without using masking fluid you could use white gouache instead. Gouache paint is opaque and can be added to the artwork once it is otherwise complete to create some highlights. You could also scrape or lift off some of the watercolor paint to create highlights on your artwork. To scrape you will use a sharp or pointed tool to manually remove the paint along with some of the paper. This method will affect the integrity of your artwork and should be used with caution. Lifting involves using a rag, sponge, or paper towel to lift the paint off of paper that is still damp. If you are using watercolor paints with good staining power, this method may not be very effective. The final option is to use wax to mask areas of your painting before you get started. There are special wax crayons available at art stores that can be used to apply wax masking to paintings. The downside to this method is that you will usually leave the wax on the paper once the painting has been completed because removal is quite difficult.

In 2005, Charlene completed her Wellness Diplomas in Therapeutic Aromatherapy and Reflexology from the International School of Reflexology and Meridian Therapy. She worked for a company offering corporate wellness programs for a couple of years, before opening up her own therapy practice. It was in 2015 that a friend, who was a digital marketer, asked her to join her company as a content creator, and this is where she found her excitement for writing.
Since joining the content writing world, she has gained a lot of experience over the years writing on a diverse selection of topics, from beauty, health, wellness, travel, and more. Due to various circumstances, she had to close her therapy practice and is now a full-time freelance writer. Being a creative person, she could not pass up the opportunity to contribute to the Art in Context team, where is was in her element, writing about a variety of art and craft topics. Contributing articles for over three years now, her knowledge in this area has grown, and she has gotten to explore her creativity and improve her research and writing skills.
Charlene Lewis has been working for artincontext.org since the relaunch in 2020. She is an experienced writer and mainly focuses on the topics of color theory, painting and drawing.
Learn more about Charlene Lewis and the Art in Context Team.