


Alcohol Ink Art – What You Need to Know for Painting With Alcohol Ink
Creating artworks using alcohol ink is a popular trend that is sweeping the art community in recent years. This article answers questions you may have such as “what is alcohol ink?” or “how do I make an alcohol ink painting?” We also discuss what you will need to get started and outline the basic techniques you can begin with while you get the hang of everything. There is an included tutorial that will help you create your first alcohol painting.
What Is Alcohol Ink?
Alcohol ink refers to both the painting medium and the fluid painting technique. The technique is quite popular in America but is still relatively unknown overall. Alcohol and pigment are the sole components of alcohol ink, much like the name suggests. You can revive dried ink by adding more alcohol or alcohol ink. This means that you can alter or change an unsealed painting at a later time without any problems. Watercolor paints work quite similarly to alcohol ink in this way.

Alcohol ink is acid-free and works best on non-porous surfaces. They are richly pigmented and glide easily around non-absorbent surfaces. This allows you to create all sorts of swirls, blotches, marbling patterns, and other designs on your surface of choice. Alternatively, you could use more absorbent surfaces and see what happens or what you can do. You can also allow your ink to dry and layer the colors on top of one another or use a blending solution to mix them.
There are almost endless opportunities to experiment with and combine different alcohol ink painting techniques in your artwork.
Materials Needed for Alcohol Ink Art
Painting with alcohol ink is very fun, and it creates very interesting and unique artworks, but what do you need to get started with alcohol painting? There isn’t much to it since it’s actually quite an easy medium to get started with. We have listed the most crucial components that you will need to create your first alcohol ink piece below.

Alcohol Ink
If you want to start painting with alcohol ink, you will need to purchase the actual alcohol ink. You can find many great sets online that will provide you with multiple colors to get started. Buying a set of inks works out to be cheaper in the long run, especially for beginners. There are many kinds of alcohol ink on the market, ranging from more pastel to metallic colors.
Get an idea of what you are looking for and get your hands on a set of at least 10 or so to get started!
Best Alcohol Ink Set: 15 Colors High Concentrated Alcohol-Based Ink
Unleash your creativity with the vibrant hues of the ‘Alcohol Ink Set – 15 Colors High Concentrated Alcohol-Based Ink.’ Dive into a world of endless possibilities as you explore resin art, painting, coaster making, and more with this versatile collection. With each 10ml bottle packed with intense pigments, you’ll be able to add depth, dimension, and stunning color to your projects on ceramic, glass, metal, and beyond. Whether you’re a seasoned artist or a DIY enthusiast, this dynamic ink set is your ticket to crafting masterpieces that dazzle and delight.

- 15 vibrant color inks
- Suitable for a variety of surfaces including resin, ceramic, glass, and metal
- Each 10ml bottle allows for easy dispensing and precise application
- 15 vibrant colors
- Versatility
- Concentrated formula
- Strong odor
- Limited quantity of 10ml bottles
- Long drying time
Blending Solution
You can use a liquid alongside your alcohol ink to help alter the characteristics of your ink. This liquid is called a blending solution, and it is specially developed to help artists lighten colors or create color gradients. It is made with an alcohol base that is mixed with other chemicals that help to thicken it and create a fluid transport system that matches that of alcohol ink. The blending solution helps you move inks around your medium with ease, allowing you to get them where you want. You can also use a blending solution to re-wet old ink and rework it. Overall, you will find that you need quite a lot of blending solutions when working with alcohol inks, so you should buy at least a medium-sized bottle. We recommend trying this blending solution made by Ranger.
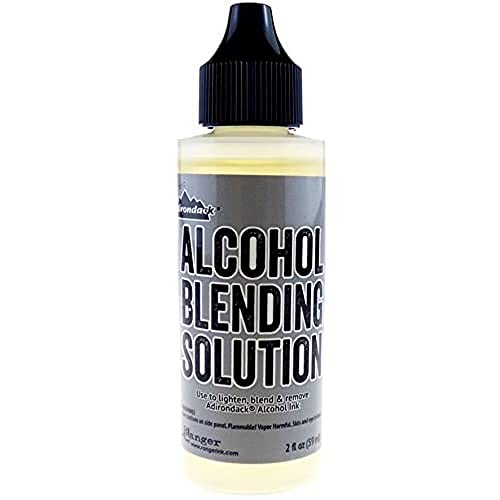
- Special formulation for Alcohol Inks
- Lighten, blend, and even remove Alcohol Ink Colors
- Bottle containss a detail applicator tip
A Painting Surface
Yupo paper is the ideal surface to use alcohol ink on because it has been specially developed for use in this way. Yupo paper is made using polypropylene and has non-porous, waterproof, and tear-resistant qualities. Alcohol ink repels away from oil, so it is best to wear gloves when you handle yupo paper so that you don’t get any of your body oil onto the paper. There are some other surfaces that can accept alcohol ink and we go into more detail about them further down in the article.

- A versatile surface especially suited for Alcohol Inks
- Heavyweight 5"X7" recyclable, synthetic papers with a smooth surface
- Non-porous and water-resistant.
Some of these surfaces include metal, ceramic, glass, fabric, and canvas.
Optional Supplies
You may want some markers on hand so that you can add some designs or decorations to your painting once it has dried. Make sure that the markers you use say “permanent” somewhere on them before you get started. Permanent markers are great for creating dots, shapes, details, and outlines on your artwork. You could also use drying aids such as hairdryers, straws, or an ink air blower.

Drying aids are also great for creating color gradients and speeding up the layering process. Hairdryers and ink air blowers have an advantage over straws as they will not deposit moisture onto your alcohol ink in the same way that straw is likely to. Just make sure to use a cool setting on your hairdryer while working with alcohol inks.
Precautions to Take When Making Alcohol Ink Art
Make sure that you only work with alcohol ink in a well-ventilated room. If you can’t work in a room that is well-ventilated, you can use a breathing mask with a fitted air filter. This prevents the possibility of you inhaling small amounts of pigment from the ink as the alcohol evaporates. It will also prevent you from inhaling too many potentially dangerous fumes and chemicals as you work.

You should also be sure to use disposable gloves of some kind while working with alcohol ink. Some people may have sensitivities to the alcohol or pigments found in alcohol ink, so it is best to have a protective barrier on your hands. Gloves also prevent you from staining your fingers with the ink and from getting any oils on your painting surface. If you use a hairdryer to help blend your alcohol inks together, you must make sure to use it on the coldest setting. Alcohol is highly flammable, and a hairdryer set to a hot setting could easily ignite your painting.
Yupo paper is also essentially made of plastic, so a hotter hairdryer setting may warp the paper.
What Surfaces Can Alcohol Ink Be Applied To?
The painting surfaces needed to use alcohol inks successfully will have to be waterproof and smooth. The surface has to be waterproof so that the ink doesn’t just seep into the medium and it has to be smooth so that you retain better control over the ink while you work to create patterns and designs. Below, we go into more detail about some of the surfaces that accept alcohol inks so that you have a good idea of where you can start experimenting with this exciting painting medium. Every surface you try to use with alcohol ink will have a completely different look. Experiment with different surfaces to try to find your favorite one!

How to Use Alcohol Ink on Yupo Paper
Yupo paper is an acid-free, non-porous synthetic paper made from polypropylene. It is pH neutral, waterproof, and stain-resistant, which gives it some unique characteristics as a painting surface. Yupo paper is strong, smooth, and has great lifting qualities. The smooth surface of yupo paper means that you can build up many patterns, designs, and nuances that wouldn’t be possible on other traditional surfaces.
Yupo paper can even be wiped clean, which means that you can restart as many times as needed without worrying about wasting any yupo!
You will quickly find that aside from being very durable and smooth, yupo paper is also tear and buckle-resistant. This means that you do not need to stretch it like you would have to when working with watercolor paper. For all these reasons, yupo paper is the most ideal surface to use when you work with alcohol ink.
How to Use Alcohol Ink on Fabric
You can use alcohol ink on fabric to create effects similar to tie-dye. In fact, alcohol ink on fabric works in a similar way to tie-dye, so if you already have experience working with tie-dye you will have no problem adjusting! Using concentrated alcohol inks will give you very vivid and saturated colors, while diluted inks will provide more subdued colors.
Alcohol inks provide a surprising amount of control and you can even create patterns using stencils or spray bottles. Another option is to try to create abstract designs like those that you could create on yupo paper. You can use alcohol inks to dye all sorts of clothing and accessories, such as scarves, shoes, tablecloths, bedsheets, and pillows.
How to Use Alcohol Ink on Metal
Metal is another great surface for alcohol ink because of its non-porous characteristics. If you want to give it a try, you can find yourself an aluminum canvas at an art and craft store. These are the most commonly available metal surfaces you can paint on with alcohol ink, but you are free to try painting on stainless steel, brass, or copper too.
If you enjoy crafting, you could use alcohol ink to dye metal that can then be made into jewelry.
You can create some really interesting bracelets, pendants, or earrings by using alcohol ink on metal. Other ideas include using alcohol ink on metal tumblers, thermoses, tea kettles, or just about anything else you can think of.

How to Use Alcohol Ink on Clayboard and Ceramic
Alcohol ink can also be used on ceramics or clay boards. Clayboard is a canvas made using artist’s grade hardboard and ground clay. The hardboard is coated in ground clay to create a smooth but somewhat absorbent surface. Clayboard does not bleed, feather or smudge in the same way as paper or canvas painting surfaces do, which makes it great for use with alcohol ink.

Ceramic tiles, vases, bowls, or jugs are some examples of great ceramic surfaces that can be painted on using alcohol ink. They can easily be painted on and used around the house decoratively or practically.
How to Use Alcohol Ink on Glass
Glass is yet another surface that readily accepts alcohol ink. The ink can move freely around the glass and allows for creative blending and mixing. Using alcohol ink on glass creates a stained-glass effect that looks lovely when the light hits it. You will need to seal the ink to the glass once you are happy with your piece. You can use a glass glaze or fixative to do this.
Painting on glass using alcohol ink is a great way to create colorful glass panels, candleholders, or glasses.
How to Use Alcohol Ink on Canvas
Using alcohol ink on canvas is quite a unique way to work with an already unique medium, but it will take some preparation. Once the canvas has been prepared, it allows you quite a lot of control and provides a lot of opportunity for detail. This allows you the chance to create some beautiful artworks with ease! You will need to coat the canvas with a latex primer before you get started, or the alcohol ink will just bleed through.

Latex primer is water-based, inexpensive, fast-drying, and water-based, which means it is convenient to work with and will properly prepare the canvas to accept alcohol ink. Use a foam roller brush to apply the primer to the top and sides of your canvas. Apply a second coat if you feel that it is necessary and then lightly sand the surface once it has dried. Once the surface has been sanded and dusted off, it will be ready to accept alcohol ink. You can now apply alcohol ink to the canvas using traditional techniques, or you could even try making use of stamps or stencils!
How to Use Alcohol Ink on Yupo Paper: A Step-by-Step Tutorial
Gather your alcohol inks, blending solution, and yupo paper. Put on some latex gloves and wear some old clothes. Place a tarp down in a well-ventilated workspace. Cut your yupo paper in half so that you start practicing on smaller pieces of paper and save your materials while you are still practicing. Allow a drop of ink of any color to fall onto your sheet of paper and allow it to spread out in a circle. Repeat this process with another color and allow the two circles to overlap. Notice how the colors displace each other.

Allow a drop of ink to fall inside one of the other drops and pay attention to the effect this creates. You can now drop some blending solution onto the ink and take note of how it displaces the ink to create a colorless circle. Experimenting with this helps you to create highlights and variety in your piece. In a fresh area of your paper, try placing some blending solution onto the page and then dropping ink into it to create an interesting effect. Use all these different methods to manipulate your ink in various ways to create a finished piece that you are happy with and then allow the painting to dry for around 24 hours.
If you decide you want to make more changes once your ink has dried, you can add some blending solution to the alcohol ink art to revive the ink.
How to Create Gradients With Alcohol Ink
If you put a drop of ink on an area of your surface where you have already placed some blending solution, you can create waves of color or gradients between two colors. You can help to direct the ink using a straw, hairdryer, or an ink air blower. An ink air blower is really just a tube with a rubber pump balloon at one end. Once the painting surface has been covered with a blending solution, you can easily swivel the ink to create waves and gradients in this way.

Using a straw has a downside, however, which is that it collects moisture from your breath that may drip onto the painting. If you use a hairdryer, you must make sure to use it on the coldest setting, as alcohol is highly flammable. Yupo paper is also essentially made of plastic, so a hotter hairdryer setting may warp the paper. Make sure to start quite far away from the paper while using a hairdryer and then move it slowly towards the paper. This stops ink from blowing off the paper and prevents the creation of splashes on the surface.
Apply Varnish to Protect Your Artwork
Alcohol ink is quite sensitive to the UV-rays found in sunlight, which means that it is quite important that you seal your finished works with a suitable protective varnish once they have dried. The easiest varnish to use is a spray varnish. Sealing your artwork with a varnish won’t only protect it from sunlight, but will also stop it from any possible physical and moisture damage.
Each manufacturer will have slightly different instructions regarding how to apply their varnish.
In general, you will hold the can a few inches back and spray in short, even bursts across the artwork until evenly coated. You will not want a thick layer of varnish, rather spray multiple thin coats than one thick coat. Allow the varnish to set properly in an area where it will not be disturbed by laying it horizontally. Apply secondary coats if necessary.

How to Make Alcohol Inks
To make your alcohol inks, you will mostly just need some alcohol markers and isopropyl alcohol. Making your own alcohol inks can seem a bit intimidating, but is quite fun and will save you a fair amount of money in the long run. We suggest you try working with some alcohol ink bought from the store before you try to use some homemade ink, just so that you have an idea of how you want your DIY ink to turn out.
Supplies Needed to Make Alcohol Inks
The list of supplies needed to start making your own alcohol ink at home is actually quite short. You will need some basic craft supplies such as a craft knife, a tarp, gloves, jars, and applicator bottles as well as the isopropyl alcohol and the ink.
We suggest using chisel-tipped markers because they tend to have a lot more ink inside of them than fine point markers do. If you happen to use a fine-tipped marker, you will need to use two of them in place of one chisel-tipped marker. That being said, the instructions below will show you how to create DIY alcohol ink by using chisel-tipped Sharpie markers.
However, you are free to use whatever brand of marker you prefer. Just make sure that the markers you use state that they are permanent.
You can’t use whiteboard markers, fabric markers, or washable markers to make your DIY alcohol ink. We recommend using the markers in the guide as we found that the Sharpie chisel tips work better than both cheaper and more expensive brands. If you happen to have old permanent markers lying around that have dried out or don’t run as well as they used to, you could also use them to create alcohol ink. This is an even more cost-effective solution than buying new markers to work with. Just because your old markers no longer work efficiently enough for their intended purpose doesn’t mean that they cannot be reused in another way!

Just keep in mind that, much like with fine-tipped markers, old markers will not produce a DIY alcohol ink that is as vibrant as if you used new markers. You will have to be careful how much alcohol you use to drain out the ink or you will have to save up multiple old markers of the same color to get the same effect.
If you follow the guide below without considering this, you will have inks that turn out quite faint. Applicator bottles are great for keeping DIY alcohol ink in. We suggest using precision bottles such as these. They come with a funnel, screw-on cap, and a needle tip. The screw-on cap also has a silicone drip stopper that helps to prevent unnecessary spills and messes. Follow the tutorial below to start getting your DIY ink. This is what you will need to make your own alcohol inks.
- Isopropyl alcohol (at least 91%)
- Disposable gloves
- A craft knife
- Sharpie markers
- Glass jars
- Applicator bottles
- Paper towels
- A tarp
How to Make Alcohol Inks: Step-by-Step Instructions
Making your own alcohol inks is a great way to save money but can be a bit messy and intimidating. Follow this tutorial to learn how to do it without making a huge mess or wasting time and money just to have ink get all over the place with nothing to show for it.
- Place down your tarp in the area you are planning to work. It is always best to work in an area with adequate airflow. Once the tarp is down you can gather all your materials on top of it.
- Put on your disposable gloves. Consider wearing old clothes that you are willing to risk staining. Making your DIY alcohol ink can be very messy and you don’t want to risk ruining your favorite t-shirt accidentally.
- Take your sharpie marker and begin twisting back and forth on the entire tip area while pulling. Make sure that you hold firmly and keep the cap in place. The plastic cap area of the marker, along with the cap itself, should pull away from the rest of the marker. Make sure to do this carefully so that you don’t make a big mess.
- Remove the tube of ink from the marker’s plastic casing and, using a craft knife, carefully slice it open lengthwise.
- Place the tube into your glass jar and pour some isopropyl alcohol onto it. Don’t pour too much alcohol onto the tube, to begin with, as DIY alcohol ink is made from a high ratio of marker pigment to alcohol.

- Put the lid on the jar and allow the tube to sit in the alcohol to have the ink seep out. After about five or so minutes, you can stir the tube around in the alcohol to assist the seeping process.
- Once the top part of your ink tube has begun turning white, you can squeeze the tube in a downwards motion to push the ink out. Repeat this a few times and add a small amount of alcohol onto the tube if it runs dry during this process.
- Grab your applicator bottle and squeeze it to remove all the air. Now, while squeezing it, turn it upside-down and place the needle portion into the liquid of the jar. Release the pressure and the alcohol ink will start being sucked up into the bottle.
Alcohol Ink: Additional Tips and Tricks
Alcohol ink is a very forgiving and exciting medium to work with, but it can take a little while to get the hang of the different techniques. Here are some of our top tips and tricks to help you through the learning process.
- Experiment with allowing the alcohol drink to dry and then layering on top of them rather than let them mix and blend into one another.
- Try using the blending solution before and after the ink and notice the difference it makes. Experiment with how you use the different effects to create interest and depth.
- Take note of how hard you blow or the strength of your hairdryer and how it affects the way your ink spreads.
- Alcohol inks can be used to create beautiful skies for the background of landscape paintings. Just layer some trees and mountains in the foreground using alcohol inks, acrylics, or permanent markers.
- Try using droppers and sponges to experiment with how the ink can be applied and reabsorbed on the surface.

- If you get ink on yourself, you can lighten the stains by using rubbing alcohol and a cotton pad or rag. However, this will not remove the stains completely and may hurt you if you have sensitive skin. Be sure to use some cream on the area afterward so that you do not dry out the skin in that area.
- Try purchasing some alcohol blending pens to help you create more controlled pieces by using more advanced techniques.
- Try using felt stamps on your pieces to create more interesting designs using alcohol inks. You can purchase felt stamps online or in most arts and crafts stores.
- Try using brushes, cotton pads, markers, or toothpicks to experiment with manipulating your ink in different ways.
- Try using your alcohol ink art for scrapbooking, card making, journaling, or more.
Now that you know just about everything important about alcohol ink, you are ready to create alcohol paint art. Enjoy the different ways this medium can be used and all the techniques available to you while you get to know alcohol ink better. Remember that alcohol paint art is usually quite abstract and not as “perfect” or defined as some other traditional mediums. Alcohol ink is a great way to let creativity flow into a piece without too much effort or planning!
Take a look at our alcohol ink painting webstory here!
Frequently Asked Questions
Can I Use Rubbing Alcohol in Place of Blending Solution?
Alcohol blending solution can be quite expensive as it is made from ethanol, glycol, ethers, and isopropanol. On the other hand, rubbing alcohol only contains isopropanol. Using rubbing alcohol in place of blending solution will work, but it will change the consistency of your inks in a different way. The blending solution is stickier and has a slightly thicker consistency when compared to isopropanol. Isopropanol also doesn’t have the same sheen that blending solutions does, and will evaporate faster than blending solution too. This means you will not have as much time to blend and move around your inks before they dry.
Can You Use Mod Podge to Seal Alcohol Ink Art?
You can use a paintbrush to apply mod podge to your ink artwork in order to seal it if you do not want to use a spray-on sealant. Just be sure to never use an alcohol-based sealant to seal your work because it can cause smudging.
How Long Does Alcohol Ink Take to Dry?
Most alcohol ink art will be tacky dry within an hour and cure fully within 24 hours in ideal conditions. Cold or humid environments may contribute towards longer drying times as well as the use of surfaces other than yupo paper. The longest alcohol ink will take to dry is around 72 hours.
Can You Use Food Coloring to Make DIY Alcohol Ink?
You can create alcohol ink using a few drops of food coloring mixed into isopropyl alcohol. This is an easy way to create DIY alcohol inks, but these colors will not blend to create new colors as well as marker ink. You will find that trying to blend different food coloring inks will create a lot of brown.
Can Vodka Be Used to Make Alcohol Ink?
You can use vodka to create alcohol ink but it will not work nearly as well as isopropanol. This is because vodka is only around 40% pure alcohol with the other 60% being entirely water.
Can You Use Watercolor Paper With Alcohol Ink?
Watercolor paper is not suitable for use with alcohol ink because it is too absorbent. You should stick to using alcohol ink on non-porous surfaces such as yupo paper, ceramic, metal, or clay board.

In 2005, Charlene completed her Wellness Diplomas in Therapeutic Aromatherapy and Reflexology from the International School of Reflexology and Meridian Therapy. She worked for a company offering corporate wellness programs for a couple of years, before opening up her own therapy practice. It was in 2015 that a friend, who was a digital marketer, asked her to join her company as a content creator, and this is where she found her excitement for writing.
Since joining the content writing world, she has gained a lot of experience over the years writing on a diverse selection of topics, from beauty, health, wellness, travel, and more. Due to various circumstances, she had to close her therapy practice and is now a full-time freelance writer. Being a creative person, she could not pass up the opportunity to contribute to the Art in Context team, where is was in her element, writing about a variety of art and craft topics. Contributing articles for over three years now, her knowledge in this area has grown, and she has gotten to explore her creativity and improve her research and writing skills.
Charlene Lewis has been working for artincontext.org since the relaunch in 2020. She is an experienced writer and mainly focuses on the topics of color theory, painting and drawing.
Learn more about Charlene Lewis and the Art in Context Team.
Cite this Article
Charlene, Lewis, “Alcohol Ink Art – What You Need to Know for Painting With Alcohol Ink.” Art in Context. March 17, 2022. URL: https://artincontext.org/alcohol-ink-art/
Lewis, C. (2022, 17 March). Alcohol Ink Art – What You Need to Know for Painting With Alcohol Ink. Art in Context. https://artincontext.org/alcohol-ink-art/
Lewis, Charlene. “Alcohol Ink Art – What You Need to Know for Painting With Alcohol Ink.” Art in Context, March 17, 2022. https://artincontext.org/alcohol-ink-art/.


Can I use ceramic tile to create alcohol ink items?
Yes, you can use ceramic tile with alcohol inks—it’s actually a popular surface.
A few tips:
Use glazed ceramic tiles (the smooth, shiny kind). The inks need a non-porous surface to move and blend properly.
Clean the tile first with isopropyl alcohol to remove dust or oils.
The ink will stay workable longer on tile, so you can manipulate it nicely.
Once you’re happy with the design, seal it well (e.g. resin or a suitable varnish), otherwise it can smudge or reactivate.
Keep in mind:
Unsealed pieces are not water-resistant.
Even when sealed, they’re best for decorative use rather than heavy wear items.
Great for coasters, small art pieces, and experiments 👍