
Foreshortening – A Guide on Foreshortened Drawings and Paintings

Foreshortening is the apparent compression of a form that points toward or away from the viewer. Artists use this visual effect to make bodies, limbs, objects, and surfaces occupy convincing depth on a flat picture plane. This guide explains how foreshortening differs from other perspective effects, traces important historical examples, and offers practical methods and exercises for drawing it.
What Is Foreshortening in Art?
Foreshortening occurs when the visible length of a form appears compressed because its long axis turns away from the picture plane and into pictorial depth. A forearm aimed toward the viewer may therefore look much shorter than the same forearm shown side-on, even though its actual proportions have not changed. Artists combine this compression with overlap, changes in contour, relative scale, and light and shadow to make the form read as three-dimensional rather than anatomically shortened.
How to Visualize Foreshortening
Because foreshortening depends on the viewing angle, it is easiest to understand through observation. Try this short exercise:
- Lift your arm and place it before your body. Bend your elbow bringing your forearm parallel with your chest.
- Look at the apparent length of your forearm and fingers in this position. Because they lie mostly across your field of view, their lengths remain comparatively easy to see.
- Extend your whole arm out in front of you now. You will now see that from this perspective, your forearm and fingers appear to be much shorter.
- Although the arm appears compressed, its actual length has not changed. The stronger effect results from viewing more of its length head-on.

Whenever a depicted form turns into depth, some degree of foreshortening may appear. When drawing figures, the effect changes the apparent proportions of the torso and limbs without changing the body’s underlying anatomy.
If, for example, you were to paint a figure lying on their back with their feet towards you, you would need to paint their feet much bigger than their head to communicate the illusion of three-dimensionality and depth.
The same principle applies beyond figure drawing. A tabletop, branch, bridge, or road surface can appear compressed when its length recedes from the viewer. Converging road edges and smaller distant trees are related perspective effects, but they are not the definition of foreshortening: convergence belongs to linear perspective, while the reduction in distant objects is usually called diminution.
Foreshortening, Diminution, and Linear Perspective
These effects often work together, but they describe different visual relationships. Foreshortening compresses a form along an axis directed into depth. Diminution makes a whole object appear smaller as its distance from the viewer increases. Linear perspective organizes parallel edges so that they appear to converge toward one or more vanishing points. A convincing drawing may use all three, yet a single arm can be strongly foreshortened without containing a visible vanishing point.
A Brief History of Foreshortening
Artists used forms of foreshortening before mathematically codified linear perspective. Surviving ancient art and medieval manuscripts include angled bodies and objects whose visible lengths are compressed. The technique became especially prominent during the early Renaissance period, when Italian artists pursued increasingly systematic illusions of space.
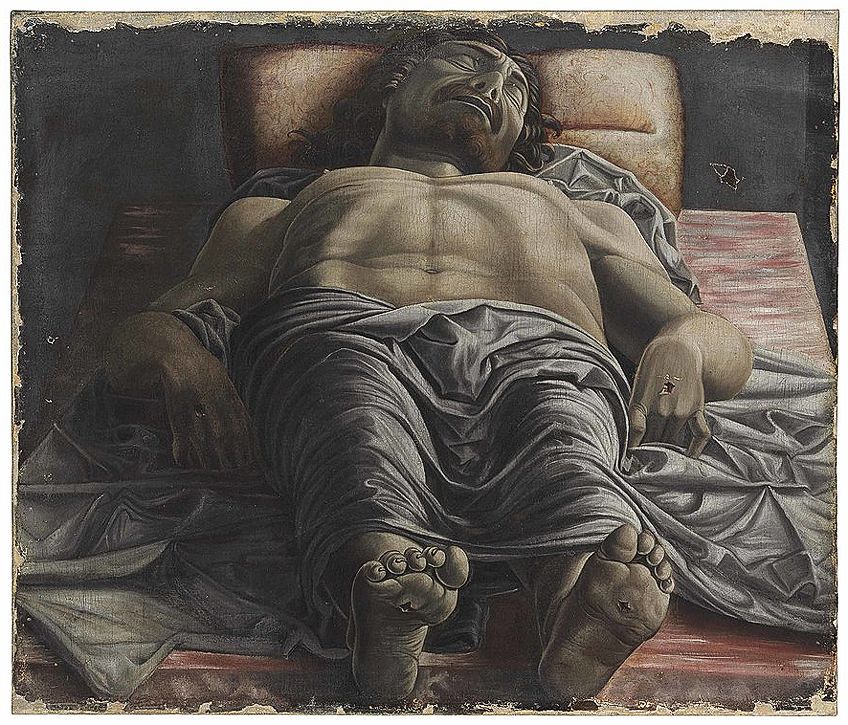
Andrea Mantegna’s Lamentation over the Dead Christ (c. 1483), now in the Pinacoteca di Brera, is an unusually forceful example. Christ’s body is viewed almost along its length, drawing the viewer close to the stone slab. Mantegna did not apply optical compression mechanically: he adjusted the relationship between the head and feet so that the body remained legible and emotionally commanding.
Paolo Uccello’s fallen knight in The Battle of San Romano and the angled figures in works by other 15th-century painters show that foreshortening was part of a broader Renaissance investigation of pictorial space. During the High Renaissance, Michelangelo and Raphael used the effect to make figures turn, project, and recede within complex compositions.
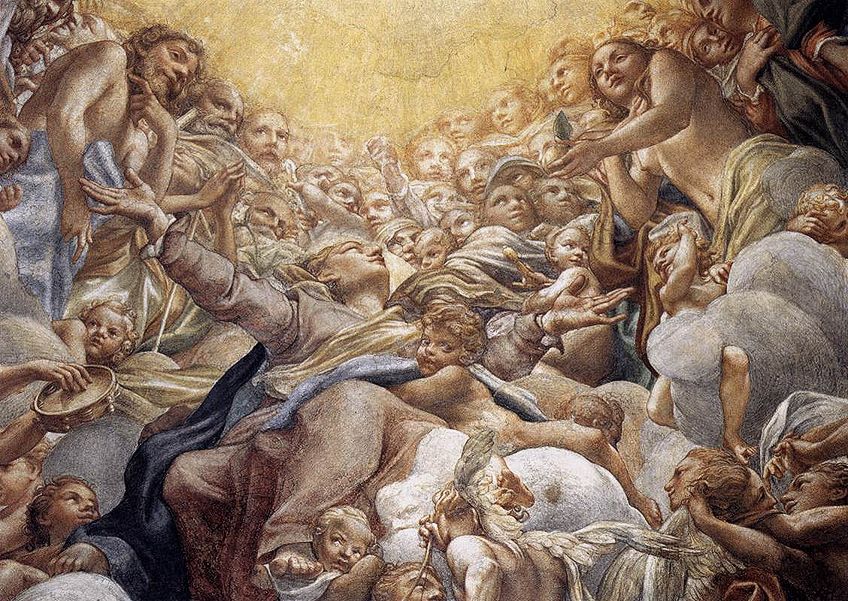
Correggio extended foreshortening into illusionistic ceiling painting. His Assumption of the Virgin (1526-1530), painted in the dome of Parma Cathedral, organizes clouds and figures around a view from below so that the architecture appears to open into an ascending space.
Later ceiling painters used foreshortening to coordinate painted bodies with the viewer’s position below. In the Rococo period, Giovanni Battista Tiepolo’s vast staircase fresco at the Würzburg Residence (1752-1753) continued that tradition on an architectural scale.
Foreshortening Effects
The strength of foreshortening varies with the viewing angle. Its clearest visual effects are:
- A form’s receding axis appears shorter than its measured length.
- Nearer parts overlap or partially conceal parts behind them.
- Contours and cross-sections change shape; for example, a circular opening may appear elliptical.
- Near and far parts may differ in apparent size, especially at close viewpoints.
Perspective geometry can help construct complex scenes, but observation remains essential. Measure the apparent relationships you actually see rather than drawing a body part at the length you know it has. Overlap, contour, cross-contour, relative scale, and value shifts provide mutually reinforcing evidence of depth.
Learning How to Foreshorten
Depending on the subject, you may use different ways to plan foreshortening. Try several approaches and combine them when that helps you understand the form in three-dimensional space.

Some Things to Consider When Foreshortening
Before trying the methods below, keep these observation and construction principles in mind.
Foreshortening Tip One
The first tip is to consider where the object lies in space. Where is it relative to you, the viewer? Does its main axis move away from you or toward you? Which parts are nearest and farthest? These questions help establish the viewing angle before you draw details.
Foreshortening Tip Two
Our second suggestion is to use perspective lines when the subject provides parallel edges. These lines can help you compare sizes and directions as a form recedes. Organic figures may not supply obvious vanishing lines, so use an imagined box, cylinder, or center line to establish their orientation.
Foreshortening Tip Three
The third tip is to look for basic forms that overlap. Break the subject into boxes, cylinders, spheres, or wedges, then compare how the nearer forms conceal the farther ones. This makes both placement and continuity easier to judge.
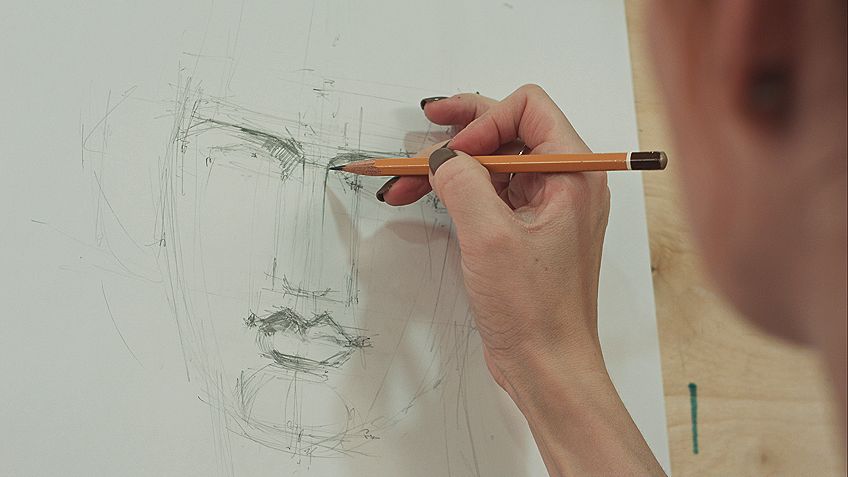
Foreshortening Tip Four
Our fourth suggestion is to draw through the object as though you could see its hidden side. Light construction lines can follow the complete box, cylinder, or torso. This helps maintain volume when an overlap conceals part of the form.
Foreshortening Tip Five
Our fifth suggestion is to compare contours and cross-contours. The outside contour shows the silhouette, while imagined bands wrapping around a limb or object reveal its direction in depth. Avoid outlining every edge equally; use line weight and value changes to support the spatial turn.
Foreshortening Tip Six
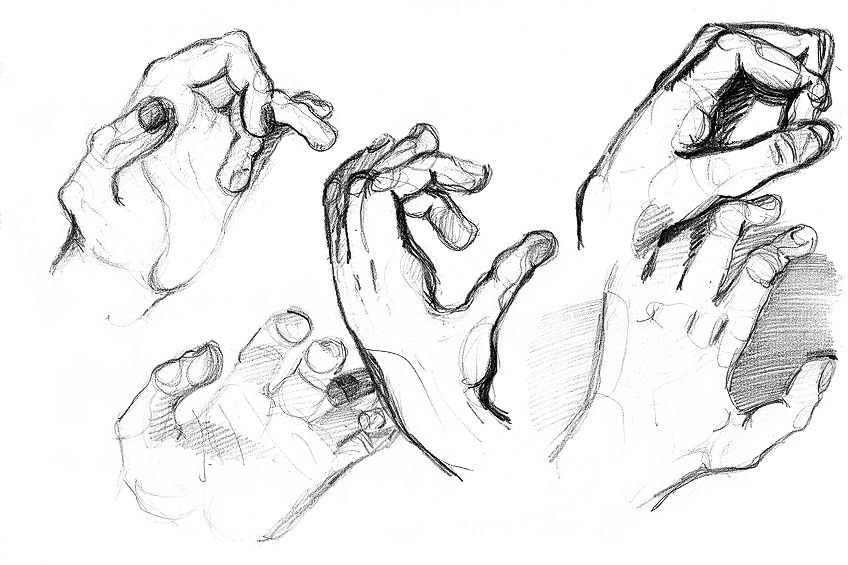
The sixth tip is to maintain continuity. Breaking a subject into overlapping shapes can make it look disjointed. Consider a hand extending away from you.
The wrist and thumb may overlap, interrupting the arm’s silhouette. Follow longer directional lines through the interruption so that the hand, wrist, and forearm still read as one connected structure.
Foreshortening Tip Seven
Our final suggestion is to decide whether observation or expressive exaggeration serves the image. Reducing the effect can flatten the pose, while increasing near-to-far scale changes can heighten drama. Make the choice consistently so the result looks intentional.
How to Foreshorten a Figure
The human body is a complex connected form, and unusual viewpoints make familiar proportions appear to change. Foreshortening is therefore essential when a figure projects toward or recedes from the viewer.
The following three methods offer different ways to maintain volume and proportion. Experiment to find which construction method best supports your observation.

The Four-Step Method for Figure Foreshortening
When drawing a figure from a steep angle, first determine how the pose is oriented in depth. These four steps provide a simple construction sequence.
Step One: Measuring Your Figure Visually
Begin by measuring the figure’s apparent head-to-foot extent on the page. Draw a directional line from the head to the feet; it may be angled or gently curved with the action of the pose.
This line helps the figure fit on the page and anchors later proportions. From a steep viewpoint, its projected length may be much shorter than expected.
Step Two: Mapping Out Other Proportions
Next, map cross-axis lines for the shoulders, rib cage, pelvis, and knees. Their angle and apparent width depend on both the pose and the viewpoint.
These lines may curve around the body’s volume, and the distances between them will compress differently as they turn into depth. Do not assume that the shoulder line must always be longer than the waist or pelvis; compare the specific pose in front of you.
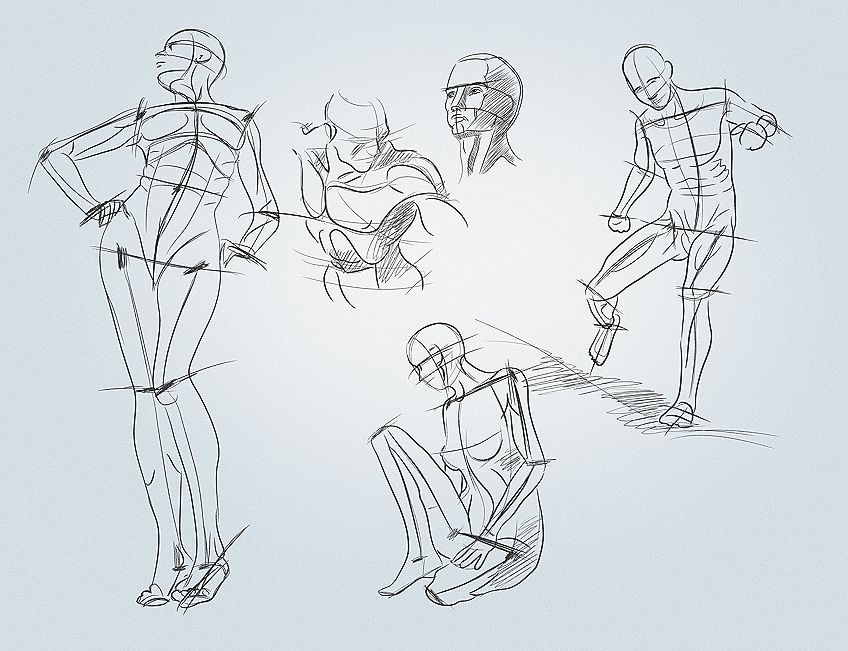
Step Three: Drawing a Stick Figure
Yes, you did read that correctly. In this next step, you need to flesh out the structure of the figure by drawing a line that follows each limb. You want to approach this step as if you were drawing the bone structure of the human form. When it comes to the torso, rather than drawing a central line, draw a geometric shape. Using geometric shapes will give you a better structure to work with as you flesh it out later. You can also use geometric shapes to represent the feet and hands.
Step Four: Fleshing Out the Figure
At this stage, you have all the basic proportions of the figure mapped out. You can now begin to flesh out your human form by drawing in contour lines. This stage is where you can explore your ideas and try new things. You can flesh out your figure as much or as little as you like. If you are adding clothes and intricate details, now is the time. You can exaggerate or understate the level of foreshortening you apply to your figure until you are satisfied with your final piece.
This four-step method separates observation from detail: establish the figure’s direction, map major cross-axes, build a simple mannequin, and only then refine the contours.
The Geometry Technique for Foreshortening Figures
The geometry technique is similar to the four-step method outlined above, but it involves breaking the body down into different shapes. When you are trying to wrap your head around human anatomy, at the same time as trying to foreshorten the figure, breaking the body down into simple geometric shapes can be very effective. There are no rules or special techniques to follow with this approach, but you need to observe the figure and map it out with different shapes.
Try to picture the limbs as three-dimensional tapering cylinders and the torso as a variety of cuboids or rectangles. The shapes you use are likely to change for each figure you draw, depending on their size and your vantage point. Part of this process involves figuring out how each of these shapes fit together. Once you have the basic shapes and proportions of your figure mapped out in simple geometric shapes, fleshing out your foreshortened figure can be as simple as smoothing out the edges.
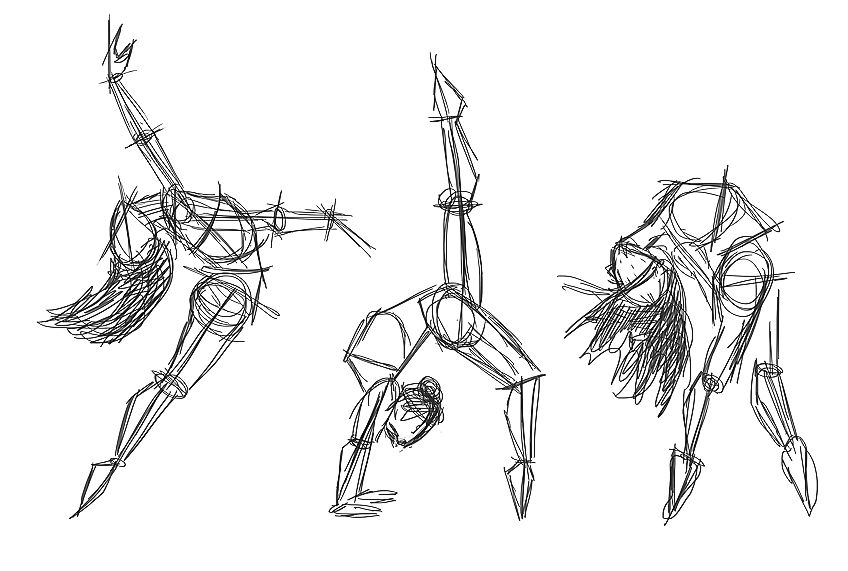
The Spiral or Coil Technique for Foreshortening Figures
The spiral or coil technique is a loose way to visualize volume. It builds a three-dimensional form from repeated curves that wrap around the body. Drawing through the object is particularly important here because the coils describe both visible and hidden surfaces.
When trying this technique, you must use your pencil quite lightly. The outcome will be a little bit messy, and you will have to do a fair amount of rubbing out. On the horizontal or vertical parts of the body, your coils will appear to be flat. When the form of the figure begins to move towards you, like a leg extending in your direction or away from you, your spirals will morph into near circles. You can map the changing form very effectively in this way. This technique can be extremely useful for becoming accustomed to the contours of the human form.
How to Foreshorten Landscapes
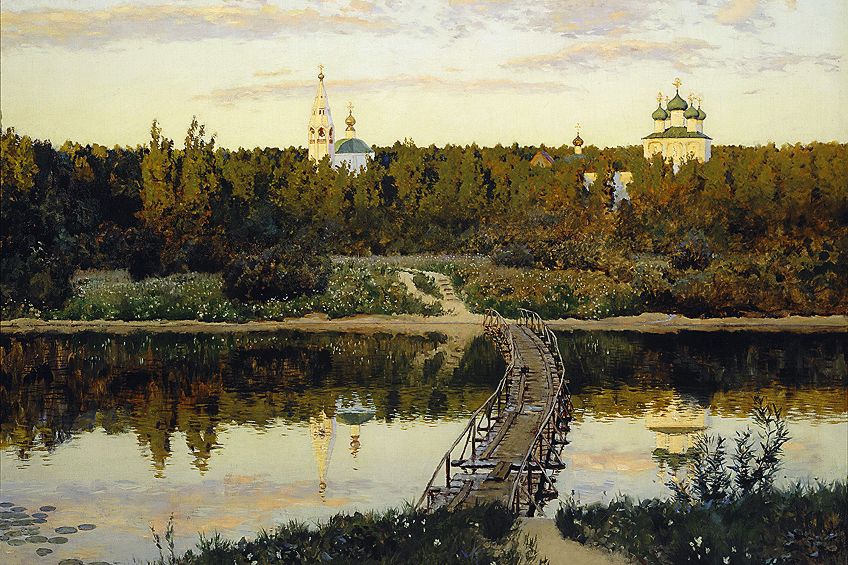
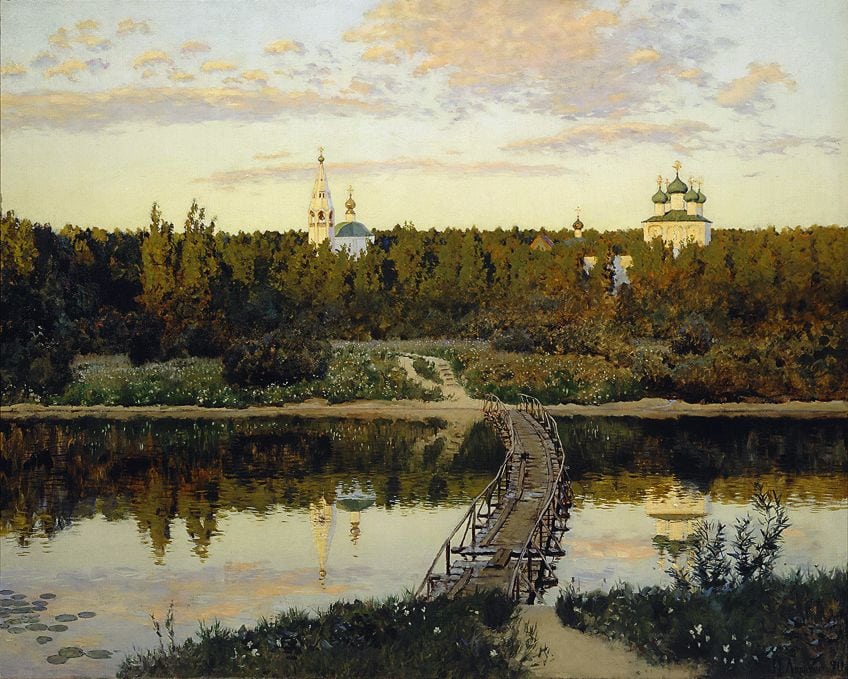
Foreshortening may be less obvious in a landscape than in a figure thrust toward the viewer, but it still affects surfaces and objects angled into depth. In Isaac Levitan’s A Quiet Monastery, for example, the bridge presents a receding plane while the surrounding banks, trees, and buildings supply additional depth cues. Other landscape subjects that may be foreshortened include:
- A road or river winding away into the distance.
- The branch of a tree extending either towards or away from the viewer.
- A fallen tree.
- An ocean wave crashing in from a sharp angle.
Linear Perspective and Foreshortening in Landscapes
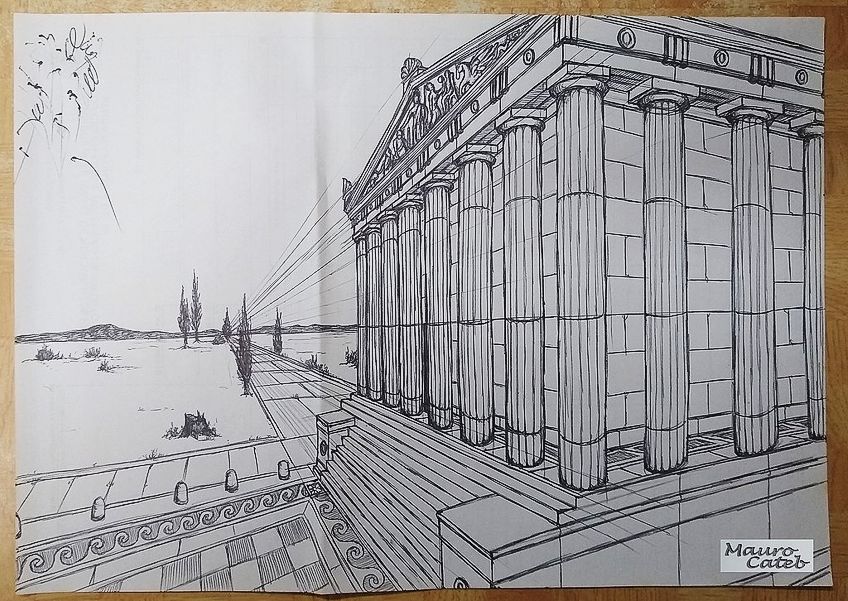
Foreshortening in landscapes is not based exclusively on one-point perspective. One-point perspective is useful when one set of parallel edges recedes toward a single vanishing point, as in a road or corridor seen nearly straight on. Two-point or more complex constructions may be needed when objects turn at other angles.
In a one-point construction, planes parallel to the picture plane keep horizontal and vertical edges, while perpendicular edges appear to converge toward a vanishing point. The vanishing point belongs on the horizon line for level parallel edges; it is not simply wherever a road meets the edge of the paper. The road surface is foreshortened because its length turns into depth, while its narrowing edges demonstrate linear convergence.
Foreshortening Exercises
Foreshortening improves through repeated observation and comparison. Practice helps you recognize simple volumes, projected lengths, overlaps, and directional changes before detail distracts you. The following exercises isolate those skills.
Foreshortening Exercise One
The first exercise involves using dramatic or extreme foreshortening to draw simple shapes. This exercise could be as simple as placing a water bottle well above your eye-line and exaggerating the foreshortening effect. The more objects you use for this exercise, the better you will become at foreshortening a variety of differently shaped objects.
Foreshortening Exercise Two
The second exercise is an extension of the first. For this practicing activity, you will draw the same object in varying perspectives and degrees of foreshortening. Practice like this will help greatly with your ability to foreshorten figures in a variety of different postures and perspectives.
Foreshortening Exercise Three
The third exercise involves drawing several overlapping forms. Arrange boxes, cylinders, or still-life objects so that each partially conceals another, then identify which edges continue behind the overlap. Repeat the arrangement from a different viewpoint to see how the spatial order changes.
Foreshortening Exercise Four
The fourth exercise is to analyze reproductions of artworks that use foreshortening. On a printout or digital layer that you are permitted to annotate, trace the principal axes, overlaps, and cross-contours. Compare several figures viewed from different directions rather than copying only their outlines.
Foreshortening Exercise Five
Our final exercise is to build simple boxes and cylinders in one- and two-point perspective, then place organic forms inside them. This is especially useful for landscape and object drawing because it separates the perspective framework from the final contours.
In Conclusion: What Are the Key Foreshortening Takeaways?
Foreshortening is easiest to identify by direction: a form points toward or away from the viewer, so its visible length contracts on the picture plane. Overlap, changing cross-contours, near-to-far scale, and light and shadow help the viewer interpret that compression as depth.
Keep foreshortening distinct from diminution and linear convergence. The three effects often appear together, but they solve different spatial problems. For drawing practice, begin with the form’s main axis, build simple volumes, compare projected proportions, and refine the contours only after the structure reads convincingly.
Accurate observation can create naturalistic space, while deliberate exaggeration can make a pose more forceful or dramatic. In either case, consistency among the depth cues matters more than mechanically applying a single formula.
Draw through the form, compare its projected lengths, and use overlap and cross-contours to keep the structure three-dimensional.
Take a look at our foreshortening art webstory here!
Frequently Asked Questions
What Is Foreshortening in Art?
Foreshortening is the apparent compression of a form whose long axis points toward or away from the viewer. Artists represent that shortened projection, together with overlap, contour, scale, and shading, to make the form occupy convincing depth.
How Is Foreshortening Different From Linear Perspective?
Foreshortening compresses an individual form along an axis that recedes in depth. Linear perspective is a broader geometric system in which parallel edges appear to converge toward vanishing points. They can work together, but neither term is a synonym for the other.
When Did Artists Begin Using Foreshortening?
Foreshortened forms appear in ancient and medieval art, but the technique became especially prominent during the Renaissance period as artists developed increasingly systematic spatial illusions. Andrea Mantegna, Correggio, Michelangelo, and Raphael used it in notably different ways.
How Do You Foreshorten a Figure?
Start with the pose’s main direction, map the shoulders and pelvis as cross-axes, and build the torso and limbs from simple volumes. Compare their apparent lengths, show which forms overlap, and use cross-contours before refining anatomy and surface detail.

In 2005, Charlene completed her Wellness Diplomas in Therapeutic Aromatherapy and Reflexology from the International School of Reflexology and Meridian Therapy. She worked for a company offering corporate wellness programs for a couple of years, before opening up her own therapy practice. It was in 2015 that a friend, who was a digital marketer, asked her to join her company as a content creator, and this is where she found her excitement for writing.
Since joining the content writing world, she has gained a lot of experience over the years writing on a diverse selection of topics, from beauty, health, wellness, travel, and more. Due to various circumstances, she had to close her therapy practice and is now a full-time freelance writer. Being a creative person, she could not pass up the opportunity to contribute to the Art in Context team, where is was in her element, writing about a variety of art and craft topics. Contributing articles for over three years now, her knowledge in this area has grown, and she has gotten to explore her creativity and improve her research and writing skills.
Charlene Lewis has been working for artincontext.org since the relaunch in 2020. She is an experienced writer and mainly focuses on the topics of color theory, painting and drawing.
Learn more about Charlene Lewis and the Art in Context Team.