How to Draw Spider-Man – Drawing Your Favourite Comic
With the current emphasis on Spider-Man in pop culture, we can see that the superhero comes in many versions, making a Spider-Man drawing a fun topic to play with. Spider-Man is a really interesting comic character with many iterations that have been explored over the past few decades in comic pages and on movie screens. Spider-Man drawings are really fun because we get to experiment with different art styles, different versions of Spider-Man, and how to represent him in unique and dynamic poses. A Spider-Man drawing is also a great way to represent unique movements within the figure and how that correlates with Spider-Man’s spider-like movements. This web-slinging character is quite acrobatic, making him a fun figure to draw. As we go through this tutorial on how to draw Spider-Man, we will also learn a little about drawing style, colors, and layering for detail.
An Easy Guide to Drawing Spider-Man
This tutorial on how to draw Spide-Man is quite simple and explores the more basic comic-styled approach for beginners. Again, Spider-Man is a very dynamic character in his movements, making him a fun figure-drawing exercise for exploring strange positions. This tutorial will break down the drawing process into digestible steps that will help us understand how to draw Spider-Man in a unique dynamic pose. Comic characters can often be a great topic for exploring anatomy and how to define unique physiques in these exaggerated movements that demonstrate heroic abilities.
Necessary Materials
This tutorial on how to draw Spider-Man is done on a digital device, however, all drawing processes can be transferred to traditional materials. Spider-Man is quite a colorful character, which means we will want some materials that are conducive to layering with various details. In this case, we will want to have some coloring materials and some drawing materials, all suggested items can be seen in the links below:
- Pencils
- Sharpener
- Pens
- Eraser
- Paper
Step-by-Step Guide on How to Draw Spider-Man
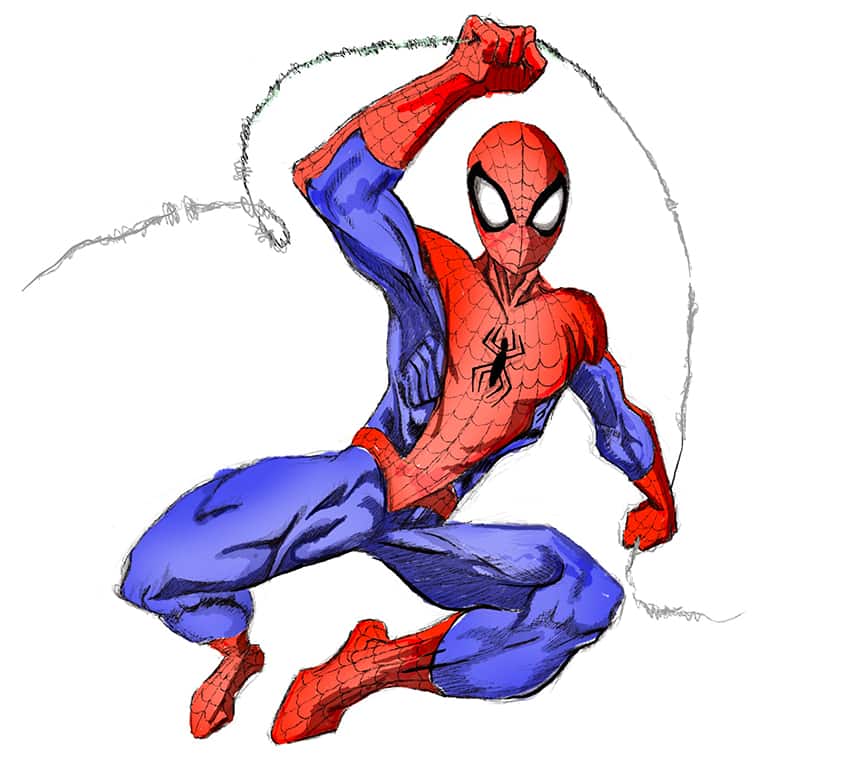
In this tutorial, we will be drawing inspiration from the Spectacular Spider-Man art style, where Spider-Man has larger eyes and a leaner physique. This is a fun artistic representation of Spider-Man and provides us the opportunity to define his muscles, body, and suit in a comic-styled approach. With a comic-styled approach, we will start sketching the figure to capture his form. From there, we will then work with linework and shading to emphasize his muscles and body.
We will then move into refining the drawing and then proceed to work in color to define the color of the suit, shadow formations, and how to emphasize the physique through the suit.
Step 1: Lightly Sketching the Character
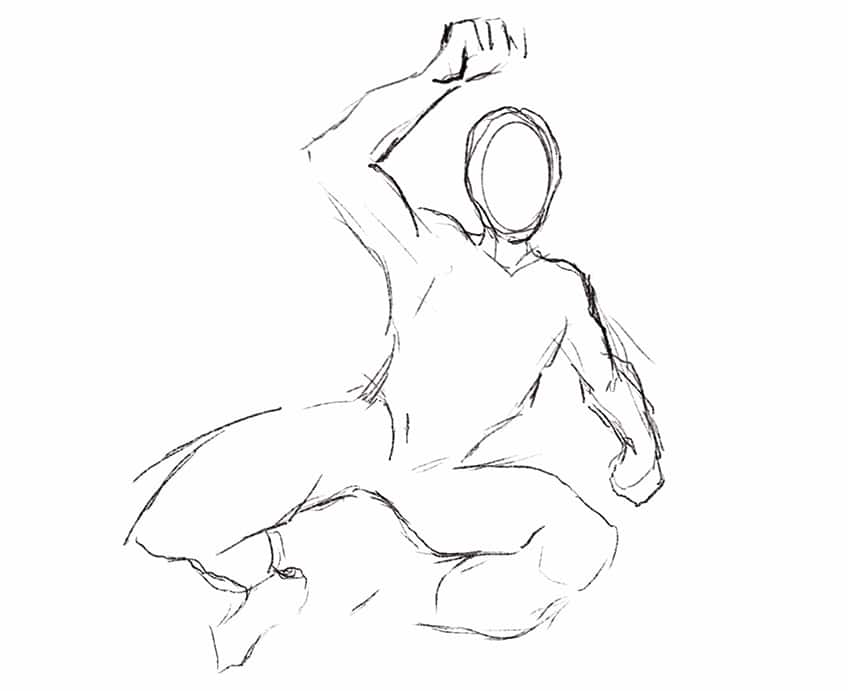
We can start with a very simple sketch to define the shape and form of the unique pose of the Spider-Man character.

We can start lightly sketching the figure in a unique pose, in doing so we can give a dynamic quality to the Spider-Man drawing. As we do this, we can make certain parts of the body larger and smaller to define the shift in depth of field.

What is meant by this is that, as some features move towards the foreground, they can become bigger to represent the form of the figure more accurately.

The same can be said for bodily features that move in a backward fashion, or toward the background. The contrary is true for them, as they can become smaller as they move away from the foreground.

Naturally, as we continue to shape the different features of the character, we can define the different muscle groups more distinctly.
Step 2: Refining the Spider-Man Drawing
We can now proceed to refine the Spider-Man design by defining the suit in more detail. Starting with the head, we can start integrating the eyes of the mask.

We can continue to work our way from one side of the character, where we start to define the anatomical nature of the different features.

With superhero figures, we can be emphatic with the muscle definition within their physiques. In the case of Spider-Man, we can define his muscular stature, emphasizing the obliques, abdominals, and so on.
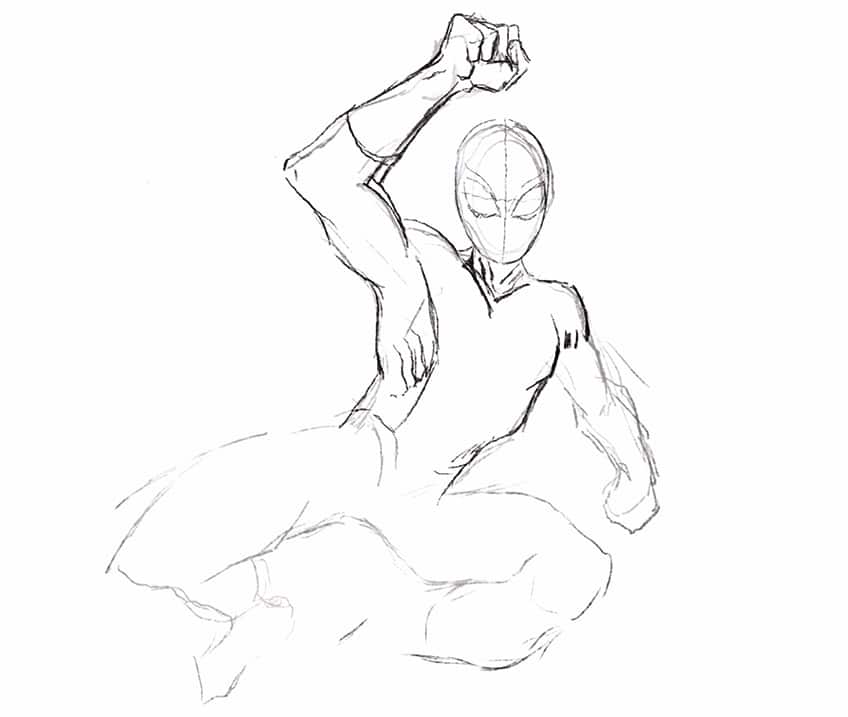
As we work our way into features that shift into the background, we can maintain the same visual quality of emphasizing the muscles and definition in the physique.

Already we can start forming the suit pattern along the Spider-Man figure within his unique pose.

Spider-Man’s suit has two colors, which establish different segments throughout the suit. We can start forming these segments throughout the suit to determine which areas will be colored.

Again, superheroes often have very exaggerated muscular formations, which is something we want to maintain throughout the whole body.
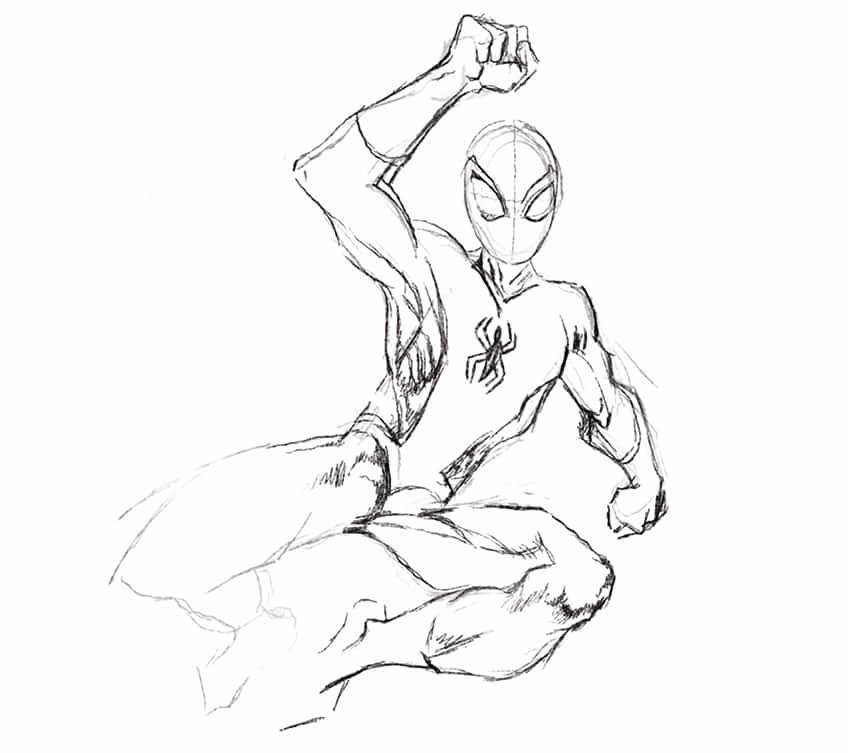
As we continue refining the different body parts, we can keep that concept of depth of field in the back of our minds as we define some of the body features as shifting into the foreground.
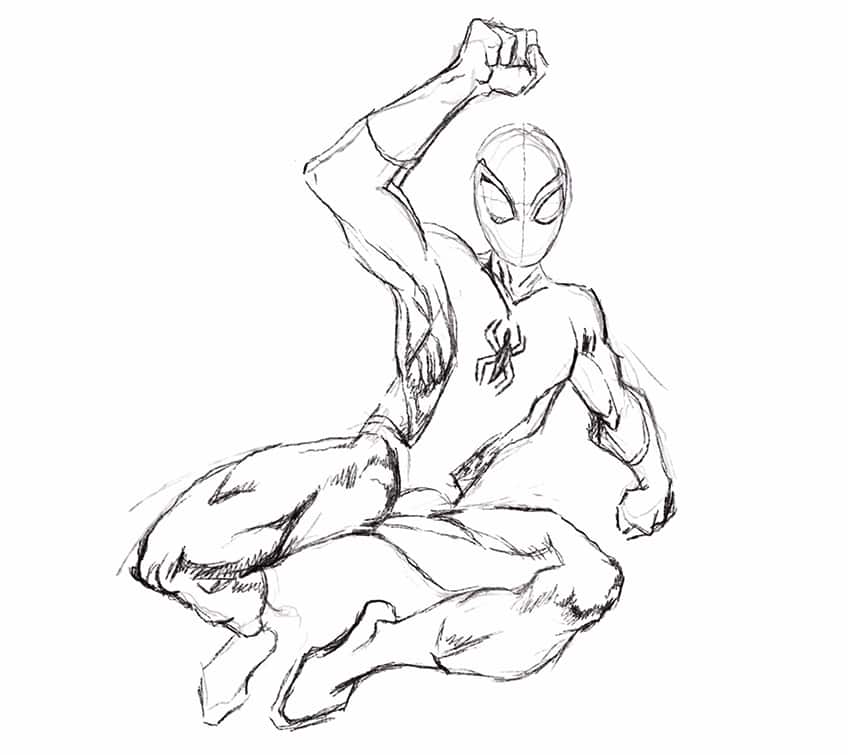
Step 3: Creating a Finalized Sketch
Once we have established the general proportions and shape, we can lightly erase our drawing. We are now going to define these different features one last time with shading and line work.

This is where we define the visible muscle groups, and add shading to the areas of the body where the shadows would be most significant.
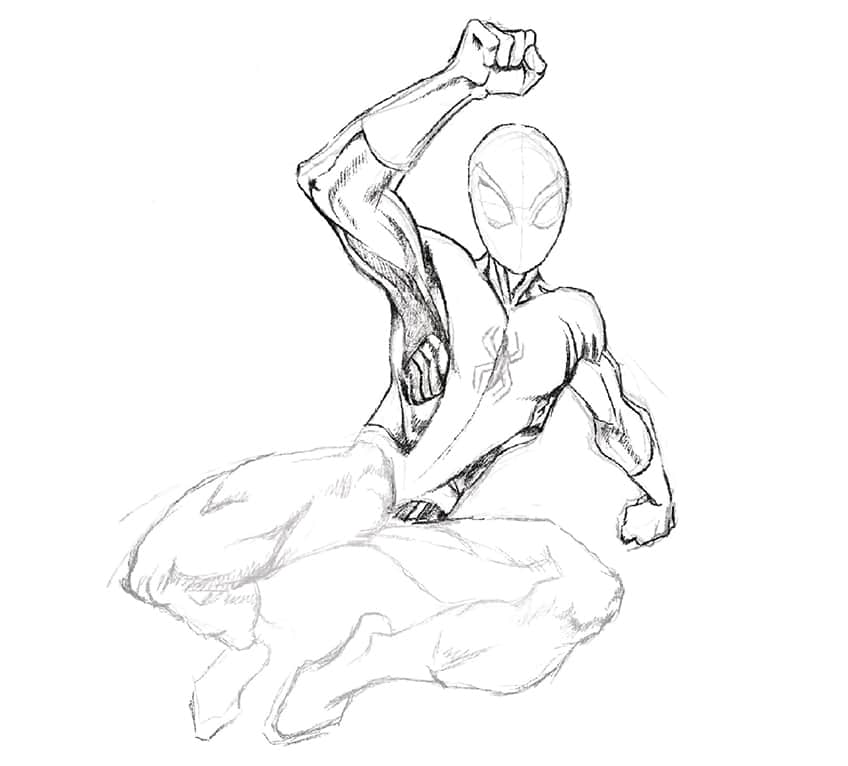
We want to be quite intentional with our linework and shading and how we define the different muscle groups. Naturally, Spider-Man does have a more muscular definition, so we want to make sure we represent this in all areas of the body.

we can start integrating the web-like pattern into the Spider-Man suit, we want to make sure we keep our web consistent throughout the entire suit. We can also bring more shape to the eyes of the suit with thick black outlines.
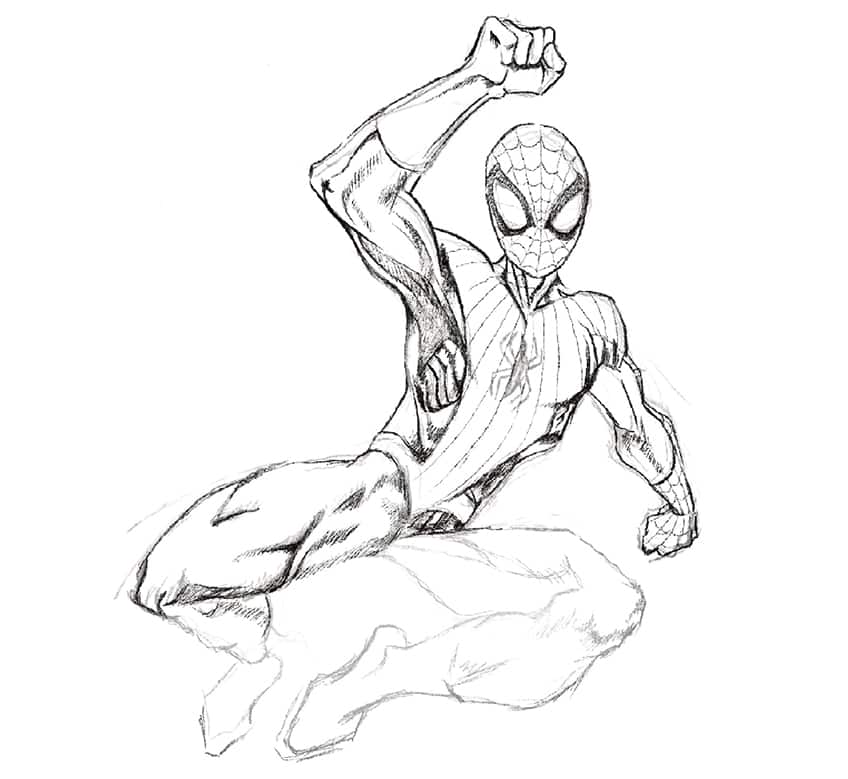
A good suggestion is to also look at some different artistic representations of different comic-styled Spider-Man on the internet. We want to make sure we are also considering the foreshortening of the features as they move between the foreground and background.
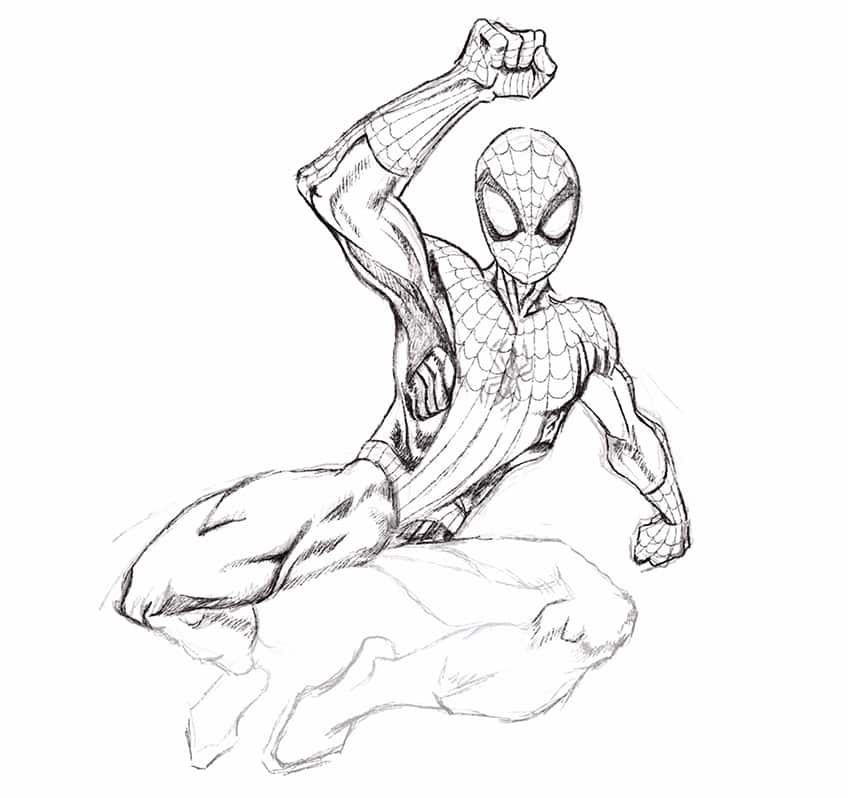
We also want to make sure that we are placing the webbing patterns in the correct spaces of the Spider-Man suit. Take your time with the suit design, and adding shading and linework to the different features of the body.
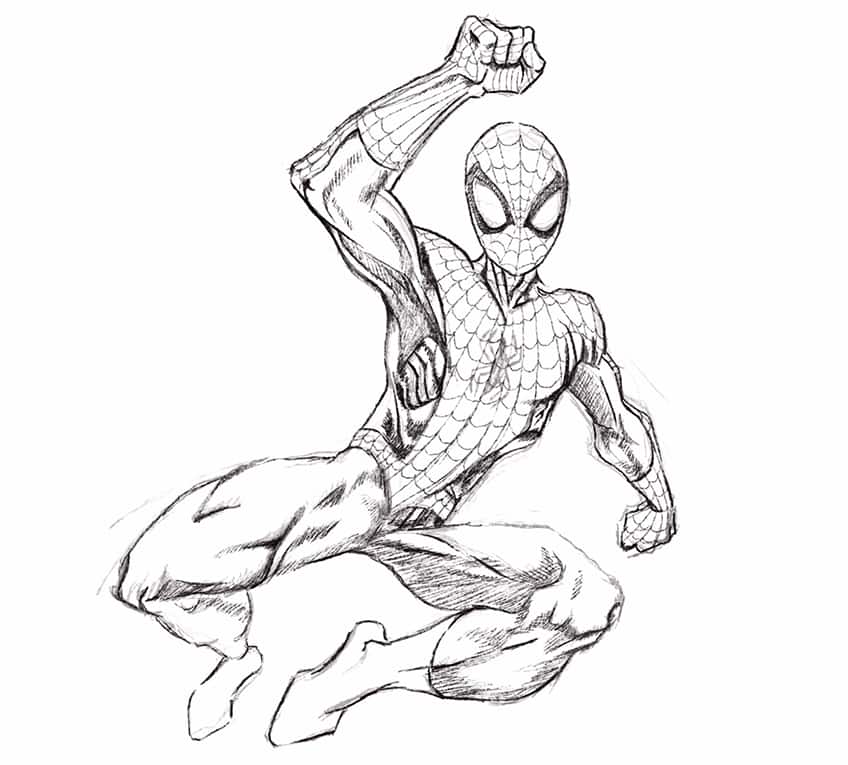
As we shift our way through the entire body, we want to make sure that we represent the different muscle groups throughout the body. We do this by defining them with linework and shading to emphasize shadow formations.

Step 4: Integrating the First Layer of Color
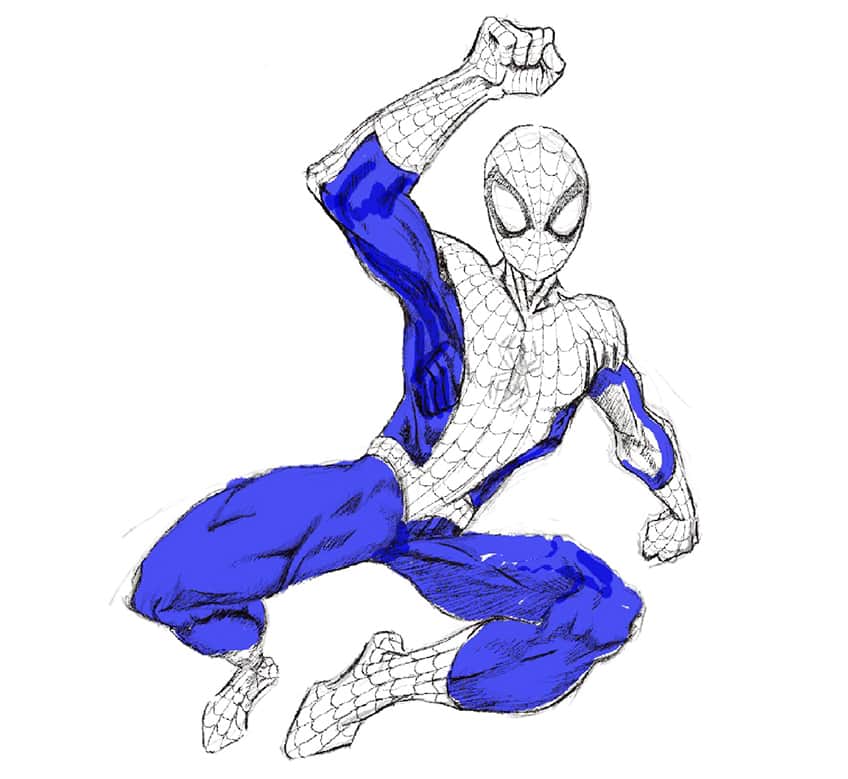
Now that we have a fully sketched Spider-Man drawing, we can proceed to integrate color into the character’s suit design. Again, Spider-Man has a combination colored suit of blues and reds.
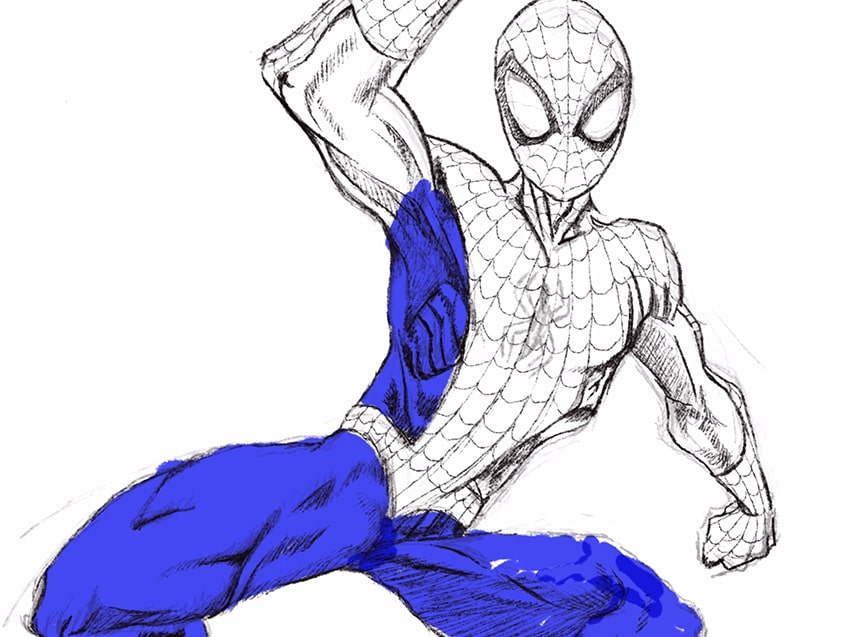
The sections without the pattern will be blue, we can also build up these tonal values from light to dark. This will allow us to have more control over the coloring process.
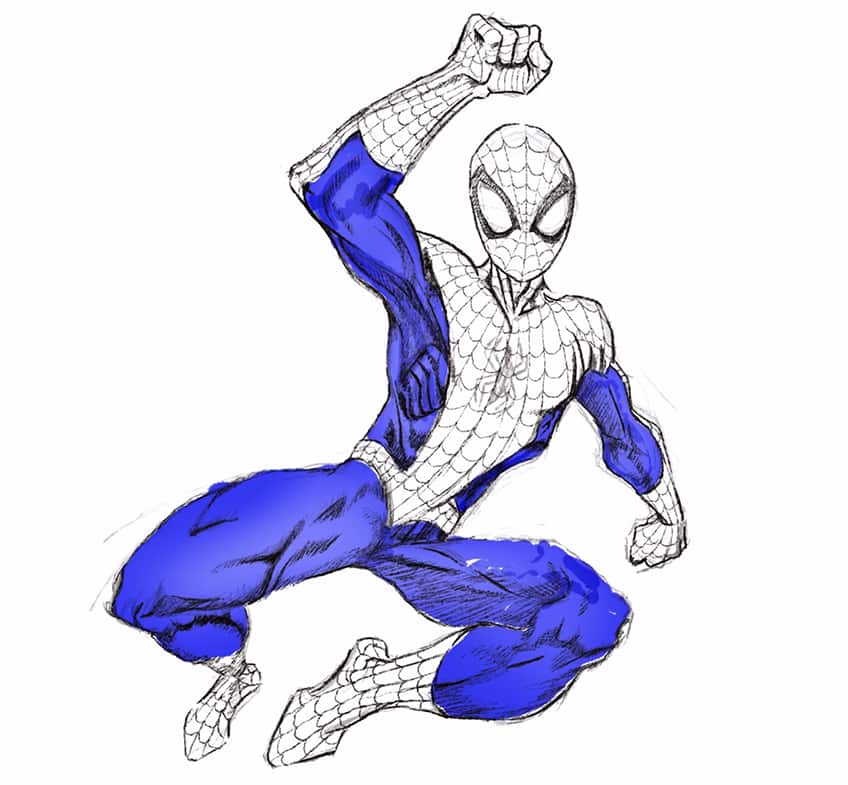
Try to work the blue color into all areas of the suit without the web-like pattern. We want to make sure we fill the entire surface area of the suit in those specific segments.
We can do the same for the red parts of the suit, making sure we integrate red into the section of the suit with the web-like pattern throughout. Again, we want to ensure we add the color to the right areas of the suit.
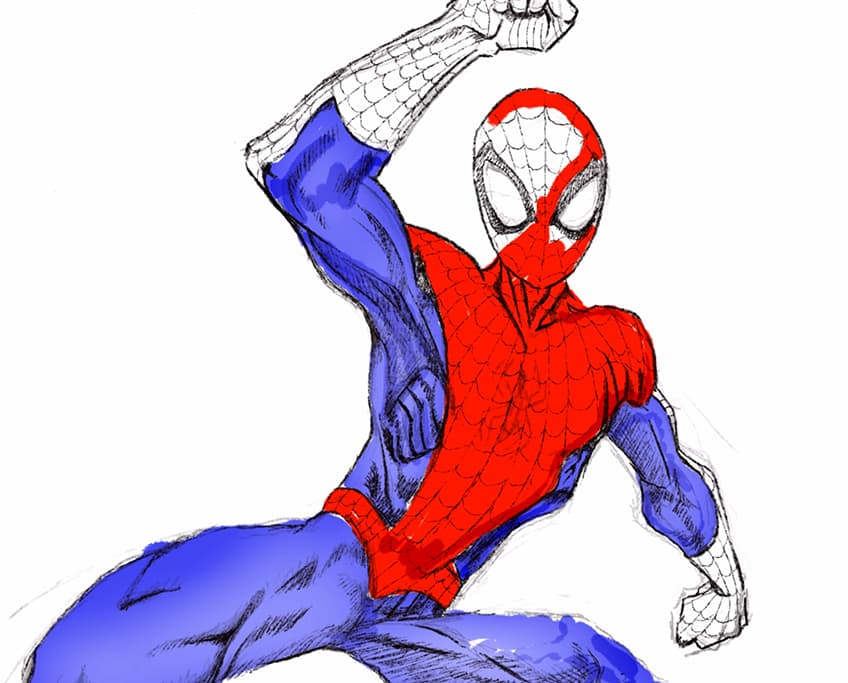
We want to also make sure that we are not overlapping the colors between the specific segments in the suit for both the red and blue colors.
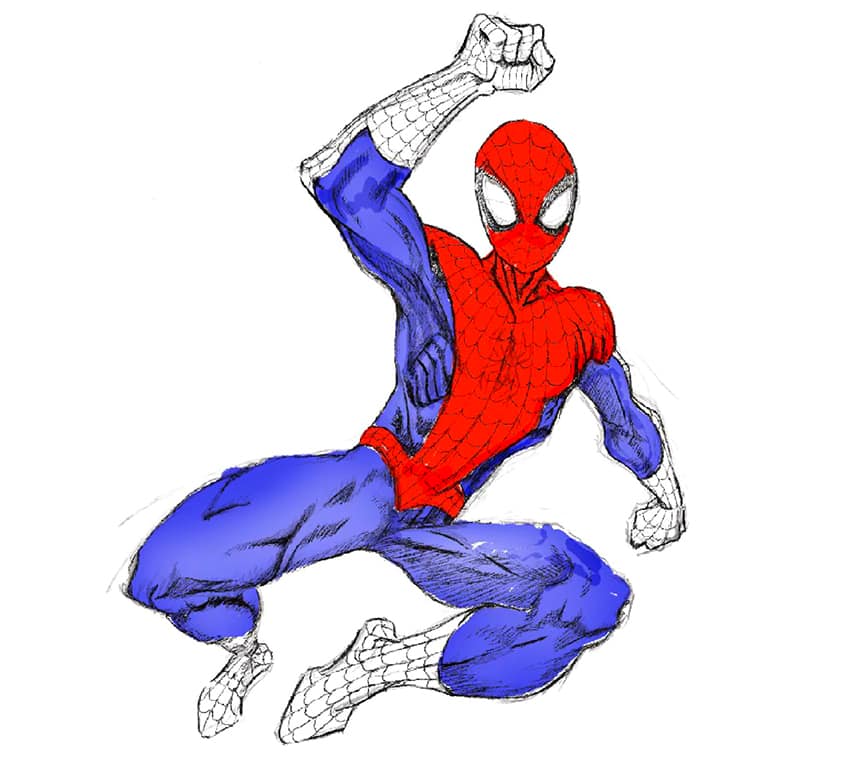
As we start to fill in the suit with the right placements for the different colors, we start to see how it affects the aesthetic of the Spider-Man drawing.
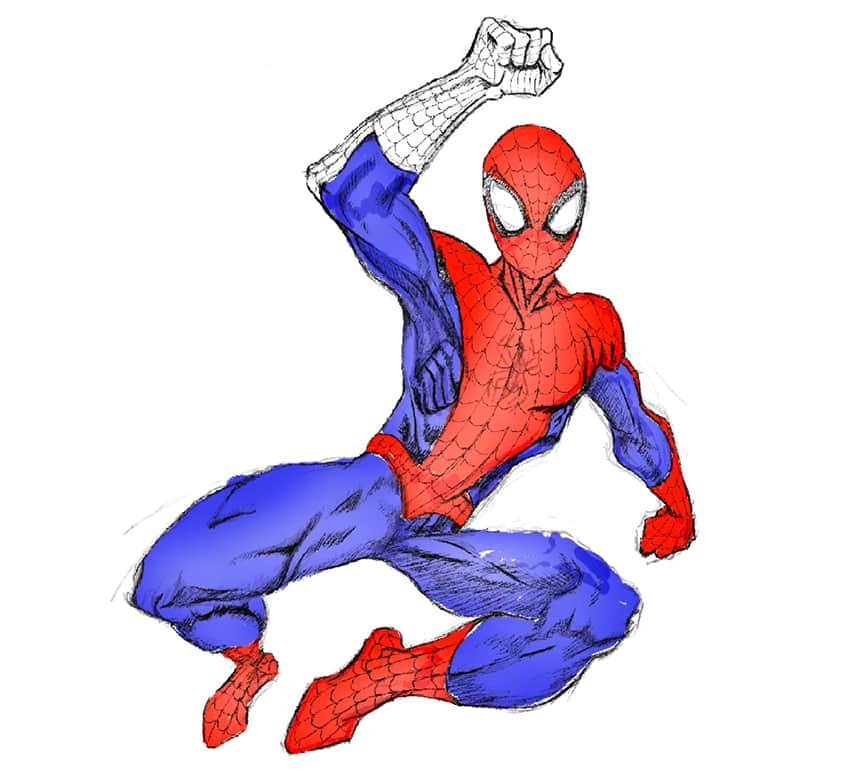
Step 5: Adding Darker Color for Shadows
Now that we have established a set of base colors, we can build up the color values with darker tones to define shadowing within the suit. This is where we use darker reds for the red areas and darker blue for the blue areas in the suit.
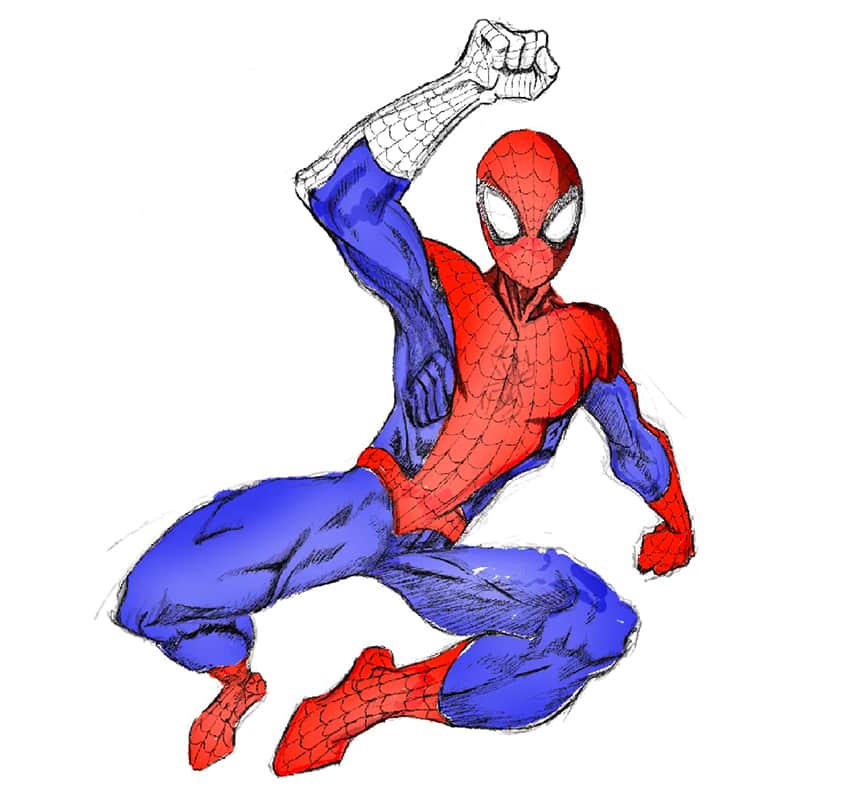
We want to take our time working through all areas of the body, slowly integrating some darker shapes to define the shadows. We can integrate these darker colors along the striations defined by the muscles.
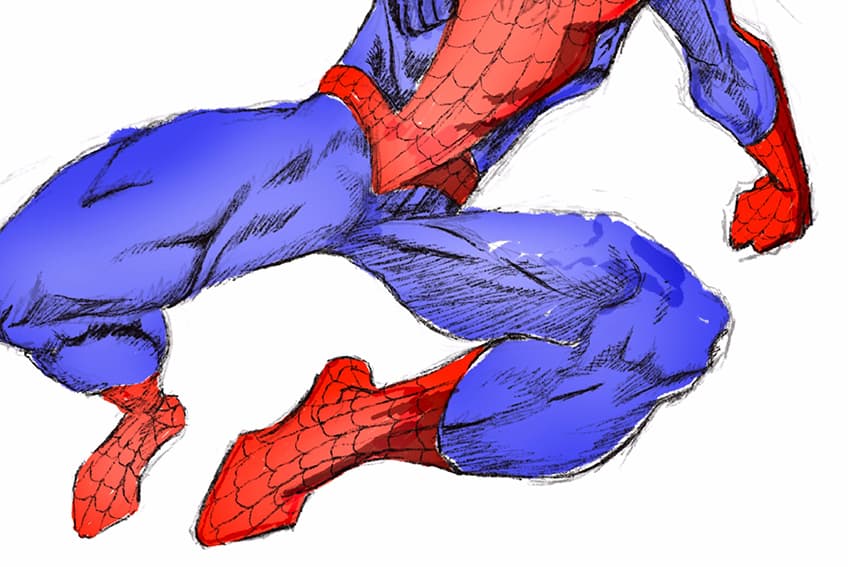
In doing so we maintain the superhero quality in the muscular physique. Simultaneously, we can also add larger shadows predominantly to one side of the body to maintain consistency in shadow formation.
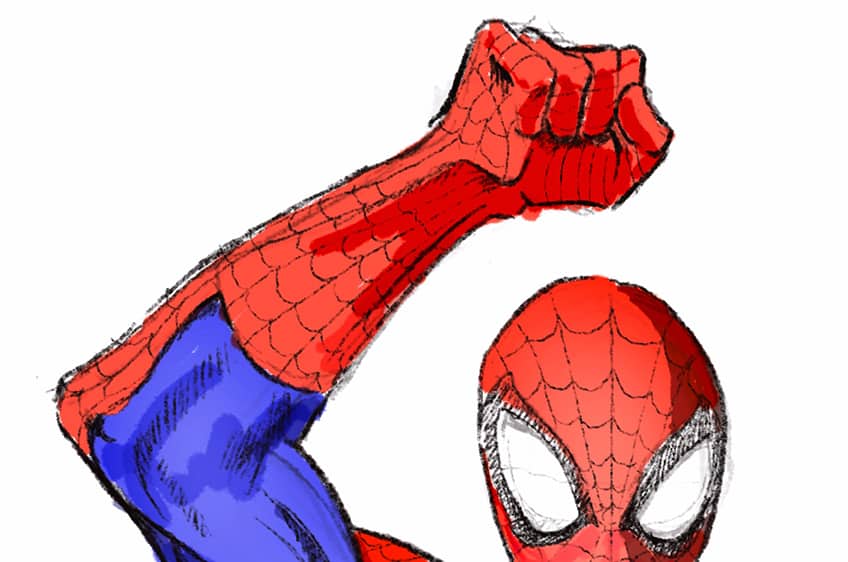
This is useful for all areas of the body and can give the structure of the anatomy a more three-dimensional quality, which will in turn enhance the drawing. As we continue to do this we will see how it brings the Spider-Man drawing to life.
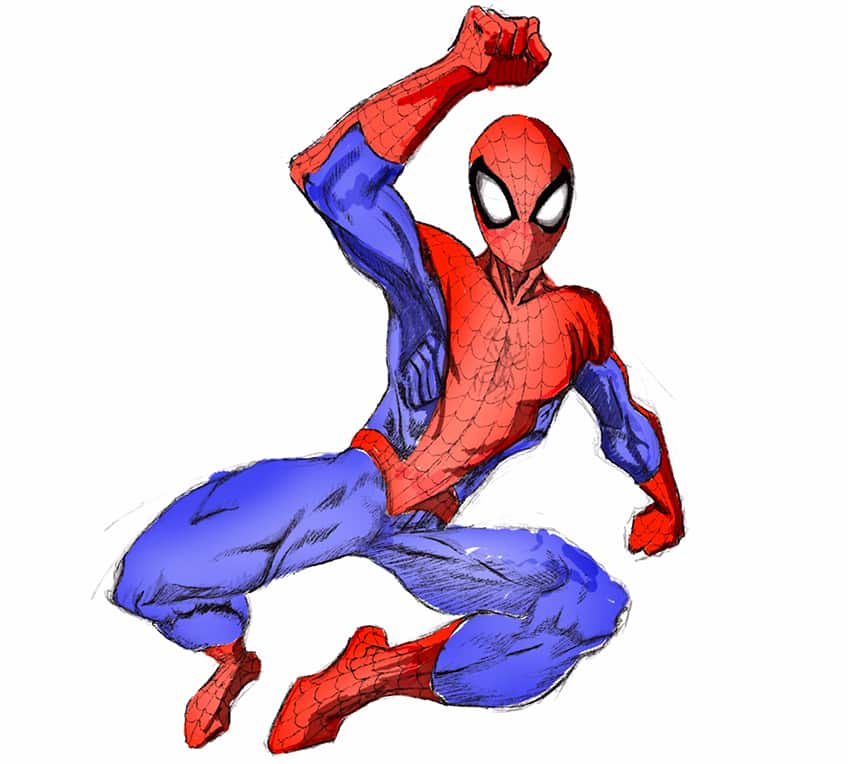
Step 6: Adding Last Details
This is where we can revert to using a black medium to integrate the iconic spider feature on top of the suit. We can also use a black medium to enhance the detailing around the eyes.

We can also integrate another layer of linework and outline the character and the various muscle groups to emphasize the design of the Spider-Man drawing.
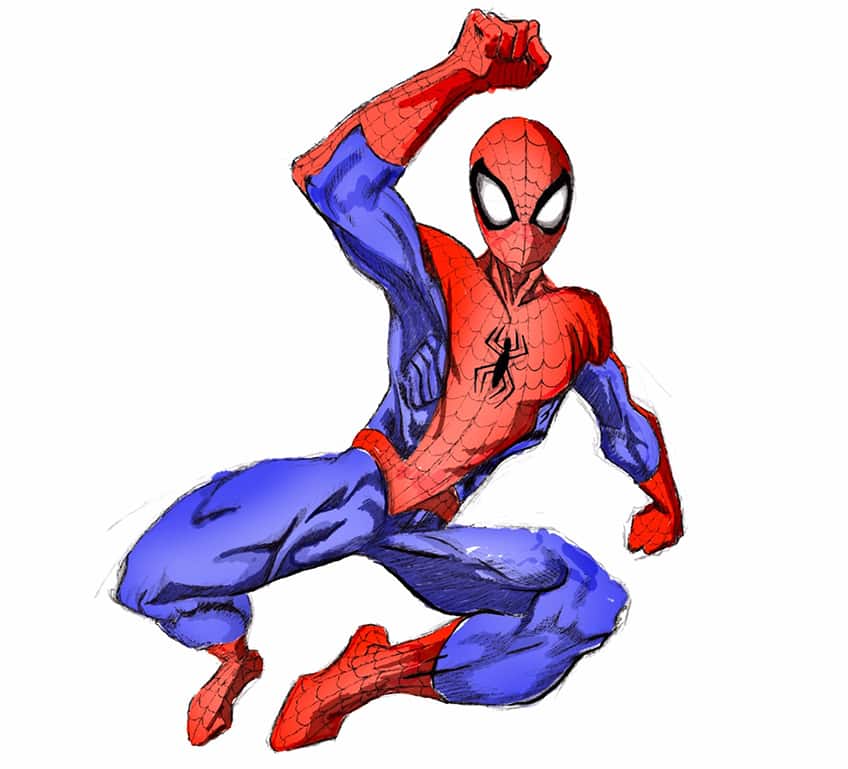
At this point, we want to work with refined and distinct strokes to emphasize the shape and form of the character. We can also integrate some linework of the darkest colors in the shading to emphasize their shadows.
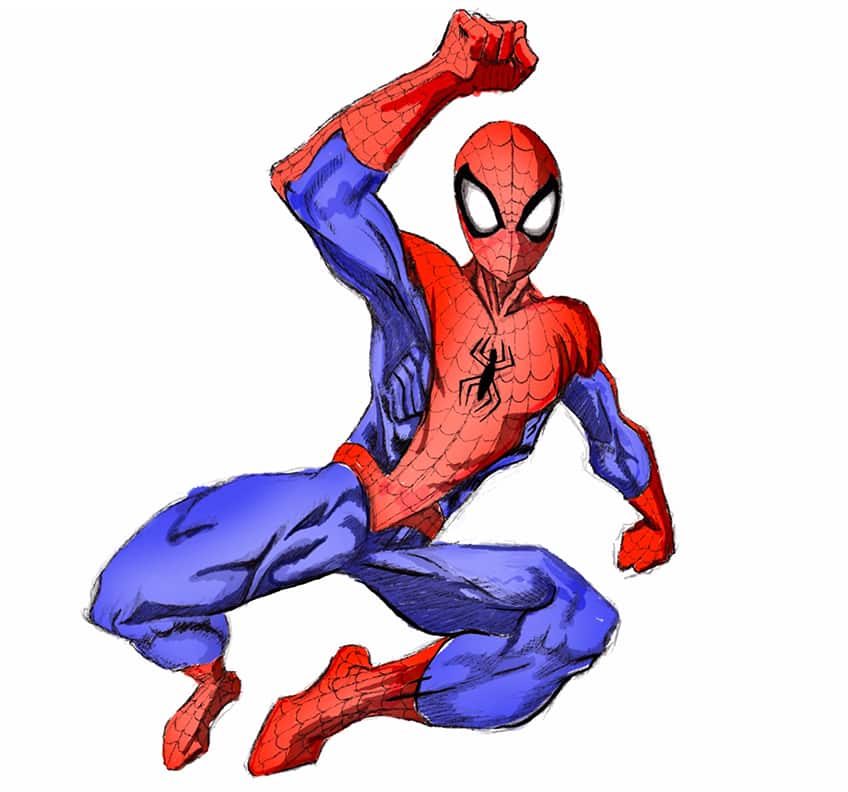
Take your time bringing more form to the structure of the Spider-Man drawing by utilizing linework to define the different features more significantly. Then lastly, we can integrate web features to contextualize the movement in the Spider-Man drawing.

Make sure to take your time going over all the details one last time, and there you have it! How to draw Spider-Man through a few simple steps.
Tips and Tricks to Remember
- First shape the figure. You want to make sure you capture the general shape and movement of the character.
- Refine the character design. We can refine the design with line work and shading to emphasize the structure of the character.
- Take your time with line work and shading. We want to make sure we capture the structure of the different muscle groups in our Spider-Man drawing.
- Layer your colors for shadows and highlights. Always build up your colors from light to dark, as this way you have more control over the shadow formations throughout the suit.
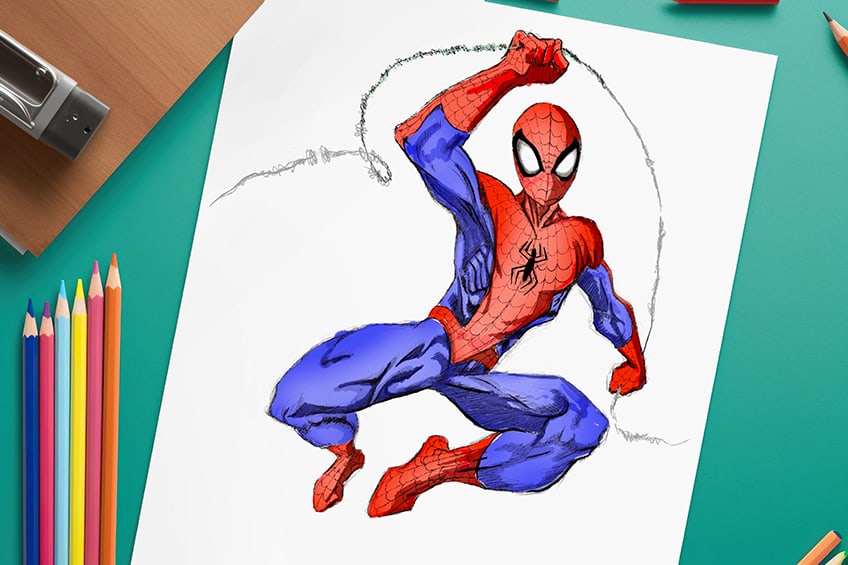
As we slowly build up our Spider-Man drawing, we want to take time to refine the figure from vague to more specific features. This means that we want to take our time with shaping the different features for a more accurate and anatomical representation of Spider-Man’s figure.
Frequently Asked Questions
How to Add Color to a Spider-Man Drawing?
There are two main ways to draw Spider-Man. One way is to establish the colors beforehand, which you then sketch the details over. The second, however, is to approach the coloring process as a last step, where we focus more on the black line work and sketching details to form the character. From there, we can start integrating our selective choice of colors to represent the blues and reds in the suit. As we proceed, we can then start working with the darker hues within the spectrum of blues and reds to represent the shadows within the different colors of the suit. For shadows in the red parts of the suit, we can use darker reds and the same can be done for the blue parts of the suit in the Spider-Man drawing.
How to Draw a Dynamic Spider-Man Drawing?
There are many ways to draw Spider-Man in unique poses, however, because he is an acrobatic character, it is quite fun to represent that in your Spider-Man drawing. In this particular drawing, we see how the distortion in proportions can be used strategically to represent the shift of how features are defined between the background and foreground. Playing around with the scale of proportions is something we want to integrate into the drawing to define the movement in the character. Naturally, as objects shift into the foreground, we see how they appear to be larger, whereas they can seem smaller as they shift into the background. This is a tool used to define unique movements in the character, defining features that shift from the background into the foreground.
Matthew Matthysen is an educated multidisciplinary artist and illustrator. He successfully completed his art degree at the University of Witwatersrand in South Africa, majoring in art history and contemporary drawing. The focus of his thesis was to explore the philosophical implications of the macro and micro-universe on the human experience. Matthew uses diverse media, such as written and hands-on components, to explore various approaches that are on the border between philosophy and science.
Matthew organized various exhibitions before and during his years as a student and is still passionate about doing so today. He currently works as a freelance artist and writer in various fields. He also has a permanent position at a renowned online gallery (ArtGazette) where he produces various works on commission. As a freelance artist, he creates several series and successfully sells them to galleries and collectors. He loves to use his work and skills in various fields of interest.
Matthew has been creating drawing and painting tutorials since the relaunch in 2020. Through his involvement with artincontext.org, he has been able to deepen his knowledge of various painting mediums. For example, watercolor techniques, calligraphy and lately digital drawing, which is becoming more and more popular.
Learn more about Matthew Matthysen and the Art in Context Team.


