How to Draw Realistic Clouds – Pencil Skyscape Drawing Lesson
Clouds are such beautiful structures that can come in all kinds of forms. They are a great reminder of nature’s beauty, and learning how to draw realistic clouds can be such a great addition to many artworks. Learning how to do a realistic cloud drawing can be a good challenge as clouds seem complex, however, it is because of their complex nature that we will find them to be quite easy to draw. Clouds are abstract, which means we can create and form them in any way we choose. However, this tutorial on how to draw realistic clouds will guide you, and teach you how to draw realistic clouds through a few simple steps.
An Easy Guide to Drawing Realistic Clouds
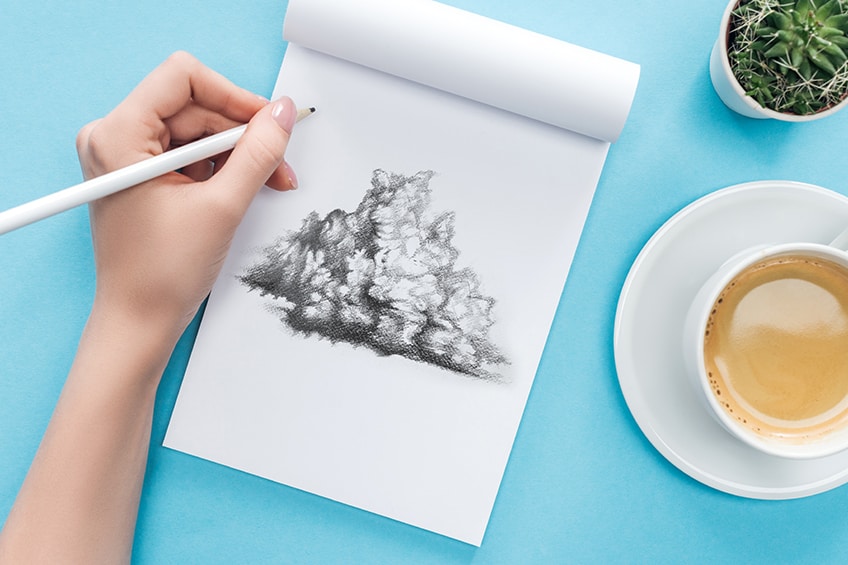
If you ever did geography in school, you will have come across the term cumulonimbus. This is the term for the most common or classical-shaped cloud, which is what we will be learning how to draw today. In this tutorial on how to draw realistic clouds, the cumulonimbus is a great cloud to draw!
This is because it is the most identifiable to us like a cloud.
Learning how to draw this type of cloud will also give you a good base for drawing other clouds, as we will learn the fundamental principles associated with how clouds are formed through a drawing. We will break down these principles into digestible steps as we go through the process of how to draw a cloud.
Step-by-Step Instructions on How to Draw Realistic Clouds
In this tutorial, we will first break down the form and shape of the clouds. The shape of a cloud is often the most misinterpreted part of the cloud. Clouds are quite geometric when we break them down into a fundamental structure.
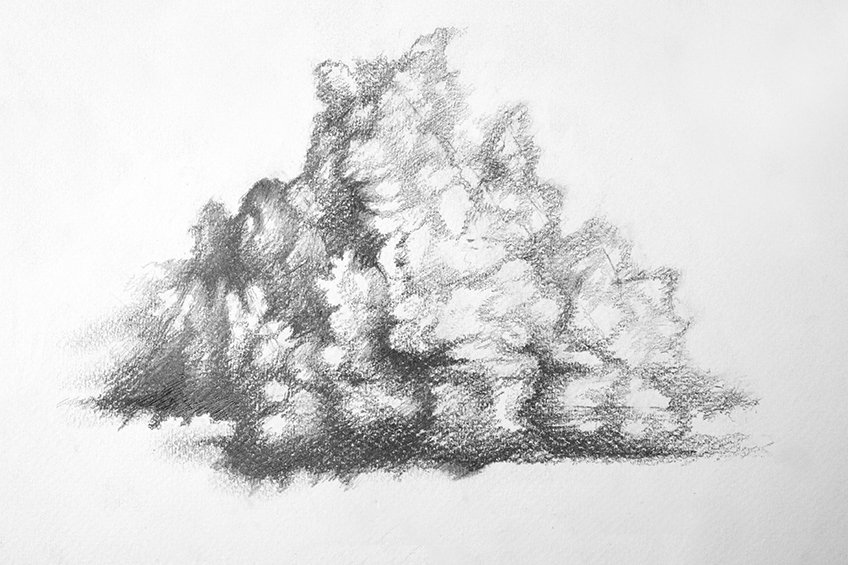
We will begin by defining these geometric structures first. Once we have done that, we start to develop a light cloud sketch around these shapes, to guide us in the way we form the cloud.
We then start to do some light first-layer details and shading, where we add some dimension to the cloud. As we proceed with our realistic cloud drawing, we will then slowly work with our erasers and pencils, as we keep adding layers and forming the cloud until we come to the final result. This is the basic process and what we can expect. Let’s get going!
Step 1: Shaping the Clouds
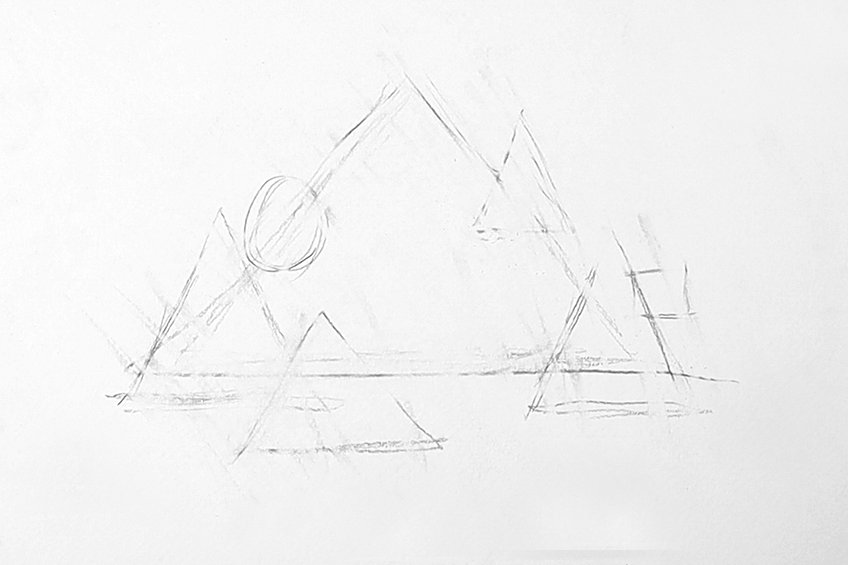
We want to begin by taking a 2H pencil and drawing a large triangle onto our page. We want to draw the general shapes that the cloud will be formed around. Cumulonimbus clouds generally have a triangular shape, so we want to establish this shape first.
We then proceed to draw a smaller triangle near the left side of the larger triangle’s base.
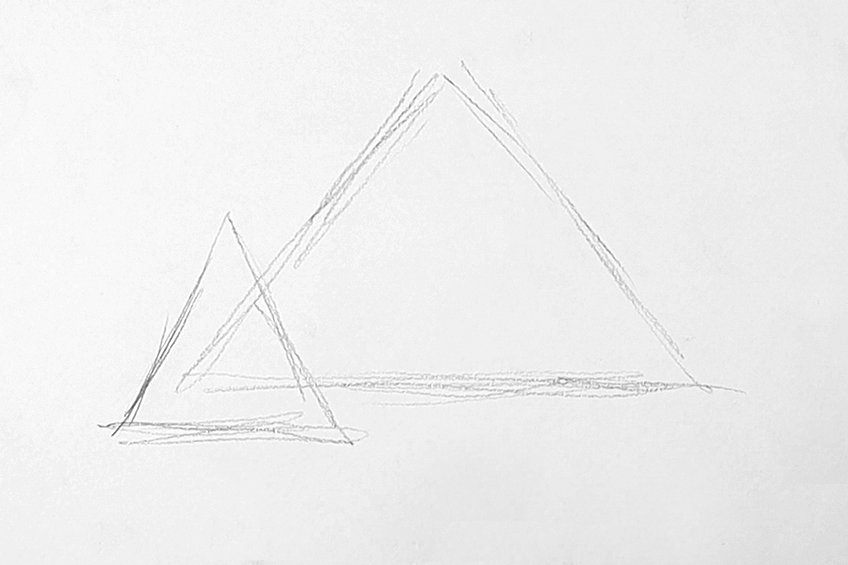
Again, we will develop a cloud sketch around these shapes, as they guide us in shaping the cloud.

This is because a cloud is fundamentally made of such shapes.
Step 2: Sketching the Clouds
We now want to move on to lightly sketching the cloud by drawing a general outline of a cloud around the edges of the shapes. We want this part of the tutorial to be loose, as we want these lines to be sporadic and squiggly.
We don’t need to make perfect bubble-type lines, rather add some zig-zag movements as you outline around the shapes.

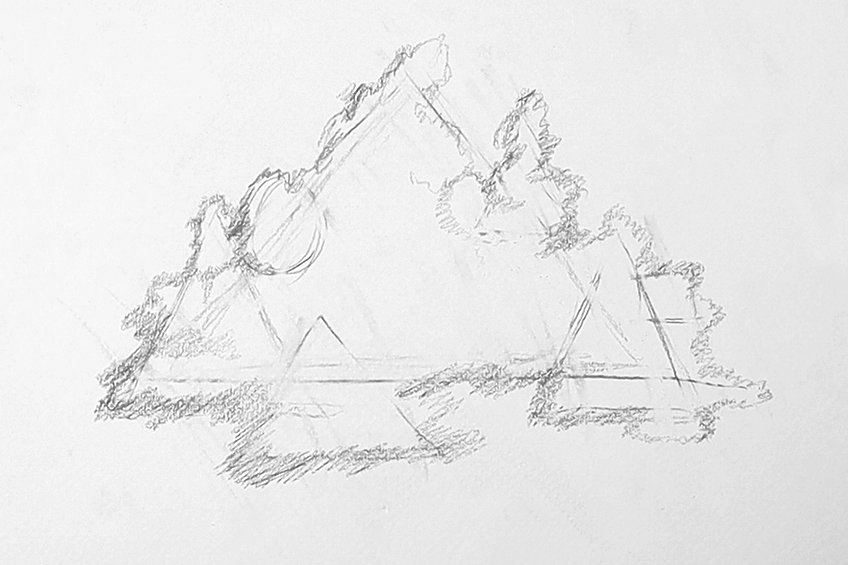
Let your hand have a shaky motion as you draw lines in the cloud.
Step 3: First Layer of Shading
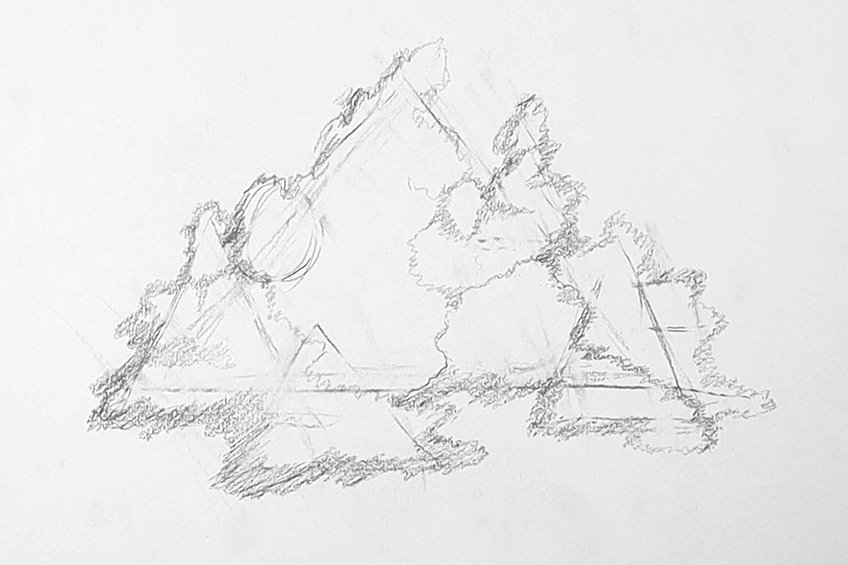
Once we feel satisfied with the general linework within and around our clouds, we can start adding some light shading. We want to use our erasers and pencils in tandem, with one another as we begin shading various sections of our cloud.
We want to keep our shading predominantly on one side.
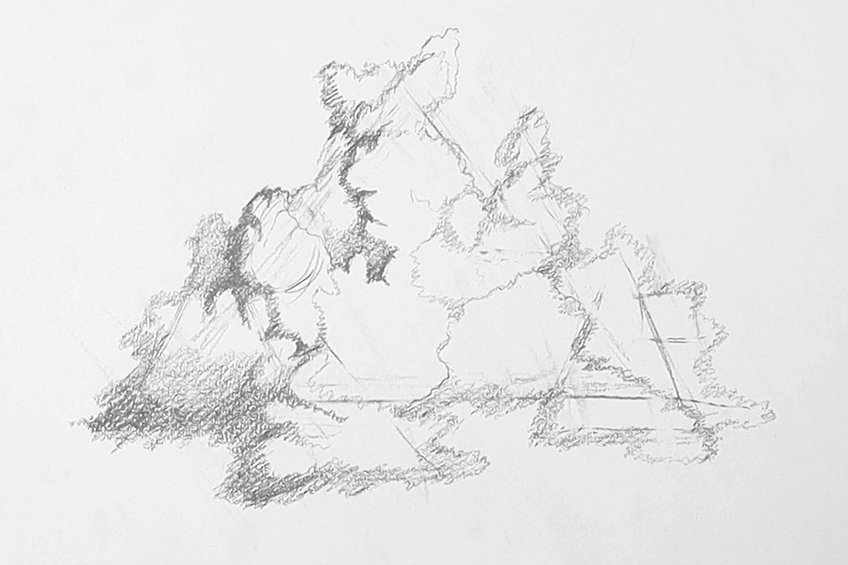
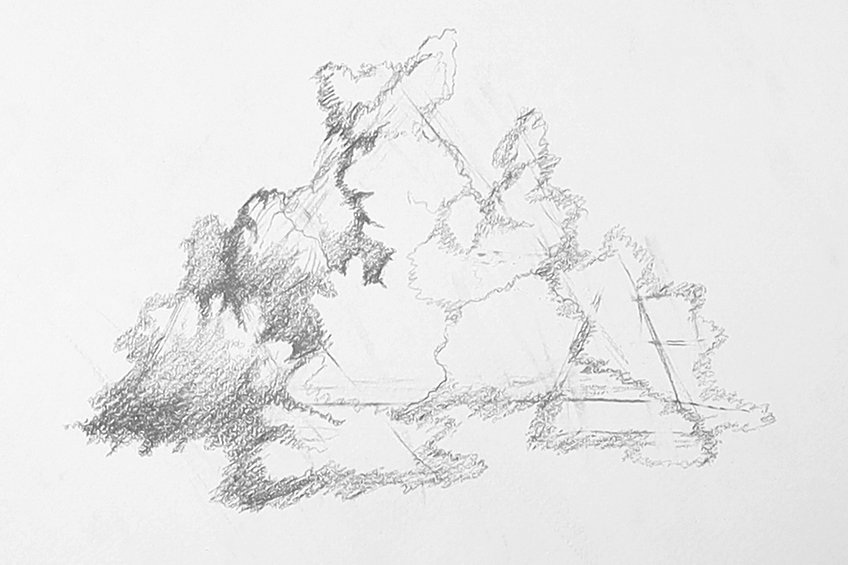
By doing so we give the realistic impression that the cloud is below the sun, or light source, therefore its darkest shadows are beneath it.

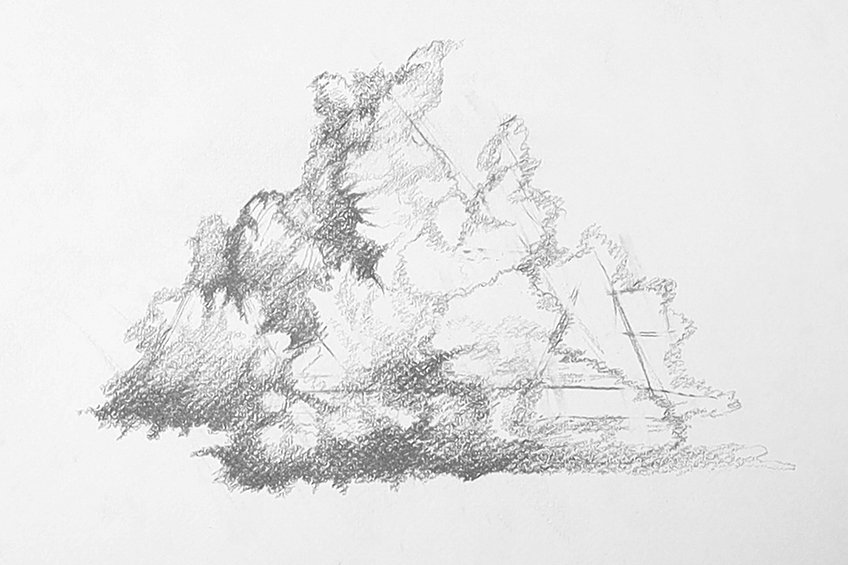
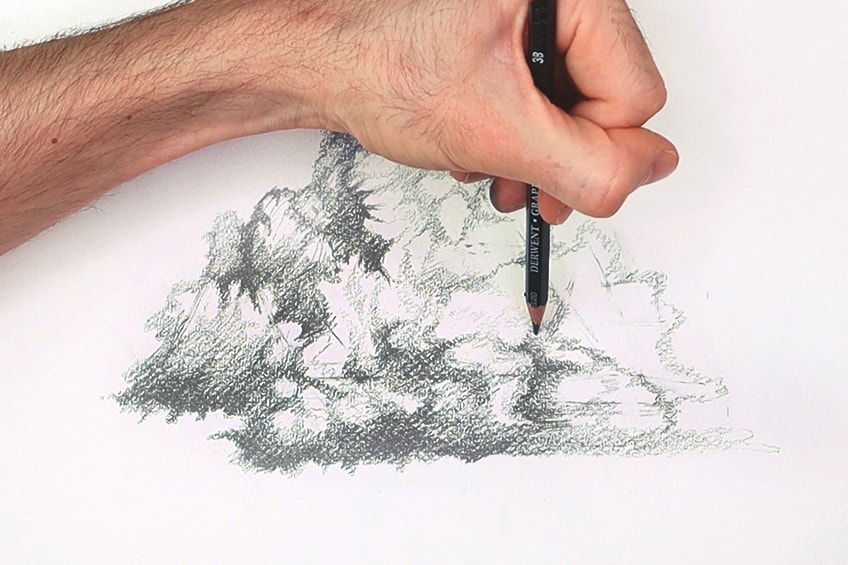
Also, use your eraser to add highlights within the cloud near the darker areas.
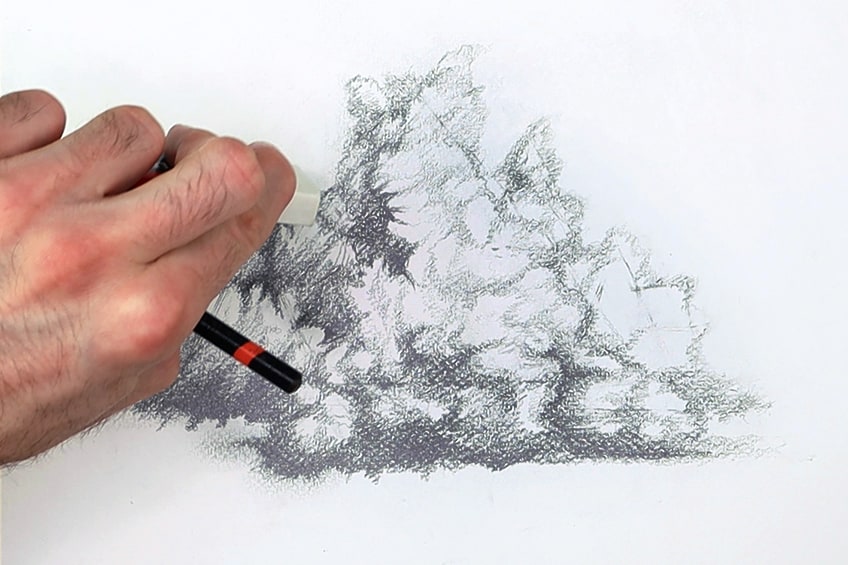
Step 4: Second Layer of Shading
Once we have added the first layer of shading and details, we want to now work with our erasers and pencils again to refine them. Add darker pencil marks in the darkest shadows, use a 4B pencil to do so. We want to make the darkest shadows have a little more contrast compared to the lighter parts of the cloud.
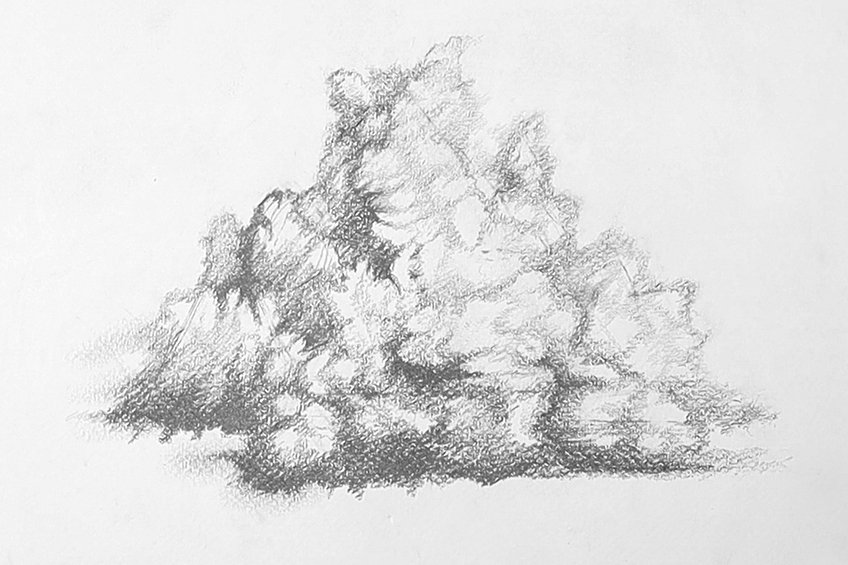
Remember to add the harsher gradients and lines near the side of the cloud that would be least exposed to the light source.
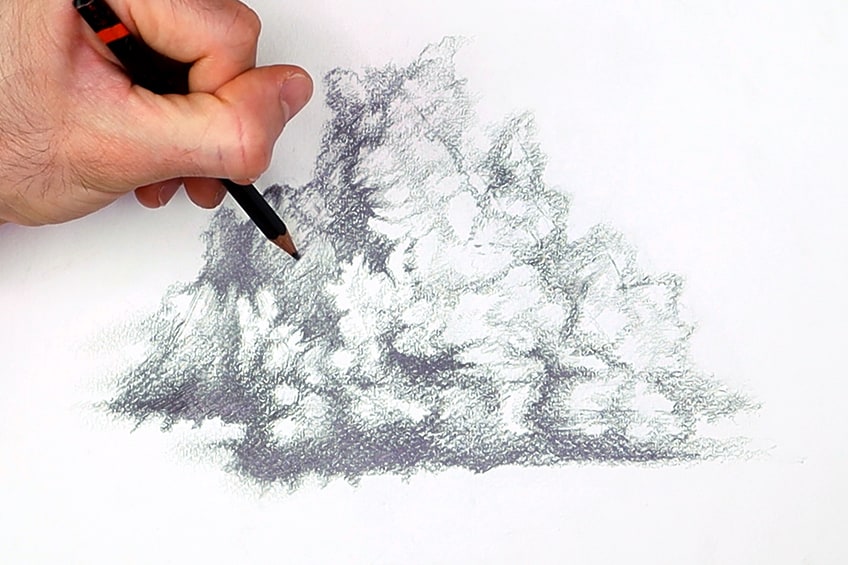
There you have it! A few easy steps on how to draw a realistic cloud.
Tips to Remember
- Take your time. Clouds are complex and require patience, so take your time.
- We can be quite playful; this is because clouds are abstract. We can create various segments in our clouds simply because there is no singular shape to a cloud.
- Use your eraser. The eraser is a tool to be used both for mistakes and for shaping the cloud.
- Drawing requires practice, so don’t worry if it doesn’t come out perfectly. Keep practicing.
- Most importantly, have fun! Have fun with the process and see it as something to refer back to when you need guidance on drawing clouds in the future.
Learning how to draw realistic clouds can be tricky if you do not understand the fundamental principles of how a cloud is formed. The cumulonimbus cloud is a great structure for cloud drawings as the protruding and multilayered nature of the cloud makes for a beautiful cloud drawing. In this tutorial on how to draw a cloud, you learn how to develop the shape, refine the shape through a light cloud sketch which then is further developed into a realistic cloud drawing. It is all about adding layer over layer, slowly working in different pencil marks, giving some light smudging, and using our erasers to form the cloud. A crucial point to take away is the concept of the light source. The light source will always affect the shadows of the clouds, so try to keep that in mind when you do another realistic cloud drawing in the future.
Frequently Asked Questions
How Do You Add Dimensions to a Cloud Drawing?
When drawing realistic clouds, you want to start by assembling the basic geometric shapes that will form the shape of the cloud. As you draw these shapes, you then begin to form a cloud sketch around the shapes. We want to slowly add the little bubble-like shapes and sporadic lines around the edges of the shapes, using them to guide the sketching process. Once we have that we start creating segments in the clouds by adding light sketching line work that moves in all sorts of directions. From there, what makes the cloud have the three-dimensionality quality is understanding which side the light source is coming from. Once we understand this we can then start adding shadows, by shading with darker pencils. We use the segments as a way to guide our shading process, keeping the cloud darker on one side. This will give the cloud a bulging quality, making it seem three-dimensional.
What Is the Easiest Way to Draw a Realistic Cloud?
Figuring out the shape of the cloud is the most important part of drawing a cloud. In this tutorial, we use different shapes to define the form of the cloud. We do this by drawing different shapes such as triangles, circles, and squares, next to one another to form what will become the cloud. From there you add linework around the edges of these shapes. We then add linework inside the cloud to create partitions and segments on the cloud. Then you start adding in shading whilst simultaneously using your eraser to shape the clouds further. We want to work shading around the segment lines within the cloud. We carry on this process, layering shading marks over one another until we are satisfied with our realistic cloud drawing.
What Is a Good Shaped Cloud to Draw?
A cumulonimbus is probably the most common and most identifiable cloud to draw. This shaped cloud is perfect for learning how to draw realistic clouds. This cloud generally takes the form of a triangular shape. The way it is drawn is by drawing a triangle with smaller shapes around this triangle. You then proceed to shape the cloud with line work, creating more sporadic-like lines around the edges of the shapes. From there it is simply a matter of adding in segments and shading around these segments to create shadows and dimensions within the cloud. You can use your eraser to take away some pencil marks to create highlights in the cloud drawing, otherwise, the cumulonimbus-shaped cloud is a great shaped cloud to draw. It has interesting features and is quite simple to draw and turn into a realistic cloud drawing.
Matthew Matthysen is an educated multidisciplinary artist and illustrator. He successfully completed his art degree at the University of Witwatersrand in South Africa, majoring in art history and contemporary drawing. The focus of his thesis was to explore the philosophical implications of the macro and micro-universe on the human experience. Matthew uses diverse media, such as written and hands-on components, to explore various approaches that are on the border between philosophy and science.
Matthew organized various exhibitions before and during his years as a student and is still passionate about doing so today. He currently works as a freelance artist and writer in various fields. He also has a permanent position at a renowned online gallery (ArtGazette) where he produces various works on commission. As a freelance artist, he creates several series and successfully sells them to galleries and collectors. He loves to use his work and skills in various fields of interest.
Matthew has been creating drawing and painting tutorials since the relaunch in 2020. Through his involvement with artincontext.org, he has been able to deepen his knowledge of various painting mediums. For example, watercolor techniques, calligraphy and lately digital drawing, which is becoming more and more popular.
Learn more about Matthew Matthysen and the Art in Context Team.
Cite this Article
Matthew, Matthysen, “How to Draw Realistic Clouds – Pencil Skyscape Drawing Lesson.” Art in Context. June 30, 2022. URL: https://artincontext.org/how-to-draw-realistic-clouds/
Matthysen, M. (2022, 30 June). How to Draw Realistic Clouds – Pencil Skyscape Drawing Lesson. Art in Context. https://artincontext.org/how-to-draw-realistic-clouds/
Matthysen, Matthew. “How to Draw Realistic Clouds – Pencil Skyscape Drawing Lesson.” Art in Context, June 30, 2022. https://artincontext.org/how-to-draw-realistic-clouds/.


