How to Draw a Princess – From Fairy Tales to Sketching Art
Once upon a time, in a world where castles touched the sky and dreams came true, there were princesses who redefined the meaning of regal. These enchanting beings weren’t just about tiaras and ball gowns; they were fierce, independent, and compassionate. They wielded kindness as their scepter and courage as their crown. With hearts as vast as their kingdoms, they proved that being a princess was more than a title; it was a powerful symbol of grace, strength, and the enduring magic of fairy tales. So, if you ever find yourself in need of inspiration, look no further than the captivating world of princesses, where the extraordinary is always within reach! Through our detailed step-by-step guide on mastering the art of drawing a princess, you’ll soon find yourself becoming a skilled expert in this intricate craft.
Princess Portrayal: A Step-by-Step Drawing Guide
Embarking on a tutorial to learn how to draw a princess is a delightful journey into the realm of creativity and imagination. Whether you’re a seasoned artist or a novice with a pencil, you’ll discover that drawing a princess is not just about capturing beauty, but also conveying the essence of grace, strength, and magic. With each stroke of your pencil, you’ll bring to life a character that embodies the timeless allure of fairy tales. So, prepare to be enchanted as you dive into this tutorial, where every line and curve you create will transport you to a world of wonder and endless artistic possibilities. Let your imagination run wild, and enjoy the enchanting process of bringing your very own princess to life on paper.
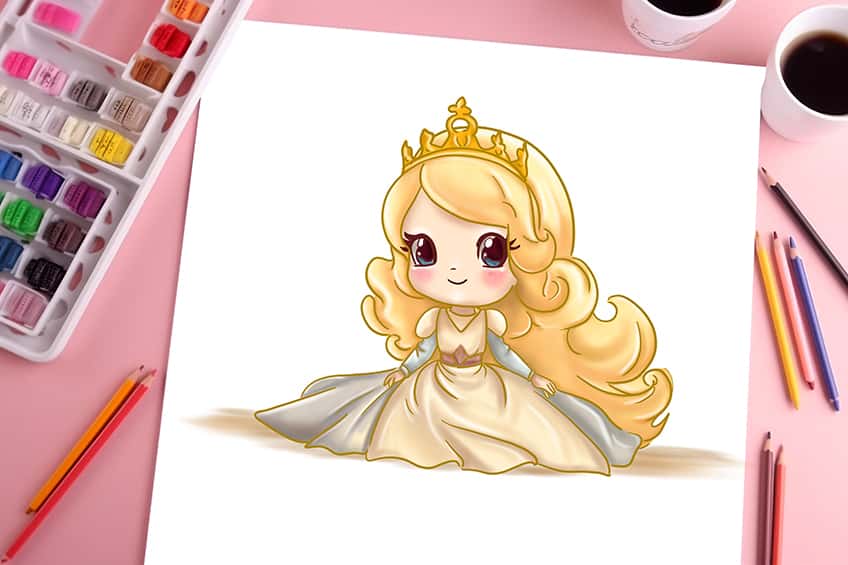
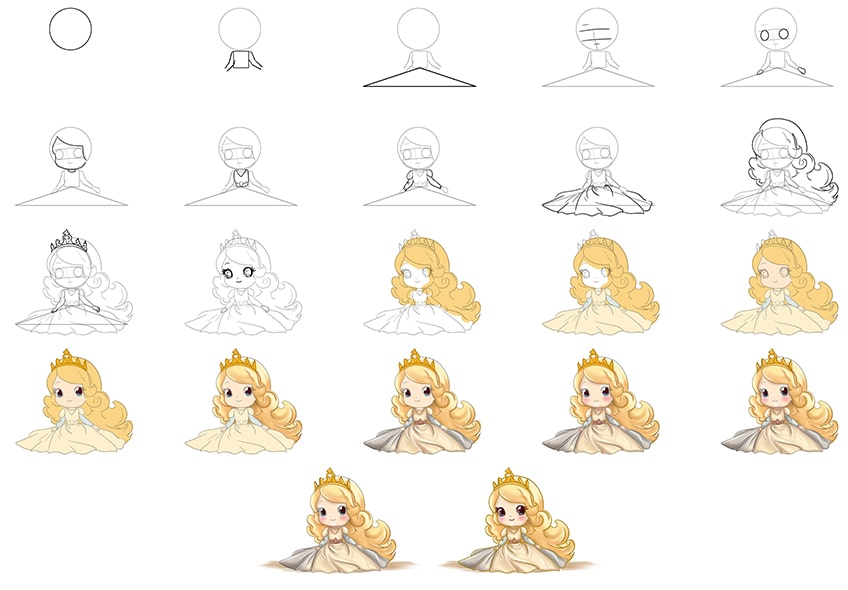
Within the collage provided below, you will discover a visual depiction of every essential phase required to achieve the final result of a cute princess drawing. Prepare yourself to immerse in the tutorial and unleash your innate artistic capabilities!
Step 1: Begin Your Cute Princess Drawing
To commence our princess drawing tutorial, start by sketching a circle above the central region to serve as the princess’s head.
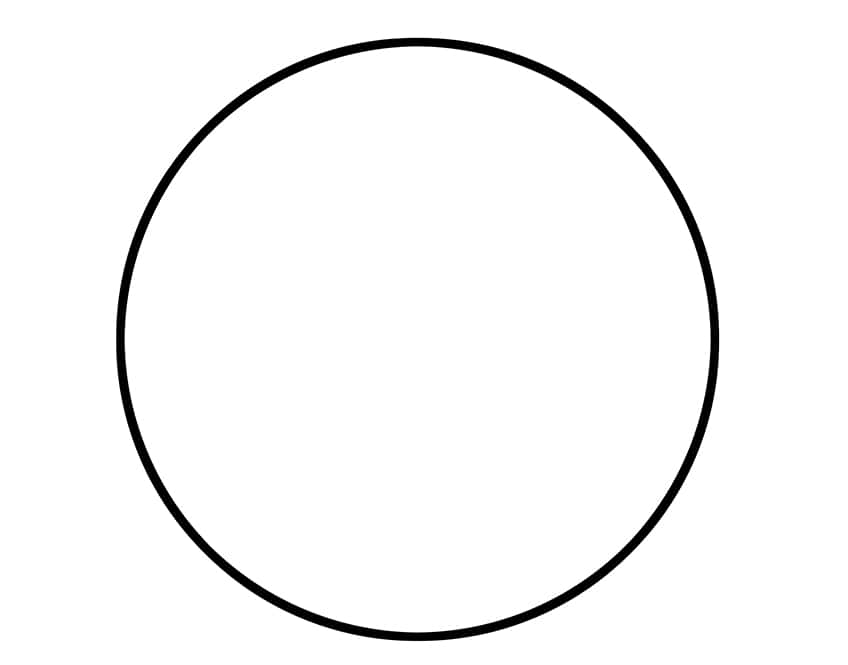
Step 2: Continue to Draw Your Easy Princess Drawing
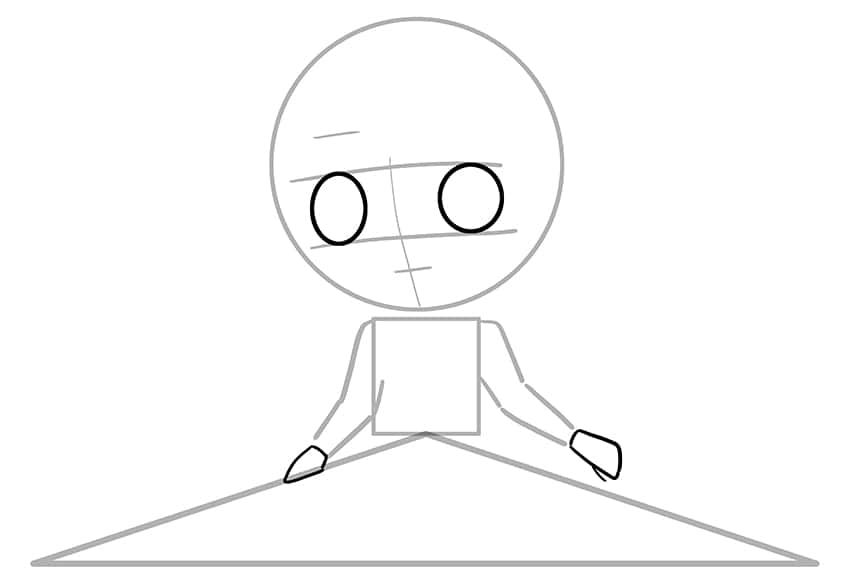
Draw the main body represented by a cube beneath the head, follow this by drawing each of the arms attached to the cube.
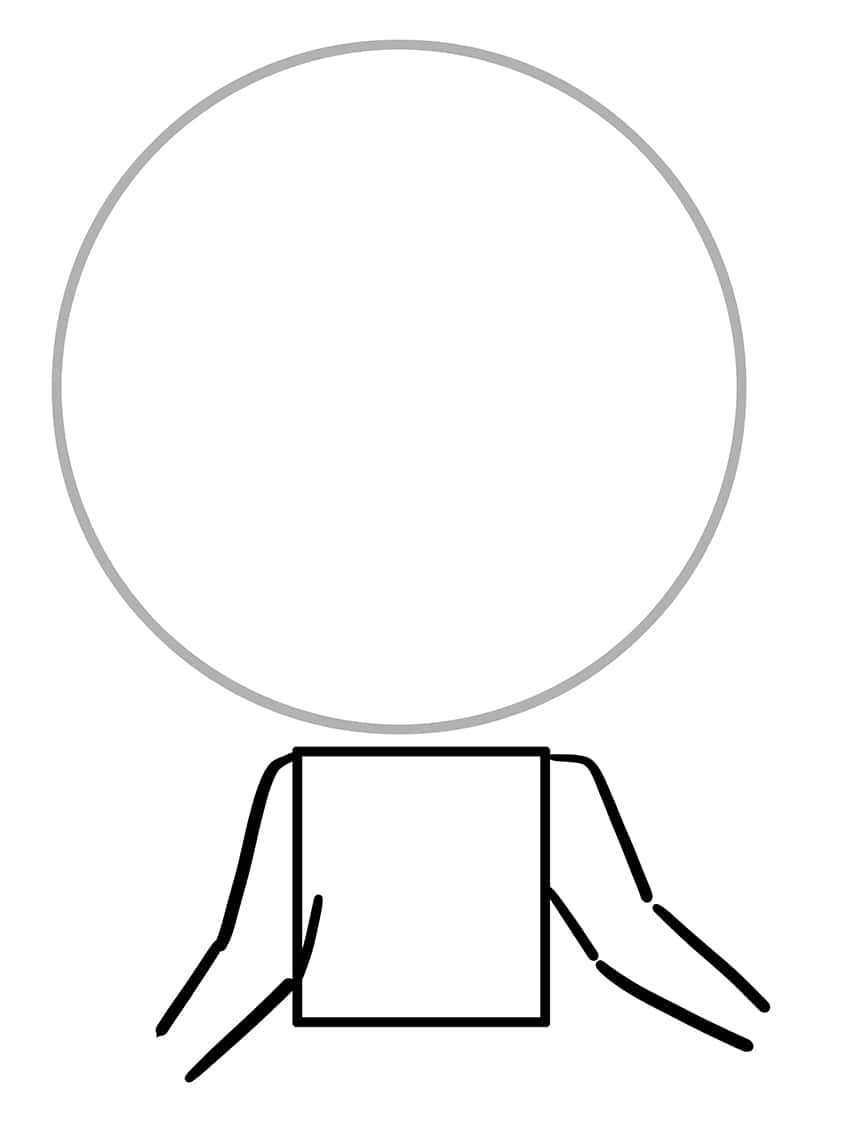
Step 3: Add the Dress
Draw a wide triangle beneath the main body to represent the princess’s dress.
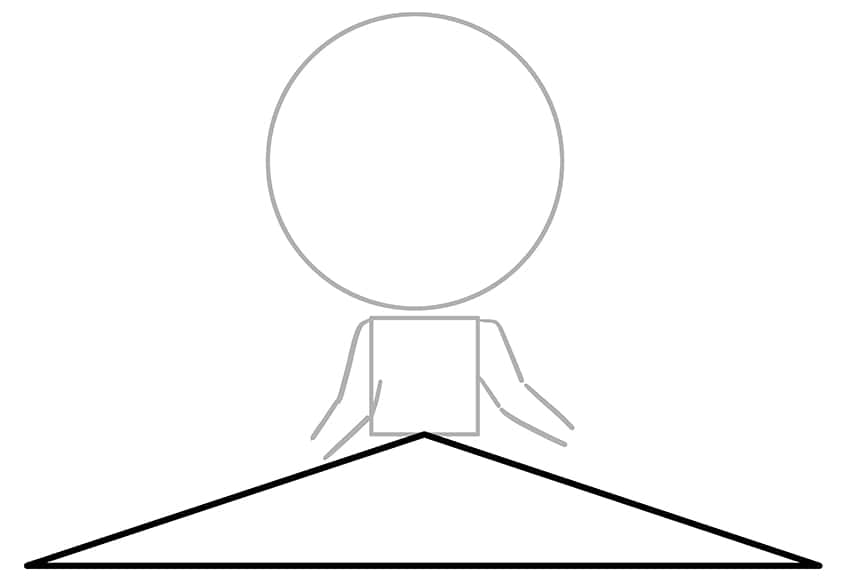
Step 4: Draw the Facial Guidelines
Within the head, draw a vertical center line and three horizontal cross guidelines. Draw an additional horizontal guideline at the top left of the head.
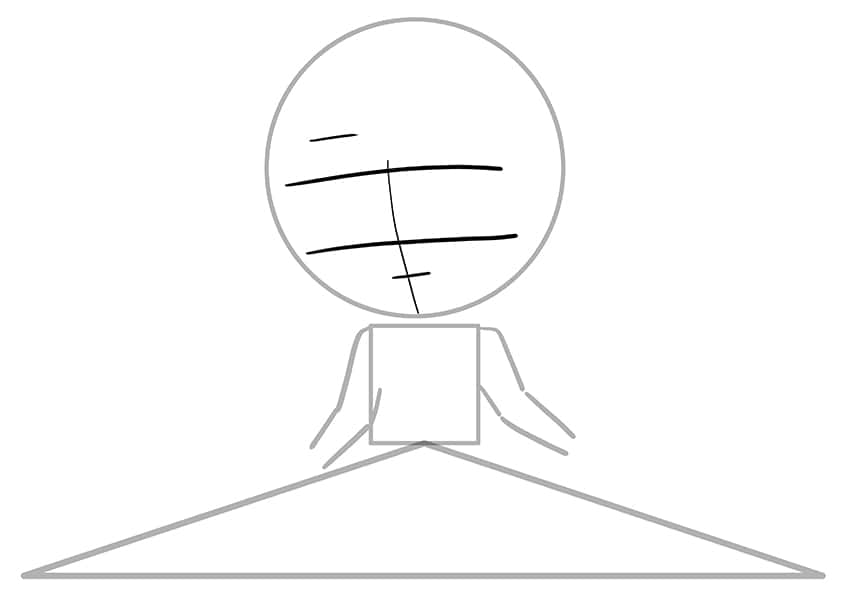
Step 5: Add the Eyes to Your Easy Princess Drawing
Within the two top guidelines, draw two large oval shapes to represent the eyes of your cute princess drawing.
Step 6: Outline the Hairline
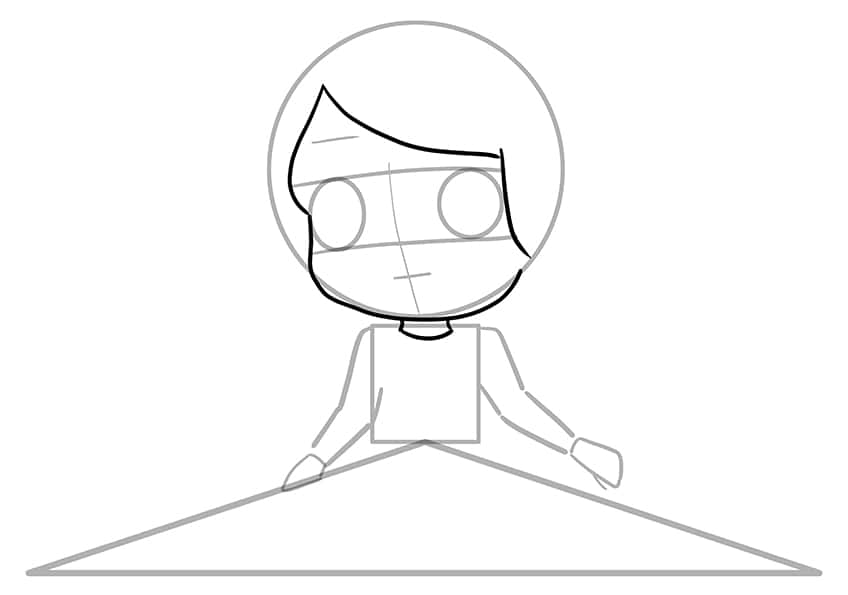
Use the construction lines you drew earlier as a guide to define both the hairline and the contours of the face. Finish this stage by sketching the partially visible neckline.
Step 7: Outline the Top of Your Princess Drawing
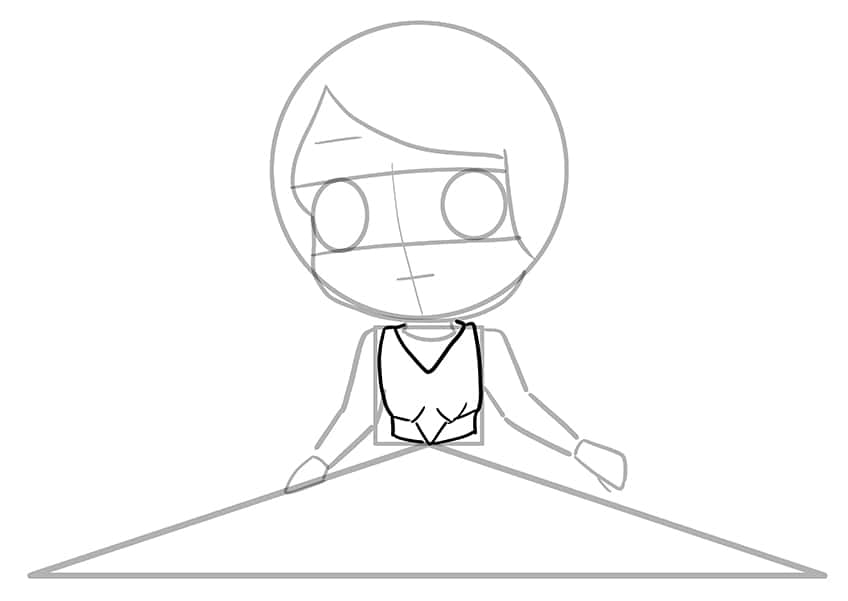
Utilize the construction lines you’ve already drawn as a reference to outline the upper part of the princess’s attire, ensuring it gracefully drapes around her torso.
Step 8: Continue to Outline the Sleeves
Begin to outline each of the sleeves wrapped around each of the arms. Draw fine crease lines on the joint areas.

Step 9: Outline the Princess’s Dress
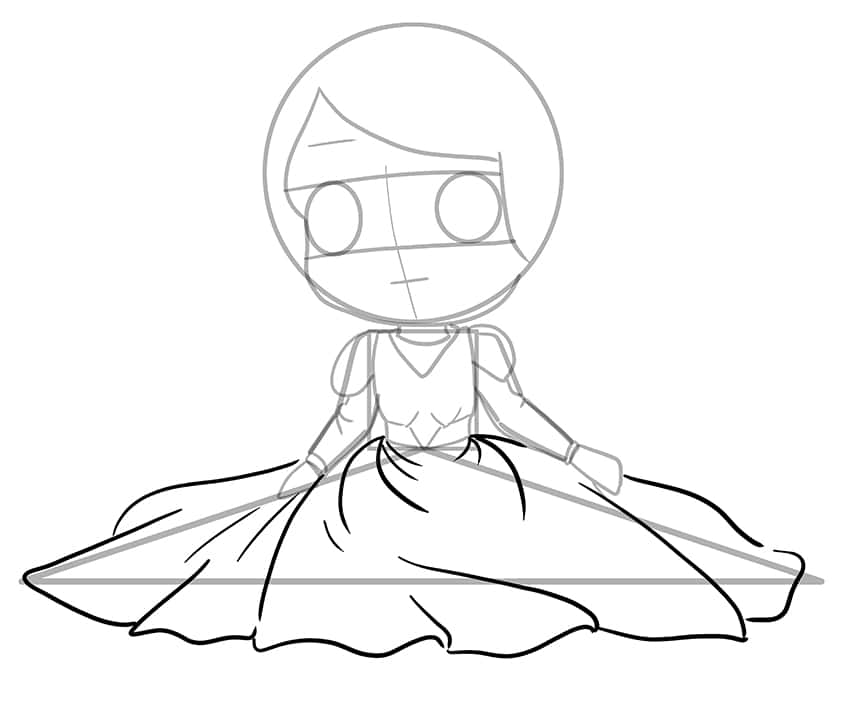
The wide triangle serves as a foundational guide for both the width and length of the dress. This step may appear more intricate than it is; in reality, it involves simply drawing a series of graceful, curving lines extending outward from the princess’s waist in a fluid, flowing motion.
Step 10: Draw the Hair
Surrounding the head, draw the large and curving hairlines. The top should cover the remaining blank area of the head while the rest of the hair leads behind the dress.
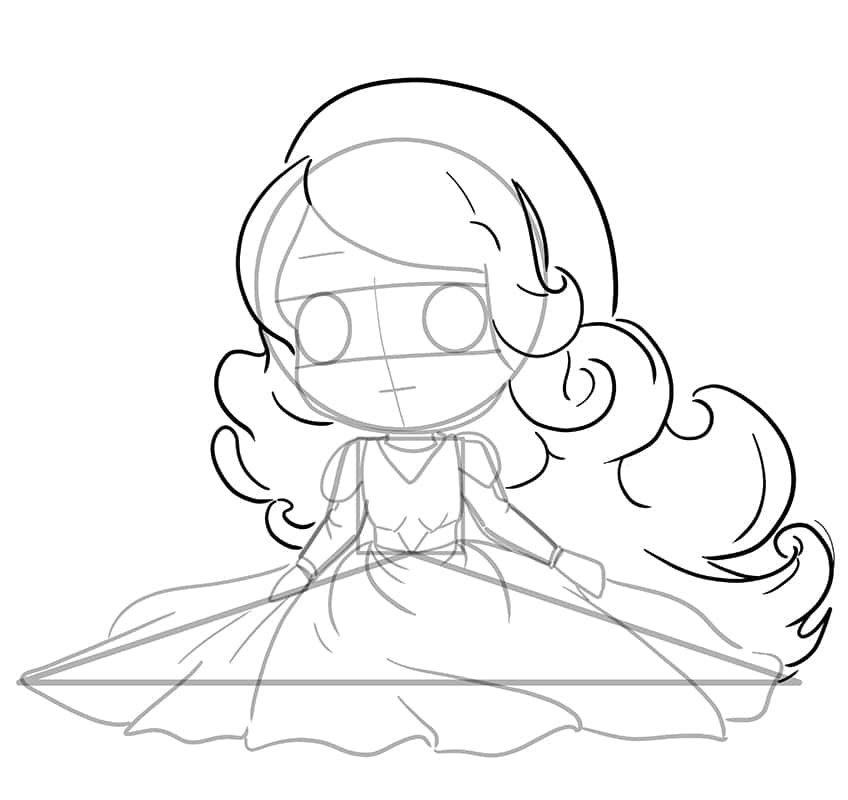
Step 11: Add a Tiara to Your Cute Princess Drawing
Above the hair, draw the five-point princess tiara and curve the bottom line along with that of the hair. Continue by outlining each of the hands. Conclude this step by carefully removing any remaining visible construction lines.
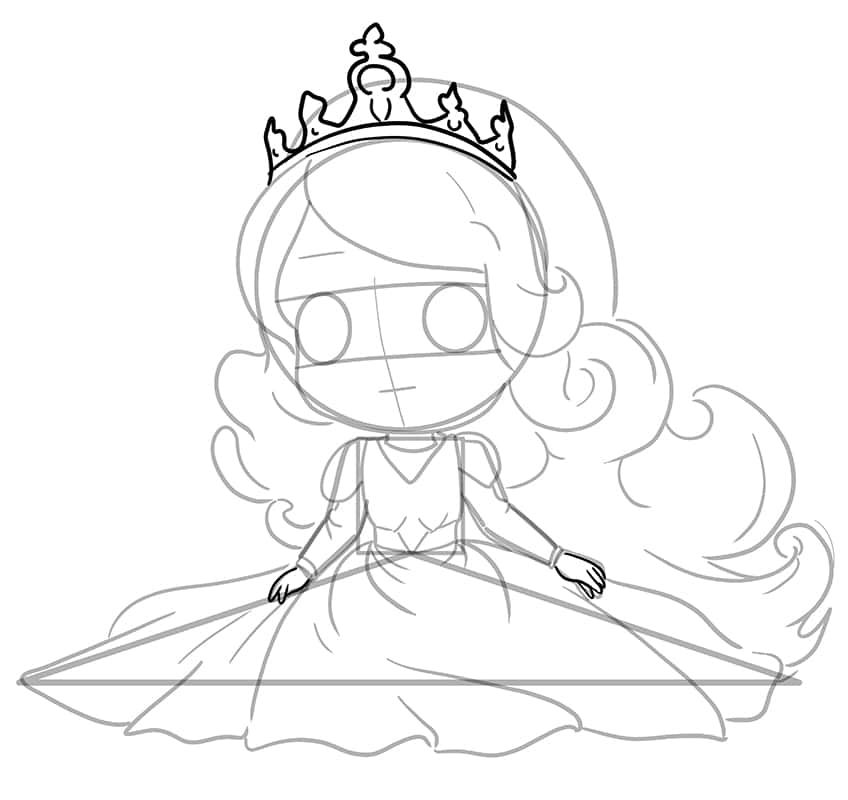
Step 12: Outline the Facial Features
Refer to the construction lines you’ve drawn earlier to assist you in delineating each of the facial features, encompassing the eyes and eyebrows, as well as the nose and mouth. Inside each eye, sketch both the iris and pupil for added detail.
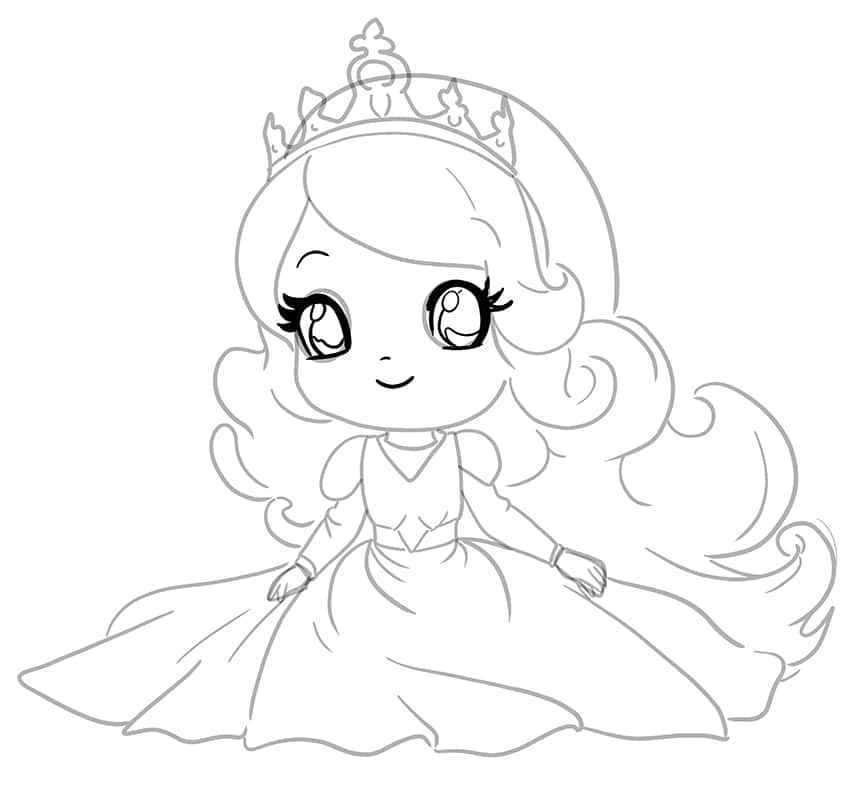
Step 13: Begin to Add Color to Your Easy Princess Drawing
Employ a finely pointed brush and select a shade of yellow paint to evenly apply it to the hair.
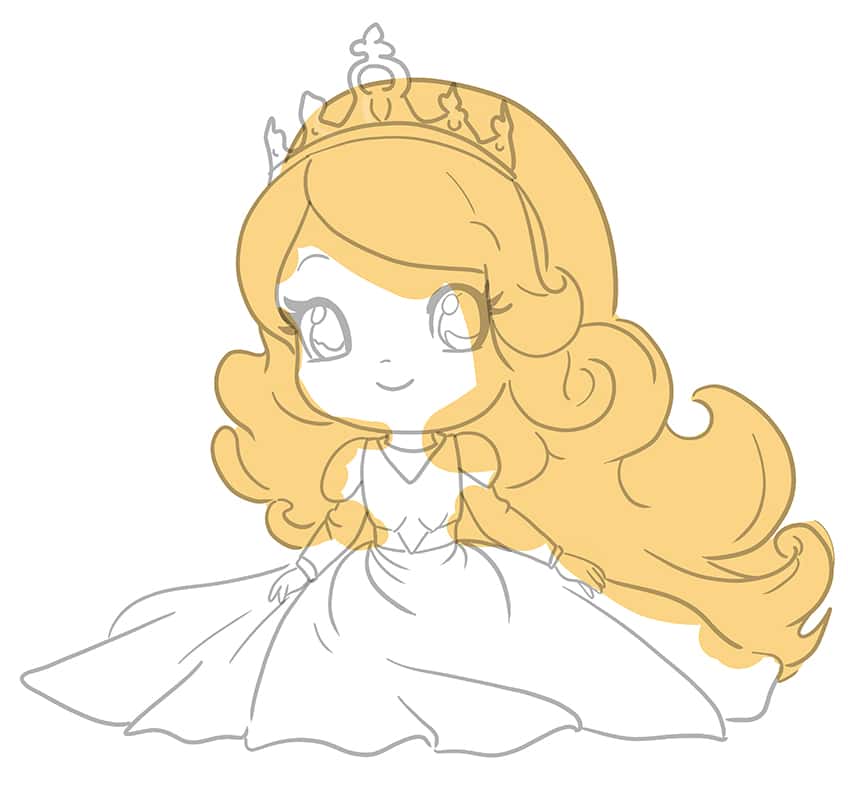
Step 14: Continue Adding Color
Utilize a precise, fine brush along with a soft yellow hue of paint to uniformly cover the dress, encompassing its upper portion. Then, with the same brush and gray paint, evenly coat the sleeves on each arm.
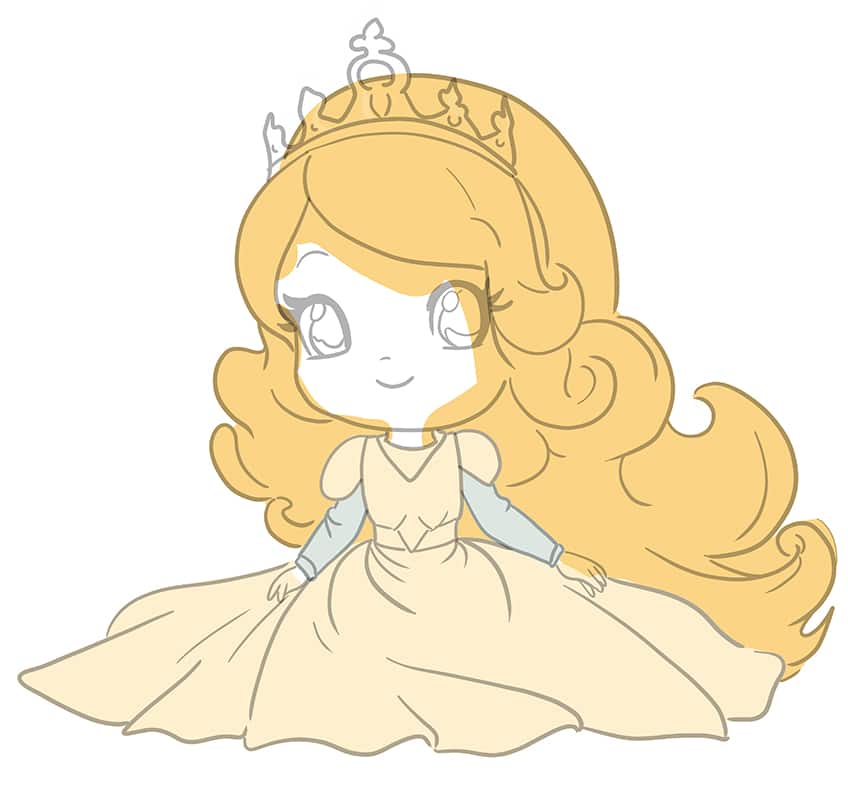
Step 15: Color the Face and Hands
Select a fine, sharp brush and a light shade of peach paint and evenly coat the face and hands of your princess drawing.
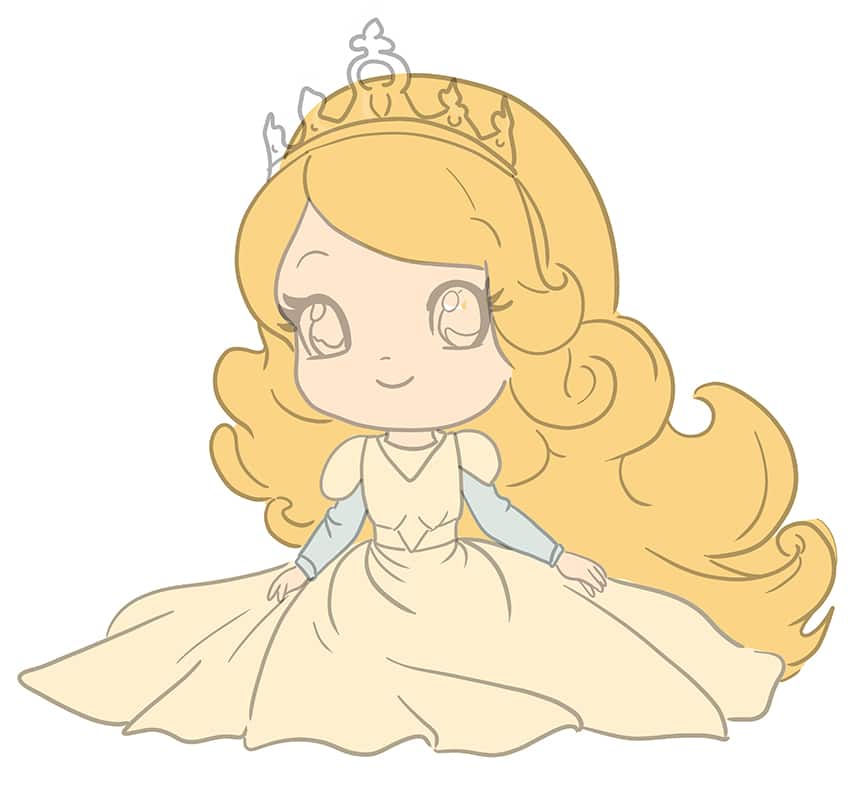
Step 16: Add Color to the Eyes and Tiara
Utilize a precise, fine brush and a gold hue of paint to ensure even coverage of the tiara. Then, with dark brown paint, coat each eye, and for the lower half of the eyes, use blue paint.
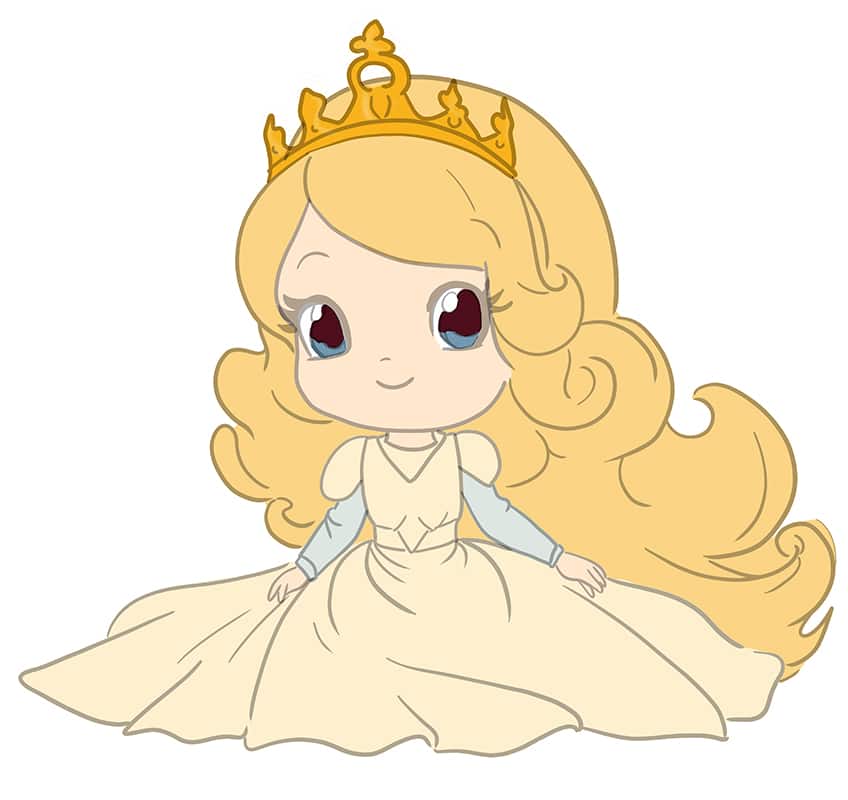
Step 17: Shade and Highlight the Hair
Take a small, gentle brush and apply caramel-colored paint to the princess’s hair to create contour shading. Next, employ a dark gray shade of paint to add subtle patches of shading. To enhance the effect, use a fine, sharp brush and white paint to introduce streaks of highlights, repeating the process with a soft brush.
Once you’ve finished this stage, use a blending brush to guide the color coats along the curves of the hair for a seamless blend.
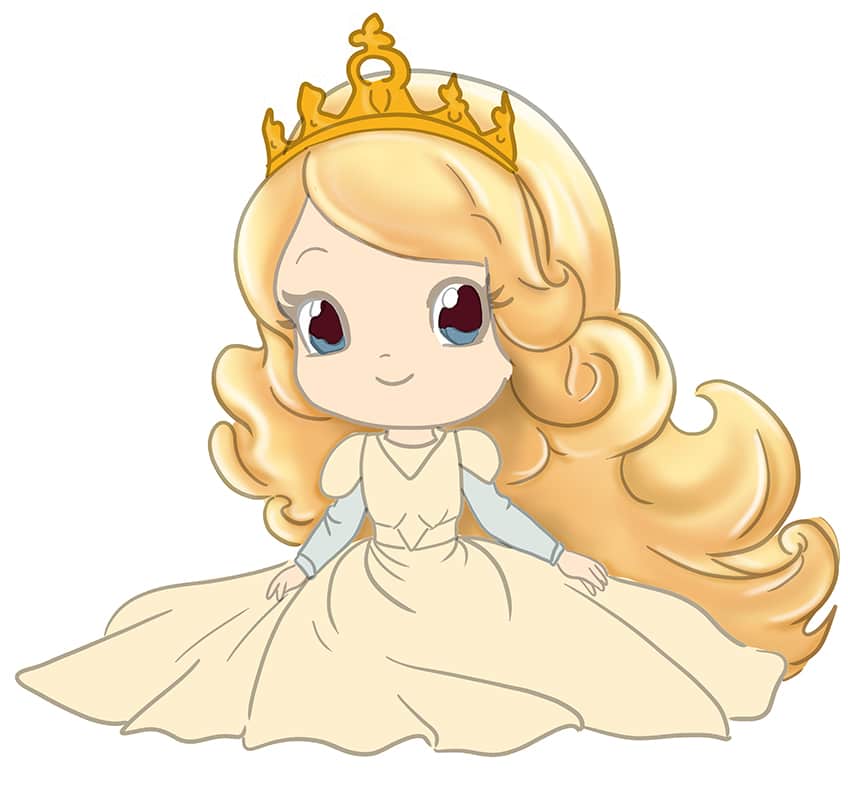
Step 18: Continue to Shade and Highlight Your Princess Drawing
To start, take a small, soft brush and a darker shade of gray paint to apply shading to each of the sleeves. Then, repeat the process using white paint to create gentle highlights. Employ a blending brush to seamlessly blend the layers. Moving on, continue with a small, soft brush and a darker gray shade to shade the sides of the dress while allowing the initial color coat to remain somewhat visible.
Repeat this step using a fine, sharp brush and white paint for adding highlights, and again, use a blending brush to ensure a smooth transition.
Progress by using a small, soft brush and brown paint to shade the edges of the front part of the dress, and repeat the process with white paint to accentuate the crease lines. Apply the same technique to the top of the dress. To complete this step, use a small, soft brush and brown paint to coat the waist harness, and again, employ a blending brush for a polished finish.
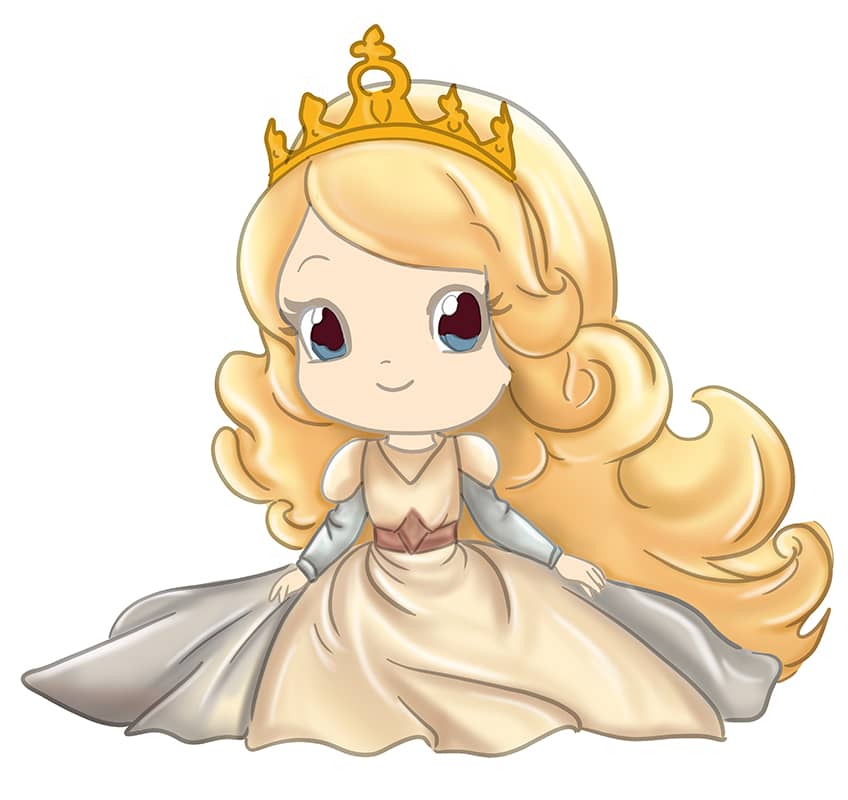
Step 19: Add Shading and Highlights to the Skin
Utilize a small, soft brush and brown paint to delicately apply soft shading along the edges of the face, forehead, and hands. Then, take white paint to introduce gentle highlights on the face and hands. To add a touch of rosy radiance, use pink paint to create blush spots on the cheeks.
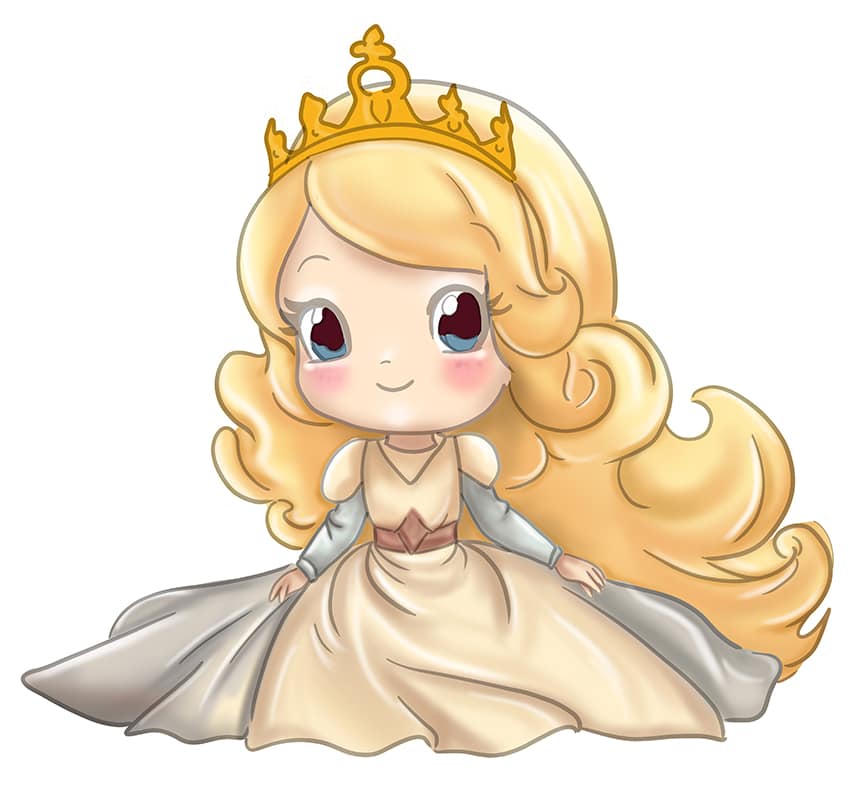
Step 20: Finish Off Shading and Highlight Your Drawing
Begin by employing a small, soft brush and dark gray paint to apply subtle shading along the edges of the tiara. Then, using a fine, sharp brush and white paint, add highlights along the structural lines of the tiara. Conclude this step by taking a small, soft brush and gray paint to add gentle shading around the edges of the eyes, and repeat the process with black paint to shade the inner eye area. Finally, use white paint to add a highlighted spot to each eye for a captivating finish.

Step 21: Add a Ground Shadow to Your Cute Princess Drawing
With a small, soft brush and a shade of golden yellow paint, being to shade beneath the princess.
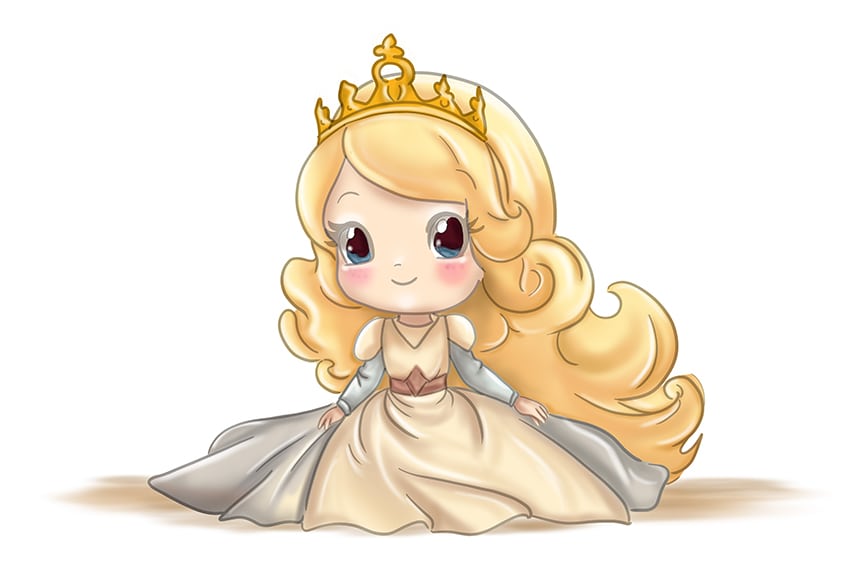
Step 22: Finalize Your Easy Princess Drawing
Finish the tutorial by utilizing a fine, sharp brush and the appropriate colors to carefully trace the outlines and any inner texture lines, achieving a final, flawlessly seamless result.
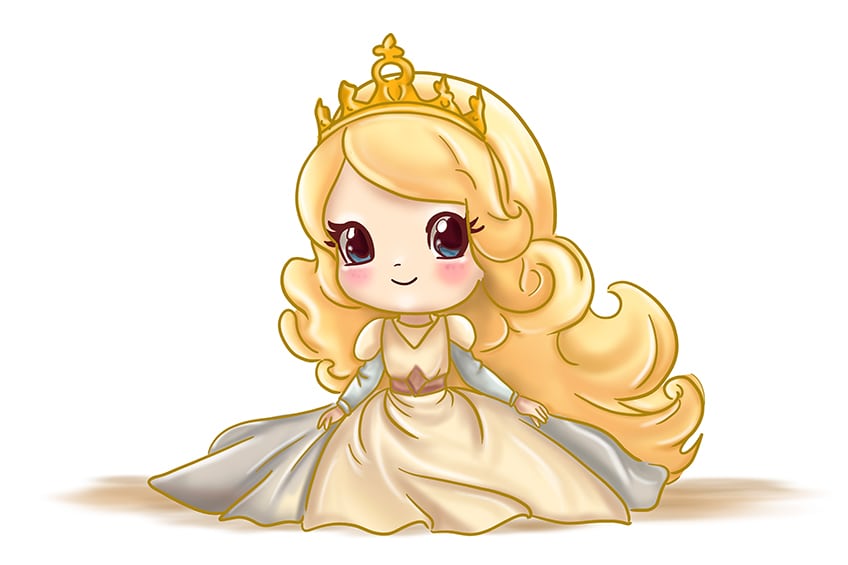
Well done on finishing the tutorial on how to draw a princess! You’ve taken a journey into the enchanting world of art and creativity, and the result is truly charming. Your attention to detail, from the graceful features to the intricacies of the dress and tiara, is impressive. Every stroke of your pencil or brush has breathed life into this character, and you’ve captured the essence of innocence and grace. Remember, art is not just about the finished piece but also the joy and satisfaction that comes from the creative process. So, whether you’re an aspiring artist or simply exploring your artistic side, keep nurturing your talent and let your imagination continue to soar. Your princess drawing is a testament to your artistic potential, and there are countless more adventures waiting on your canvas.
Frequently Asked Questions
How Do You Add Shading to Give Depth and Dimension to the Princess’s Hair?
Adding shading to the princess’s hair is crucial for creating a three-dimensional and realistic appearance. Start by identifying the primary light source in your drawing, as this will determine where shadows fall. Using a softer pencil or a fine brush, apply darker shading where the hair strands overlap or where they are farther from the light source. Keep in mind the direction of the hair’s flow; this helps in achieving a natural look. For highlights, use an eraser or a fine brush with white paint to gently lighten areas where light hits the hair. Gradually build up layers of shading and highlights until you achieve the desired depth and texture, and don’t be afraid to reference real hair for inspiration and guidance.
What Colors Work Best for a Traditional Princess Gown?
When choosing colors for a traditional princess gown, it’s essential to capture the classic elegance associated with royalty. Typically, soft, pastel shades such as pale pinks, blues, or lavenders are popular choices. These colors evoke a sense of grace and femininity, enhancing the princess’s enchanting aura. Incorporating delicate details like shimmering gold or silver accents can also add a touch of opulence to the dress. Remember to consider the character’s personality and the story’s setting when selecting colors, as they can influence the overall mood and style of the drawing. Go and check out our tutorial on how to draw a princess to find out what colors we used for our drawing!
Matthew Matthysen is an educated multidisciplinary artist and illustrator. He successfully completed his art degree at the University of Witwatersrand in South Africa, majoring in art history and contemporary drawing. The focus of his thesis was to explore the philosophical implications of the macro and micro-universe on the human experience. Matthew uses diverse media, such as written and hands-on components, to explore various approaches that are on the border between philosophy and science.
Matthew organized various exhibitions before and during his years as a student and is still passionate about doing so today. He currently works as a freelance artist and writer in various fields. He also has a permanent position at a renowned online gallery (ArtGazette) where he produces various works on commission. As a freelance artist, he creates several series and successfully sells them to galleries and collectors. He loves to use his work and skills in various fields of interest.
Matthew has been creating drawing and painting tutorials since the relaunch in 2020. Through his involvement with artincontext.org, he has been able to deepen his knowledge of various painting mediums. For example, watercolor techniques, calligraphy and lately digital drawing, which is becoming more and more popular.
Learn more about Matthew Matthysen and the Art in Context Team.


