

Encaustic Painting – A Guide to Creating Your Own Encaustic Wax Art
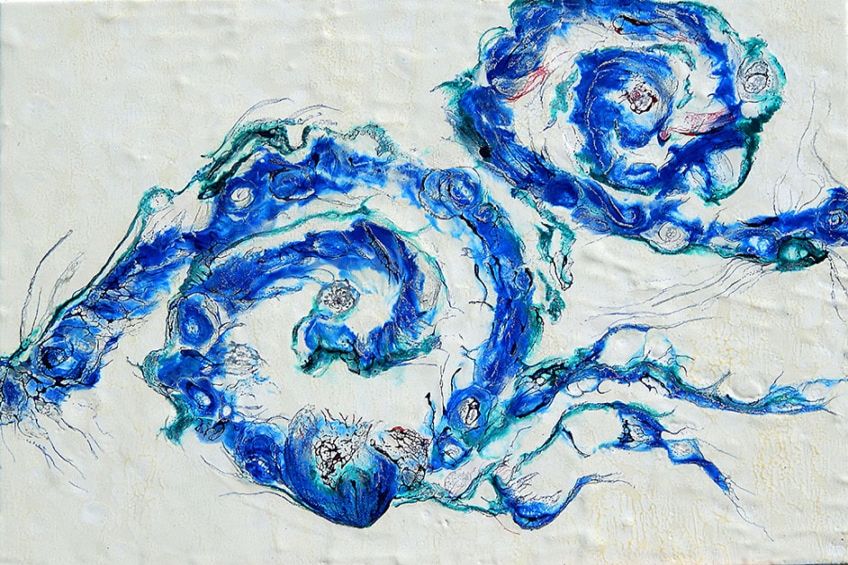
Encaustic art, also known as wax painting, is a fascinating art form. This article will provide you with an encaustic definition along with a detailed step-by-step guide from our guest artist, Sonja Werner. Keep reading to learn all that you need to know about encaustic painting!
What Is Encaustic Art?
Encaustics, or wax painting, describes an artistic painting technique. Here, special encaustic wax colors are heated with a painting iron and applied to the painting surface. These wax colors can then be worked on with different tools such as a sponge in order to achieve beautiful effects.
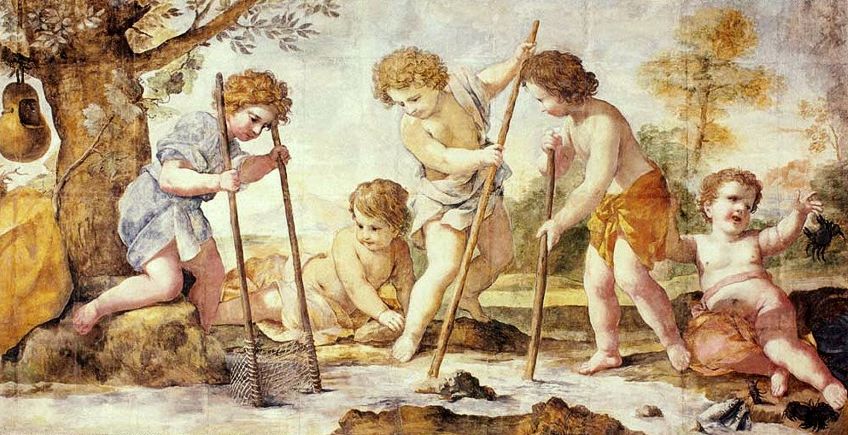
History of Encaustic Painting
The basic technique of encaustic art has a very long history that goes back even further than oil painting. The word “encaustic” alone has been around for over two and a half thousand years, and the heyday of this technique was in Greek-Roman antiquity. At that time, the materials were permanently burned into the surfaces with fire and red-hot iron and applied with hot spatulas. The beeswax was mostly mixed with imported pigments from Egypt or Sudan.
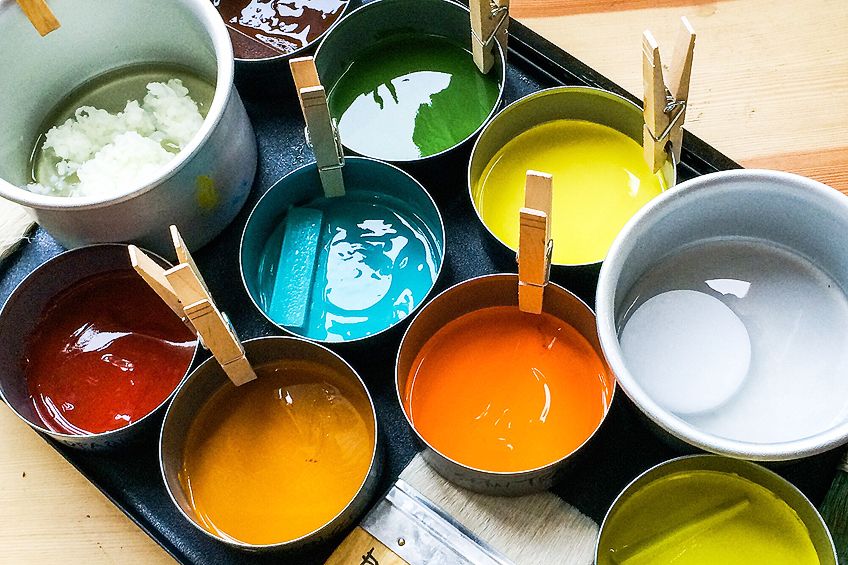
Materials Required for Encaustic Painting
For beginners, or those looking to get started quickly, you can get a complete encaustic art set. This will kit you out with everything you need for this art technique for greater convenience. All of the encaustics materials needed for encaustic painting are listed below.
- Heat-adjustable pen
- Hot air dryer or blowtorch
- Colored encaustic beeswax
- Clear wax, which is also very suitable for cleaning
- Encaustic paper
- Wood panels
- Cover for the table (nothing that burns quickly!) – a wax tablecloth works great
- An apron to protect your clothes
- A multiple-socket plug with a switch so that the power can be switched off quickly in case of an emergency
- Kitchen roll for regular cleaning of the iron and pen
- A fine stocking to polish up the finished pictures at the end
- Shellac wax in the right colors
- Brushes
- Fire extinguisher
Best Encaustic Art Kit: R&F Premium Encaustic Starter Kit
You can get everything you need for getting started with encaustic painting through this kit. This complete starter kit includes a range of encaustic cakes, brushes, mediums, and boards – basically, everything you need for this art technique. All paints here are handmade and are of the highest quality standards.

- Includes everything you need to begin encaustic painting
- Paints are solvent-free, wax-based, and come in a cake form
- Can be polished to a high gloss, carved, scraped, layered, and more
PROS
- A complete encaustic art set
- Uses premium, handmade materials
- Includes 100% pure beeswax
- Set contains the most popular colors
- Brushes and boards are included
CONS
- Not a very big range of colors to choose from
- Does not include a heat gun or warming surface
Safety first
Since this technology involves a lot of heat, electricity, and fire, the motto is always safety first! You must always ensure that you observe the following guidelines when doing encaustic painting:
- Never leave hot equipment unattended. Should you leave the room, always turn everything off and remove the power plug from the socket as well.
- It is best to have an emergency power switch so that you can react quickly in the event of overheating.
- Always have the fire extinguisher handy in case of an emergency.
Important: If you burn shellac wax with a blowtorch, make sure that the flame is completely off of the painting, as it often burns invisibly. Thus, it is safer to use a hot air dryer. Always keep a sufficient distance from your painting (about 20 to 30 cm) because it will also get extremely hot.
- Be careful, as hot wax causes burn blisters. Always hold your paint iron so that the wax cannot run over your hands.
- Protect your clothes with an apron because wax and shellac are very difficult to get out of the clothes.
Please always handle all equipment with the greatest possible care, so that in any situation (including situations that may arise spontaneously and are not listed here), there is absolute safety for you and your surroundings. Do not handle any device carelessly and check all devices for possible damage before each use.
How to Make Encaustic Art
In modern encaustic painting, special electrical painting devices are used, such as the pen, special hot plates, or hot-air dryers. The dyed beeswax is melted and applied to the respective surface. For creating encaustic art, you will need the right surface, namely, specially coated papers, wood boards, and canvases. You will also require MDF boards (a good and inexpensive alternative to encaustic wood surfaces, you can simply have MDF cut to size at the DIY store), as these are ideal for processing.
Sonja Werner’s Guide to the Mixed-Media Encaustic Technique
The encaustic mixed-media technique is a wonderful and exciting variation. Here, special shellacs are usually processed together with classic encaustic paints. You can also use other media such as oil and acrylic paints with this technique. In this tutorial, we will be going into this encaustic mixed-media technique with shellac wax.
Wooden foundations are great to work with as they do not have to be specialized for the encaustic technique, so you can get them easily at the art store or on Amazon. While you can also paint with wax on canvas, it is not the ideal surface as it is flexible and always moving. This means that when the wax gets cold and hardens, it could crack or break as a result of the background moving. This is of course very annoying, as you will have put a lot of time and energy into your artwork.
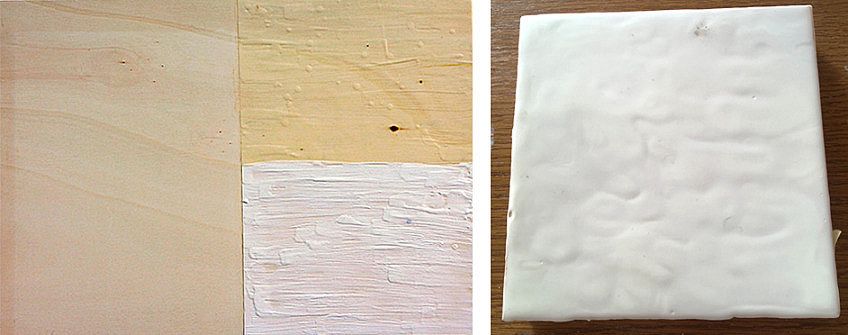
First, always go over your wooden painting surface with fine sandpaper in order to straighten any rough areas. Once this is done, the wooden surface must be dusted and cleaned. Then, cover the edges with standard masking tape, because the wax will run down the sides. We then suggest priming the surface with wax, although you can also use commercial Gesso if you want to achieve an especially bright white.
It is very important to remember that every single layer of wax must be blown out. For this purpose, you can use a hot-air dryer from any hardware store. This creates a background where the respective wax layers will have bonded together so that they do not crumble away individually later.
What do you have to consider when blow-drying? Always keep the hairdryer in motion and about 20 to 30 cm away from your painting. Set the blow dryer to the lowest power setting, otherwise, you will blow the wax off your surface and it will not become smooth. Because of the air trapped in the wood, bubbles can form in the wax, which you can eliminate by moving the hairdryer steadily.
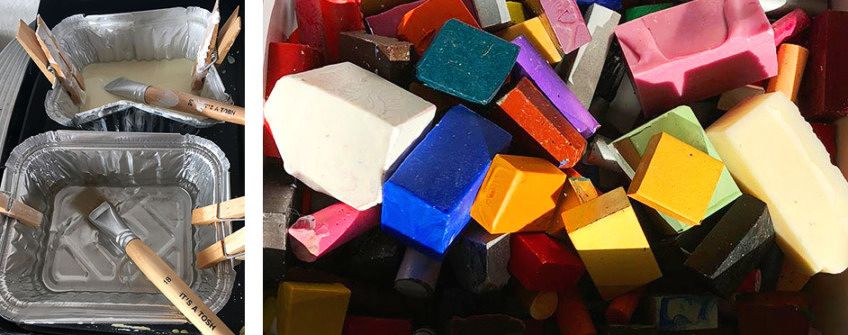
We suggest allowing the wax layers to cool down completely before applying the next, as this will ensure that the underlying color does not mix with the others too quickly. This technique requires quite a lot of wax, so it is best to purchase an electric grill and some aluminum bowls. You can also get some great painting boards that keep the temperature constant without getting too hot. Here, you have the guarantee that your wax does not melt too quickly once adjusted correctly.
Now, you are ready to begin your real work of art! Most of the painting irons that you buy in the majority of basic encaustic painting sets can be converted into a small painting board. You can melt small amounts of wax on this.
Now, you can choose to paint either with wax and brush or by painting directly onto the iron and then using this to paint the surface. This tutorial will focus on the brush method as it allows for finer, more detailed work. If you choose to paint straight onto the surface, you need to pay attention to the pressure you are applying, as otherwise the surface may melt or grooves can appear.
Important: As you did before, each layer needs to be blow-dried separately to ensure that the layers bond.
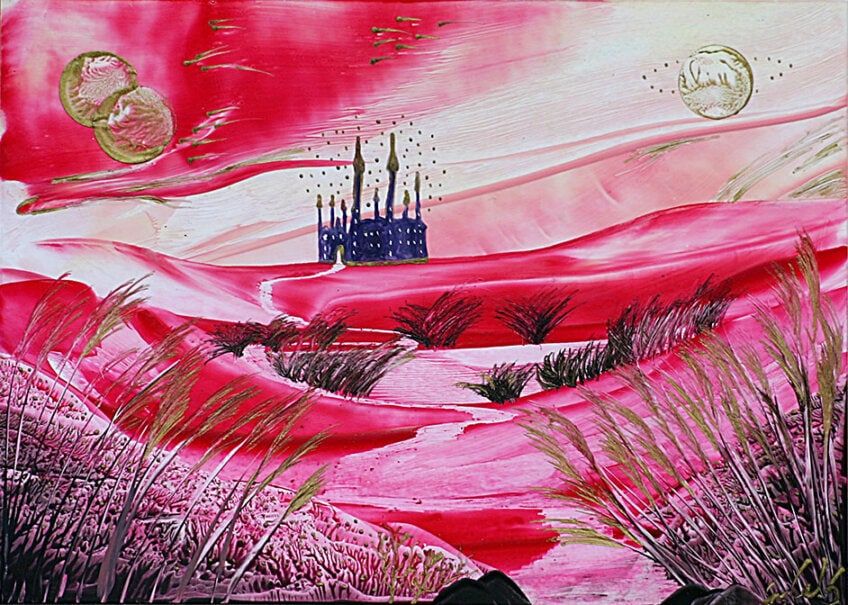
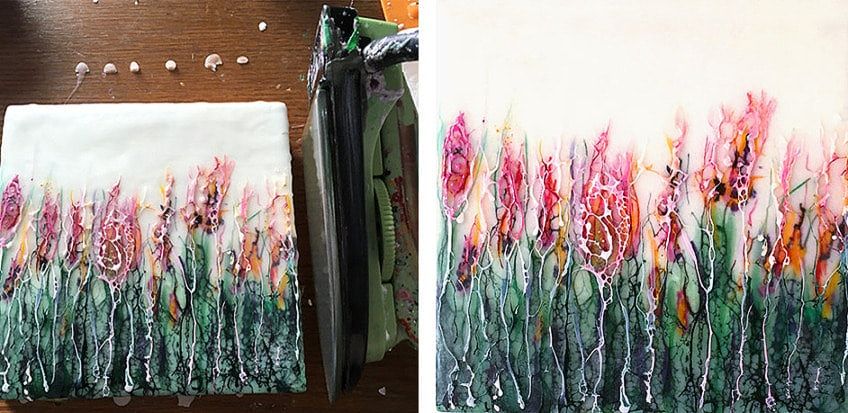
If you like your painting so far, you can now start with the first layer of color with your shellac wax. Below, you can see how the grass is painted with green shellac on the left, and on the right, the shellac has been burned with a blowtorch (but you can also use a hot air dryer).
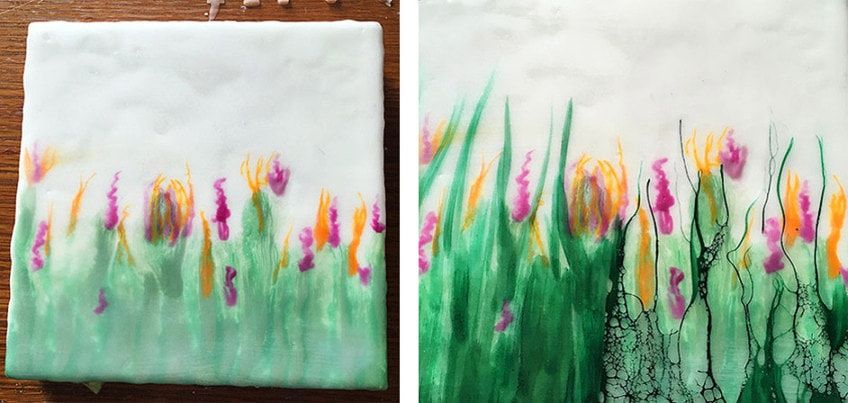
Here, it is important to burn the alcohol from the shellac with enough distance and caution, as burning too closely can result in the wax melting. The heat causes the pigments to contract, thus creating a “tearing effect”.
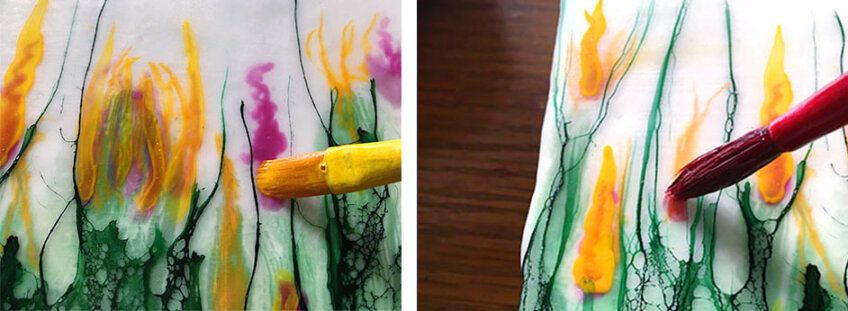
To get more depth, you can apply another layer of clear wax or photo wax after the initial layer dried. The drying time can differ depending on room temperature. You must then “blow-dry” the layers once again in order to connect and blend them. Allow them to cool down, and then repeat this process until your painting is finished.
Another tip for achieving depth in your images is not to use the same color of wax in your layers, but instead, to use contrasting colors – this is where the tearing effect comes out best. You can then add additional layers of clear wax, or you can choose to work directly on the surface with your shellac colors.
When you are finished and satisfied with your painting, let the shellac dry properly – in fact, it is best to allow your painting to dry for several days. Once dry, you can smooth out the edges with your paint iron. Doing this will also cause the adhesive tape to dissolve much better by warming it up a little.
Now, you can remove the masking tape and clean the edges. Since we worked on a wooden surface, you should paint the back and sides with paint to prevent it from warping. We suggest using black or white acrylic paint in a matte finish to add more depth, but this is purely a matter of taste.
Finally, you can choose whether or not you would like to seal your painting. Because it is made of wax, you do not necessarily need to seal the painting, although doing so will certainly improve its durability and will make it last longer. To seal your wax painting, you can use a very light shellac.
Different Encaustic Techniques
There are a lot of different encaustic techniques to discover, each of which will result in a different effect on your encaustic painting. Below is an overview of the main encaustic techniques so that you can get an idea of all that is possible with this art form!
Scraping the Surface
As you build up your encaustic layers, you can also use a scraper to lightly dig into previous layers, revealing colors and imagery that might have otherwise been unseen.
Fusing Technique
Fusing describes the process of gently melting each layer of paint that is applied, ensuring that it properly adheres to the layer beneath it. As you apply layers of paint to your foundation, you will want to fuse (or re-heat) each and every layer to ensure that it adheres to your substrate. It is important to fuse in-between layers as well to prevent them from separating.
Stenciling
This method blocks off certain areas in preparation for painting. By taping off an area with painter’s tape, you will have a high degree of control when applying the paint. When you are done painting, simply remove your stencil and you will be left with clean lines, shapes, or patterns.
Pouring Technique
Pouring is a technique that can be used to build up the surface with encaustic wax without using brushes. By creating a barrier around your support, you can simply pour melted encaustic paint or medium onto your panel. Allow the encaustic paint to cool to room temperature before removing the barrier. It is helpful to heat up your base prior to pouring.
Encaustic Monotype
Images can be created directly on a heated palette and then lifted onto a piece of paper much the same way that a monotype is made in printmaking. The benefit to creating encaustic monotypes is that once you lift your paper and it cools, there is no drying time. You can pull multiple prints in a relatively short amount of time.
Create a Textured or Smooth Surface
For a smooth surface, use a hake brush and a palette cup of paint or medium. Apply the wax in sections, moving across a small area of your panel in one swipe to avoid any build-up of texture, which will occur as the wax cools across the surface. Working with cooler wax or using multiple applications with a brush (especially a dry brush) will build up texture. You will still need to fuse different textural surfaces for them to remain stable. Also note that exaggerated textures will be fragile.
Image Transfers
Encaustic image transfer is the transference of a printed or drawn image onto wax. The adhesive properties of wax allow images to be transferred with ease, and a burnisher or spoon is the only tool necessary for transferring onto wax.
Creative Idea: Using Collage Materials in Your Encaustic Art
There are many possibilities for adding mixed-media elements to encaustic painting. For example, collage and photo transfers can be incorporated into the paint. Oil color, whether brushed on from the tube or drawn on with an oil stick, can also be applied on top of the painting.
Begin laying down your collage materials between layers of wax, such as a dried flower or piece of newspaper. A sheet of music or an old family photo can also be marvelous. Remember that whatever you put down first will be more deeply buried in the wax layers, and may not show up as well as the items you layer in towards the top. You can create different effects depending on where you place your papers.
And there you have it, a complete guide to encaustic painting and creating encaustic art. We hope that this guide has inspired you to start creating your own paintings in this style!

Sonja Werner
The artist of this tutorial is Sonja Werner, who was born in Reutlingen in May 1979. Sonja has had an interest in art and music from a young age, and has tried out many creative avenues over the years. It was during a tough phase of Sonja's life, in 2002, when she first found encaustic art. An acquaintance of hers showed her the basic steps and Sonja immediately fell in love! The two would paint with wax every now and then, and Sonja has since found great peace and solace in encaustic painting. Making art with beeswax has become somewhat of a meditative process for her, and it is here that she comes to rest and replenish herself. It is not only beeswax that Sonja has an affinity towards, but also working with hot wax. The luminosity and depth of her first finished wax painting blew her away, describing it as "indescribably beautiful".
Some years later, Sonja began to experiment more with her encaustic art. She began combining different materials and playing around with the mixed-media technique, and was quite enthralled when she tried this technique with shellac for the first time. Sonja then had two exhibitions in 2016, one at the Pfeiler law office in Sonnenbühl and the other at the TUI Reise Center in Pfullingen, where she received an overwhelmingly positive response. A couple of years later, Sonja held her biggest exhibition to date, which spanned several floors. Once again, Sonja's encaustic art was met with great applause. You can follow Sonja and her artistic journey on her Instagram account below:
Frequently Asked Questions
How Is an Encaustic Painting Made?
Encaustic painting, also known as hot wax painting, involves using heated beeswax to which colored pigments are added. The liquid or paste is then applied to a surface, which is usually prepared wood, although canvas and other materials are often used as well.
Can You Use Candle Wax for Encaustic Painting?
Candles are made from a variety of waxes. For encaustic painting, you will need to add an encaustic medium made from beeswax, damar resin, and pigment to your candle wax.
Do Encaustic Paintings Melt?
Encaustic painting, if created properly, will mostly take care of itself. You can ensure further protection by making sure that you never leave a painting in any extreme temperatures. Any extreme heat over 200 degrees Fahrenheit (90 degrees Celsius) may melt your encaustic painting, so it is best to keep it somewhere simple like your home or office.
Is Encaustic Painting Toxic?
With adequate ventilation and proper working temperatures, encaustic painting is non-toxic. We recommend using a thermometer and working within a safe temperature of 180 to 200 degrees Fahrenheit (82 to 93 degrees Celsius). Warning signs that your wax is too hot include an acrid odor and smoking.
How Permanent Is Encaustic Paint in Art?
Some encaustic colors tend to “bloom” or become cloudy over time. If your painting appears indistinct, simply rub the surface with a soft cloth or nylon stocking. Over time, the surface retains its gloss as the wax medium continues to cure and harden for up to three years.
How Old Is Encaustic Painting?
Encaustic, meaning “to burn in or fuse”, is an ancient painting medium first practiced by Greek artists as far back as the 5th century B.C. The oldest known pigment binder, encaustic art combines molten beeswax with dry pigment and tree resin.

In 2005, Charlene completed her Wellness Diplomas in Therapeutic Aromatherapy and Reflexology from the International School of Reflexology and Meridian Therapy. She worked for a company offering corporate wellness programs for a couple of years, before opening up her own therapy practice. It was in 2015 that a friend, who was a digital marketer, asked her to join her company as a content creator, and this is where she found her excitement for writing.
Since joining the content writing world, she has gained a lot of experience over the years writing on a diverse selection of topics, from beauty, health, wellness, travel, and more. Due to various circumstances, she had to close her therapy practice and is now a full-time freelance writer. Being a creative person, she could not pass up the opportunity to contribute to the Art in Context team, where is was in her element, writing about a variety of art and craft topics. Contributing articles for over three years now, her knowledge in this area has grown, and she has gotten to explore her creativity and improve her research and writing skills.
Charlene Lewis has been working for artincontext.org since the relaunch in 2020. She is an experienced writer and mainly focuses on the topics of color theory, painting and drawing.
Learn more about Charlene Lewis and the Art in Context Team.
Cite this Article
Charlene, Lewis, “Encaustic Painting – A Guide to Creating Your Own Encaustic Wax Art.” Art in Context. May 19, 2021. URL: https://artincontext.org/encaustic-painting/
Lewis, C. (2021, 19 May). Encaustic Painting – A Guide to Creating Your Own Encaustic Wax Art. Art in Context. https://artincontext.org/encaustic-painting/
Lewis, Charlene. “Encaustic Painting – A Guide to Creating Your Own Encaustic Wax Art.” Art in Context, May 19, 2021. https://artincontext.org/encaustic-painting/.


