How to Draw a Gingerbread Man – A Step-by-Step Tutorial
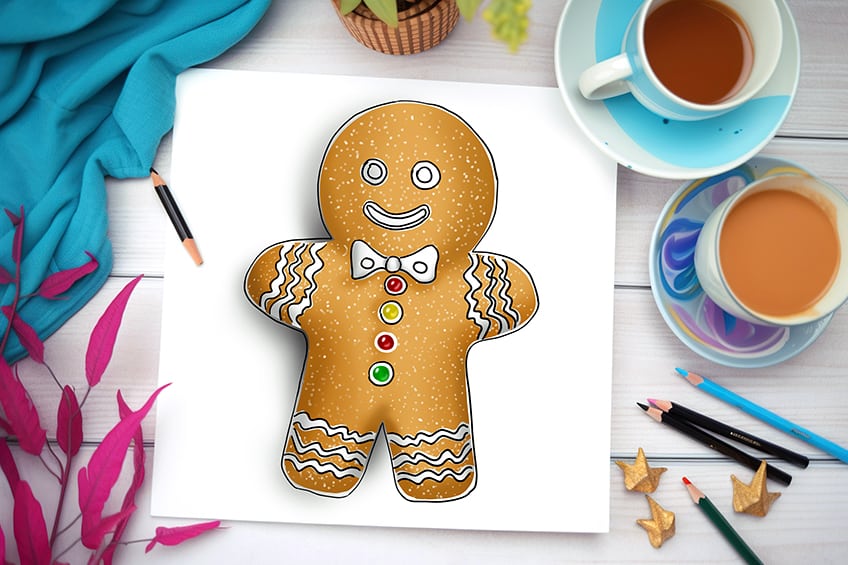
The gingerbread man, a beloved holiday treat, is not your average cookie. He’s a spicy and sweet confectionary creation that has captured the hearts and taste buds of people around the world. With his iconic shape, snappy personality, and colorful decorations, the gingerbread man is a staple of winter festivities. Whether he’s running away from hungry children or taking a dip in a glass of milk, this tiny cookie packs a punch of flavor and fun that is sure to delight both young and old alike. So, follow today’s easy tutorial where we show you how to draw a realistic gingerbread step-by-step!
Learn How to Draw a Gingerbread Man Step-by-Step
Drawing a gingerbread man is a fun and creative activity that can be enjoyed by all ages. Through this simple exercise, you can develop your sketching and coloring techniques, as well as your ability to add texture and detail to your drawings. As you draw your gingerbread man, you’ll also learn about proportion and perspective, as well as how to use shading and highlights to add depth and dimension to your art. Whether you’re a beginner or an experienced artist, drawing a gingerbread man is an excellent way to improve your skills and create something that is both fun and festive. So why not give it a try and see what you can create! With a little practice, you’ll be able to create your very own adorable and delicious-looking gingerbread man.
Check out the steps depicted in the below collage, and you can learn how to draw a realistic gingerbread man. So, try it out for yourself and see if you can create your own delicious-looking gingerbread man!
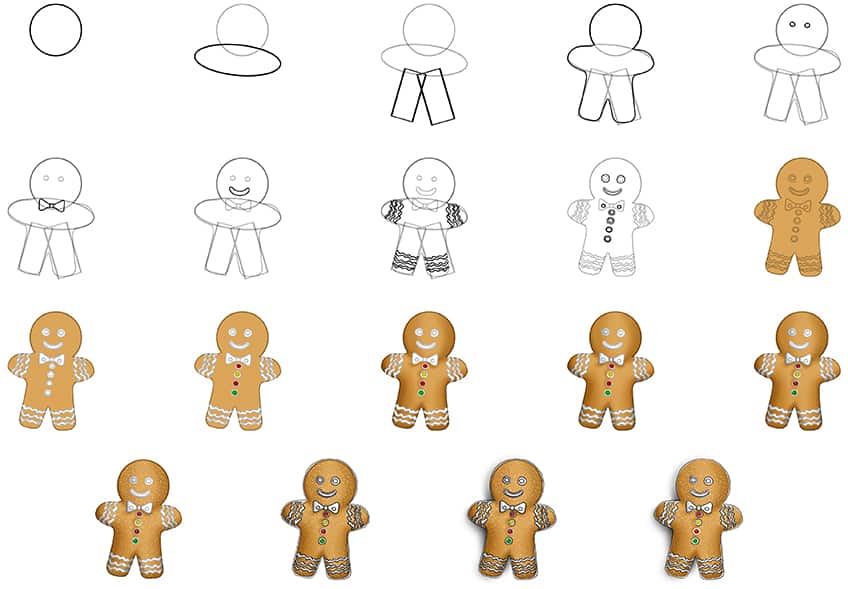
Step 1: Draw the Head of Your Gingerbread Man Drawing
Begin our tutorial by drawing a circle to represent the head of the gingerbread man.

Step 2: Draw the Arms
Draw a horizontal oval shape, overlapping the head, to represent the arms.

Step 3: Add the Legs to Your Gingerbread Man Sketch
Attached to the previously drawn oval shape, draw two rectangular to represent the legs.

Step 4: Outline the Gingerbread Man
Begin to outline the gingerbread man using the previously drawn construction lines.

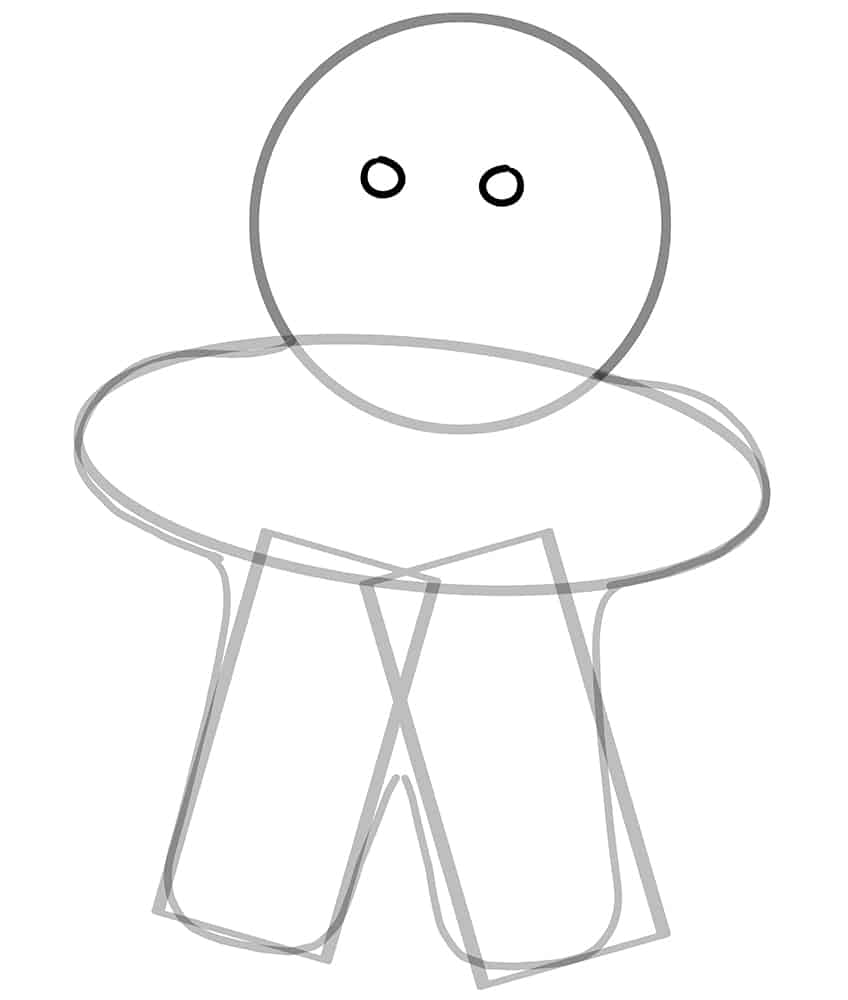
Step 5: Draw the Eyes
Draw two small circles within the head of your gingerbread man to represent the eyes.
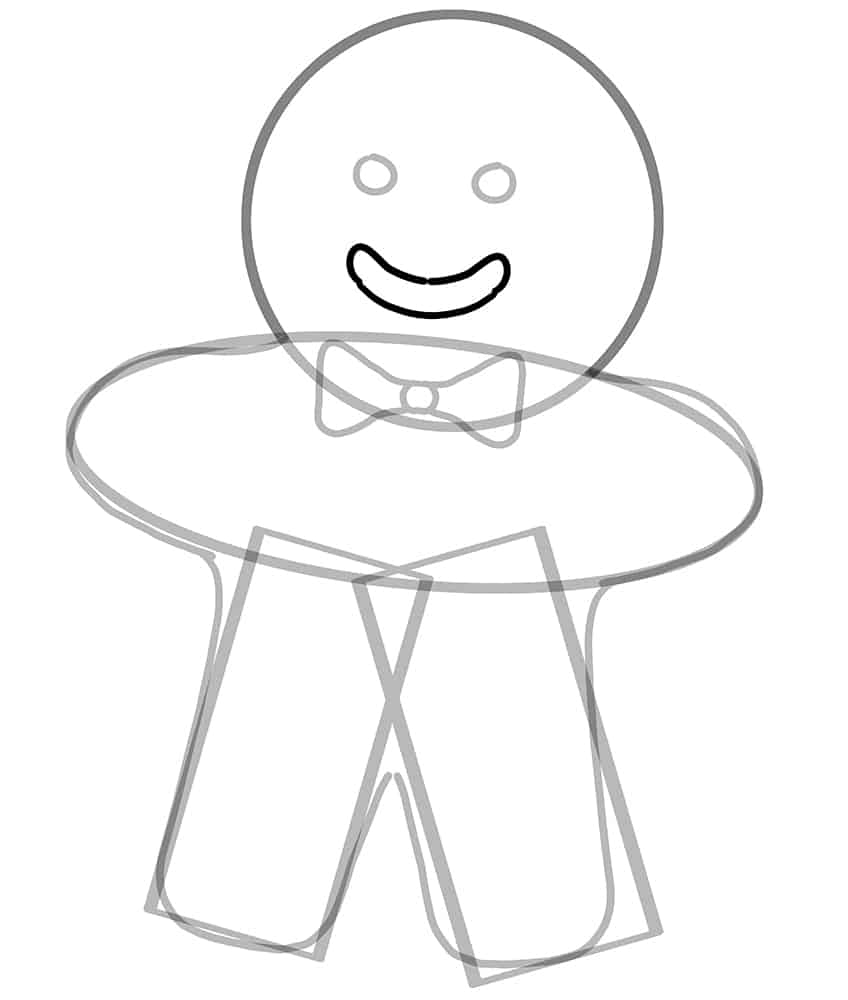
Step 6: Add a Bow to Your Gingerbread Man Sketch
Between the head and the arms, where the two shapes overlap, draw a bow shape below.

Step 7: Draw the Mouth
Draw the wide smiling mouth line below the eyes of your gingerbread man drawing.
Step 8: Add the Frosting Patterns
Along each end of the arms, draw the wiggly frosting pattern lines. Repeat the step on each leg.
Once you have completed this step, erase any still visible construction lines.

Step 9: Draw the Details
Begin by drawing the frosting outline around each eye. Repeat this process on the mouth. Continue by drawing the four button circles and two more within the bow.

Step 10: Apply the First Color Coat
Select a fine, sharp brush and a shade of caramel paint, and evenly coat your gingerbread man drawing.

Step 11: Color the Frosting
Continue using the same brush as previously and switch to white paint, and color in each of the frosting details.

Step 12: Continue to Color Your Gingerbread Man Sketch
In this step, begin to add color to the buttons on your gingerbread man drawing. Use a fine, sharp brush and red paint to color the top button, yellow for the middle button, red once more for the third button, and complete the step using green paint for the final button.
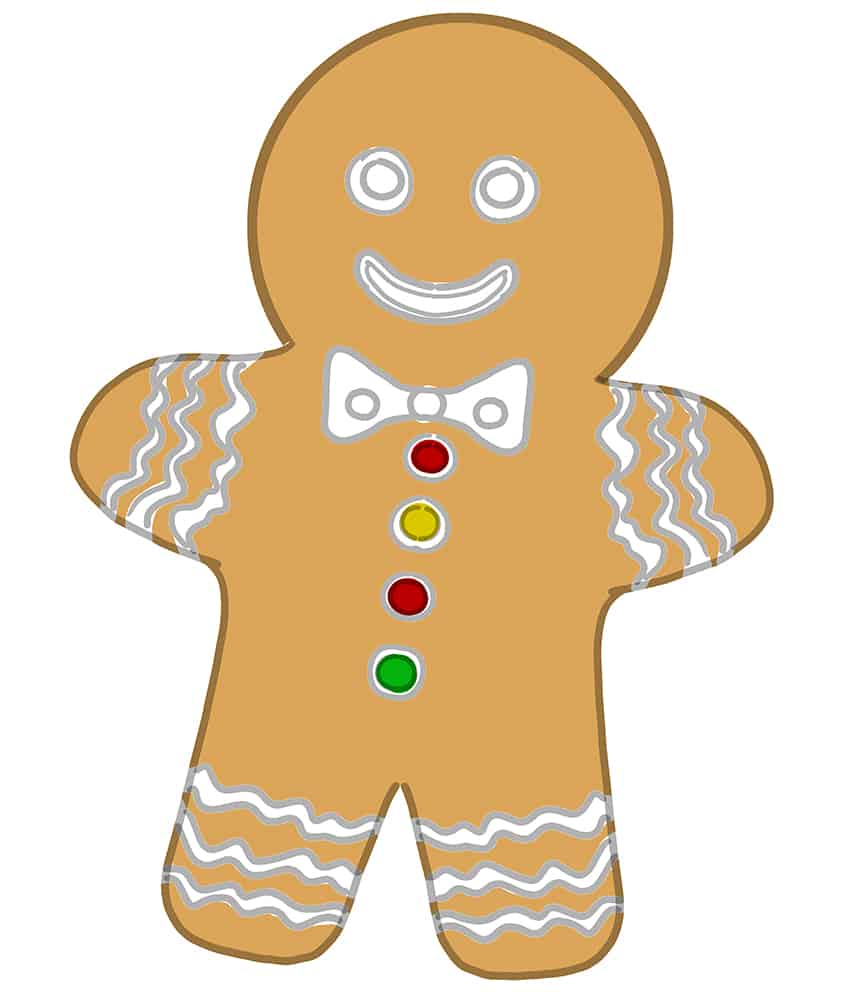
Step 13: Contour the Gingerbread Man Drawing
With a small, soft brush and a darker shade of caramel paint, add soft shading around the inner outline of your gingerbread man sketch. Continue using a blending brush to spread and soften the contouring.

Step 14: Shade the Details
Use the same brush as previously and switch to black paint, and add soft shading around each of the details and patterns on the gingerbread man drawing.

Step 15: Continue to Shade and Highlight the Buttons
In this step, add light shading within each button leaving the first color coat somewhat visible, using a soft brush and black paint. Repeat this step using a thin brush and white paint to add a fine highlight within each button.

Step 16: Texture Your Gingerbread Man Sketch
Begin to paint fine, individual dots and spots through the gingerbread man using a fine, sharp brush and white paint.
Doing this will create a second layer of texture to your gingerbread man drawing.

Step 17: Outline the Main Frosting
With a fine, sharp brush and black paint, outline the details on the gingerbread man which includes all the frosting patterns and the outer outline of your gingerbread man.

Step 18: Add a Background Shadow
In this step, add shading to the left edges of the gingerbread man using a small, soft brush and black paint. Switch to a blending brush to spread and soften the shadow.

Step 19: Finalize Your How to Draw a Gingerbread Man Drawing
You have reached the final step of completing your gingerbread man drawing! To finalize your drawing, where possible erase any outlines that are still visible. You have now officially drawn a gingerbread man!

Congratulations! You have just learned how to draw a gingerbread man step-by-step, and it looks fantastic! Now that you have mastered the basic technique, you can start experimenting with different colors, shapes, and decorations to make your gingerbread man unique. For instance, you could try using a darker shade of brown to add some depth and shading to your drawing, or you could add some glitter or sparkles to make your gingerbread man look even more festive. You could also try drawing different poses or expressions to give your gingerbread man even more personality. The possibilities are endless, so have fun and keep practicing! With each new gingerbread man that you draw, you’ll improve your skills and create something that is truly one-of-a-kind.
Frequently Asked Questions
How to Add Shading and Highlights to a Gingerbread Man Drawing?
To add shading and highlights to your gingerbread man drawing, you can use pencils, markers, or brushes in varying shades of brown. Start by identifying the areas of the gingerbread man that would be in shadow, such as the creases and folds in the arms and legs. Use a darker shade of brown to add depth and dimension to these areas. Then, use a lighter shade of brown to add highlights to the areas that would catch the light, such as the top of the head or the tip of the nose. Blend the shades using a blending tool, such as a blending stump or your finger, to create a smooth transition between the different shades.
How to Make a Gingerbread Man Drawing Stand Out From Others?
To make your gingerbread man drawing stand out from others, you can try adding unique decorations or accessories. For example, you could draw a scarf or hat on your gingerbread man, or add some extra candy buttons or icing decorations. You could also experiment with different color schemes, such as using non-traditional colors like pink or purple, or create a patterned gingerbread man with stripes or polka dots. Another way to make your drawing stand out is by adding a background, such as a snowy landscape or a gingerbread house. Use your imagination and creativity to come up with unique ideas that make your gingerbread man drawing truly one-of-a-kind!
Matthew Matthysen is an educated multidisciplinary artist and illustrator. He successfully completed his art degree at the University of Witwatersrand in South Africa, majoring in art history and contemporary drawing. The focus of his thesis was to explore the philosophical implications of the macro and micro-universe on the human experience. Matthew uses diverse media, such as written and hands-on components, to explore various approaches that are on the border between philosophy and science.
Matthew organized various exhibitions before and during his years as a student and is still passionate about doing so today. He currently works as a freelance artist and writer in various fields. He also has a permanent position at a renowned online gallery (ArtGazette) where he produces various works on commission. As a freelance artist, he creates several series and successfully sells them to galleries and collectors. He loves to use his work and skills in various fields of interest.
Matthew has been creating drawing and painting tutorials since the relaunch in 2020. Through his involvement with artincontext.org, he has been able to deepen his knowledge of various painting mediums. For example, watercolor techniques, calligraphy and lately digital drawing, which is becoming more and more popular.
Learn more about Matthew Matthysen and the Art in Context Team.


